
I must apologize for my prolonged absence from the blogosphere. It's a funny thing: when the days are long and the sun is warm, I find myself out doing projects, not writing about them! With the onset of shorter days and cooler temperatures (and the fact that I've had multiple people ask me what happened to the blog), I have decided to stage my return!
Instead of starting with the details of the projects we've completed over the last several months (I know, I KNOW, it's been awhile…), I thought it would be more fun to hook you back into the blog with two massive before-and-after, whole-house posts: one for inside, one for outside. In October 2012, we met our future home for the first time. We drove down to Campbell the day after one of my best friends got married in Marin, and only a few weeks after Justin had knee surgery. Needless to say, we were tired, and I think Justin was on pain killers of some sort, but this was our first chance to see the house and we couldn't pass it up. And I will be the first one to admit that I didn't see the potential…
I guess you could say I couldn't see the trees through the forest? When we first came to Burrows, the house (and west wing and garage and shop and backyard and miscellaneous structures) were so full of stuff that I just couldn't get my head around the potential of the house and it's good bones, the size of the lot, the great neighborhood, or the shop (I will say that I was thrilled that we wouldn't have to fight about who could park in the garage and where all the tools would live). You'll see the pictures; every square inch of outdoor space was covered and being used as extensions of the shop, and every wall in the house was covered with shelves.
I must also admit that it didn't take me much convincing that buying the house was a good idea. It's a good thing Justin saw everything the house and the lot could be. I was still apprehensive about the whole thing until we really got in there, refinished the floors, painted EVERYTHING, and moved all of our stuff into the house. Then I had that light-bulb, “aha” moment. I love my husband and his good judgement 🙂
Now, before I show you all the pictures, I just have to take one small paragraph to say thank you. Thank you to everyone (and there are a lot of you!) who have helped us. From navigating the loan and title process, to refinishing floors and painting, to copious amounts of weeding, to all the cleaning and demo, we could not have done this by ourselves and we are so grateful for the love and support from each of you.
Okay, enough rambling for now. There will be plenty of time for rambling in future posts that are dedicated to filling in the blanks from the last few months. Without any further musings, here are the before and after pictures of the inside of Burrows, and a list of the projects we've completed in a year. It's amazing the difference a year (and some blood, a lot of sweat, and a few tears… mostly of joy!) can make!
Watch for the before-and-after outside post, hopefully coming through tomorrow 🙂
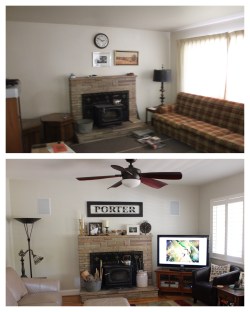
Living Room
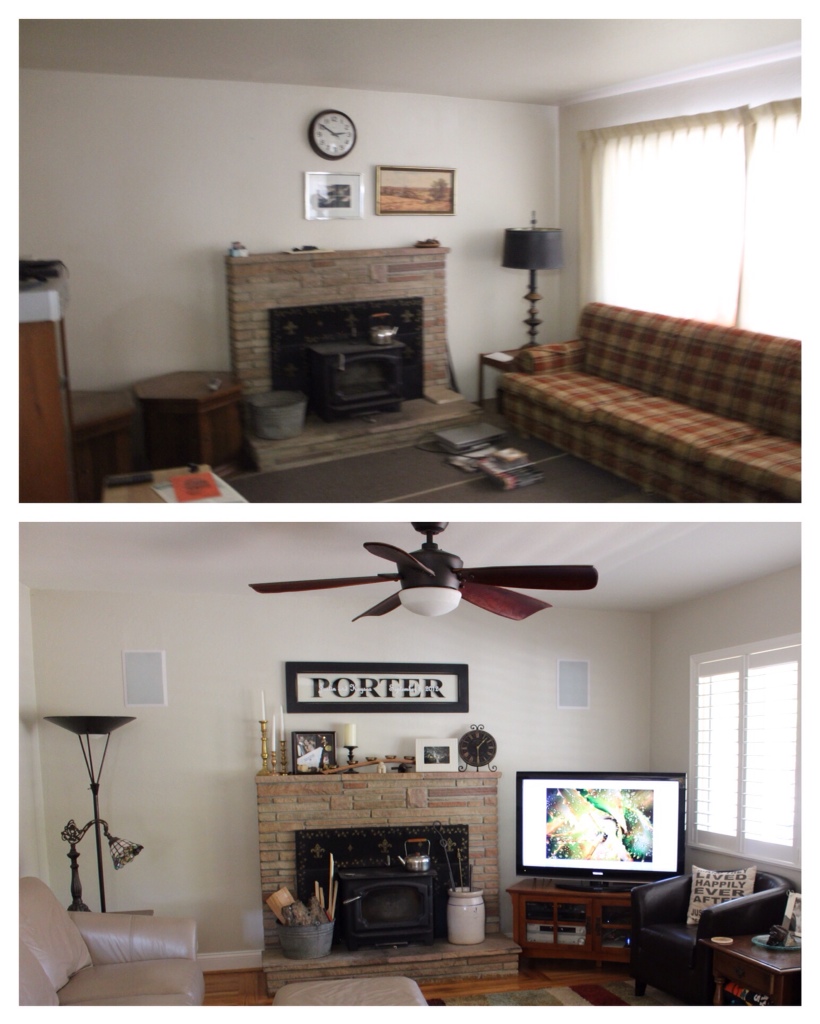
- Removed carpet
- Patched, refinished, and sealed original hardwood floors (special thanks to my dad, Papa, and Lucas for this massive undertaking!)
- Painted walls, ceiling, and trim
- Installed baseboard and quarter-round
And a list of living room specific projects:
- Replaced the grimy curtains with plantation shutters
- Installed a ceiling fan
- Moved in our furniture, hung some art, and decorated (and bought and rearranged things as necessary!)
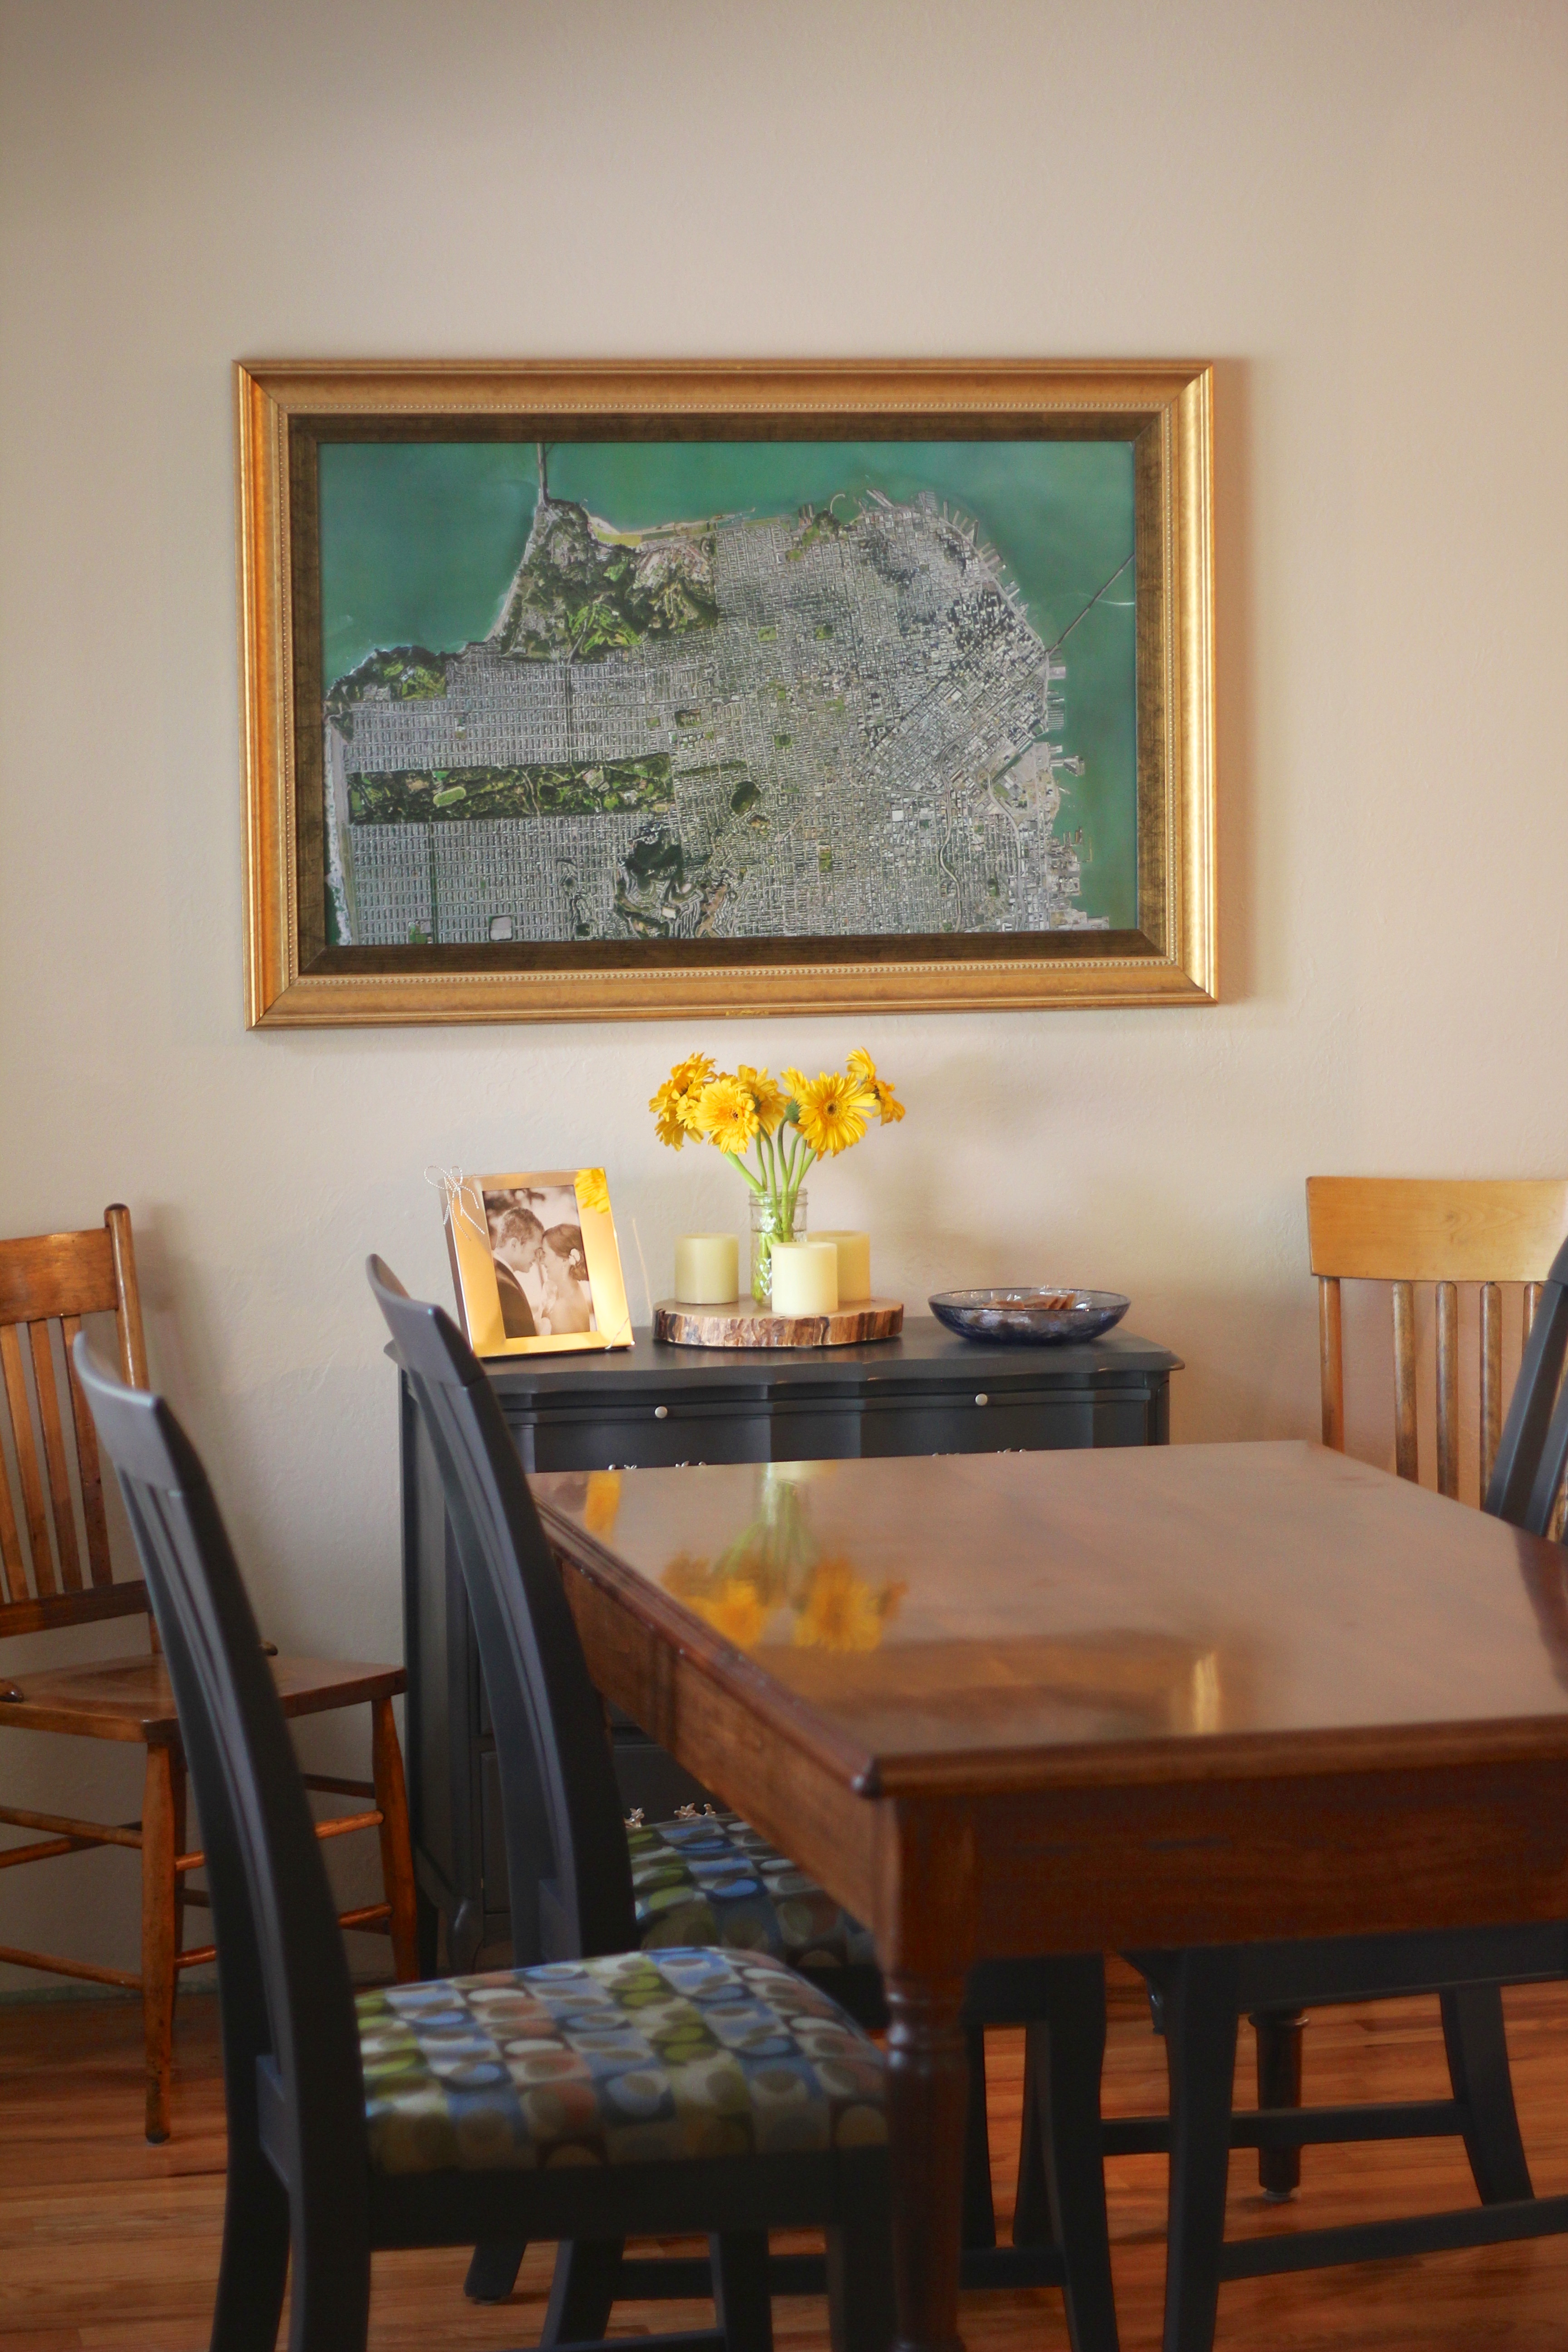
Dining Room

- Replaced grimy curtains with plantation shutters (even though you can't see it in this photo)
- Refinished and painted the dresser and dining room chairs
- Made a mason jar chandelier
- Hung an oversized print of our favorite photo from our honeymoon in Argentina
Kitchen
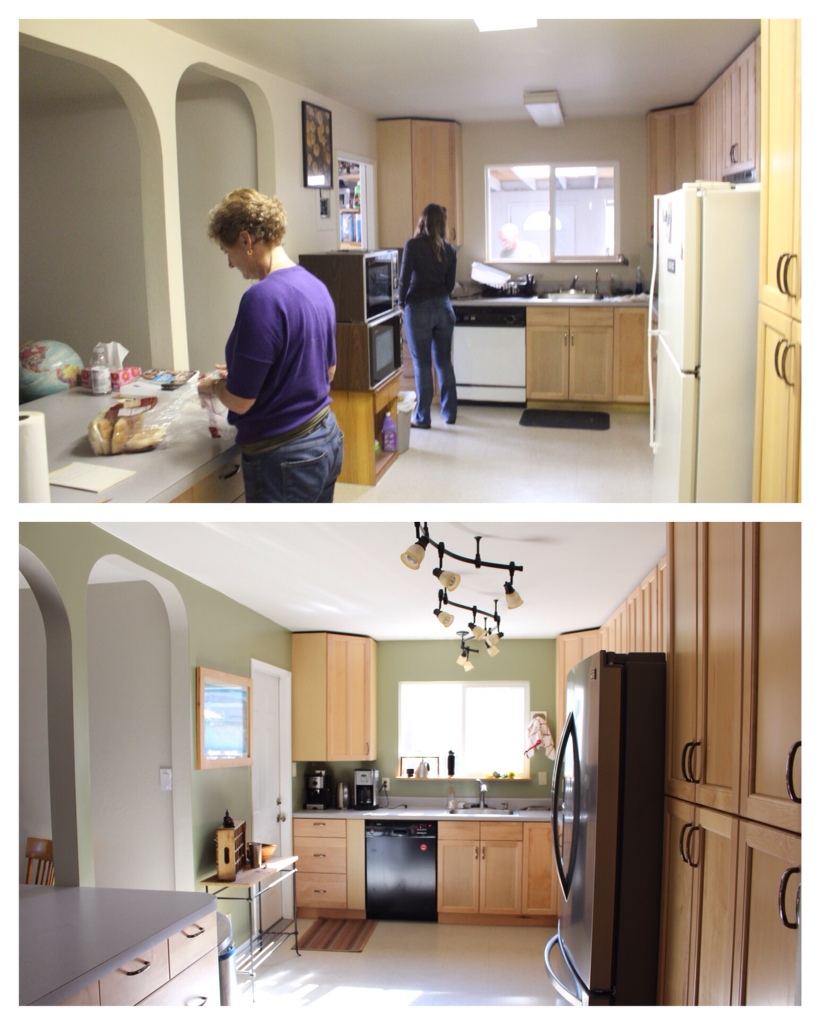
- Cleaned. And cleaned. And cleaned some more!
- Ditched the fluorescent shop lights for something easier on the eyes (and with dimmers, too!)
- Hung some art to cover the ugly electrical box
- Got a “new”, hand-me-down dishwasher that works great
- Got a “new”, hand-me-down refrigerator that doubled our PG&E bill, and subsequently purchased an actual new refrigerator
- Demo-ed the “west wing”… More about this tomorrow, but by removing that add-on to the house, we allowed a serious amount of natural light in through the kitchen window
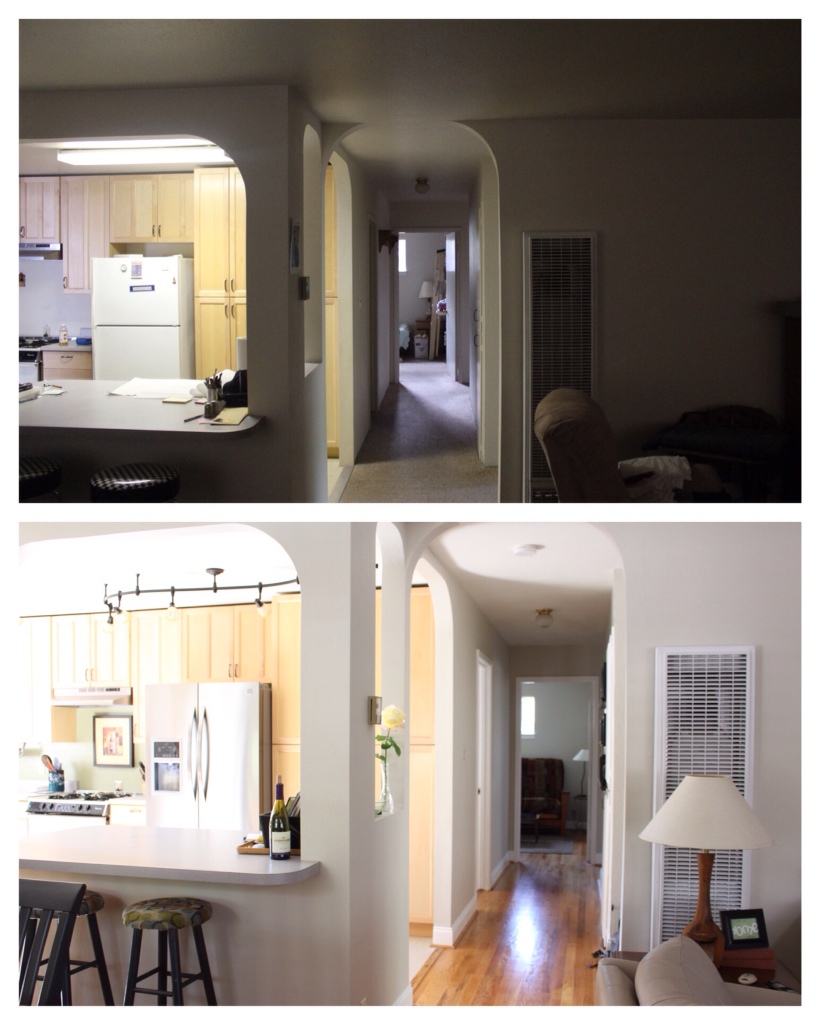
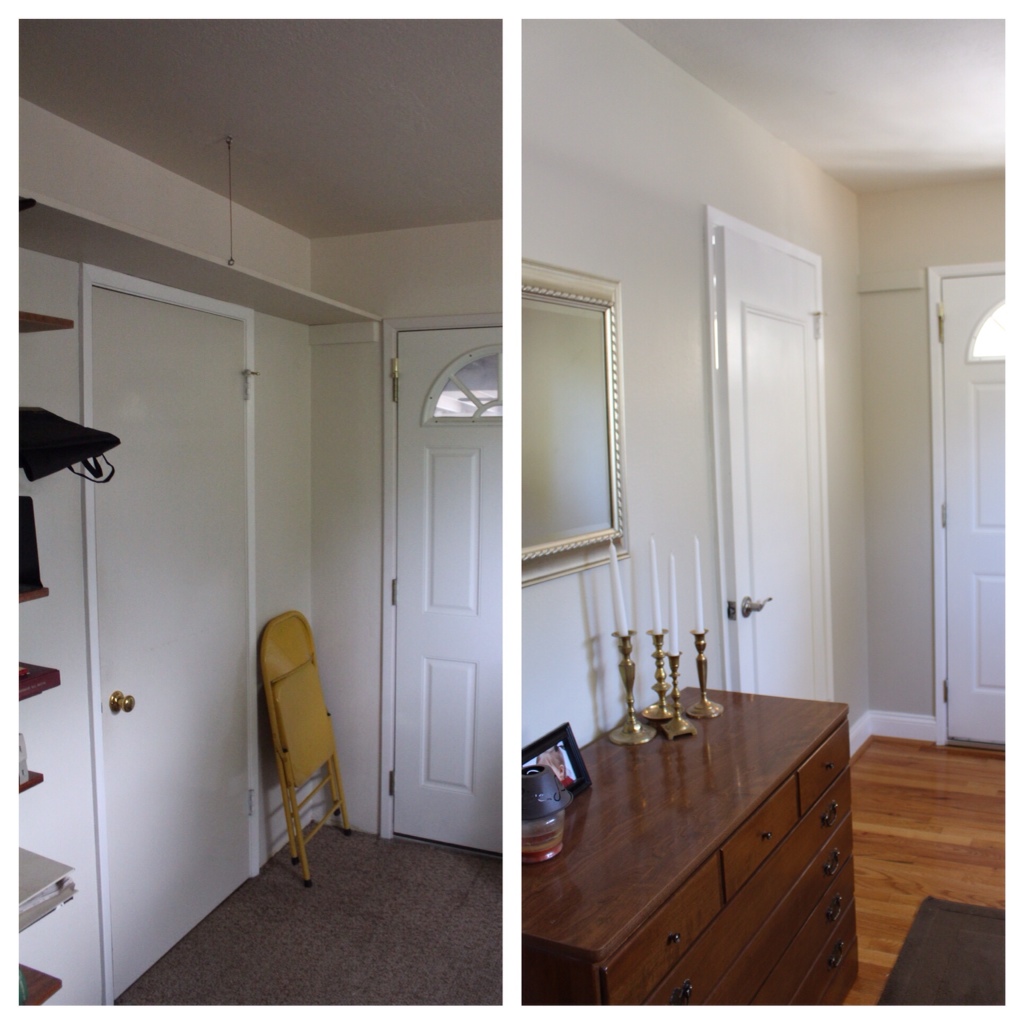
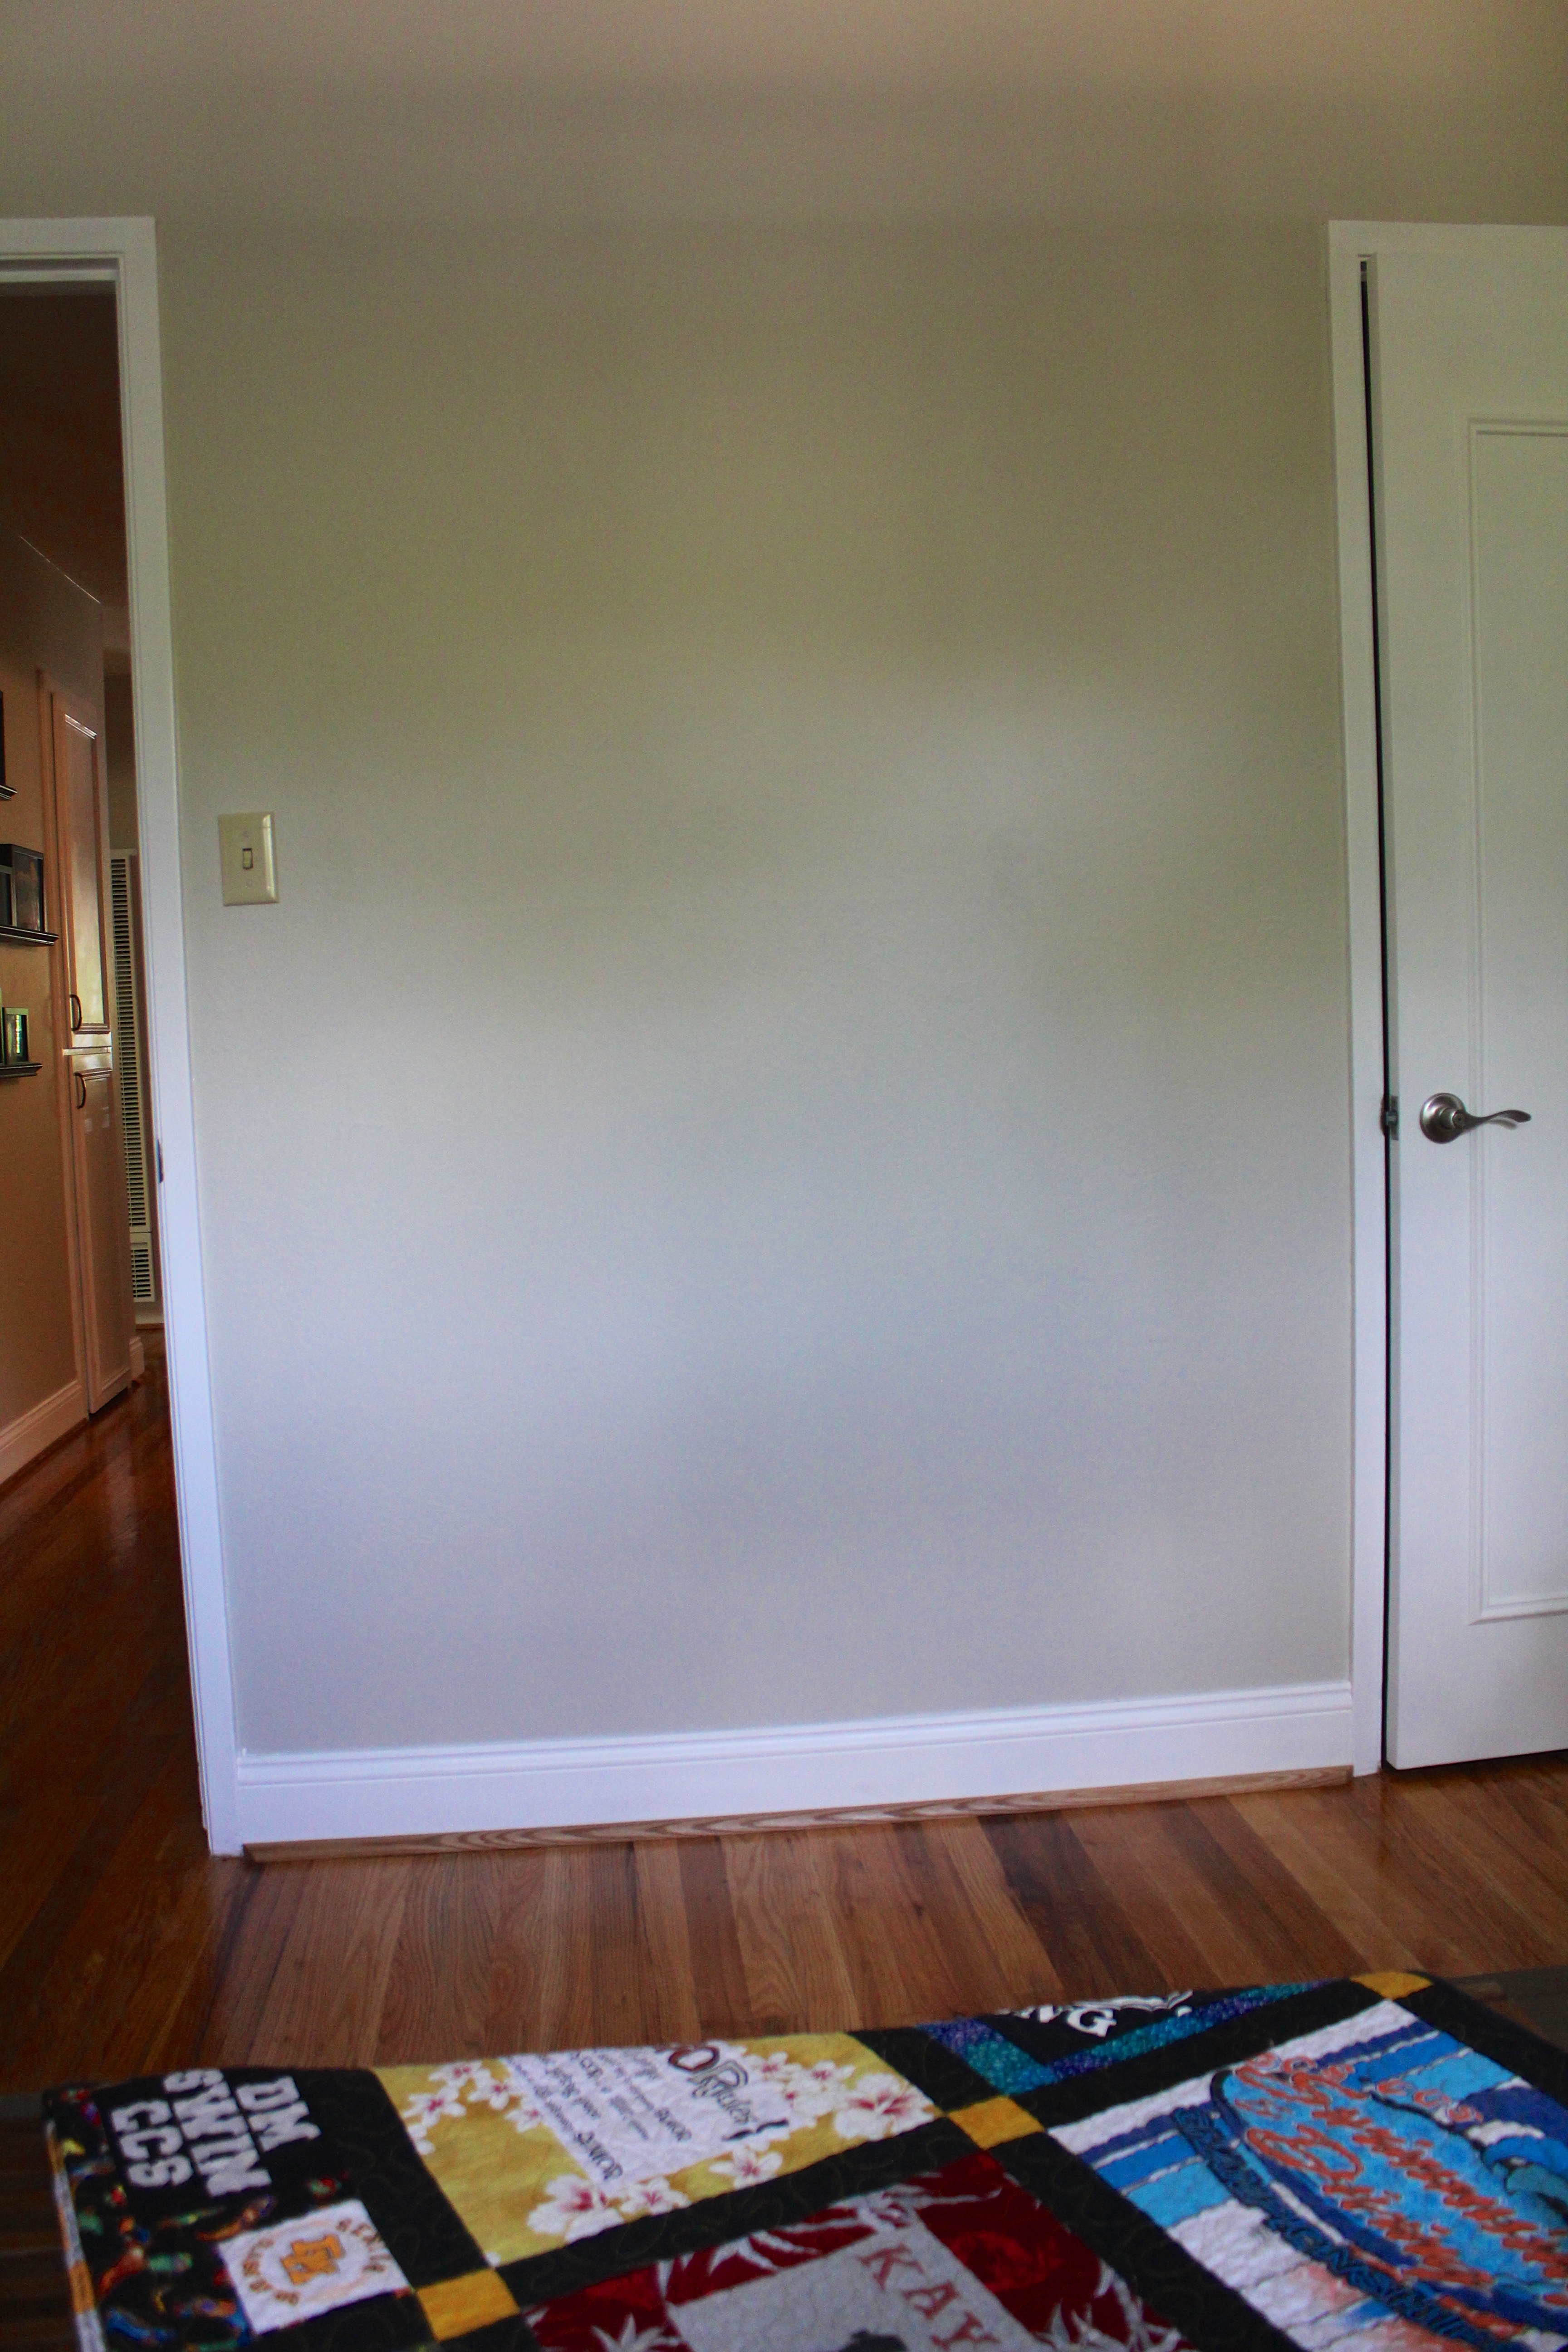
Hallway
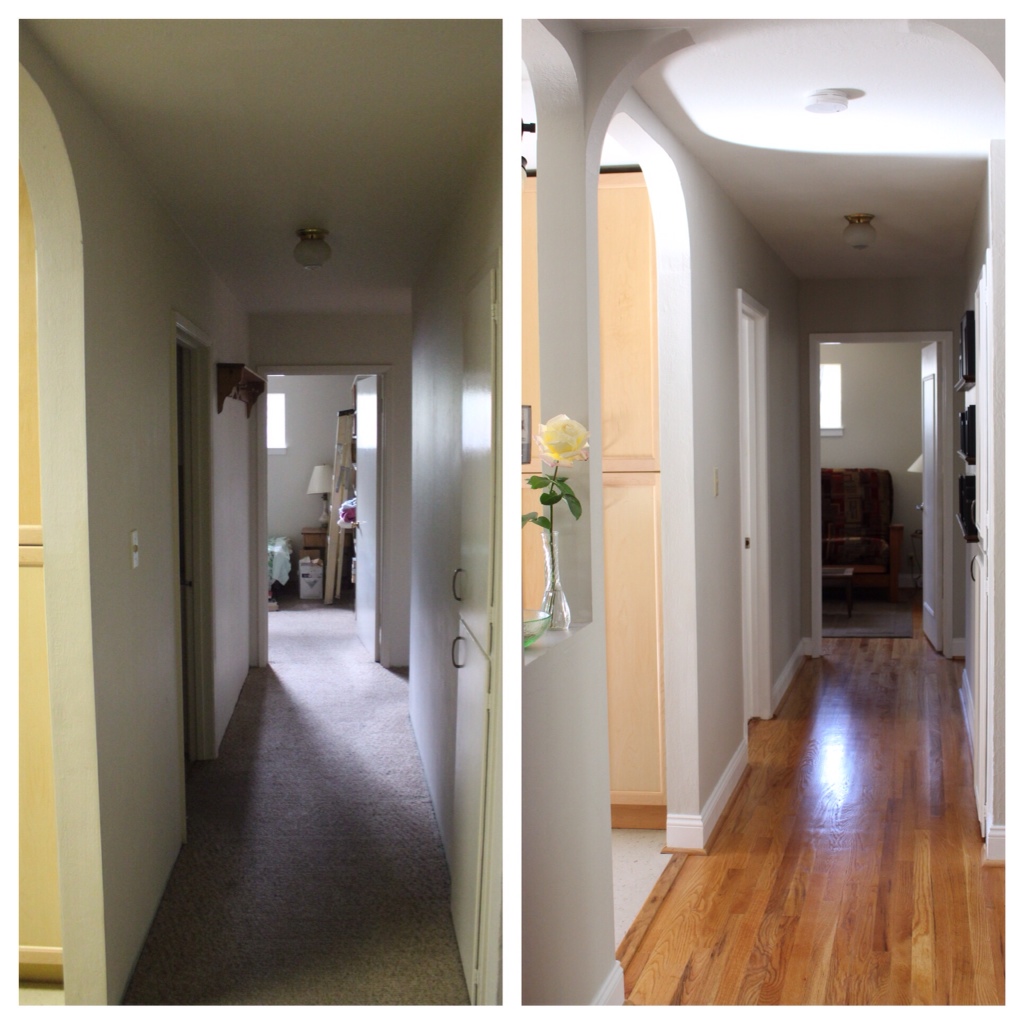
- Installed picture shelves to display our favorite travel photos (which you can't really see I this photo)
- Removed the western inspired “coat rack”
- Added trim and painted all the doors, including the doors into the bathroom, office, bedroom, guest room, and the hall closet cupboard doors (we also did this for the closet doors in the bedrooms)
Office
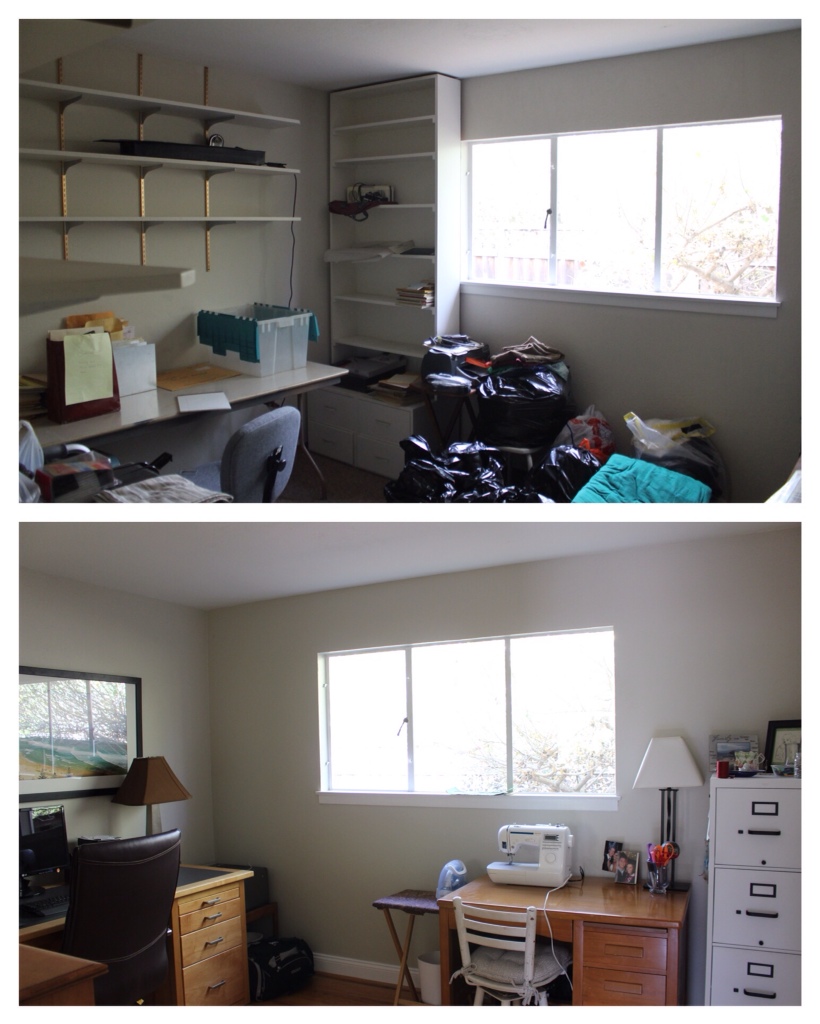
- Removed the shelving on every wall and patched all the holes left behind (I wasn't kidding about this before…)
- Moved in and created a nice space for Justin to work from home and for me to sew 🙂
- We also did some serious closet management in here to make this tiny closet work for us
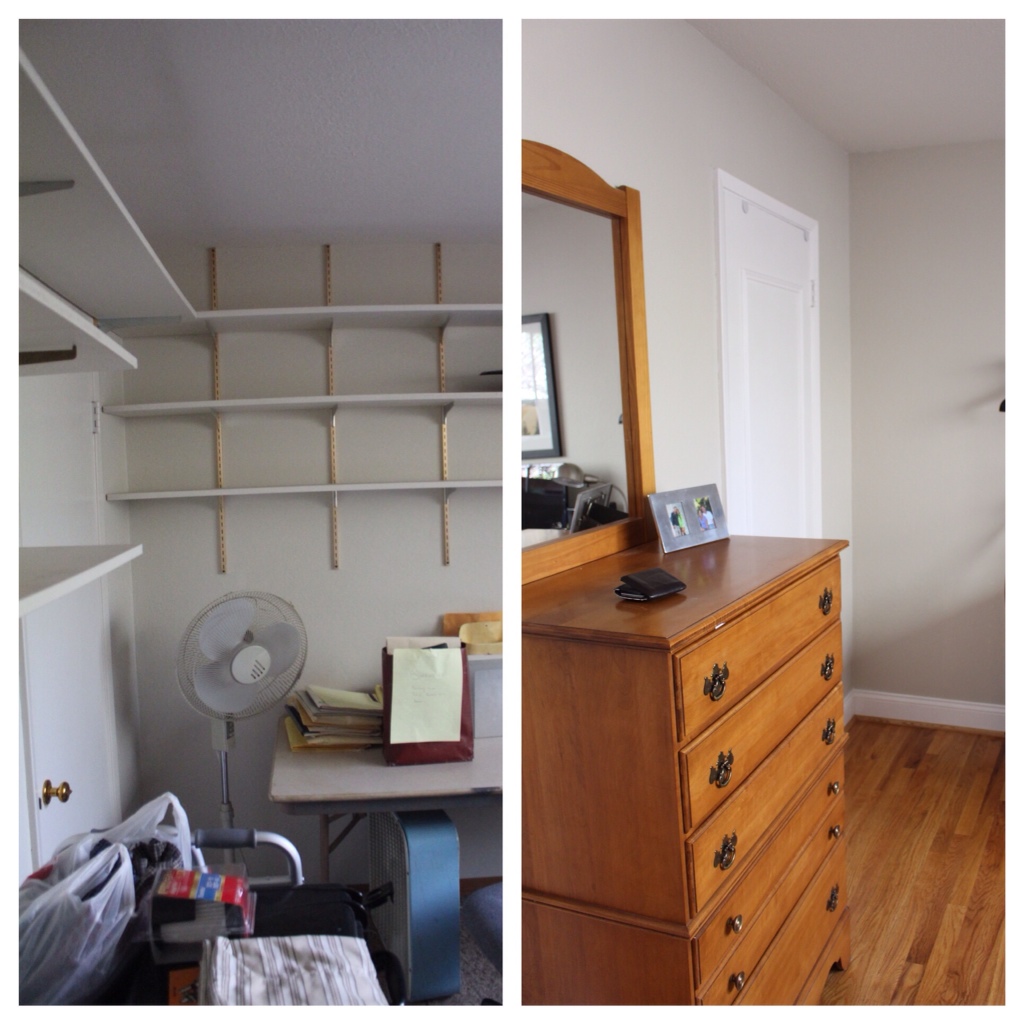
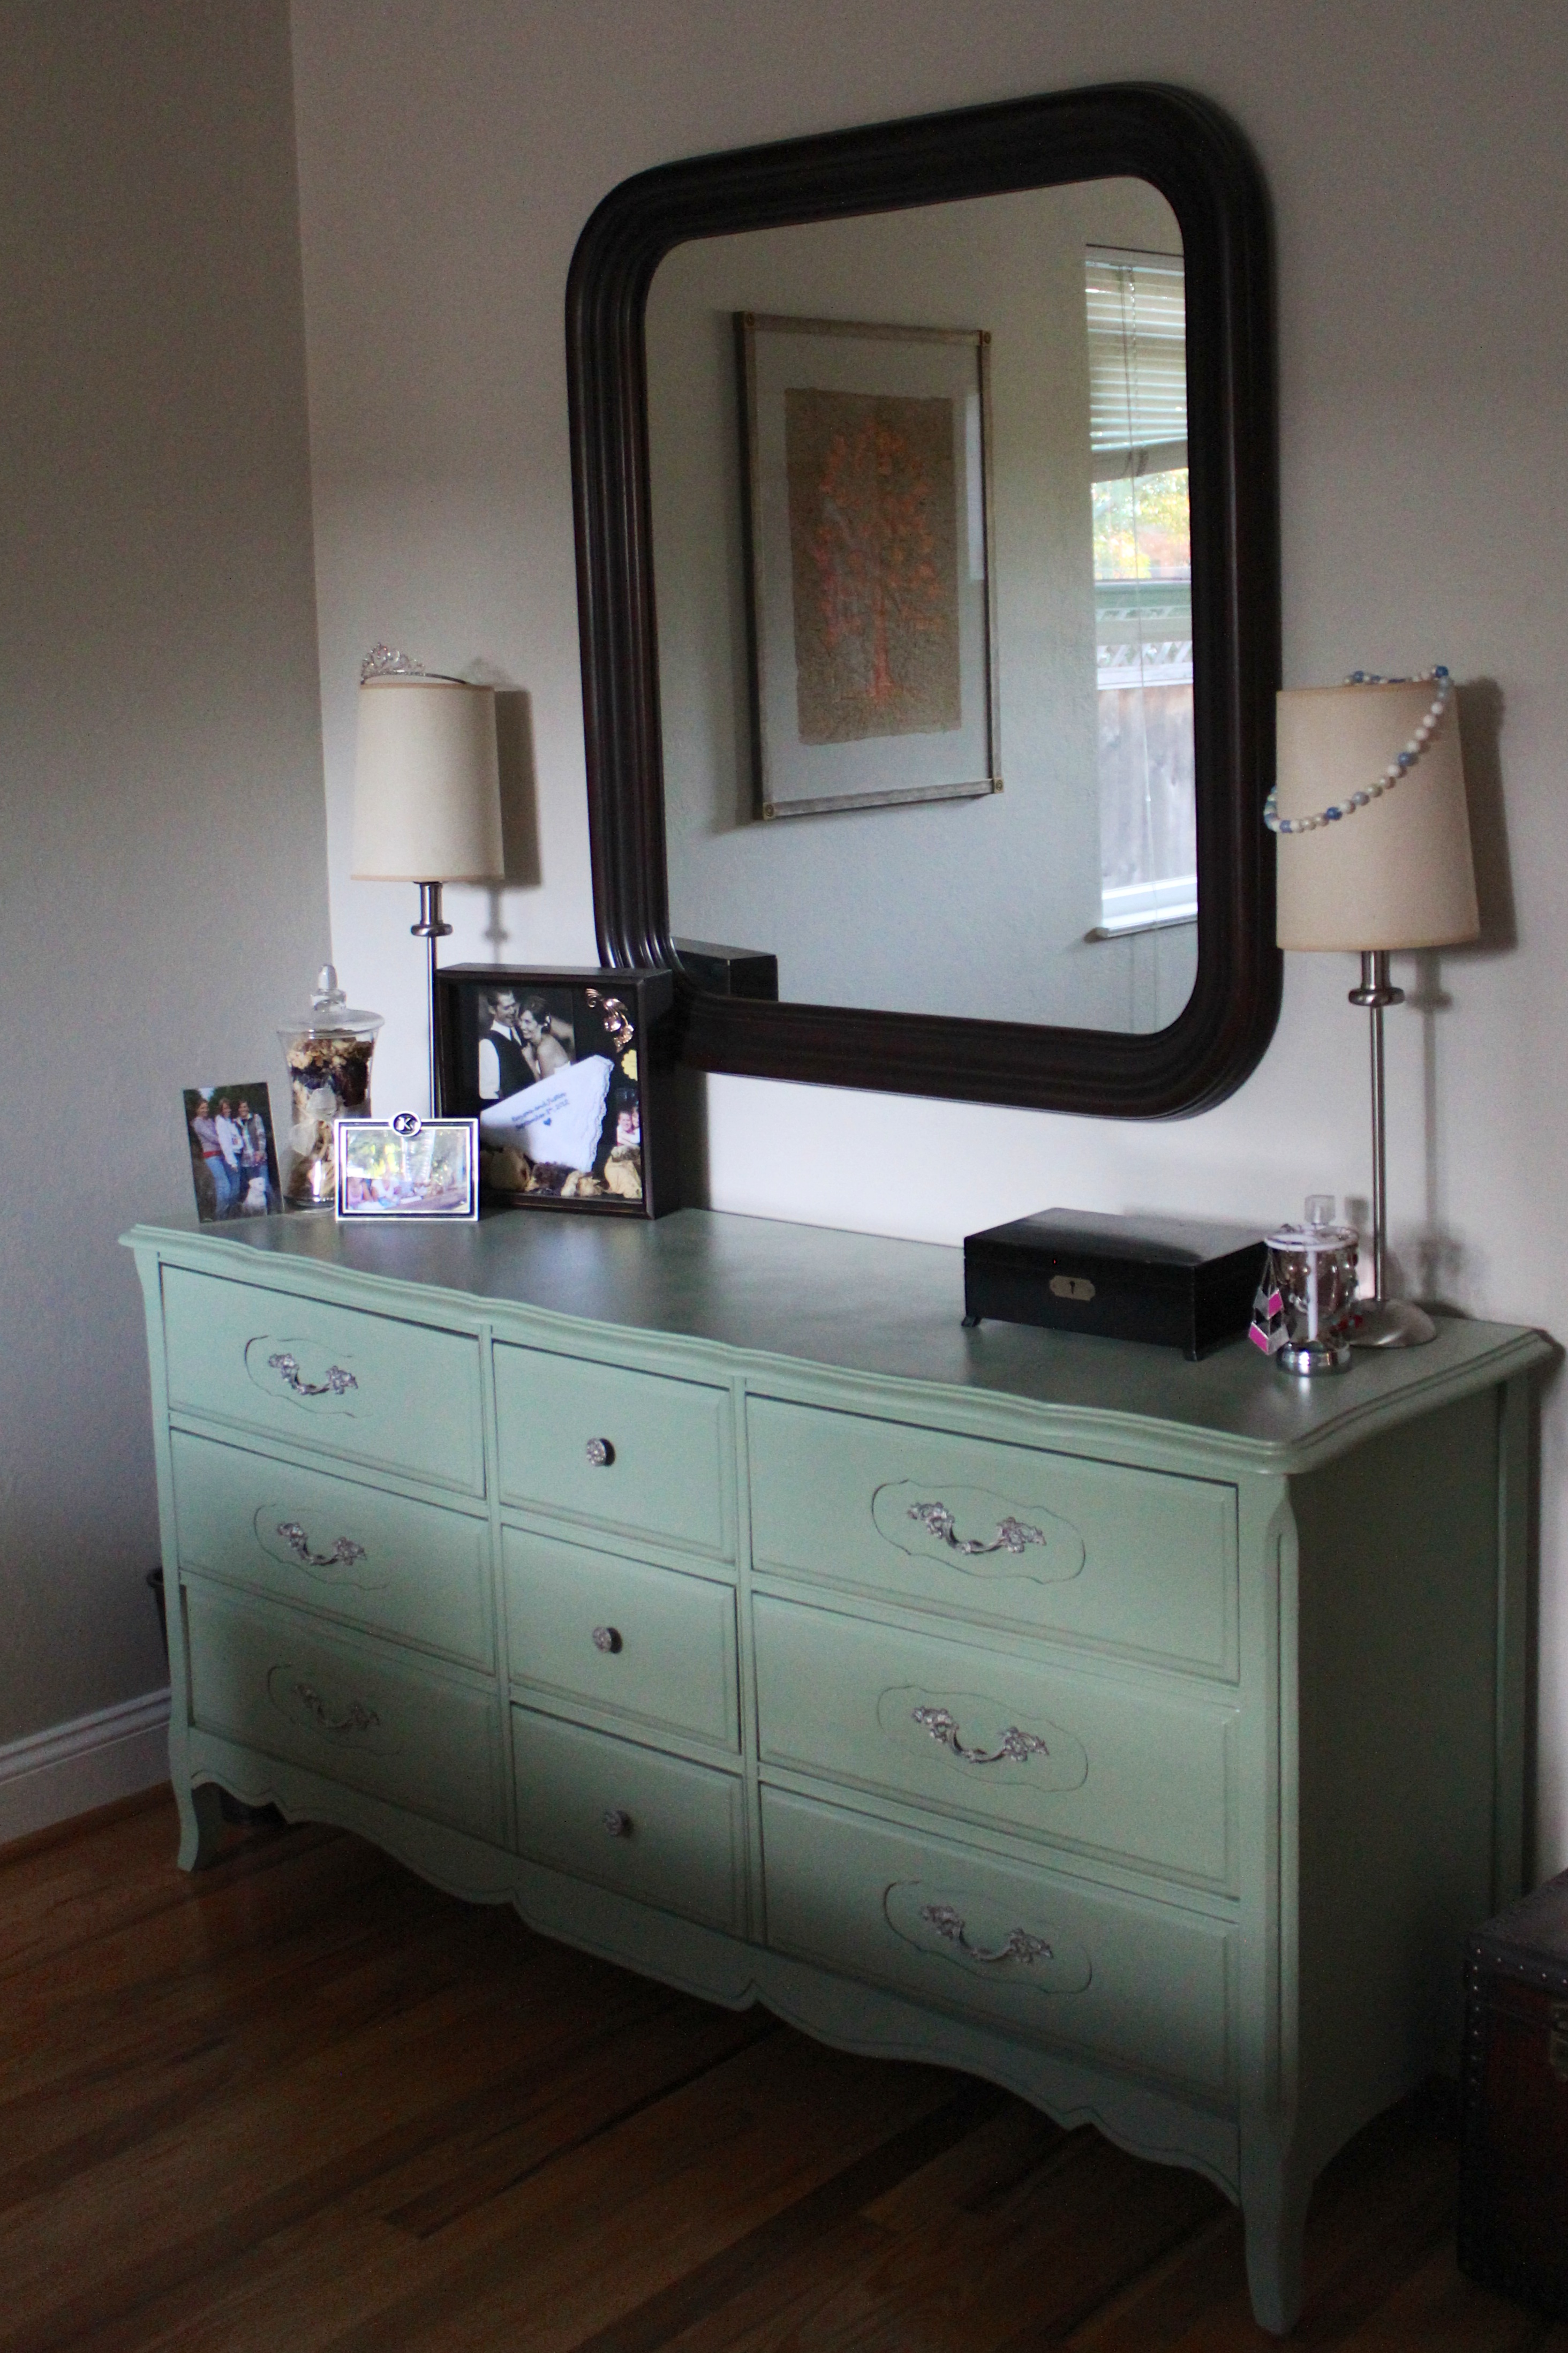
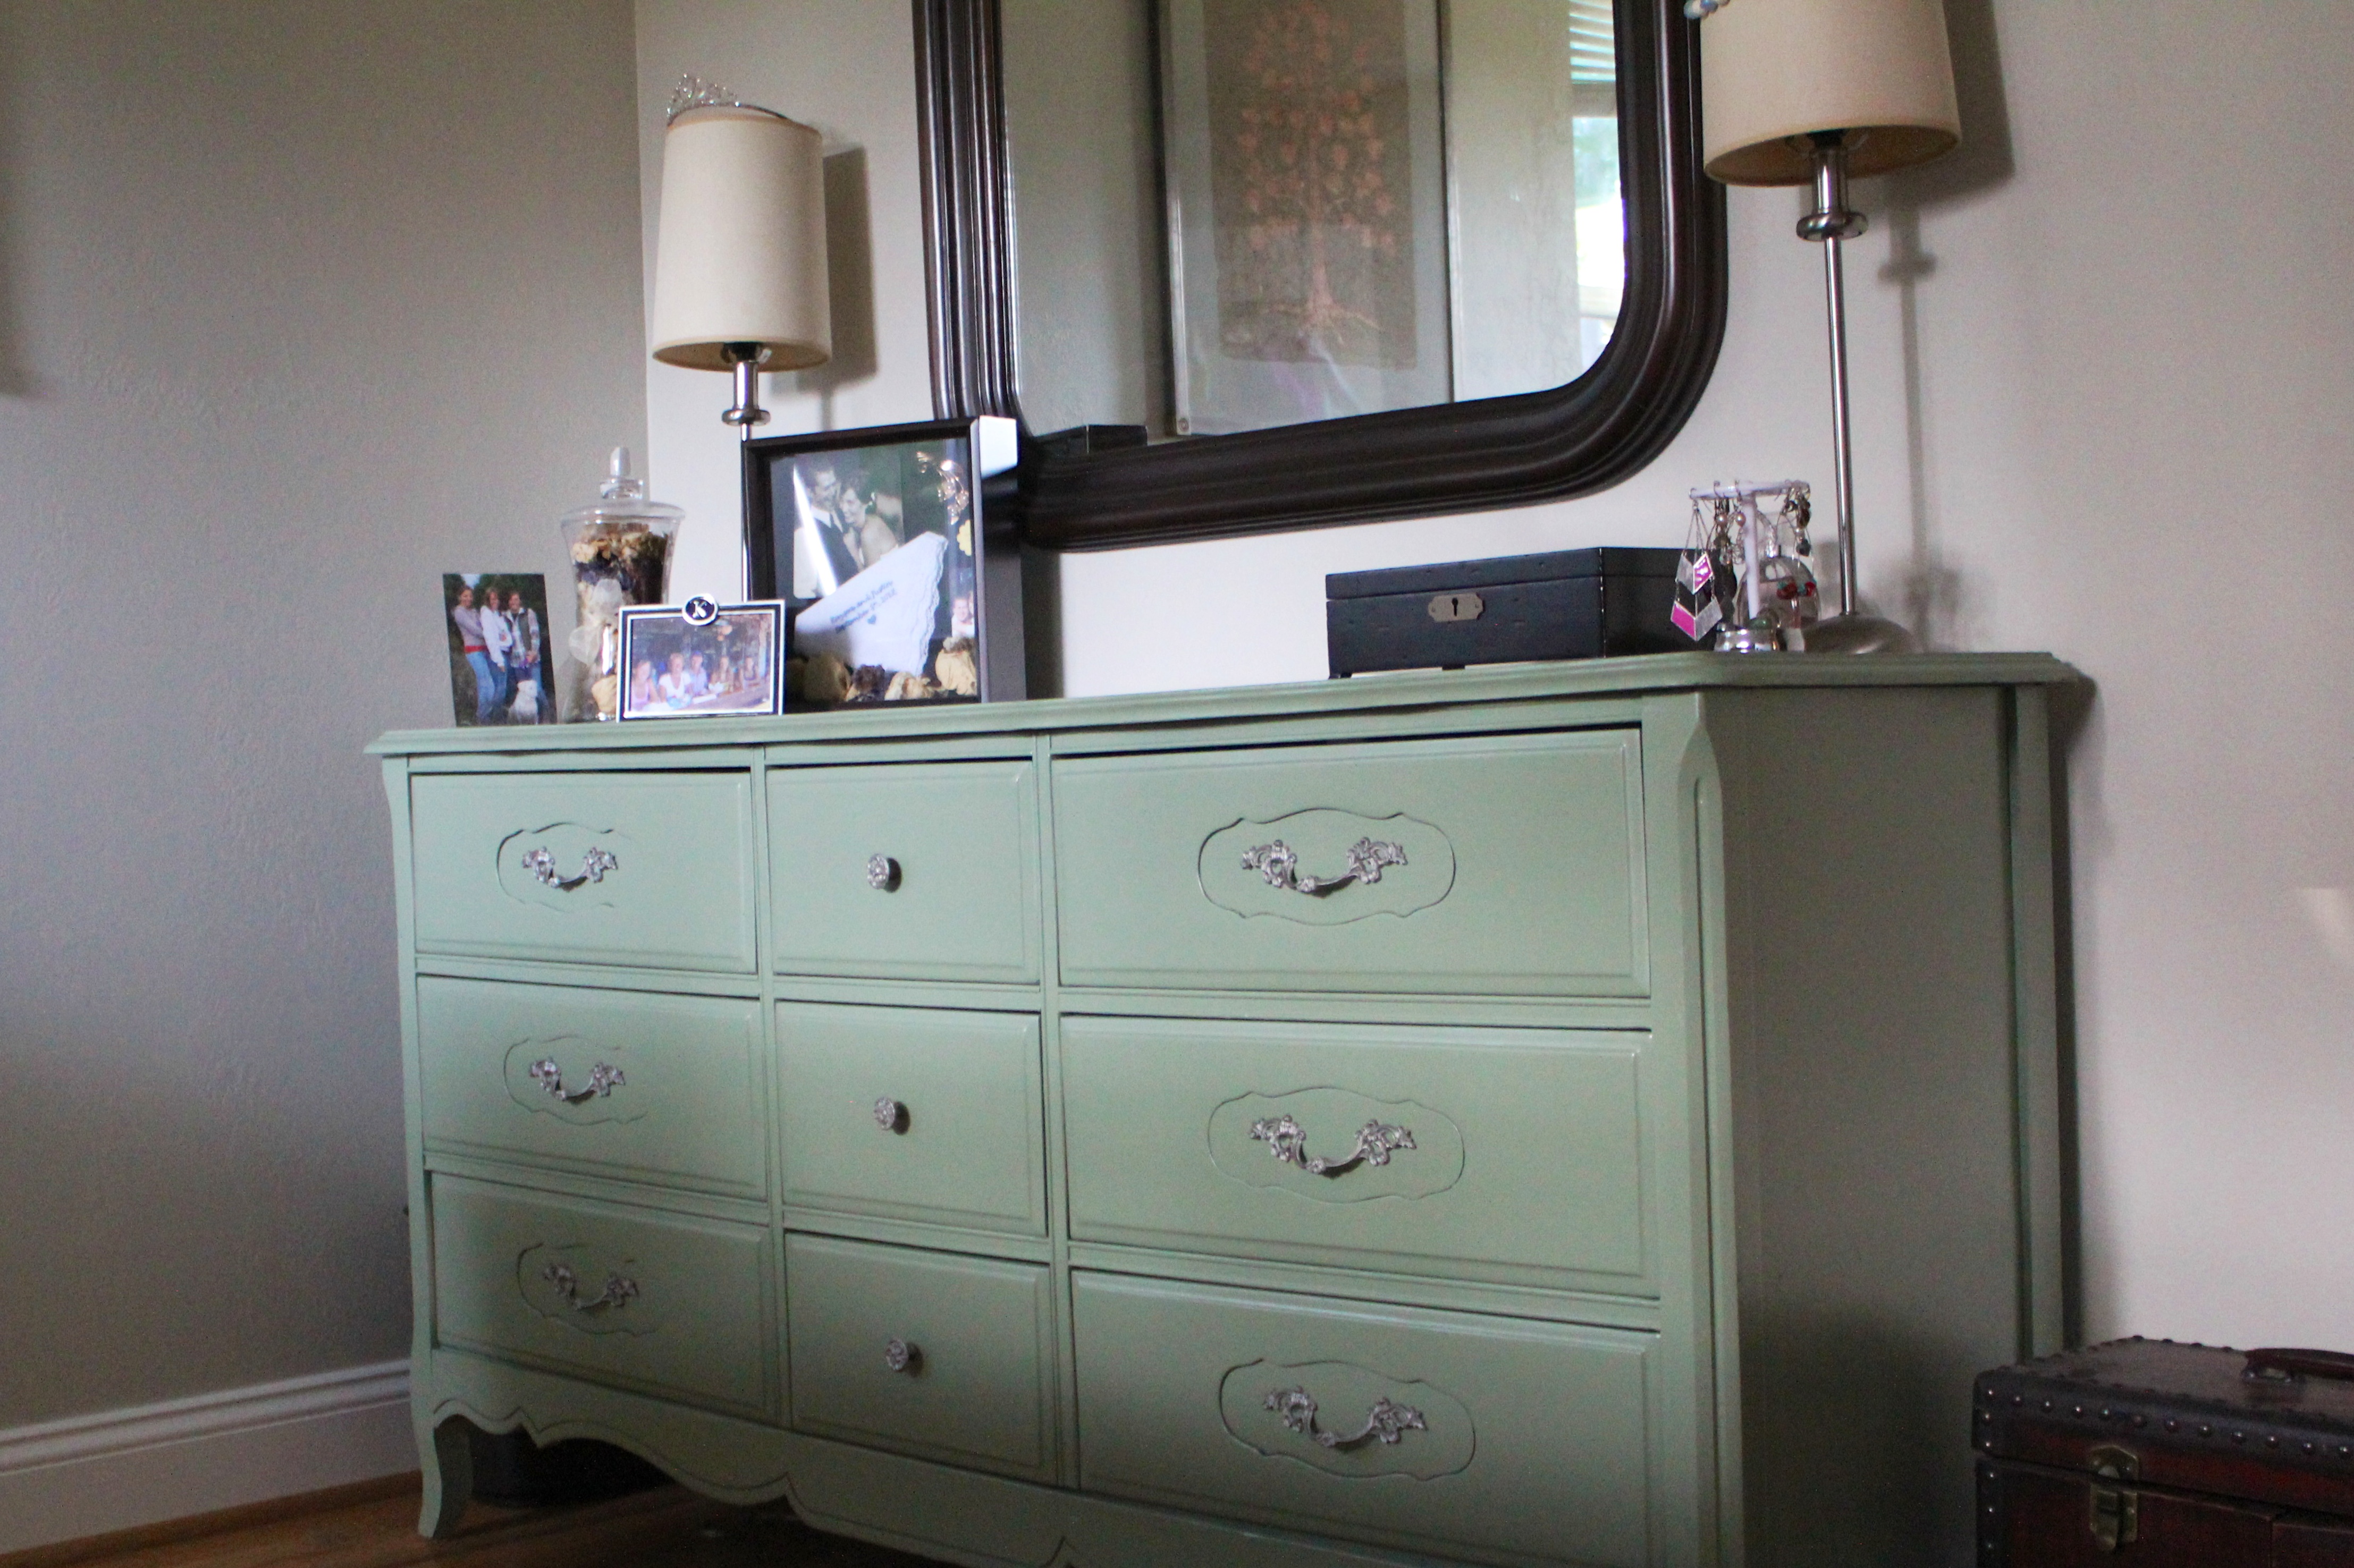
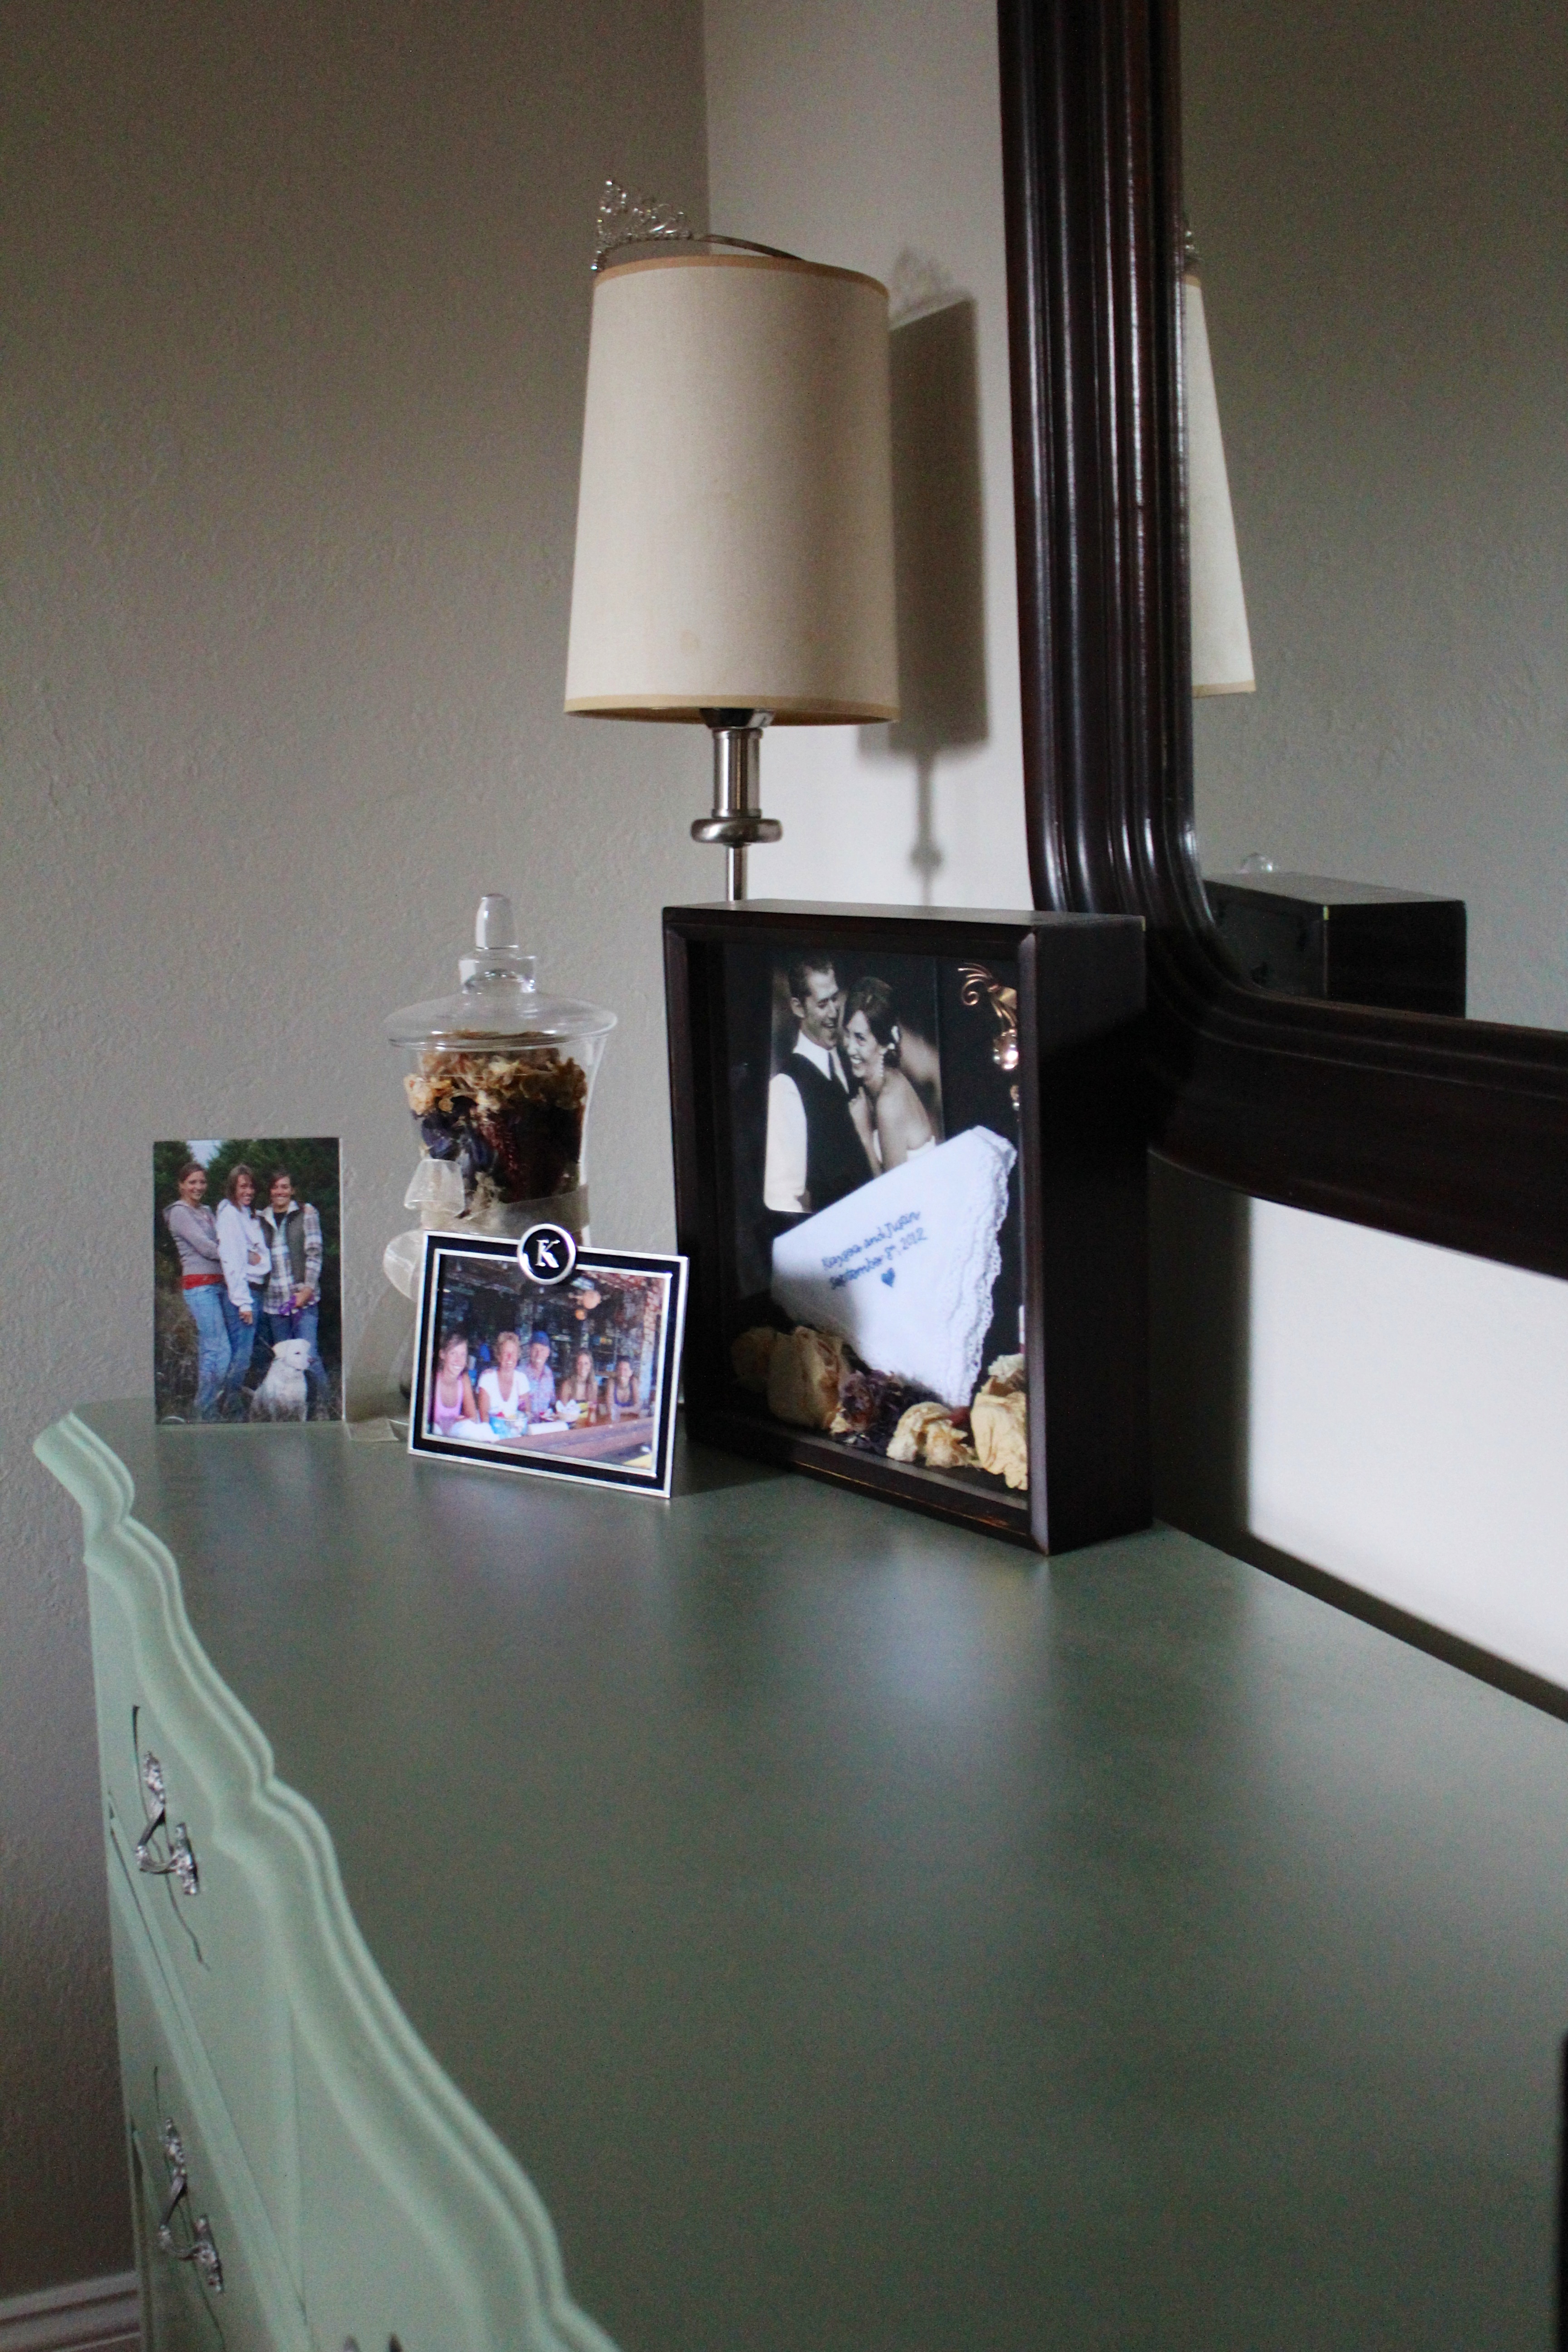
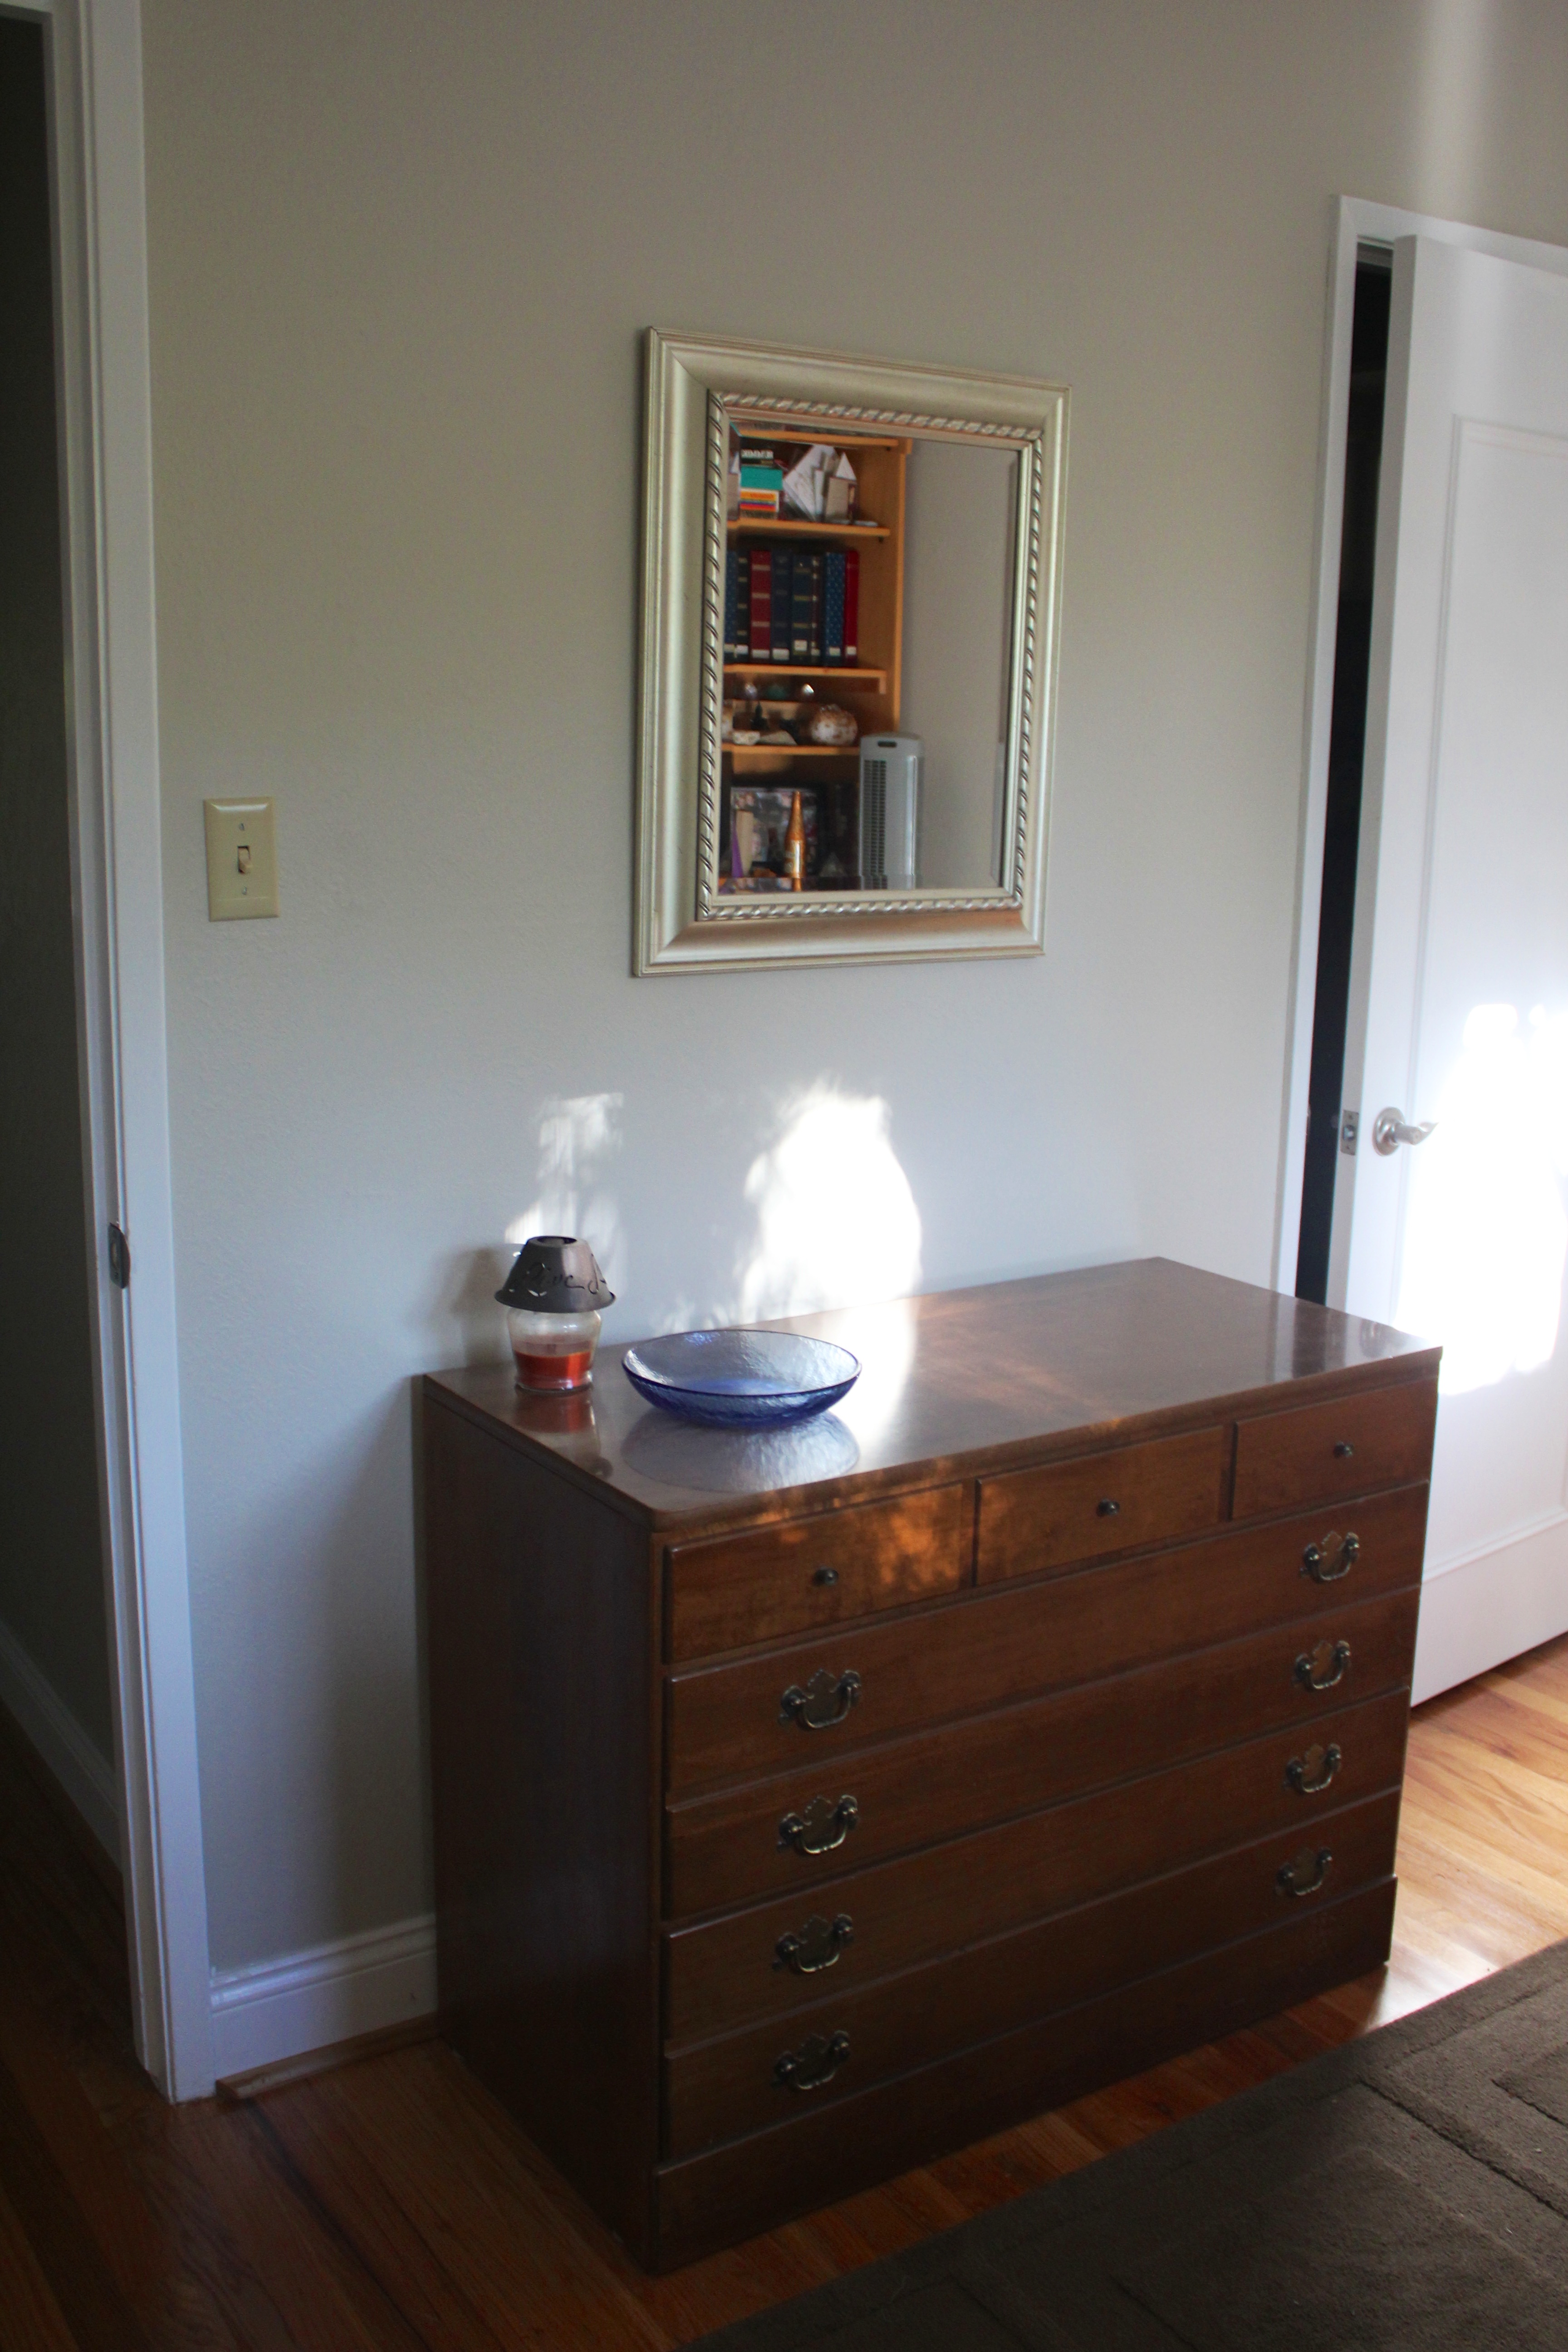
Bedroom

- Installed a ceiling fan, which also replaced the gross light fixture that was in here
- Moved in
- Although you can't see it in this photo, we also hung some art, refinished a dresser, and put in a giant mirror to bounce some light off and make the room appear bigger and brighter
Guest Room
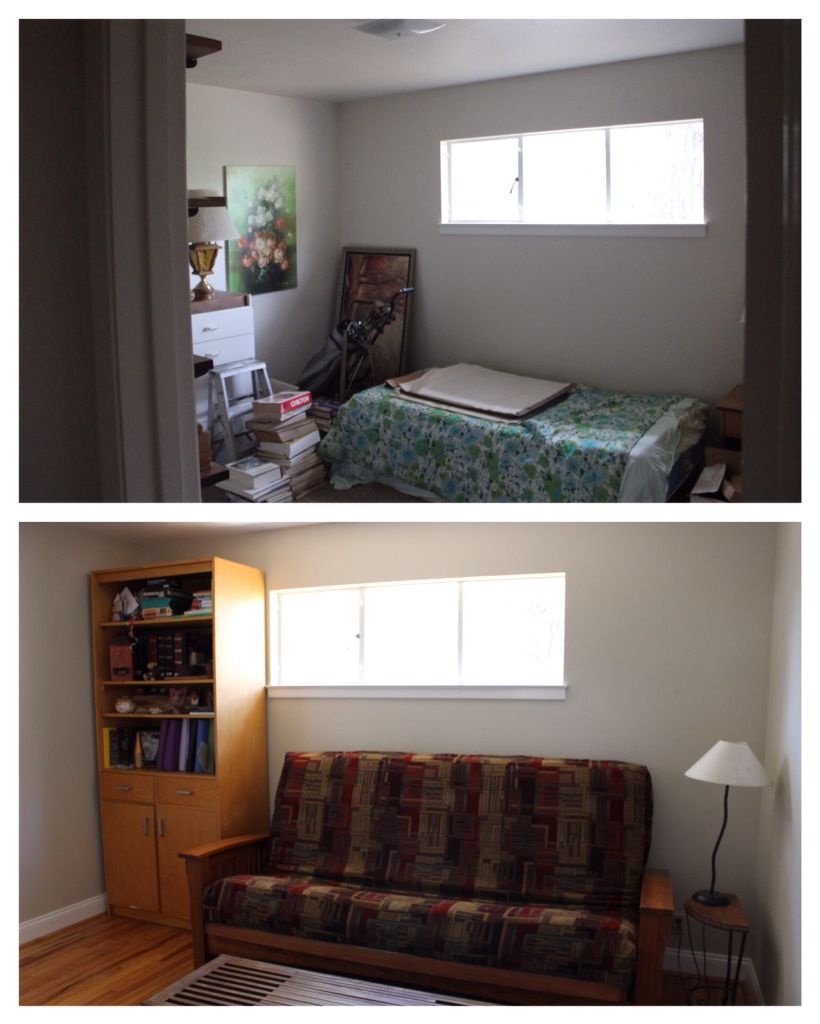
- Removed the shelves and filled in the holes (just like the office)
- Moved in, and as far as we can tell our guests like this little spot just fine!
- The second photo is a pretty good shot showing the door detailing we worked on in all the rooms
Bathroom
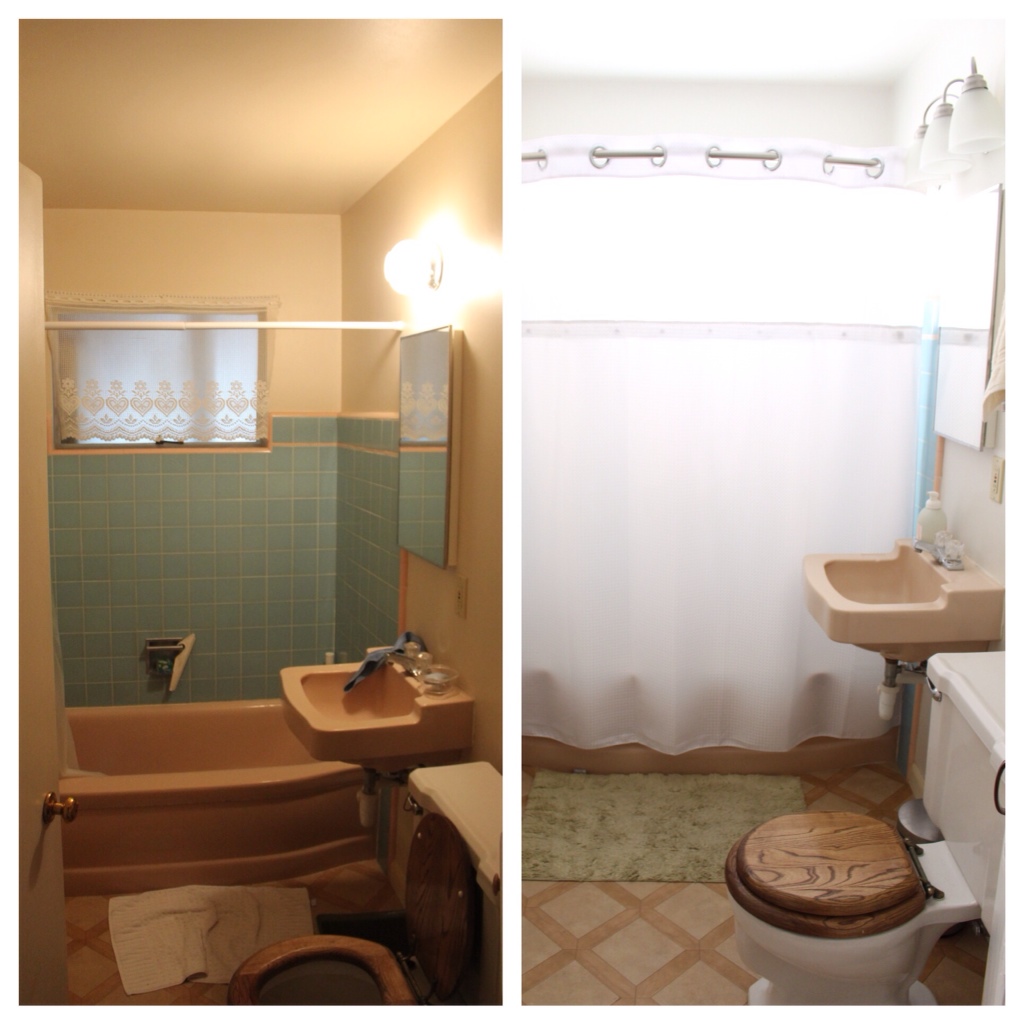
- Installed a curved shower curtain rod and a bright white, cotton shower curtain (that really brightens things up!)
- Installed a new light fixture over the sink
- Ditched the gross doily curtain over the window. Yuck!
Well, there you have it folks. Hope you've enjoyed this post, and the outdoor version that will follow soon! Most of the indoor improvements we've already blogged about, and this summer was really about creating a livable outdoor space. But you'll see that tomorrow, and I don't want to give away all of our surprises 🙂
For as long as I can remember, my family has gone camping near Mendocino, usually twice a year to coincide with the best conditions for abalone diving. This was tradition from before I was born all the way through high school. Then we all went our separate ways (i.e., college) and it was just too hard to get everyone in the same place on a weekend with good tides during ab season. So after a few year hiatus, I decided it was time to reinstate the annual Mendo trip! I was having abalone withdrawals…
Last year, we made the trip to Mendo on Justin’s birthday weekend. It was cold and foggy, but we still managed to gorge ourselves on abalone and wine. We even went wine tasting in Anderson Valley on the way home. However, with the wedding planning madness of last spring, we just couldn’t get our act together for Justin to dive. This year was a different story!
All bundled up with the birthday boy (2012)
fog + food = typical Mendo (2012)
Justin got all set up to dive, AND it was sunny and warm. Like shorts and t-shirts warm. This is relatively unheard of for Mendo camping. It’s more likely to rain sideways than be sunny. And this year it was my birthday, and I really couldn’t have asked for a better weekend.
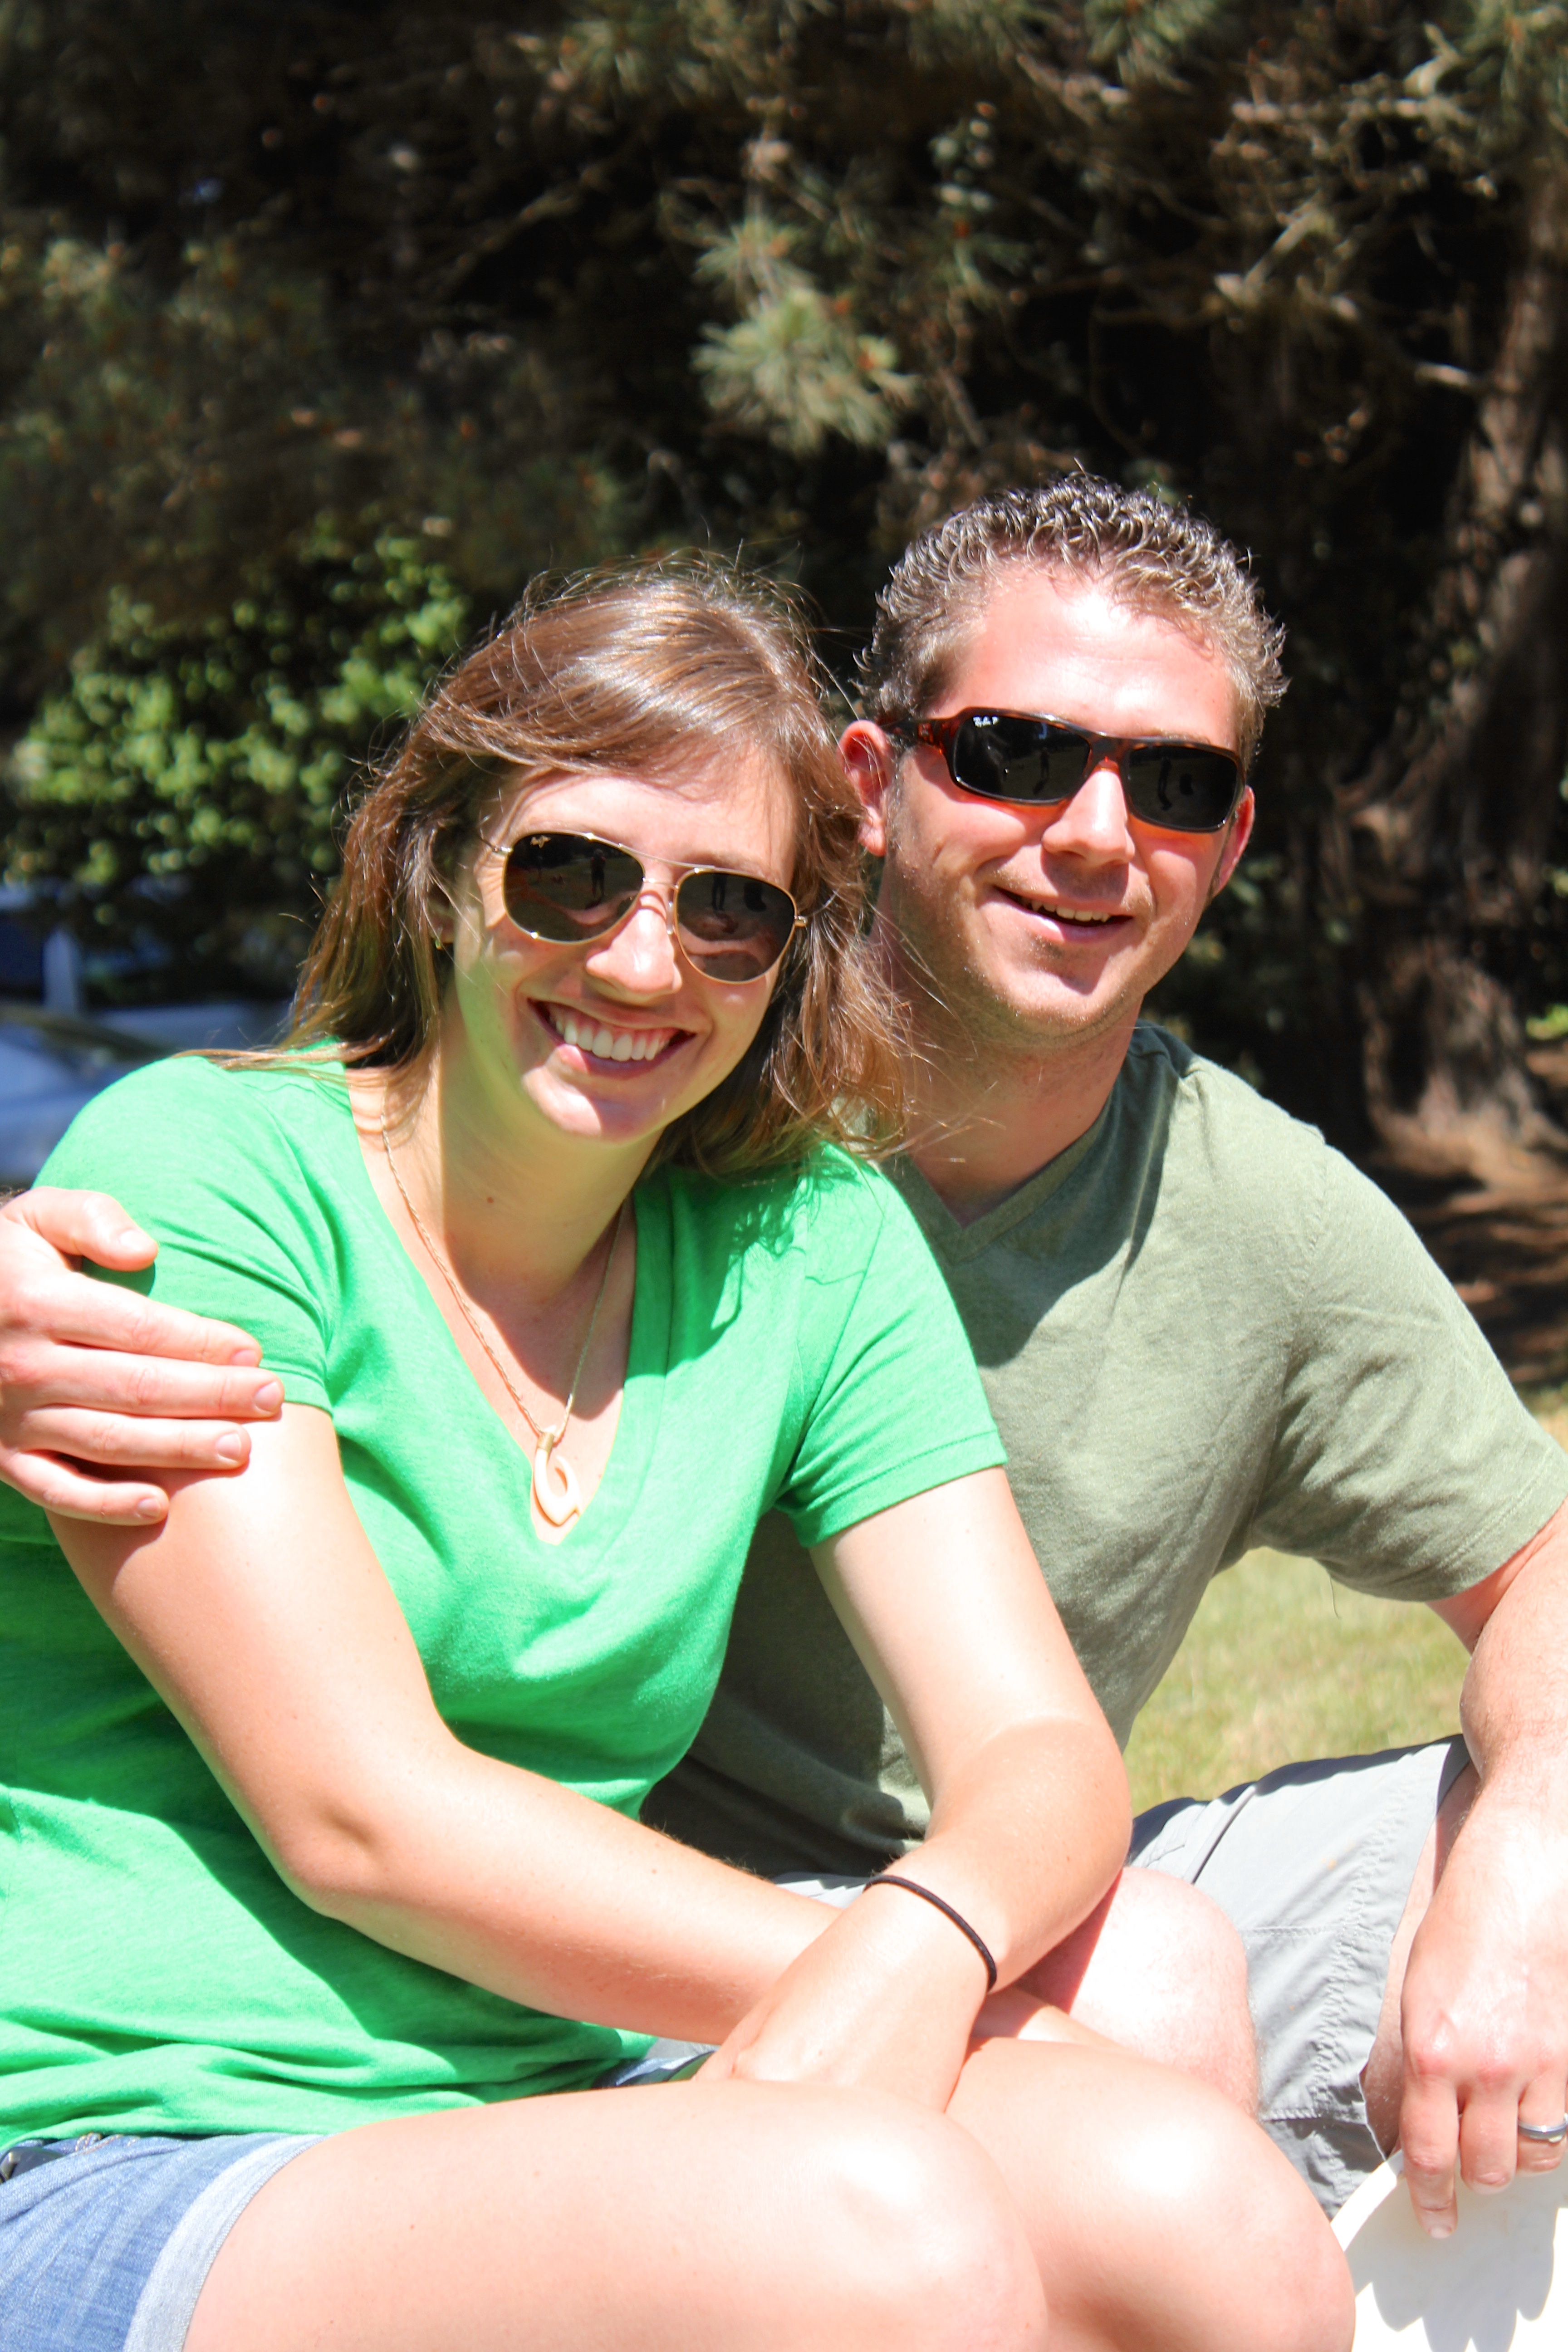
Shorts and tees for the birthday girl this year

SUN!
Justin went diving and successfully “caught” his share of abs for our feast. I’m not sure if you catch abalone, or what the term is… The abalone are like giant one sided clams. They have a big suction cup foot that attaches to the rock, and abalone divers have to pry them off the rocks. And I should specify: I don’t mean dive like scuba dive. I mean dive like free dive (no tanks, just one big breath), down to 10 or 15 feet where the abalone search and prying activities commence. Oh, and the water is absolutely freezing. You couldn’t convince me to go out there without a dry suit, and then I’m still not sure I would go! Needless to say, these abalone divers are savages. At least in my humble opinion.

what a savage. look at those abs!
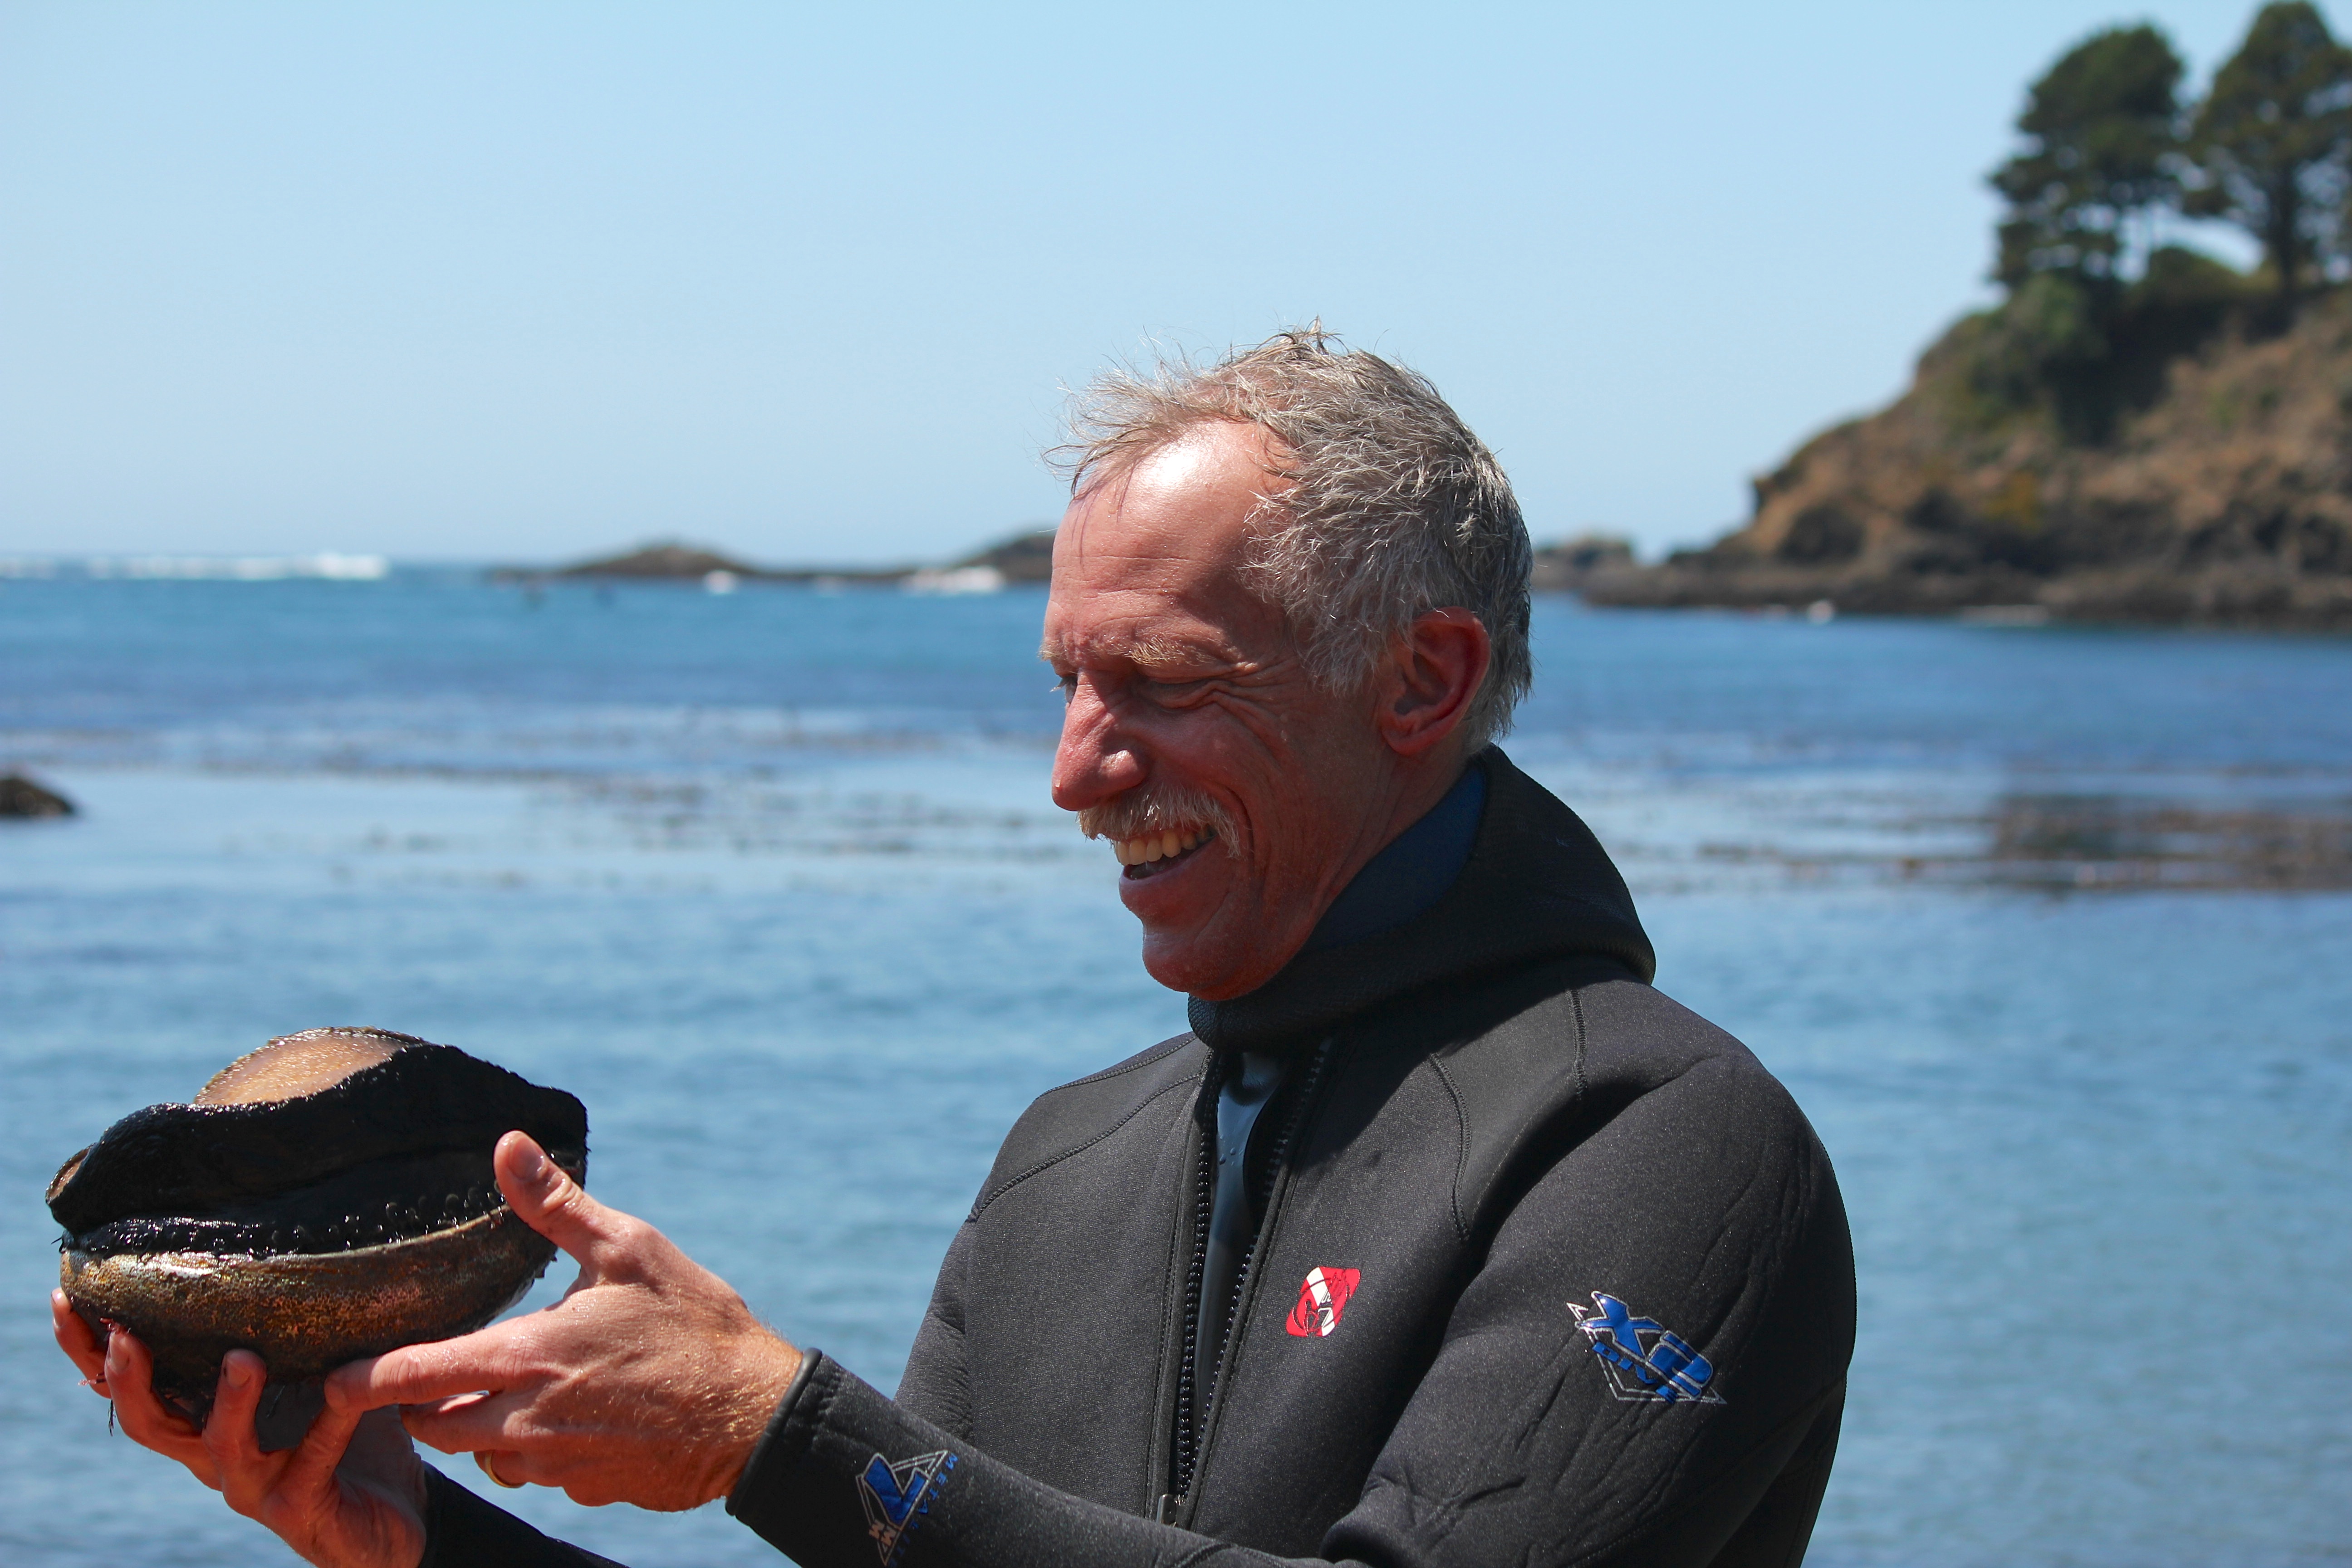
more savagery and awesome abs 🙂
So the men dove and the girls sat on the beach. After our morning festivities near the ocean, we went back to camp. We spent the afternoons playing games and prepping the abs. Then we feasted!

waiting for our men to bring back dinner 🙂

our “view” from the beach. can’t really see much until they come in to shore…
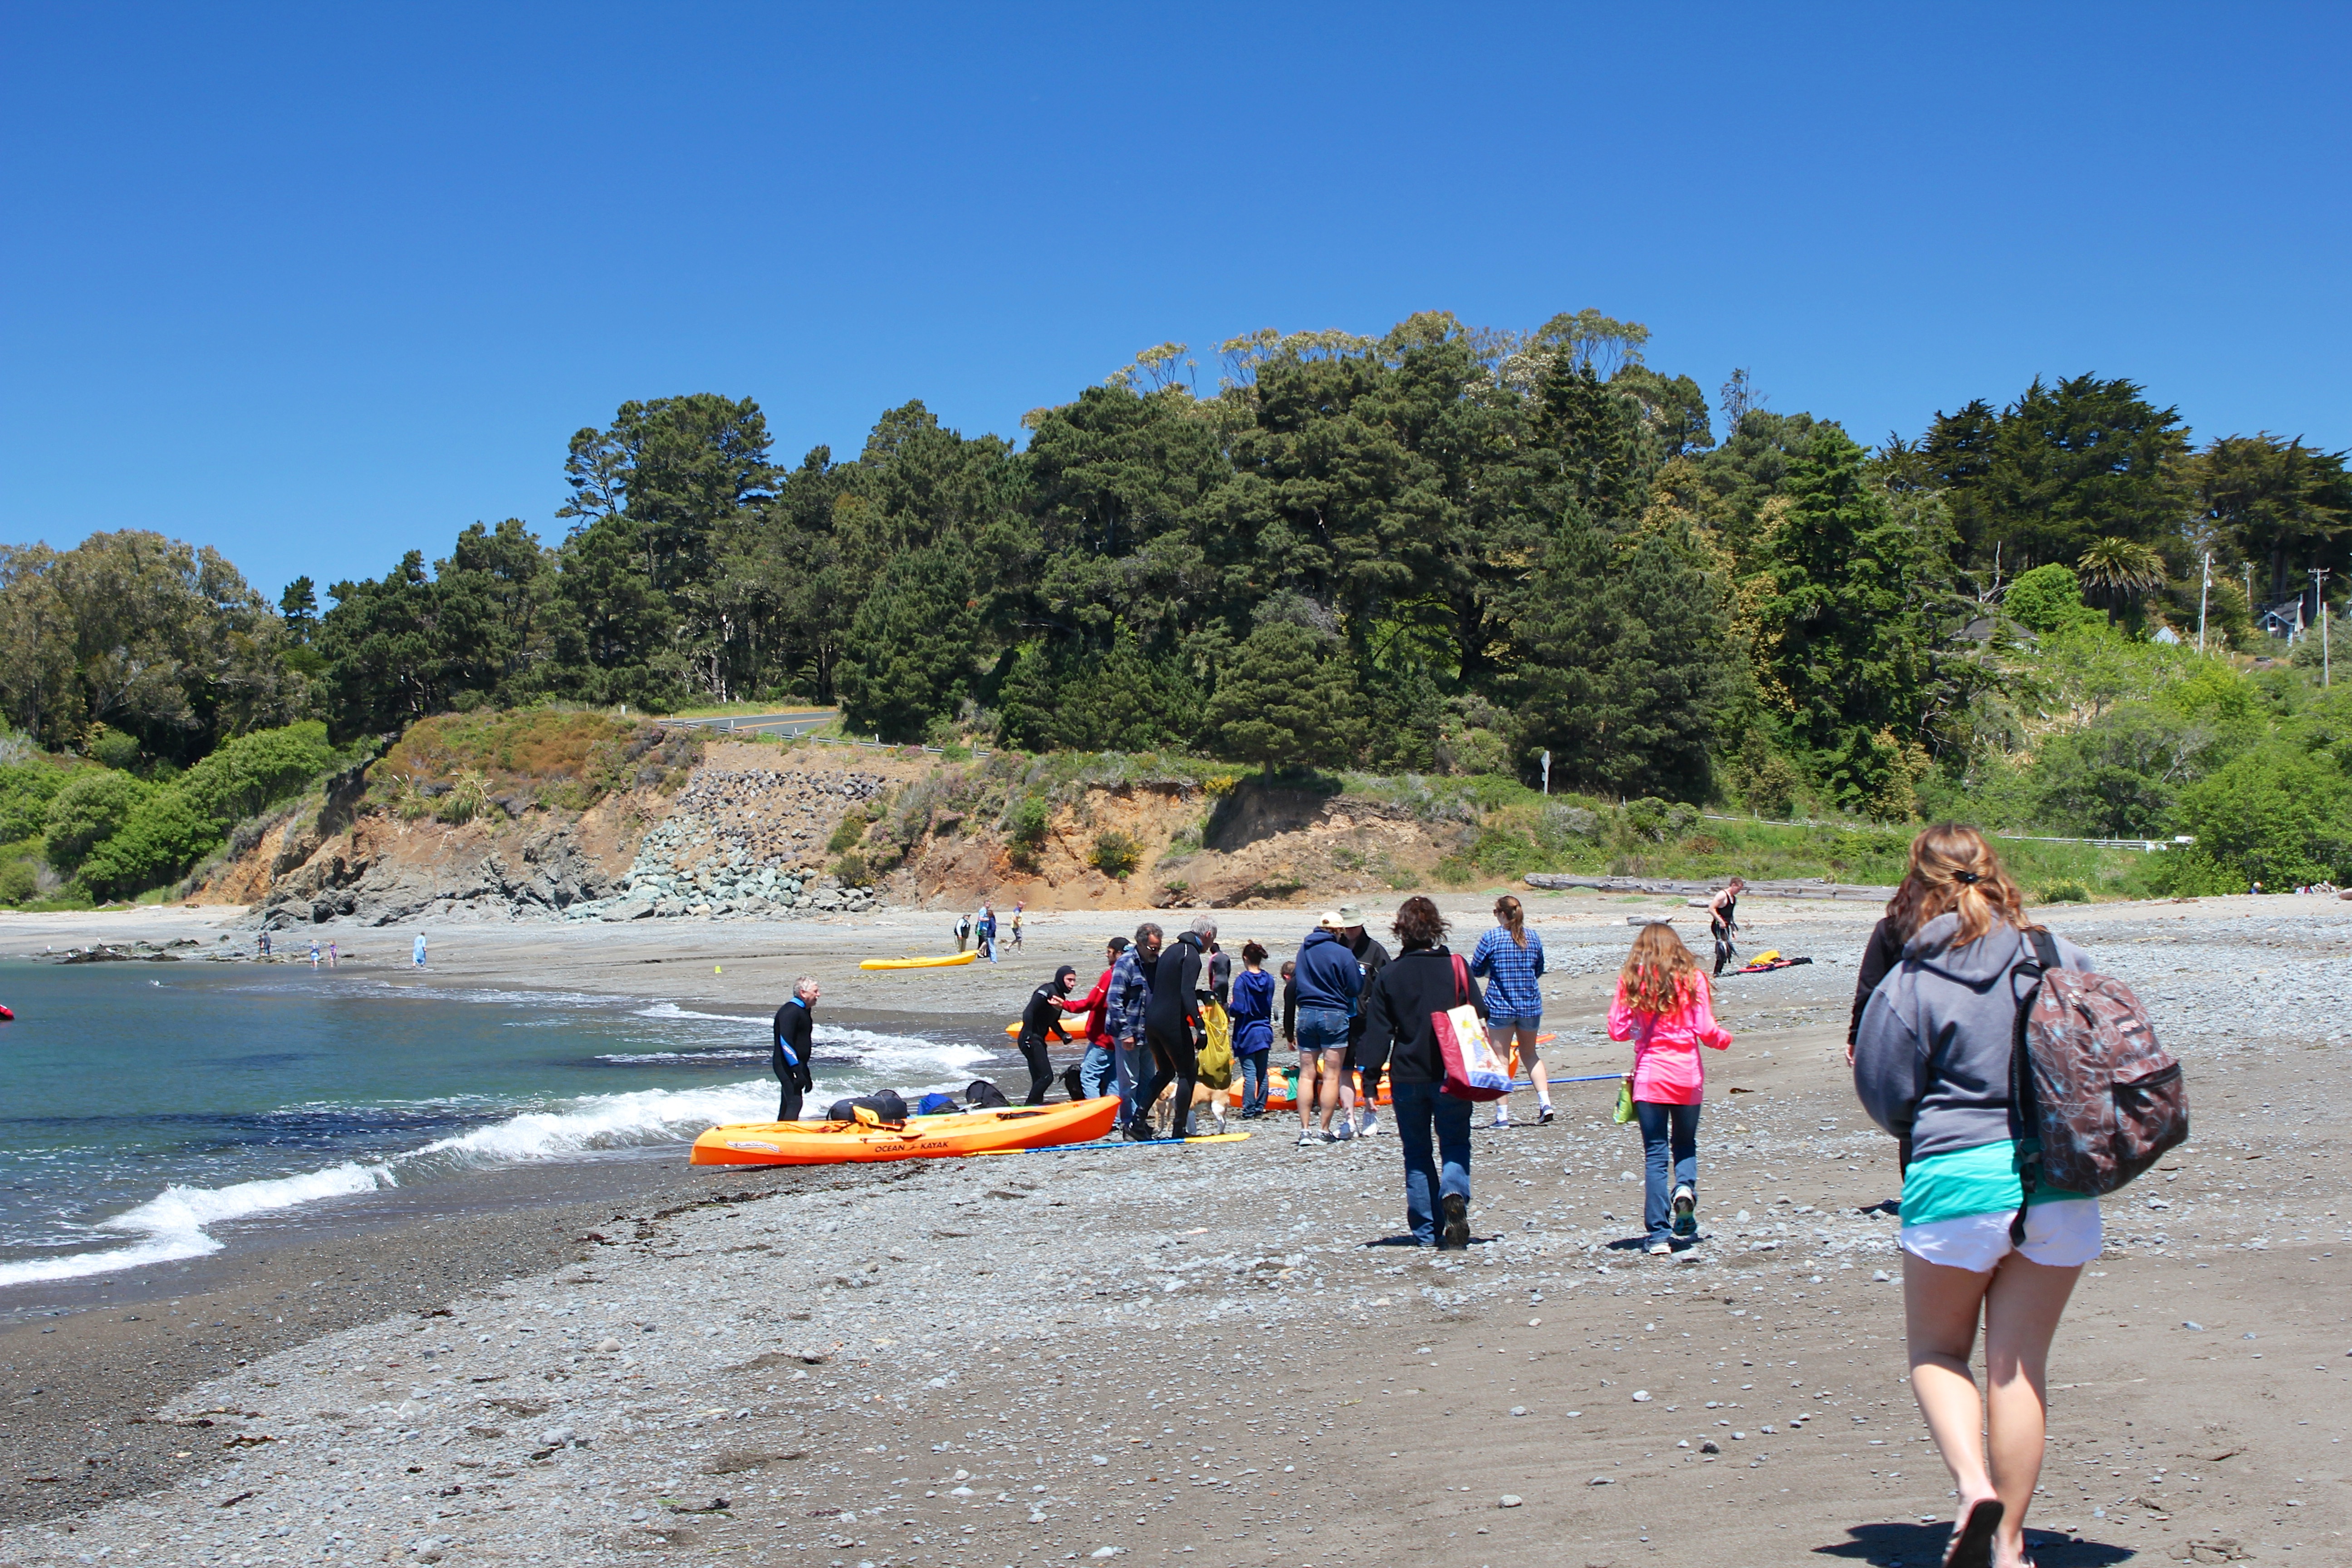
the welcoming party

yard games back at camp
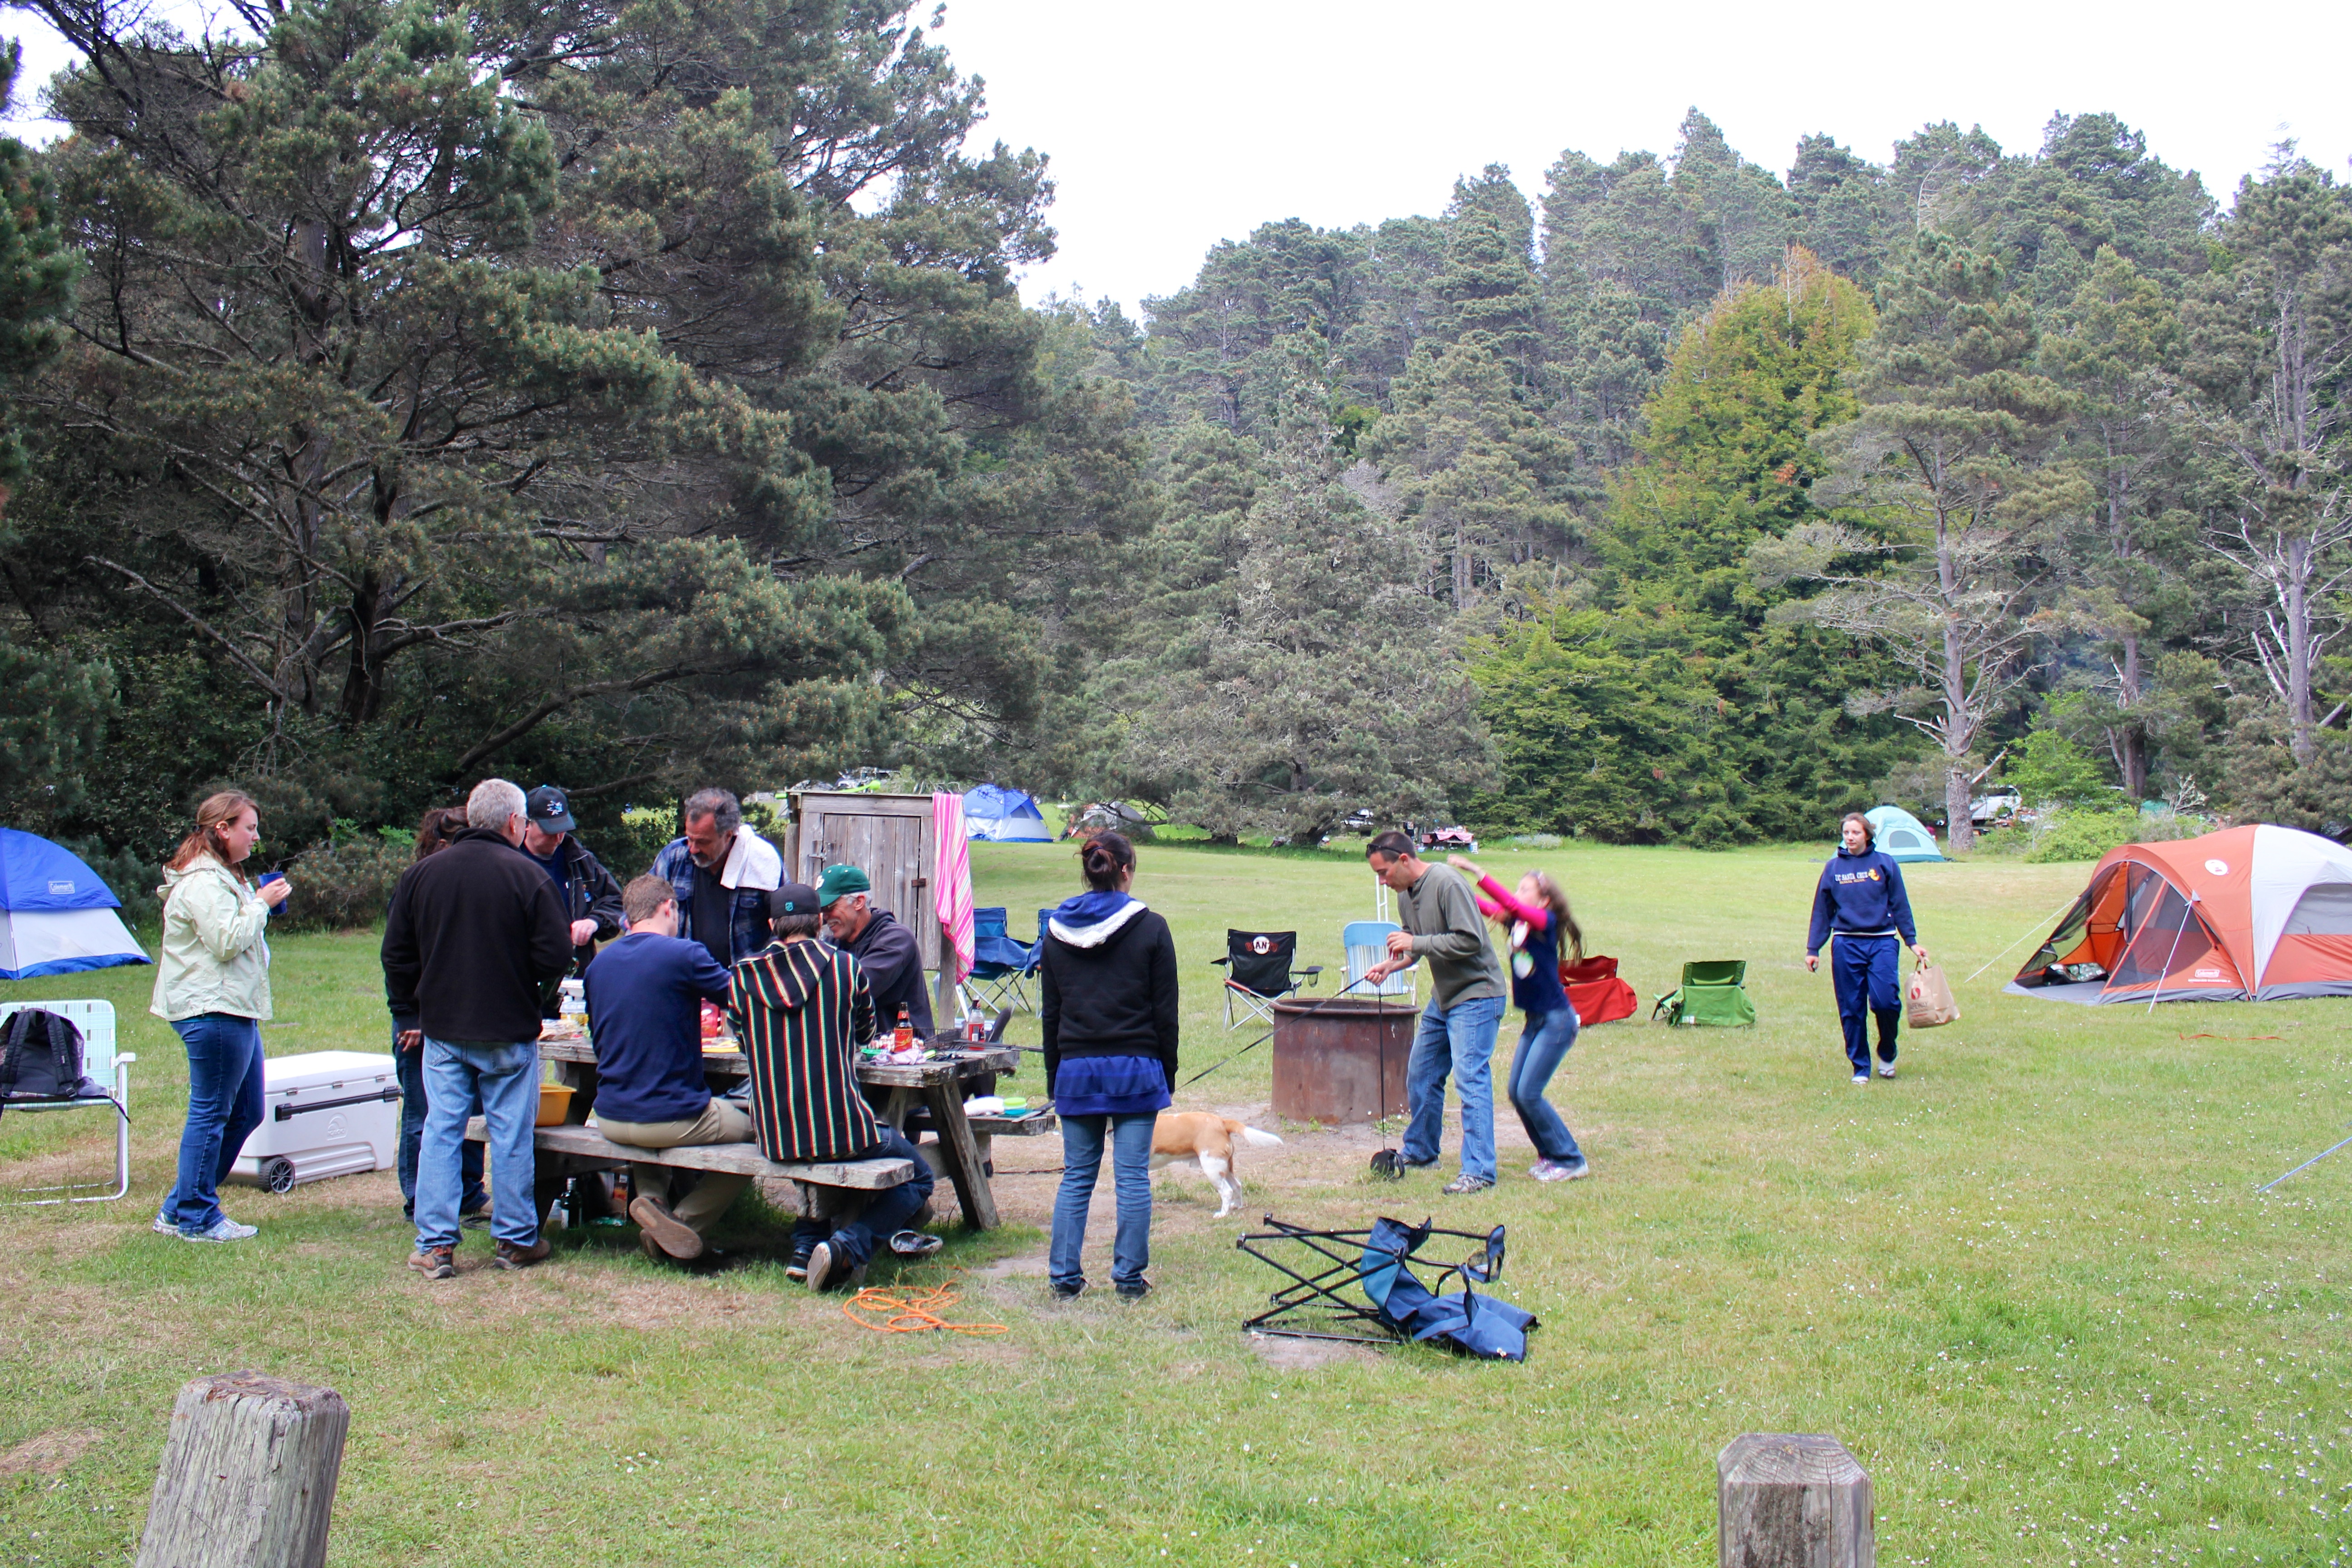
abalone preparing and feasting. glorious!
Moral of the story: we camped, we indulged, and we conquered. Well, Justin conquered. Me, not so much. Still waiting for that dry suit…
Side note: we also went into town at some point. We popped in this really cool reclaimed wood shop that had Justin and my dad drooling (and my mom and I to a slightly lesser degree). We also tried to go to a brewery in Fort Bragg, but the brewery didn’t open until 6pm on Saturday. Who does that?!

drooling…

we could have spent hours here…
Second side note: we went wine tasting in Anderson Valley on the way home (again). It just so happened that we caught the tail end of the Anderson Valley Pinot Fest, which we thoroughly enjoyed 🙂
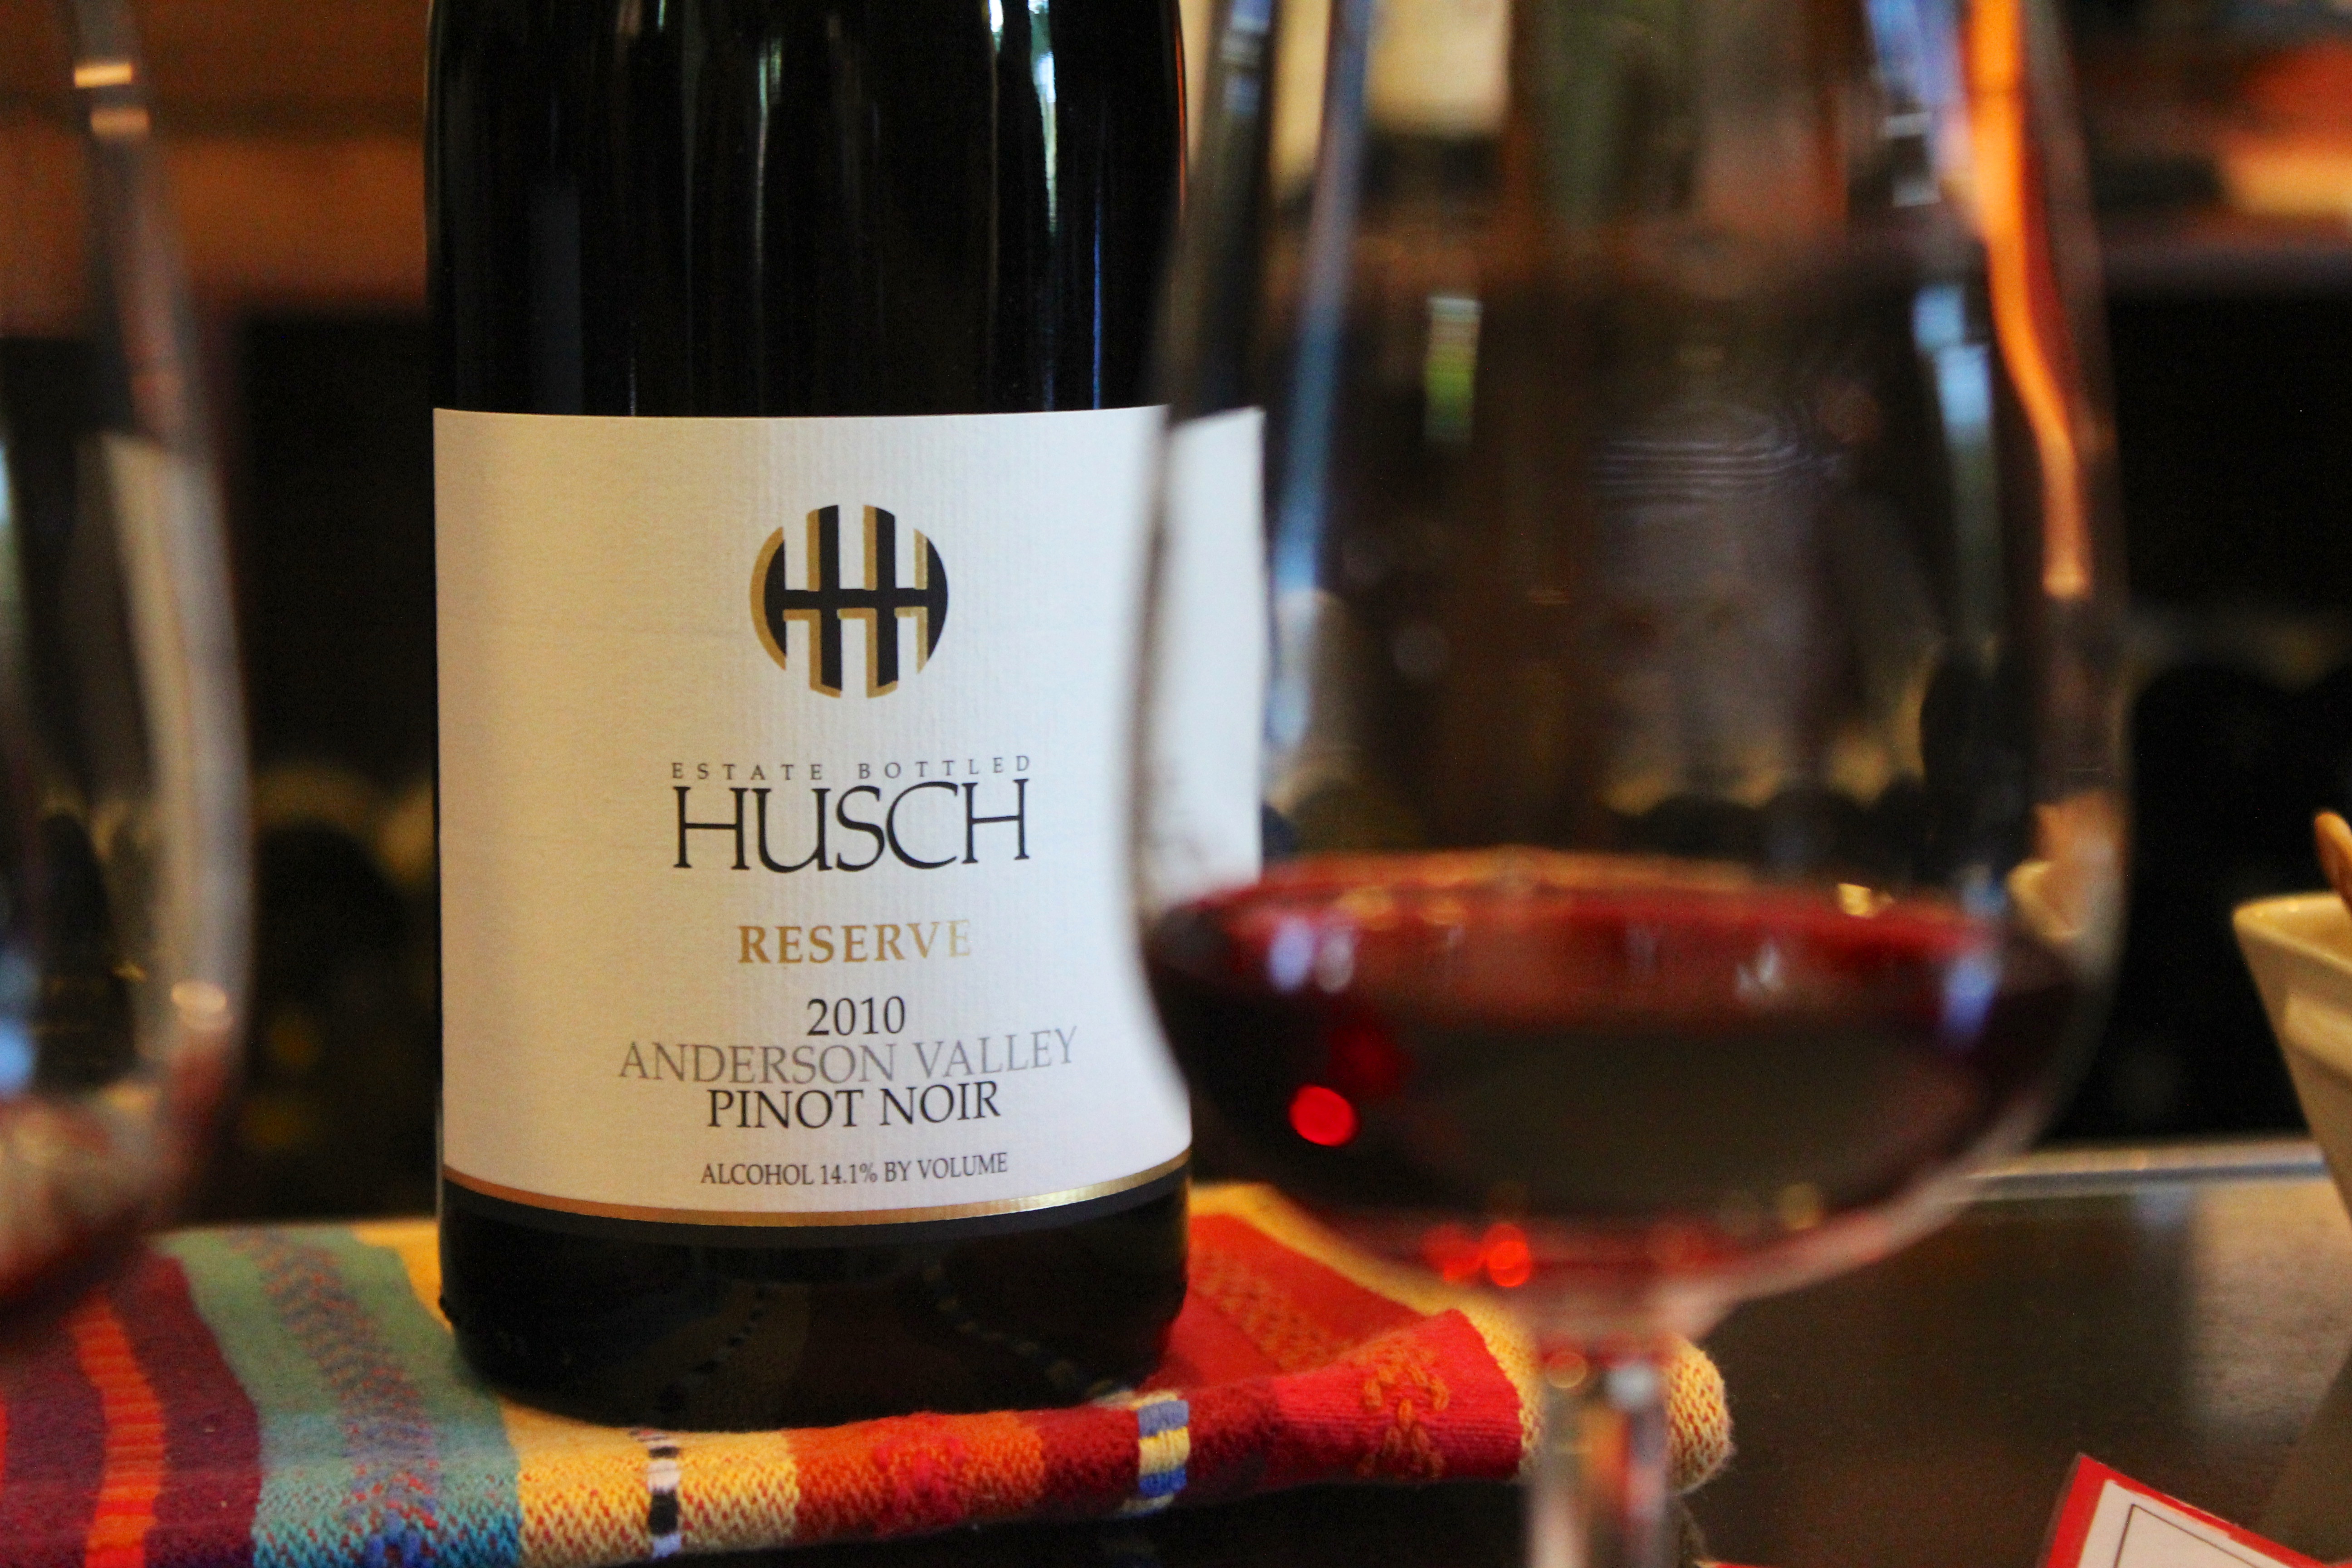
yaaaaay pinot fest!
Third (and final) side note: Talk about an EPIC birthday weekend. 26 is going to be a good year!
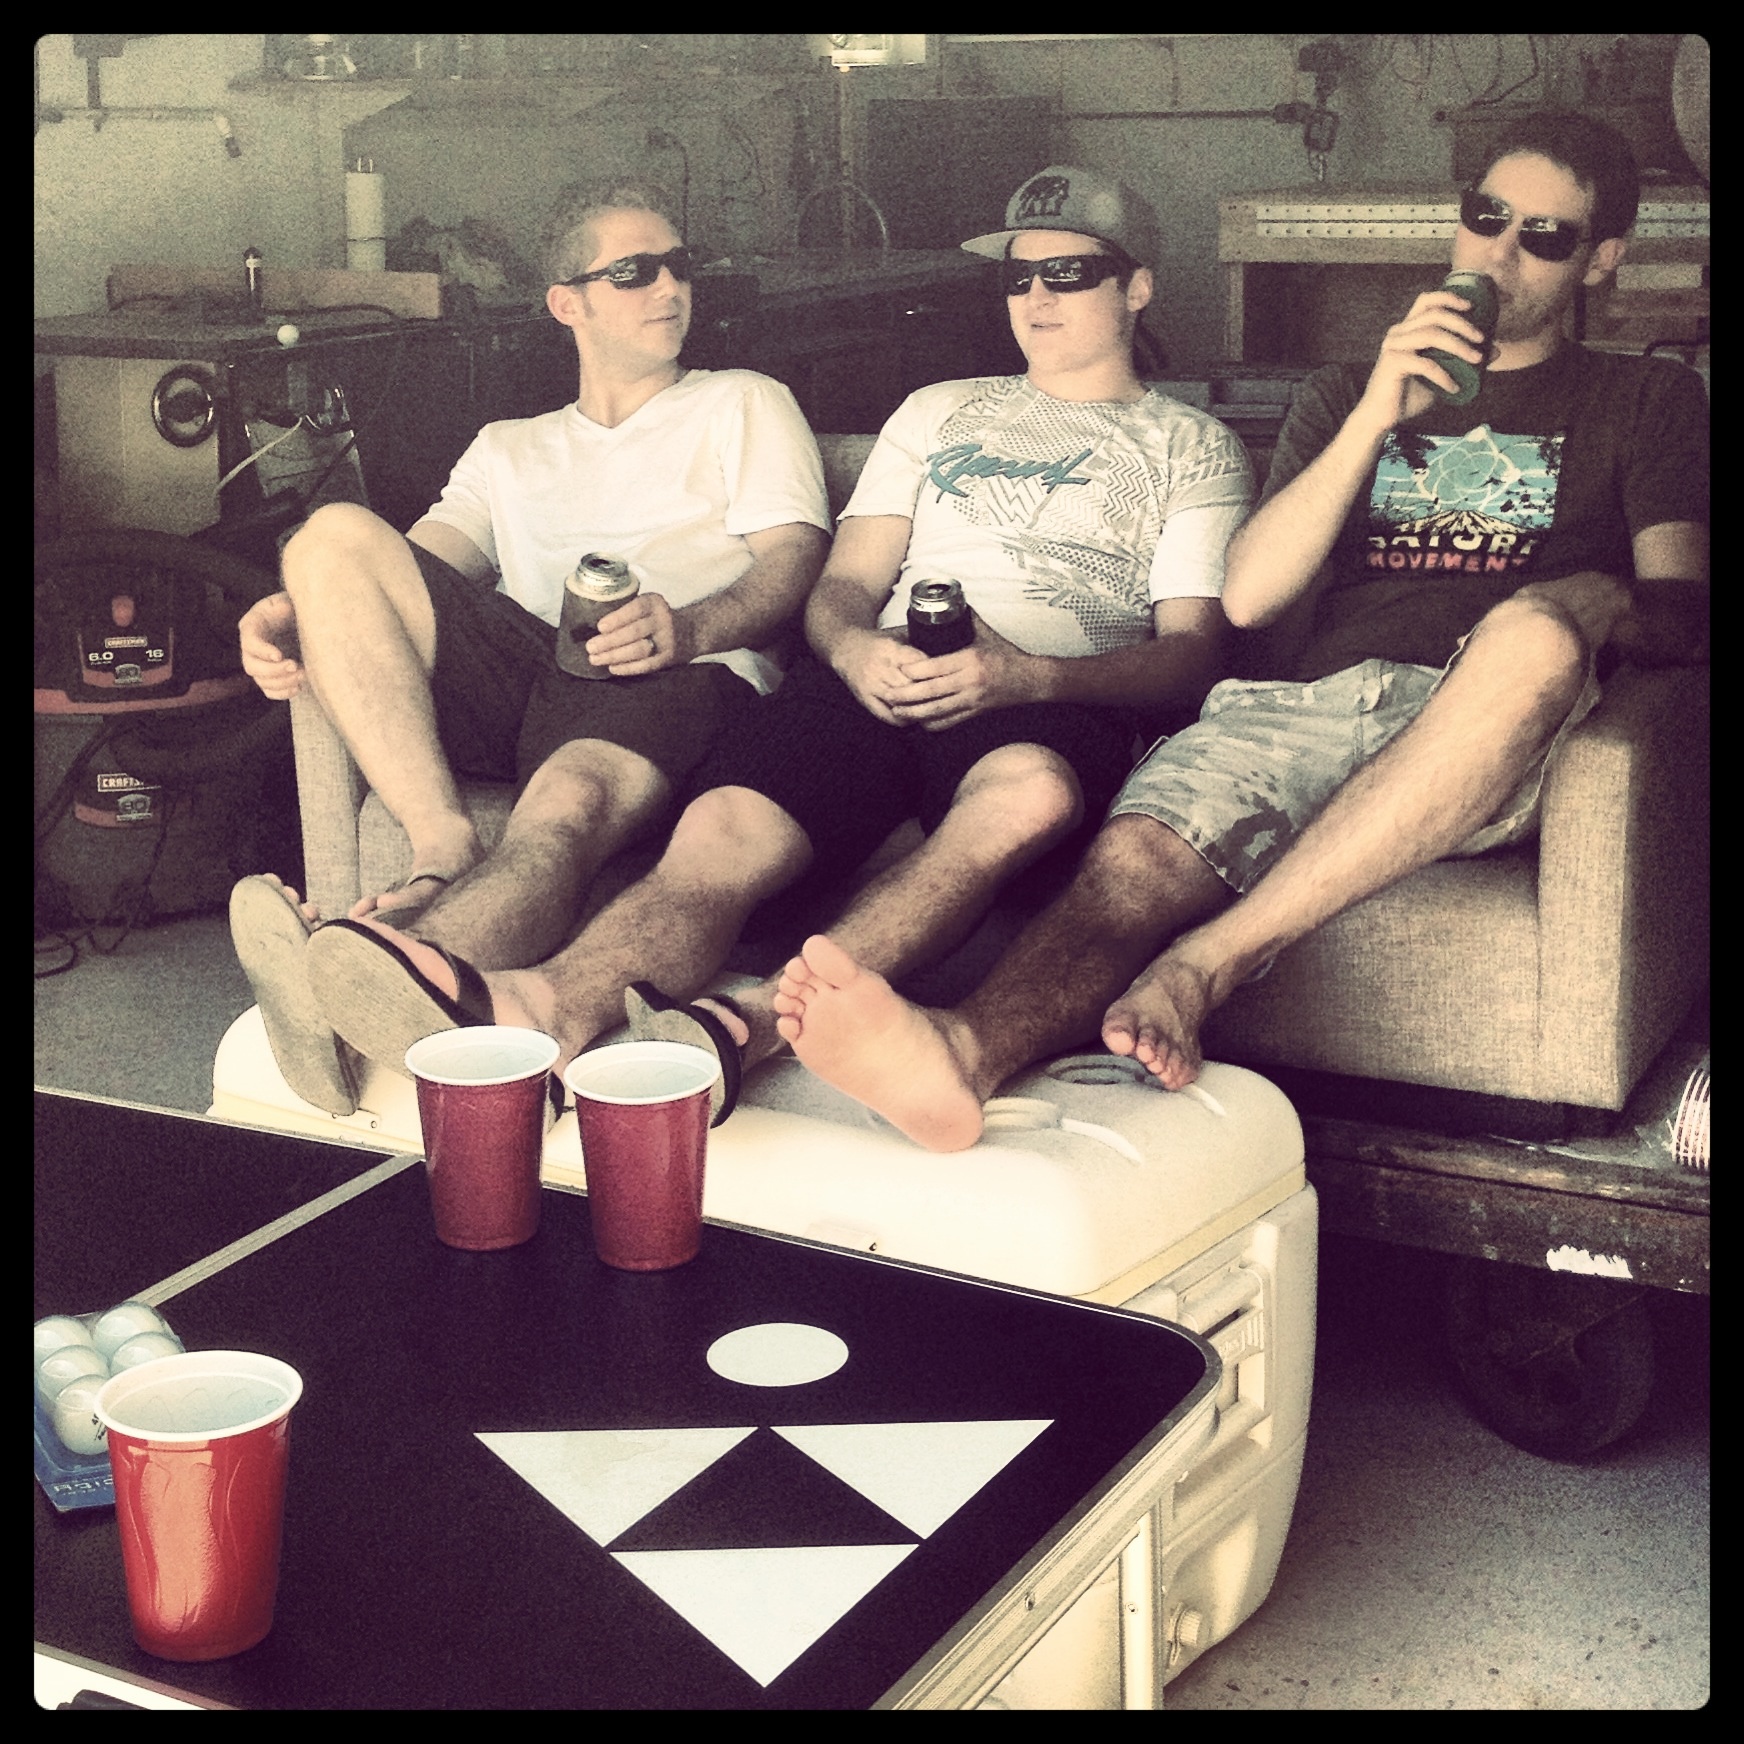
Justin’s college roommates, Bass and Ferro (and Ferro’s gf, Sarah), recently came up to visit us and check out the new pad.
We spent Saturday catching up, drinking, eating, and playing yard games. It was the typical way we spent a lot of Saturdays in college, and I felt obliged to say as much. Here is how that conversation went:
K: Sometimes it feels like we never left SLO…
B: Ya, except you two are married and bought a house.
F: And now we drink Coors Light instead of Natty Light.
Well, if you put it that way… Sometimes it takes a little perspective to realize how far we’ve come in the last few years 🙂

My kind of before and after picture… on the left, see the finished planters. On the right, what they looked like before
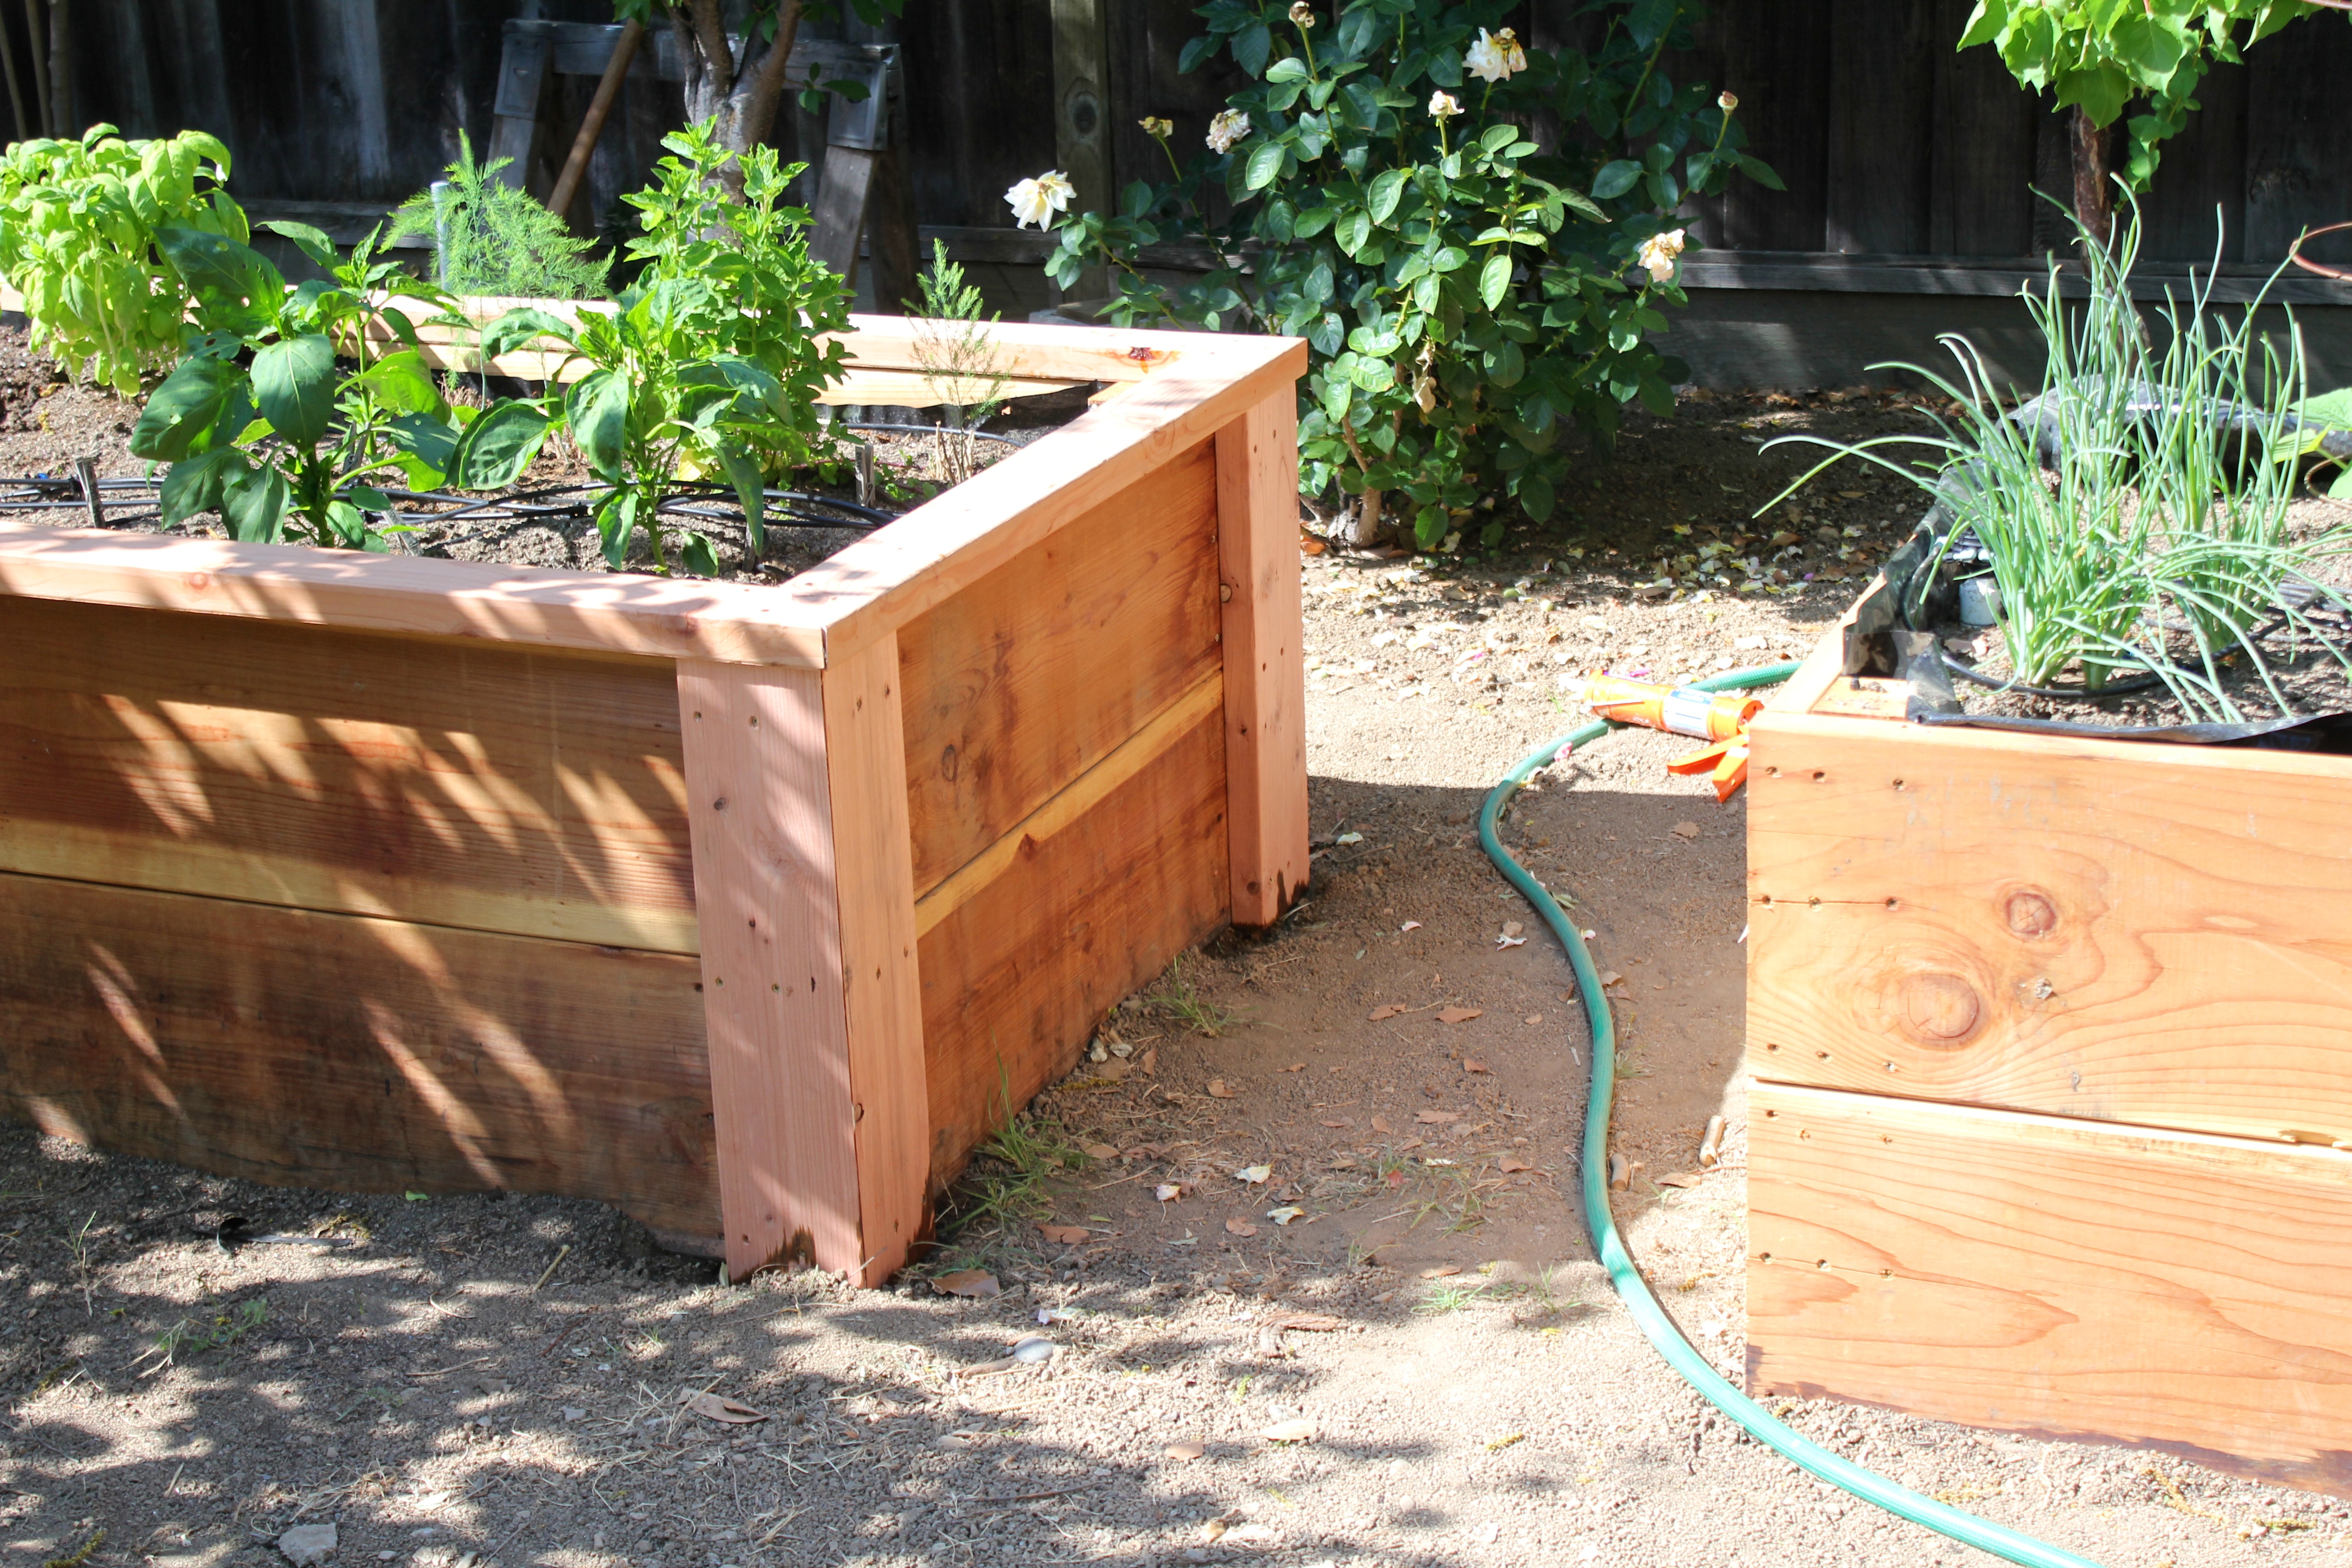
Up close for the beauty shot

Workin away

We’ve started calling the garden the jungle… hopefully this picture gives you an idea of why. And this was taken about two weeks ago!
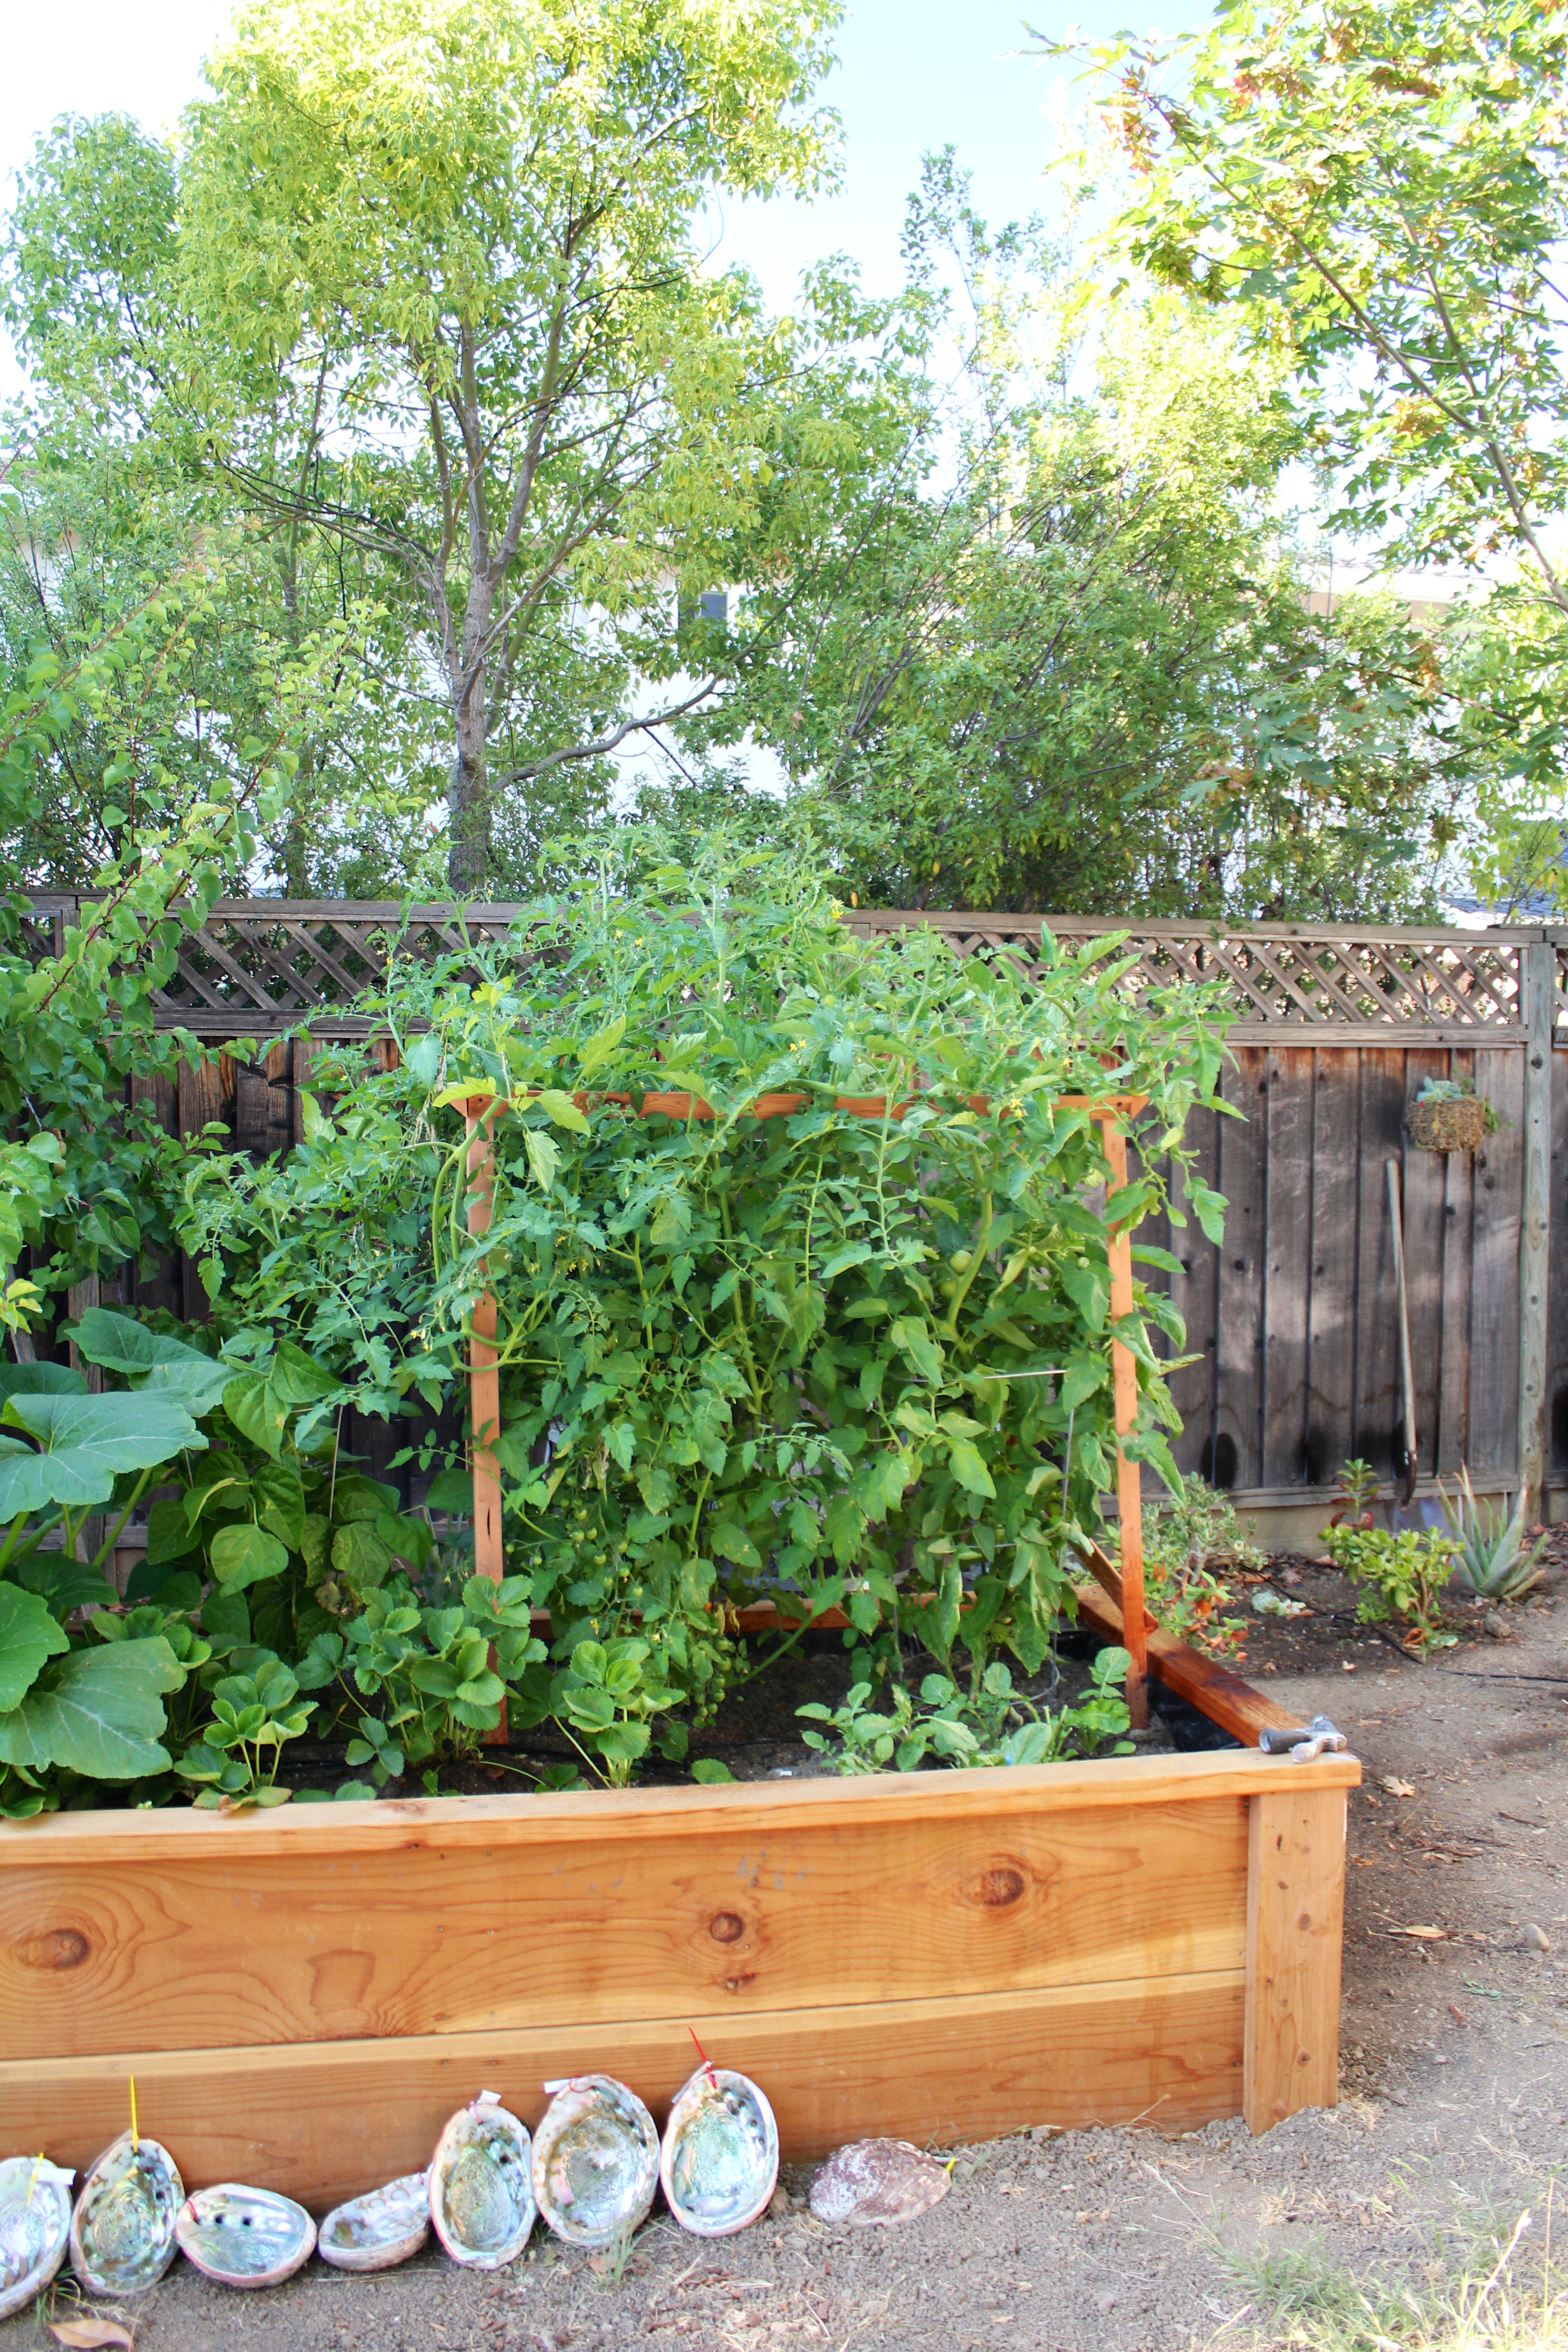
yummmmmm
Ever gotten a new piece of furniture and had to shuffle some pieces around to make everything fit? We haven’t quite gotten to that point in our house yet, but when we get a new piece of furniture it’s exciting to be able to fill a blank wall. Hence, the furniture shuffle begins!
Nancy found us a sweet dresser at a garage sale that definitely needed some love. I don’t know about you, but we aren’t crazy about white and pink anything, much less white and pink furniture. Regardless of the heinous paint job, we could see the potential in this piece and were excited to clean it up.

looking good… kind of…
We used the same materials and strategy we used to paint our first dresser (and dining room chairs), but this time we went with a soft shade of green instead of navy. Enter TSP and our trusty paint sprayer…
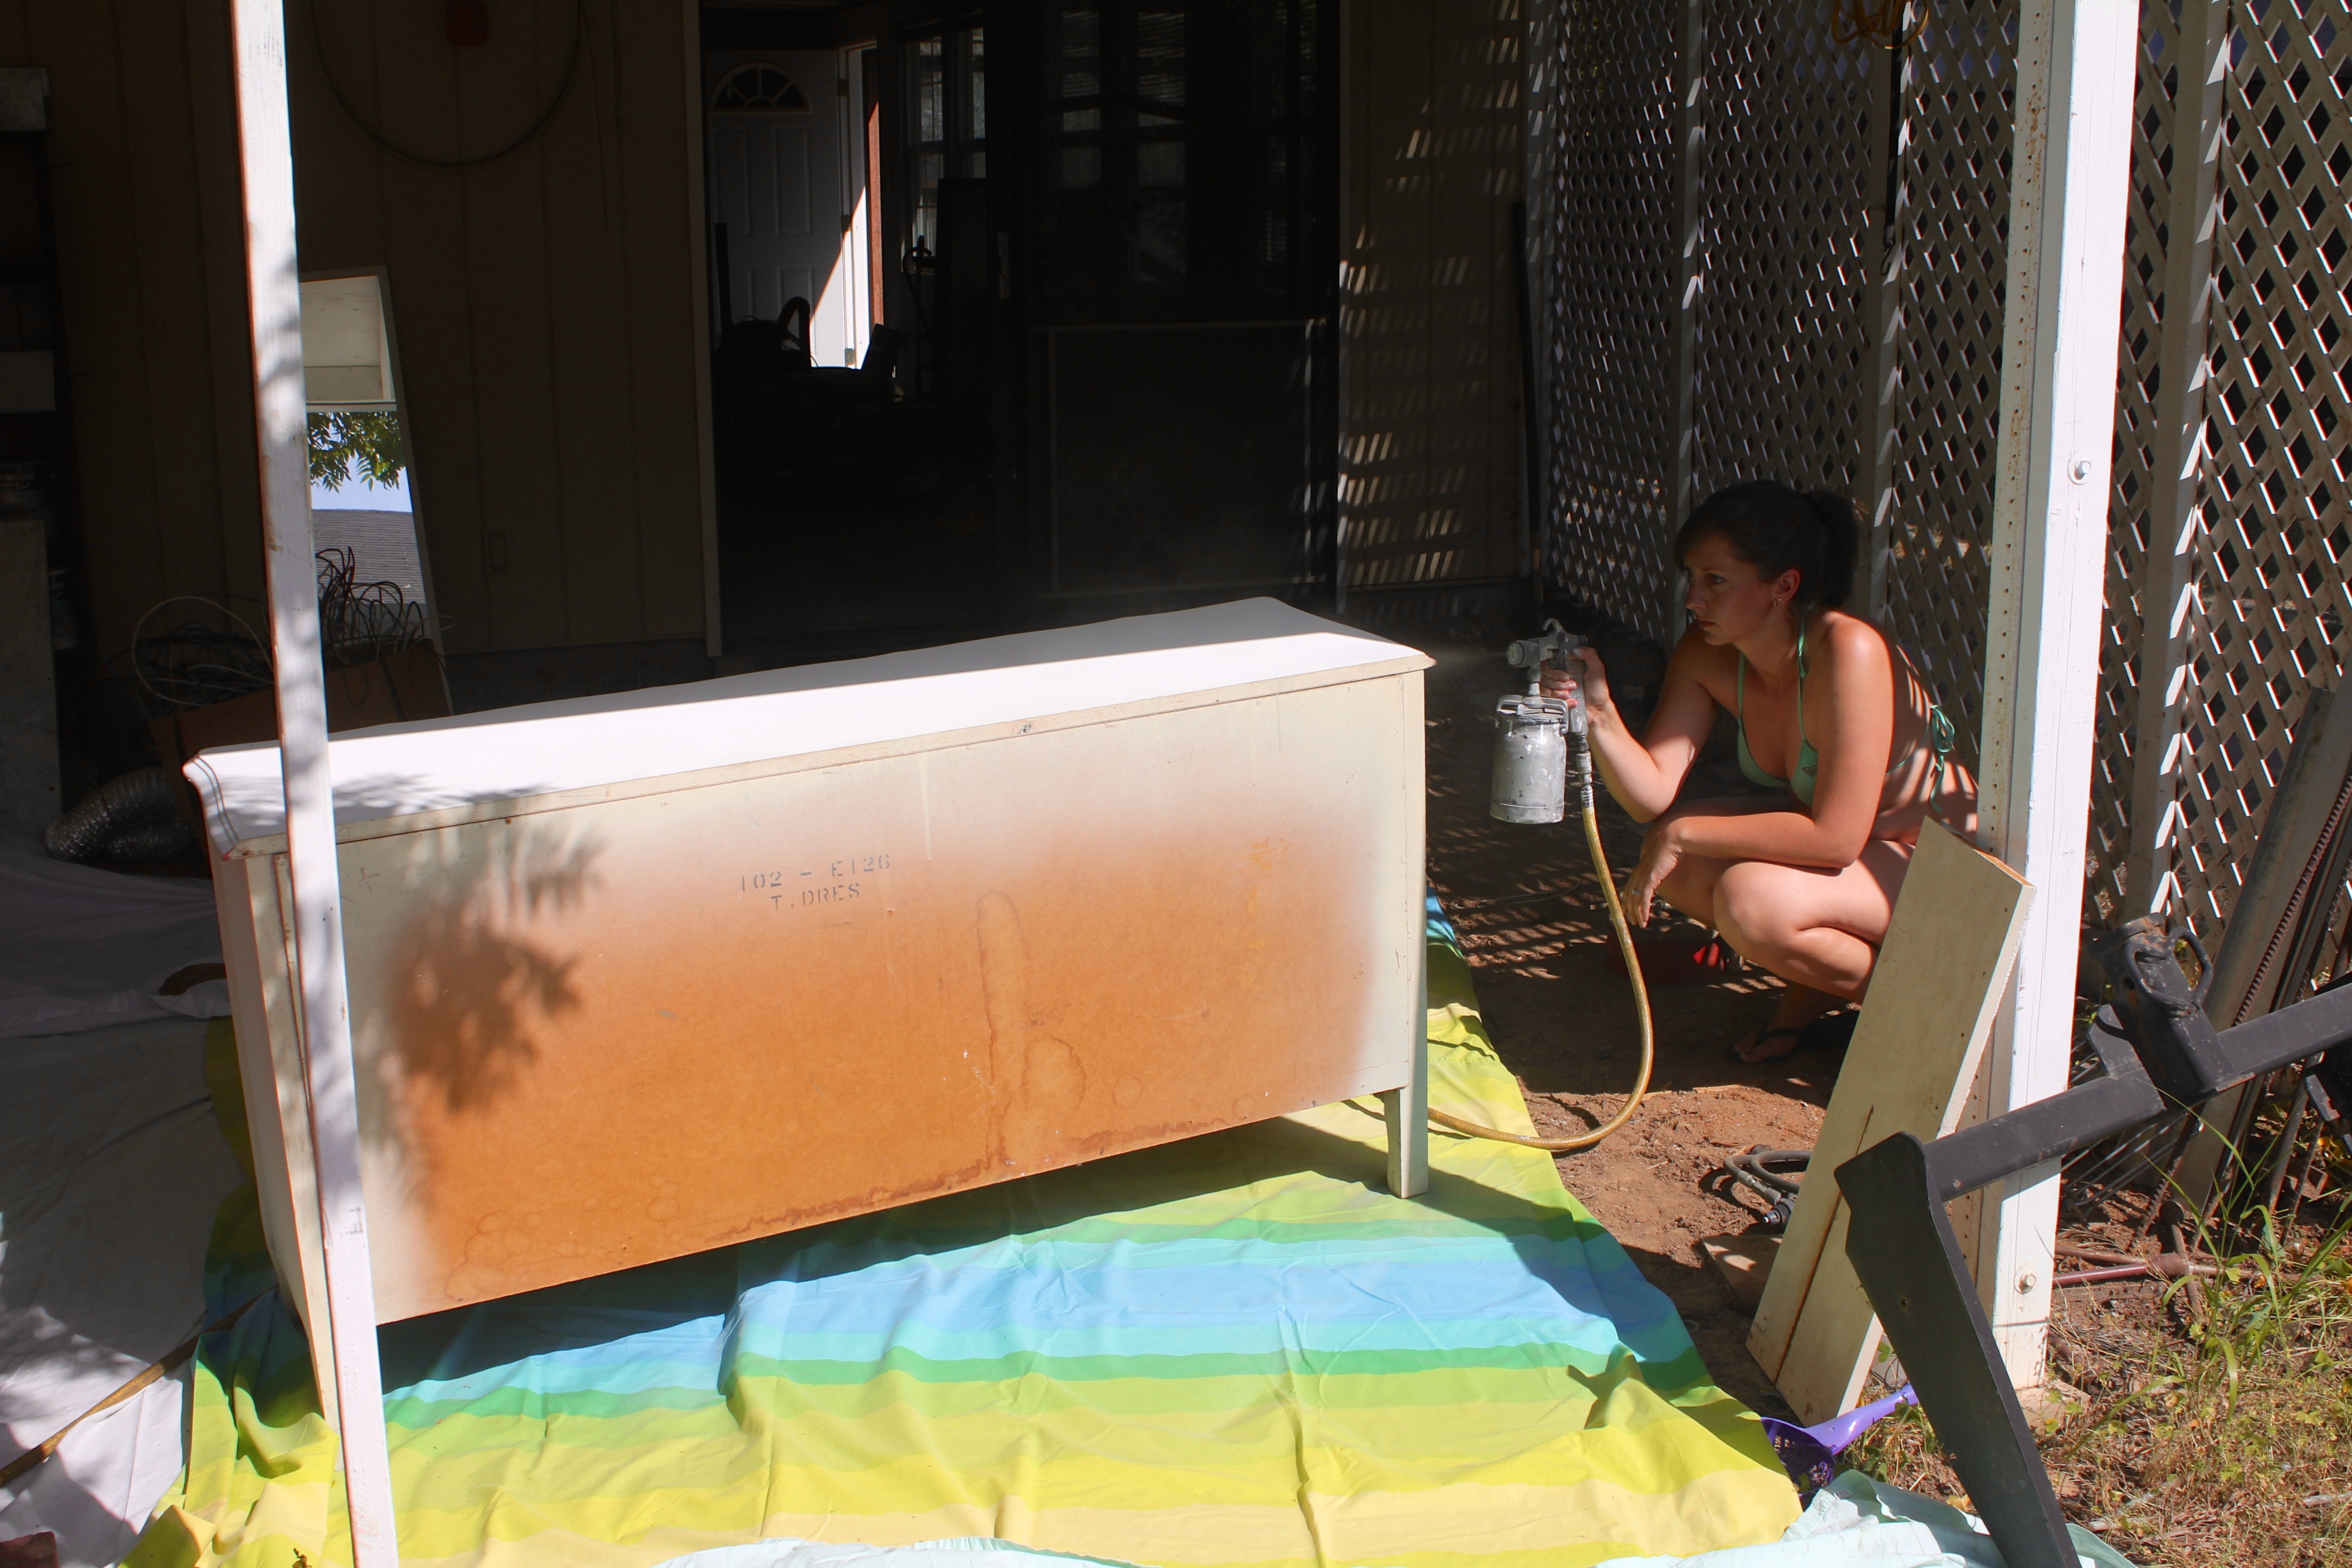
who doesn’t paint furniture in a bikini?
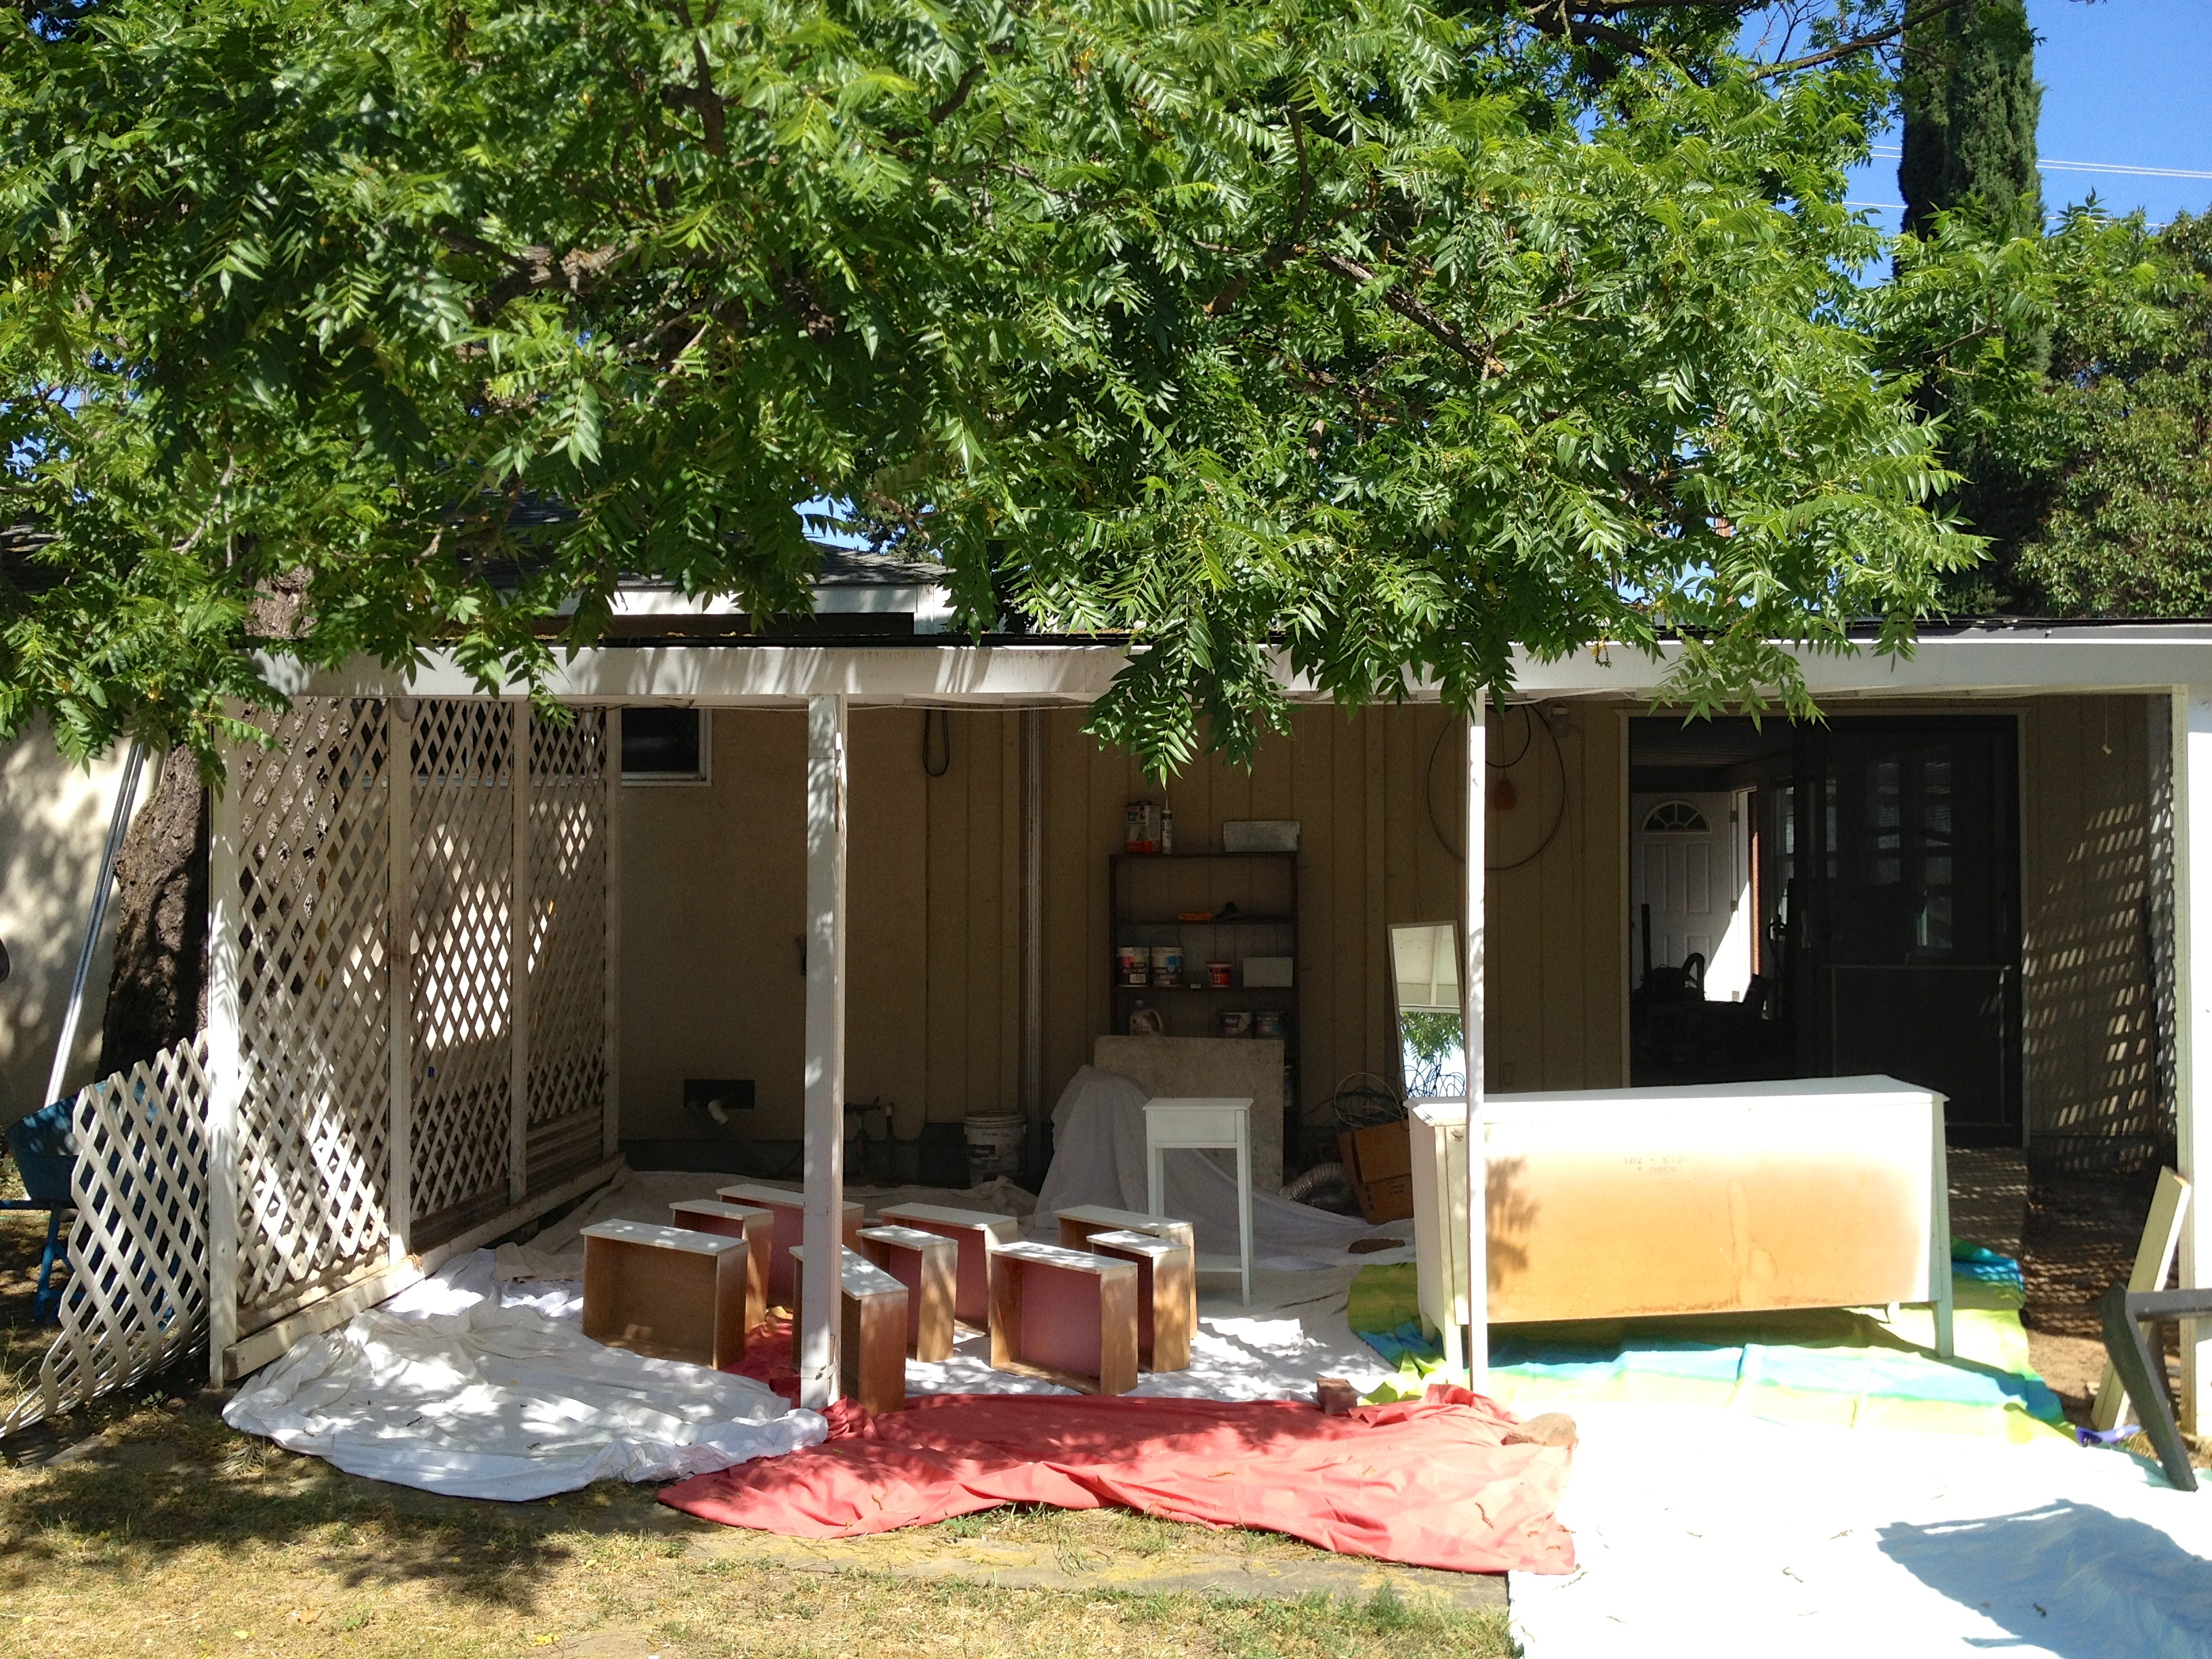
what a great painting set up
Now for the furniture shuffle. We wanted to put this new dresser in our bedroom and replace the two dressers we had smushed together under the mirror. These are perfectly functional dressers, but we weren’t crazy about the look they created when pushed together.
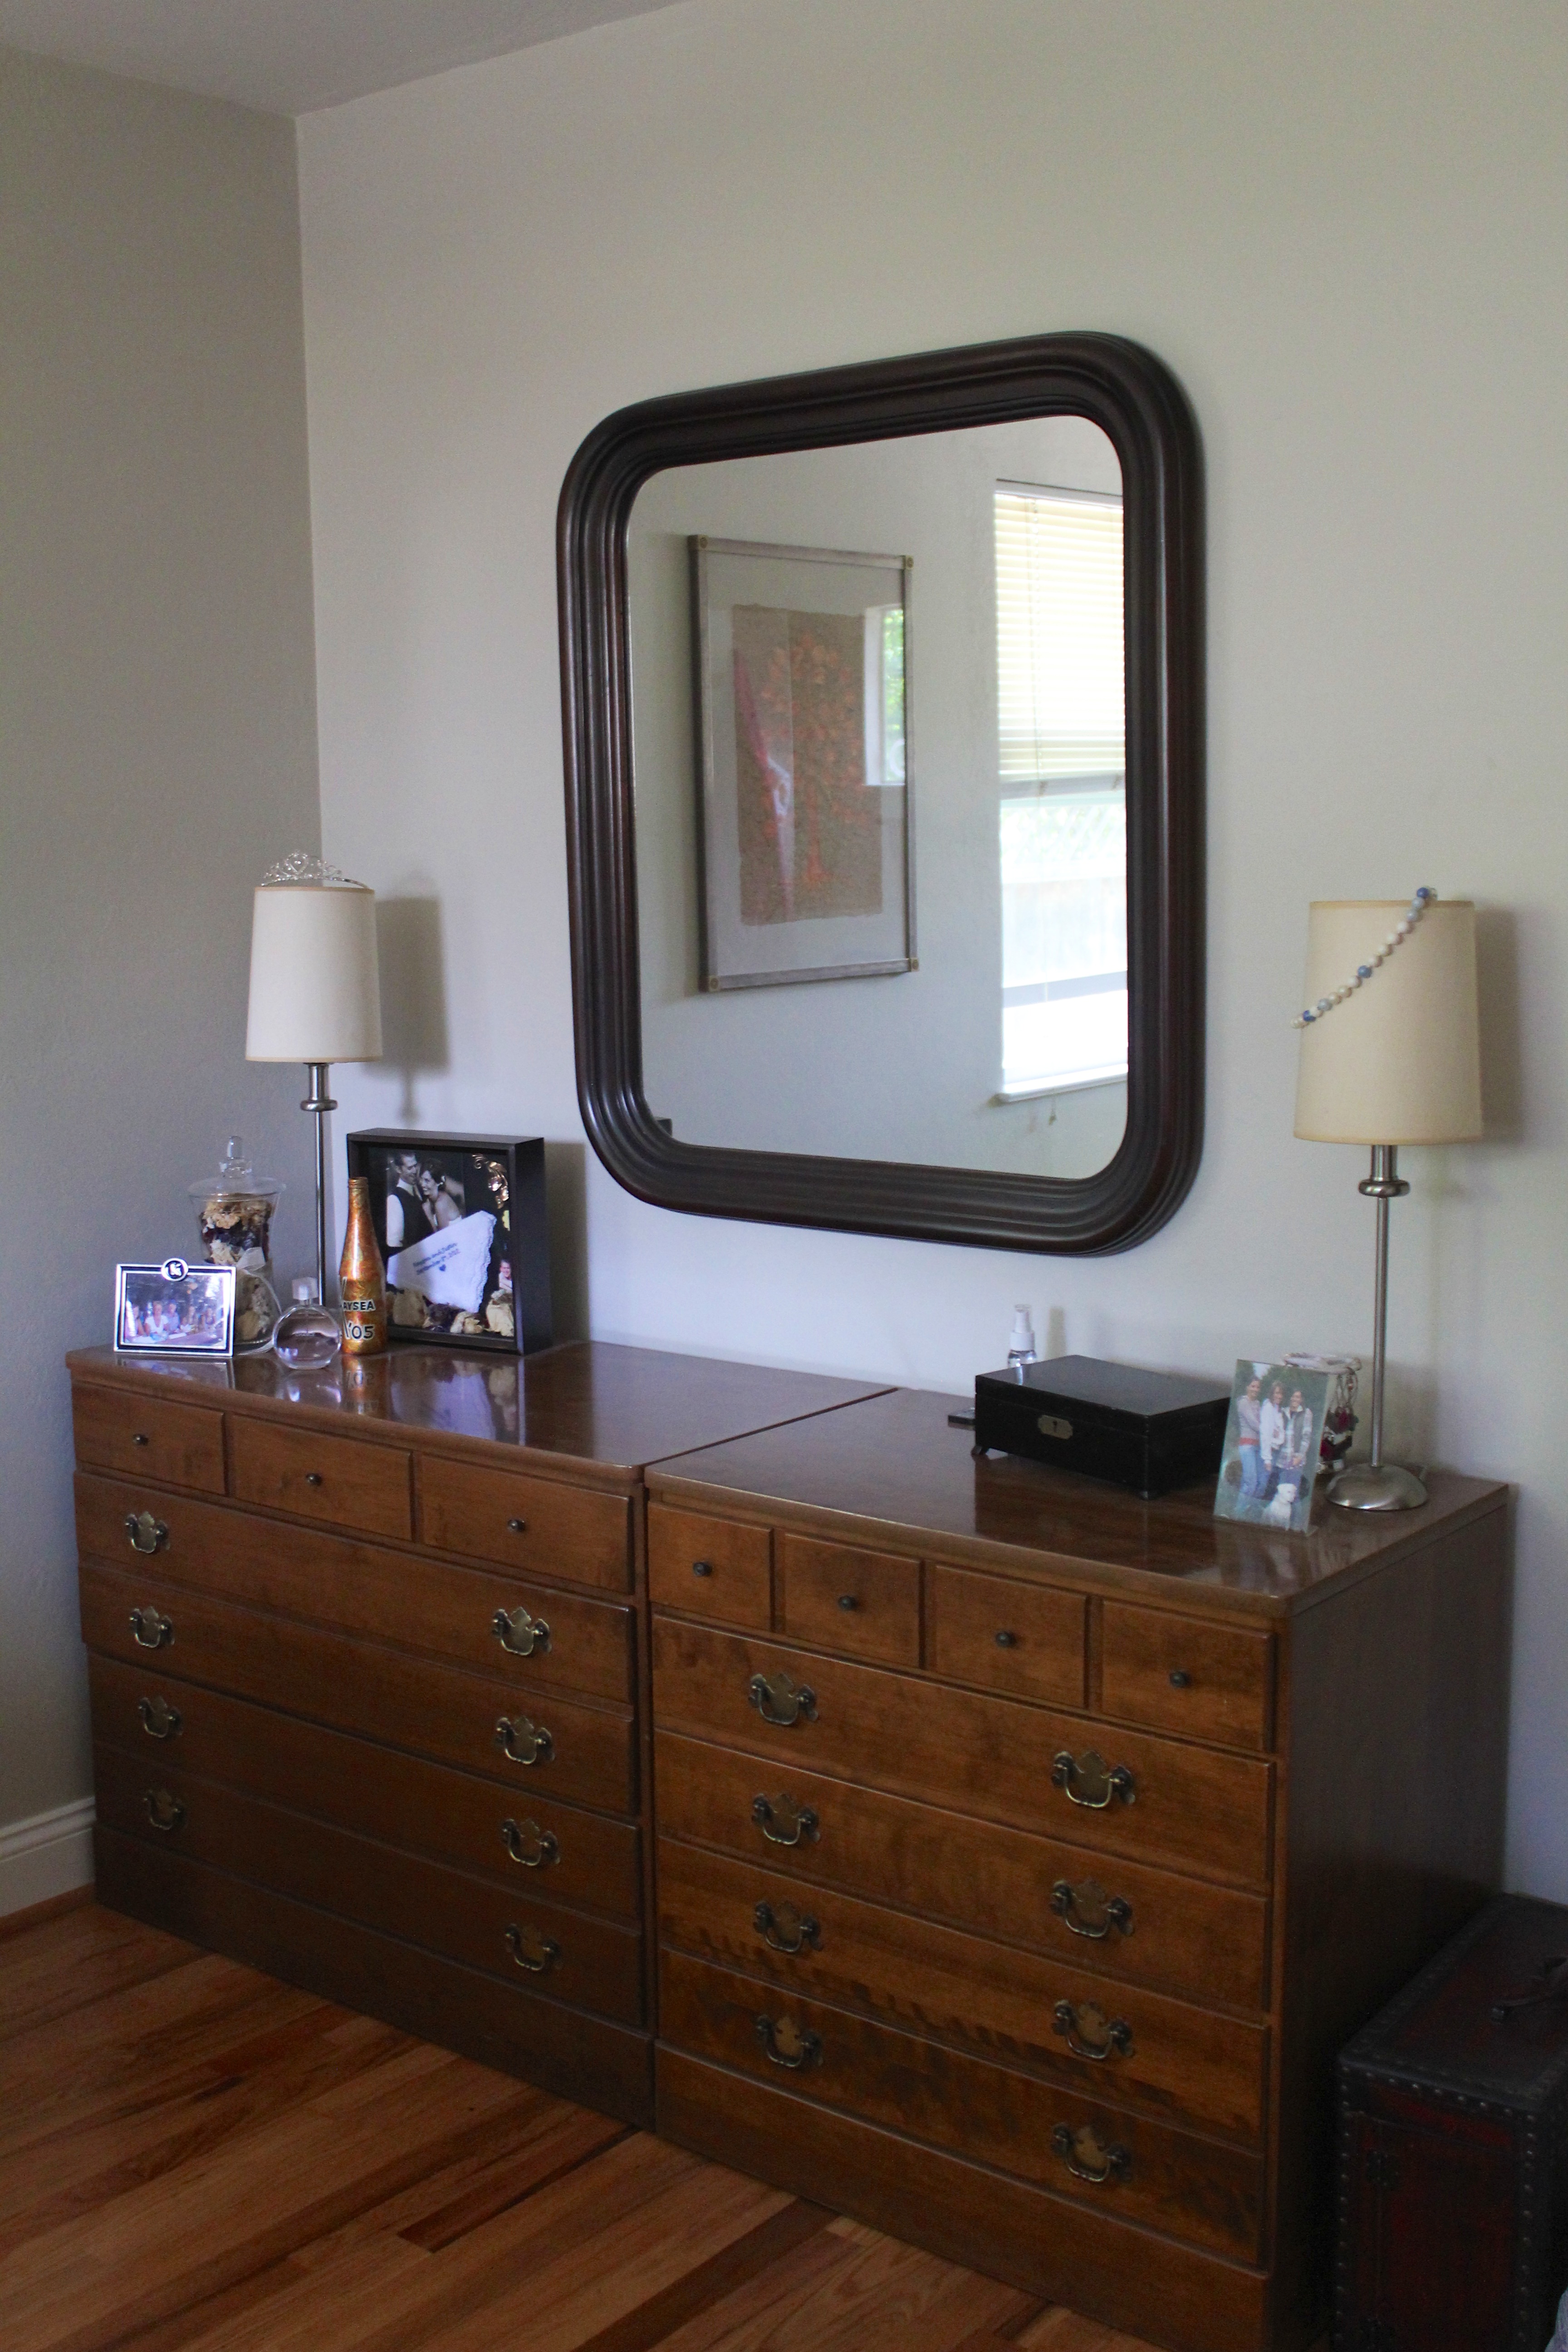
before…
We swapped them out for this newly refurbished dresser and couldn’t be happier with the result. I love the pale green and the dark wood frame of the mirror. The high contrast (and the much needed pop of color) make this room look a lot less hodge podge and a lot more sophisticated.
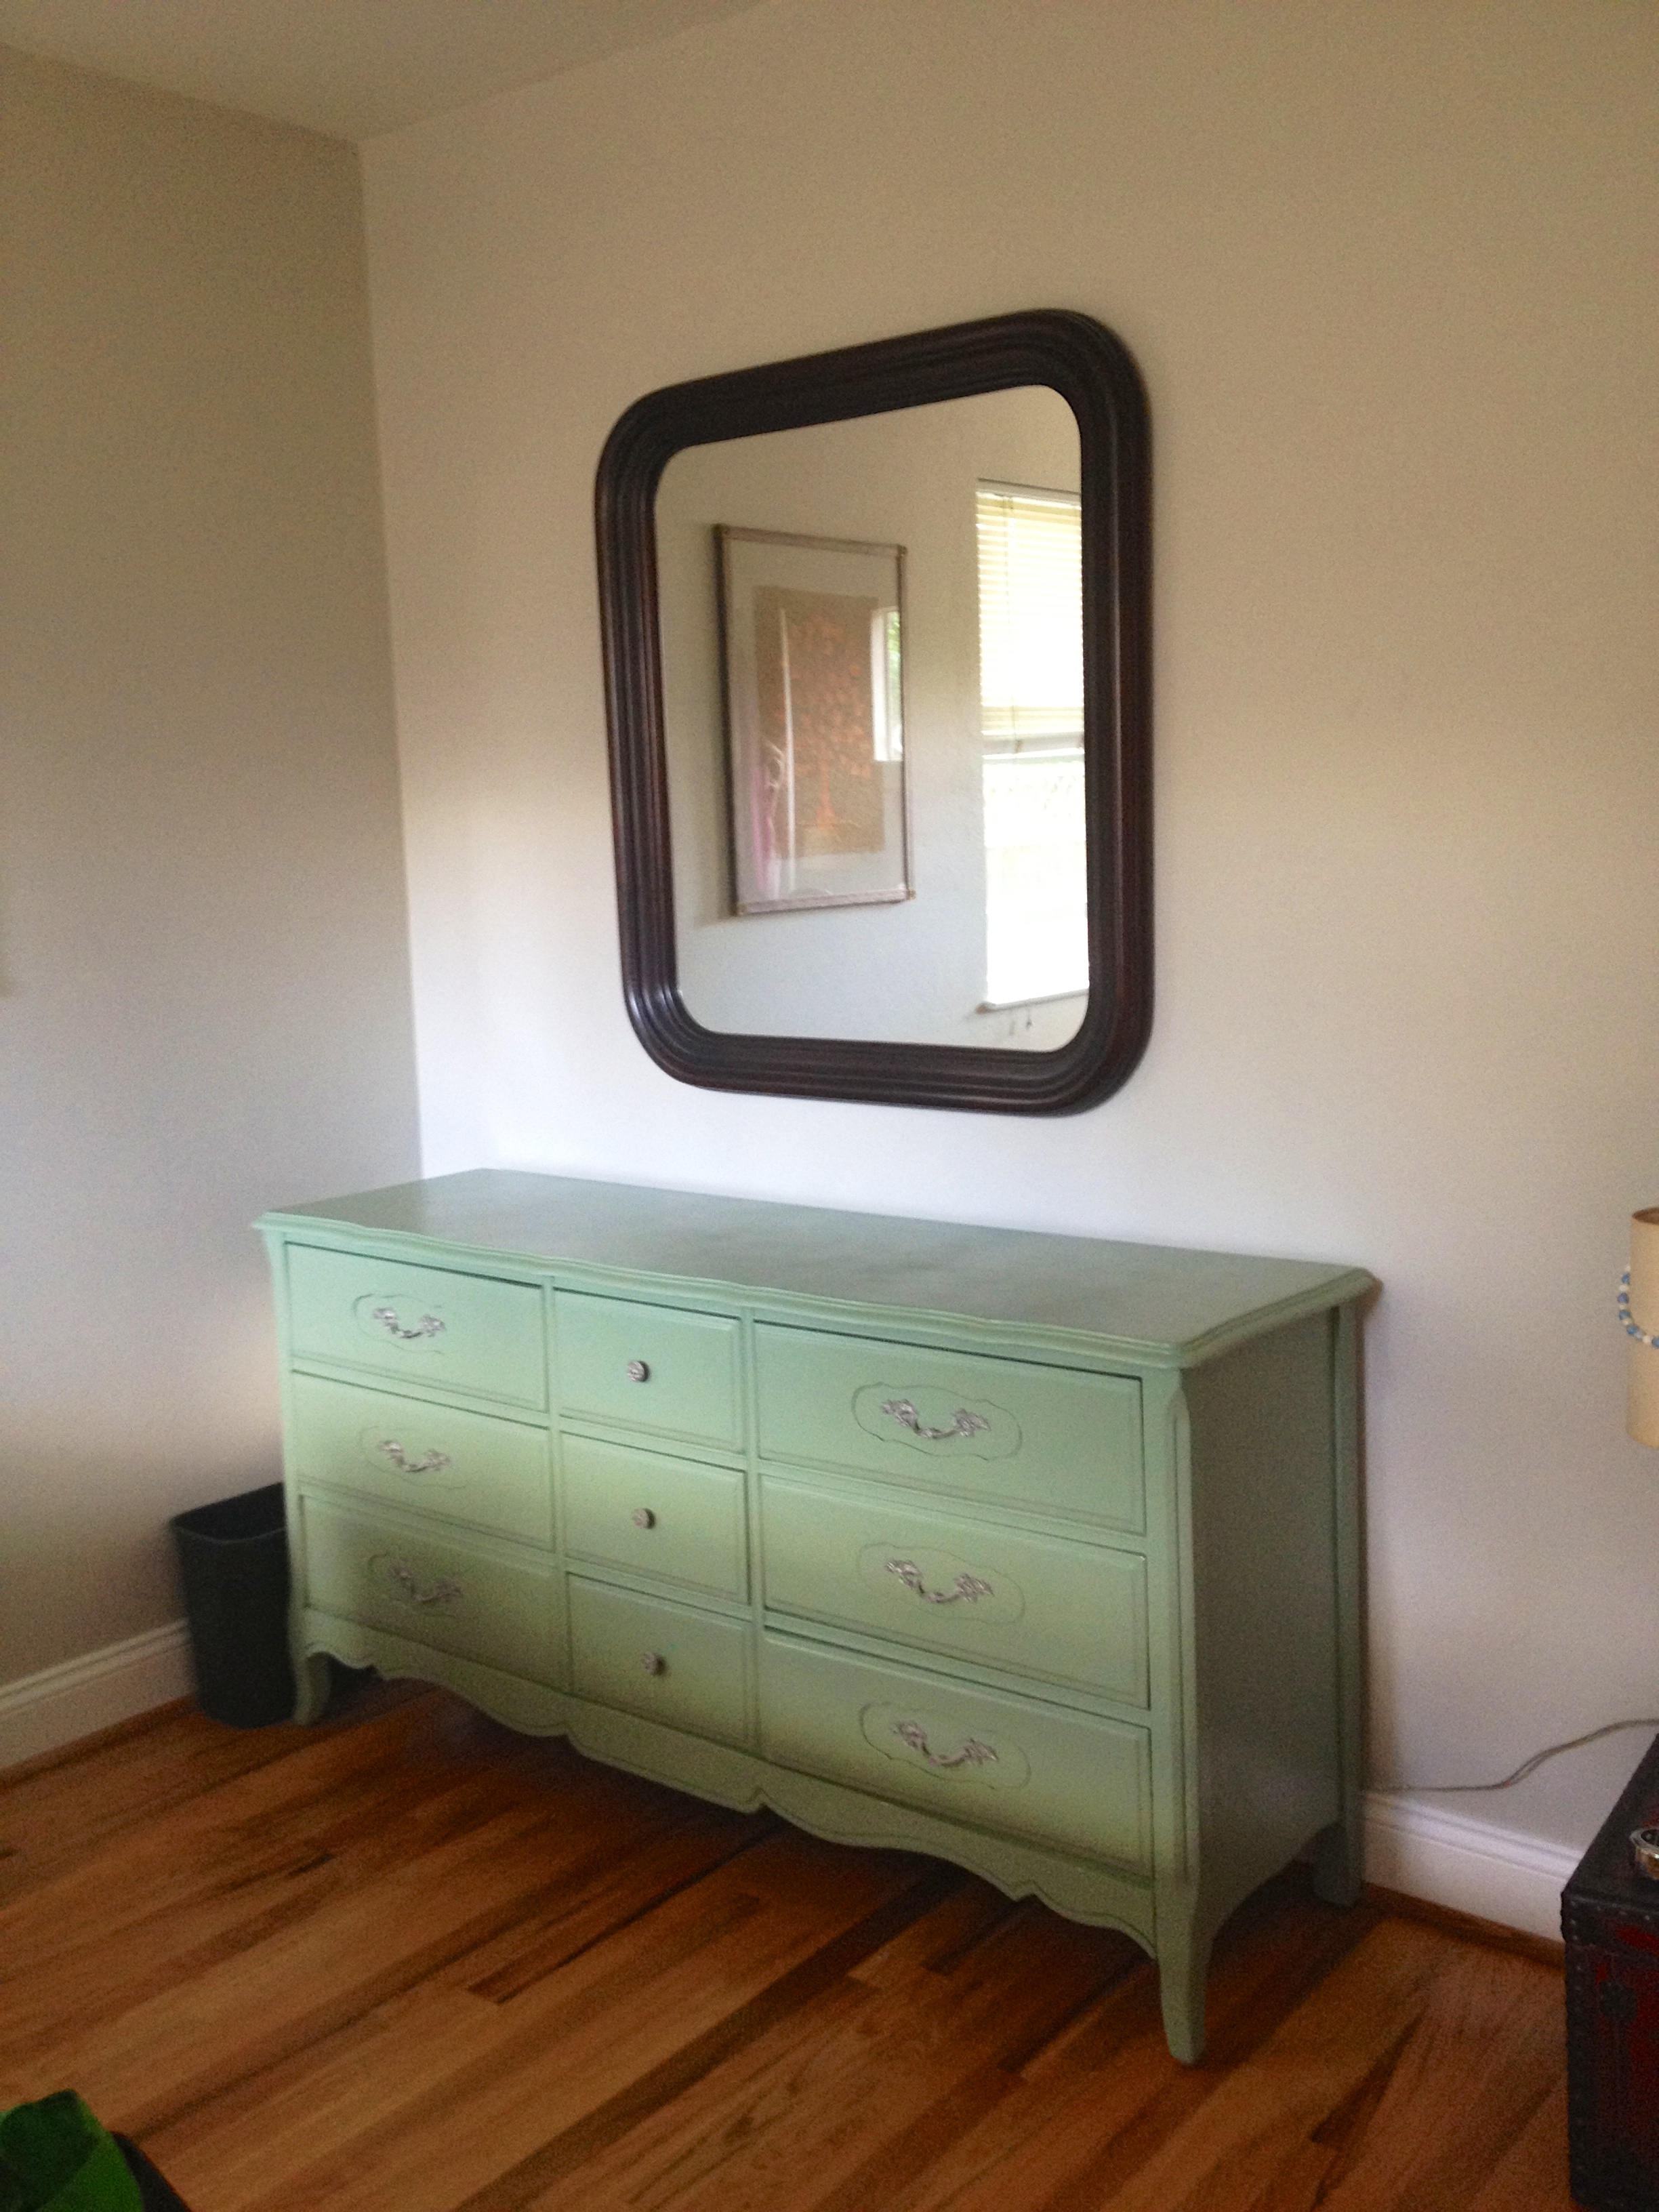
after!
more after (a little less bare)
one more!
last one, I promise 🙂
We were left with two perfectly functional unused dressers after stage one of the furniture shuffle. We decided to fill up an empty wall in the guest room with one dresser. See this bland empty wall? Even though the baseboards and paint look gorgeous, it was definitely lacking something…
incredibly empty wall
In goes the dresser. We also added a frame, so now when you come visit us there is a table top and a mirror for you to use 🙂
much less empty wall!
The second dresser is hanging out in the west wing until we figure out a new home for it. Which will happen eventually…
I should start by apologizing for the serious lack of posts lately… it’s not that we haven’t been doing fun and exciting things, more that I have been too busy working in fault trenches and working on a somewhat time-sensitive surprise project. But more on both of those things in a later post!
Up to this point in our home renovating, we have tried desperately to keep costs down and work on projects that don’t break the bank. And don’t worry, there are many more budget projects to come! But today I want to share our first (and so far only) splurge. We decided to put plantation shutters in the two front windows of the house! Specifically, the big picture windows that face the street in the living room and dining room. The beige pleated drapes that hung in these windows have been a serious eyesore since we moved in. We did give them a good washing and steaming (thanks, Mom!) to make them look temporarily presentable, but the ultimate goal was always to ditch those dowdy drapes.
Here are some before pictures of our main living spaces with the clean, wrinkle-free, yet still hideous curtains:
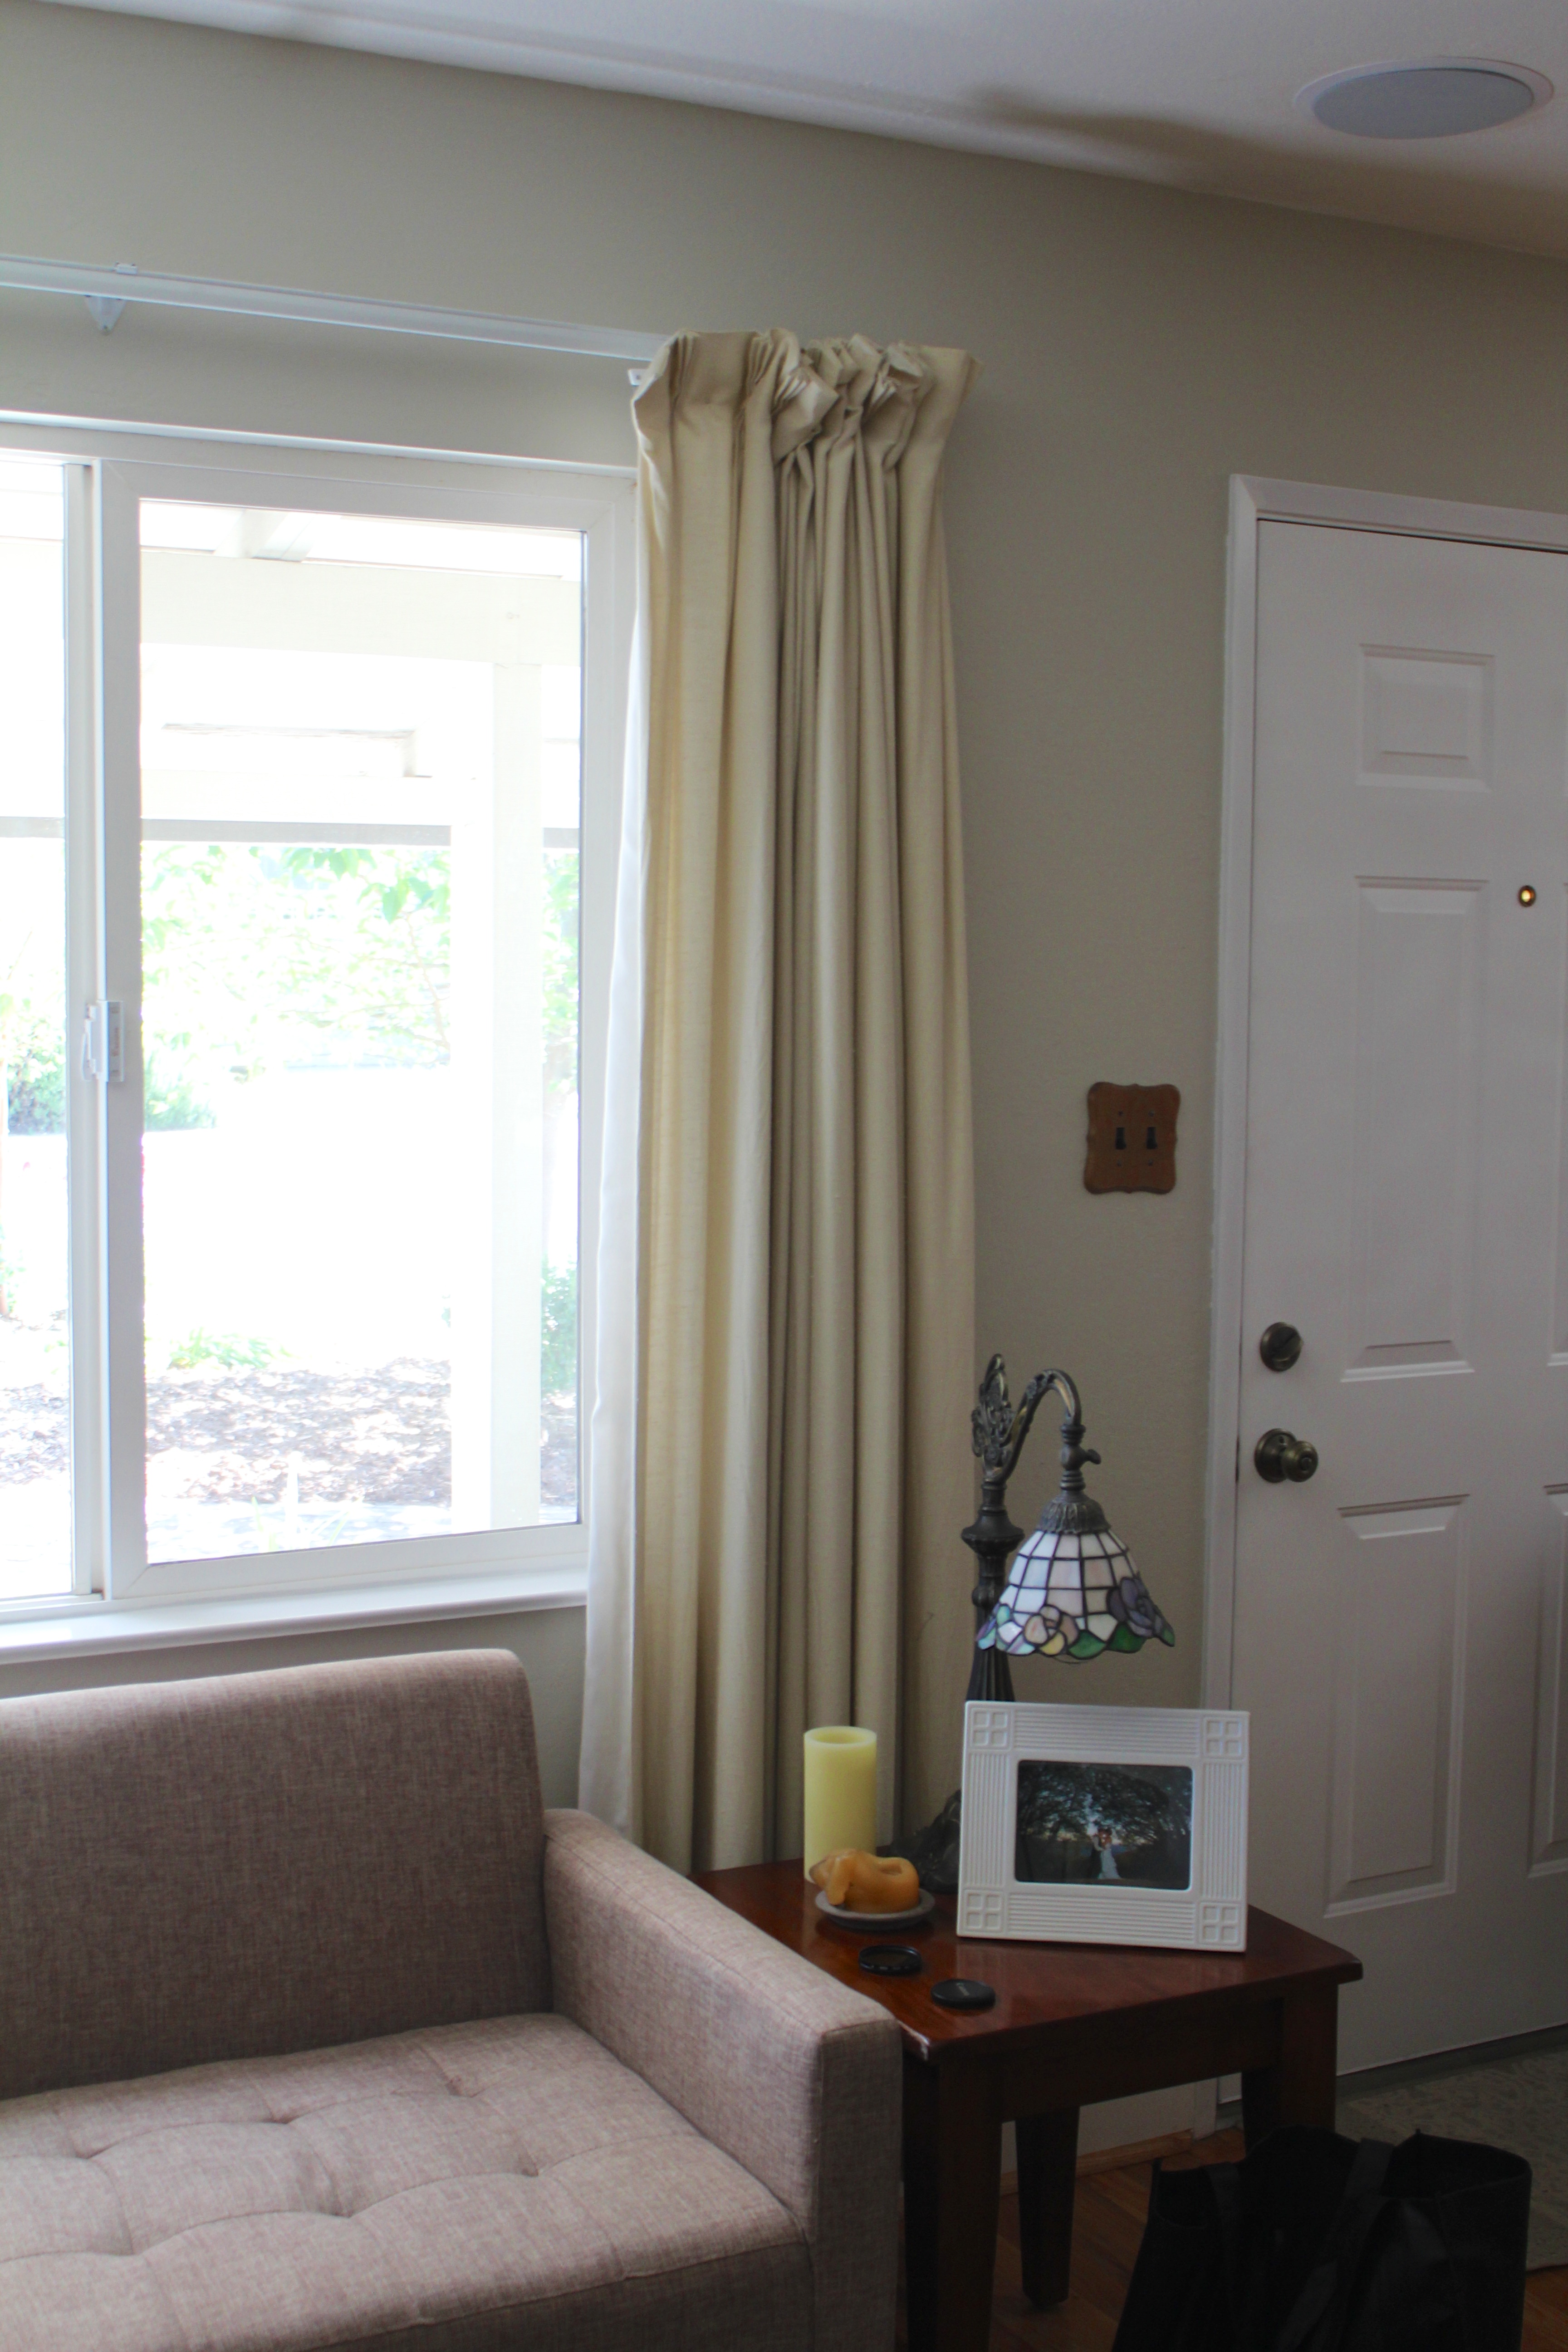
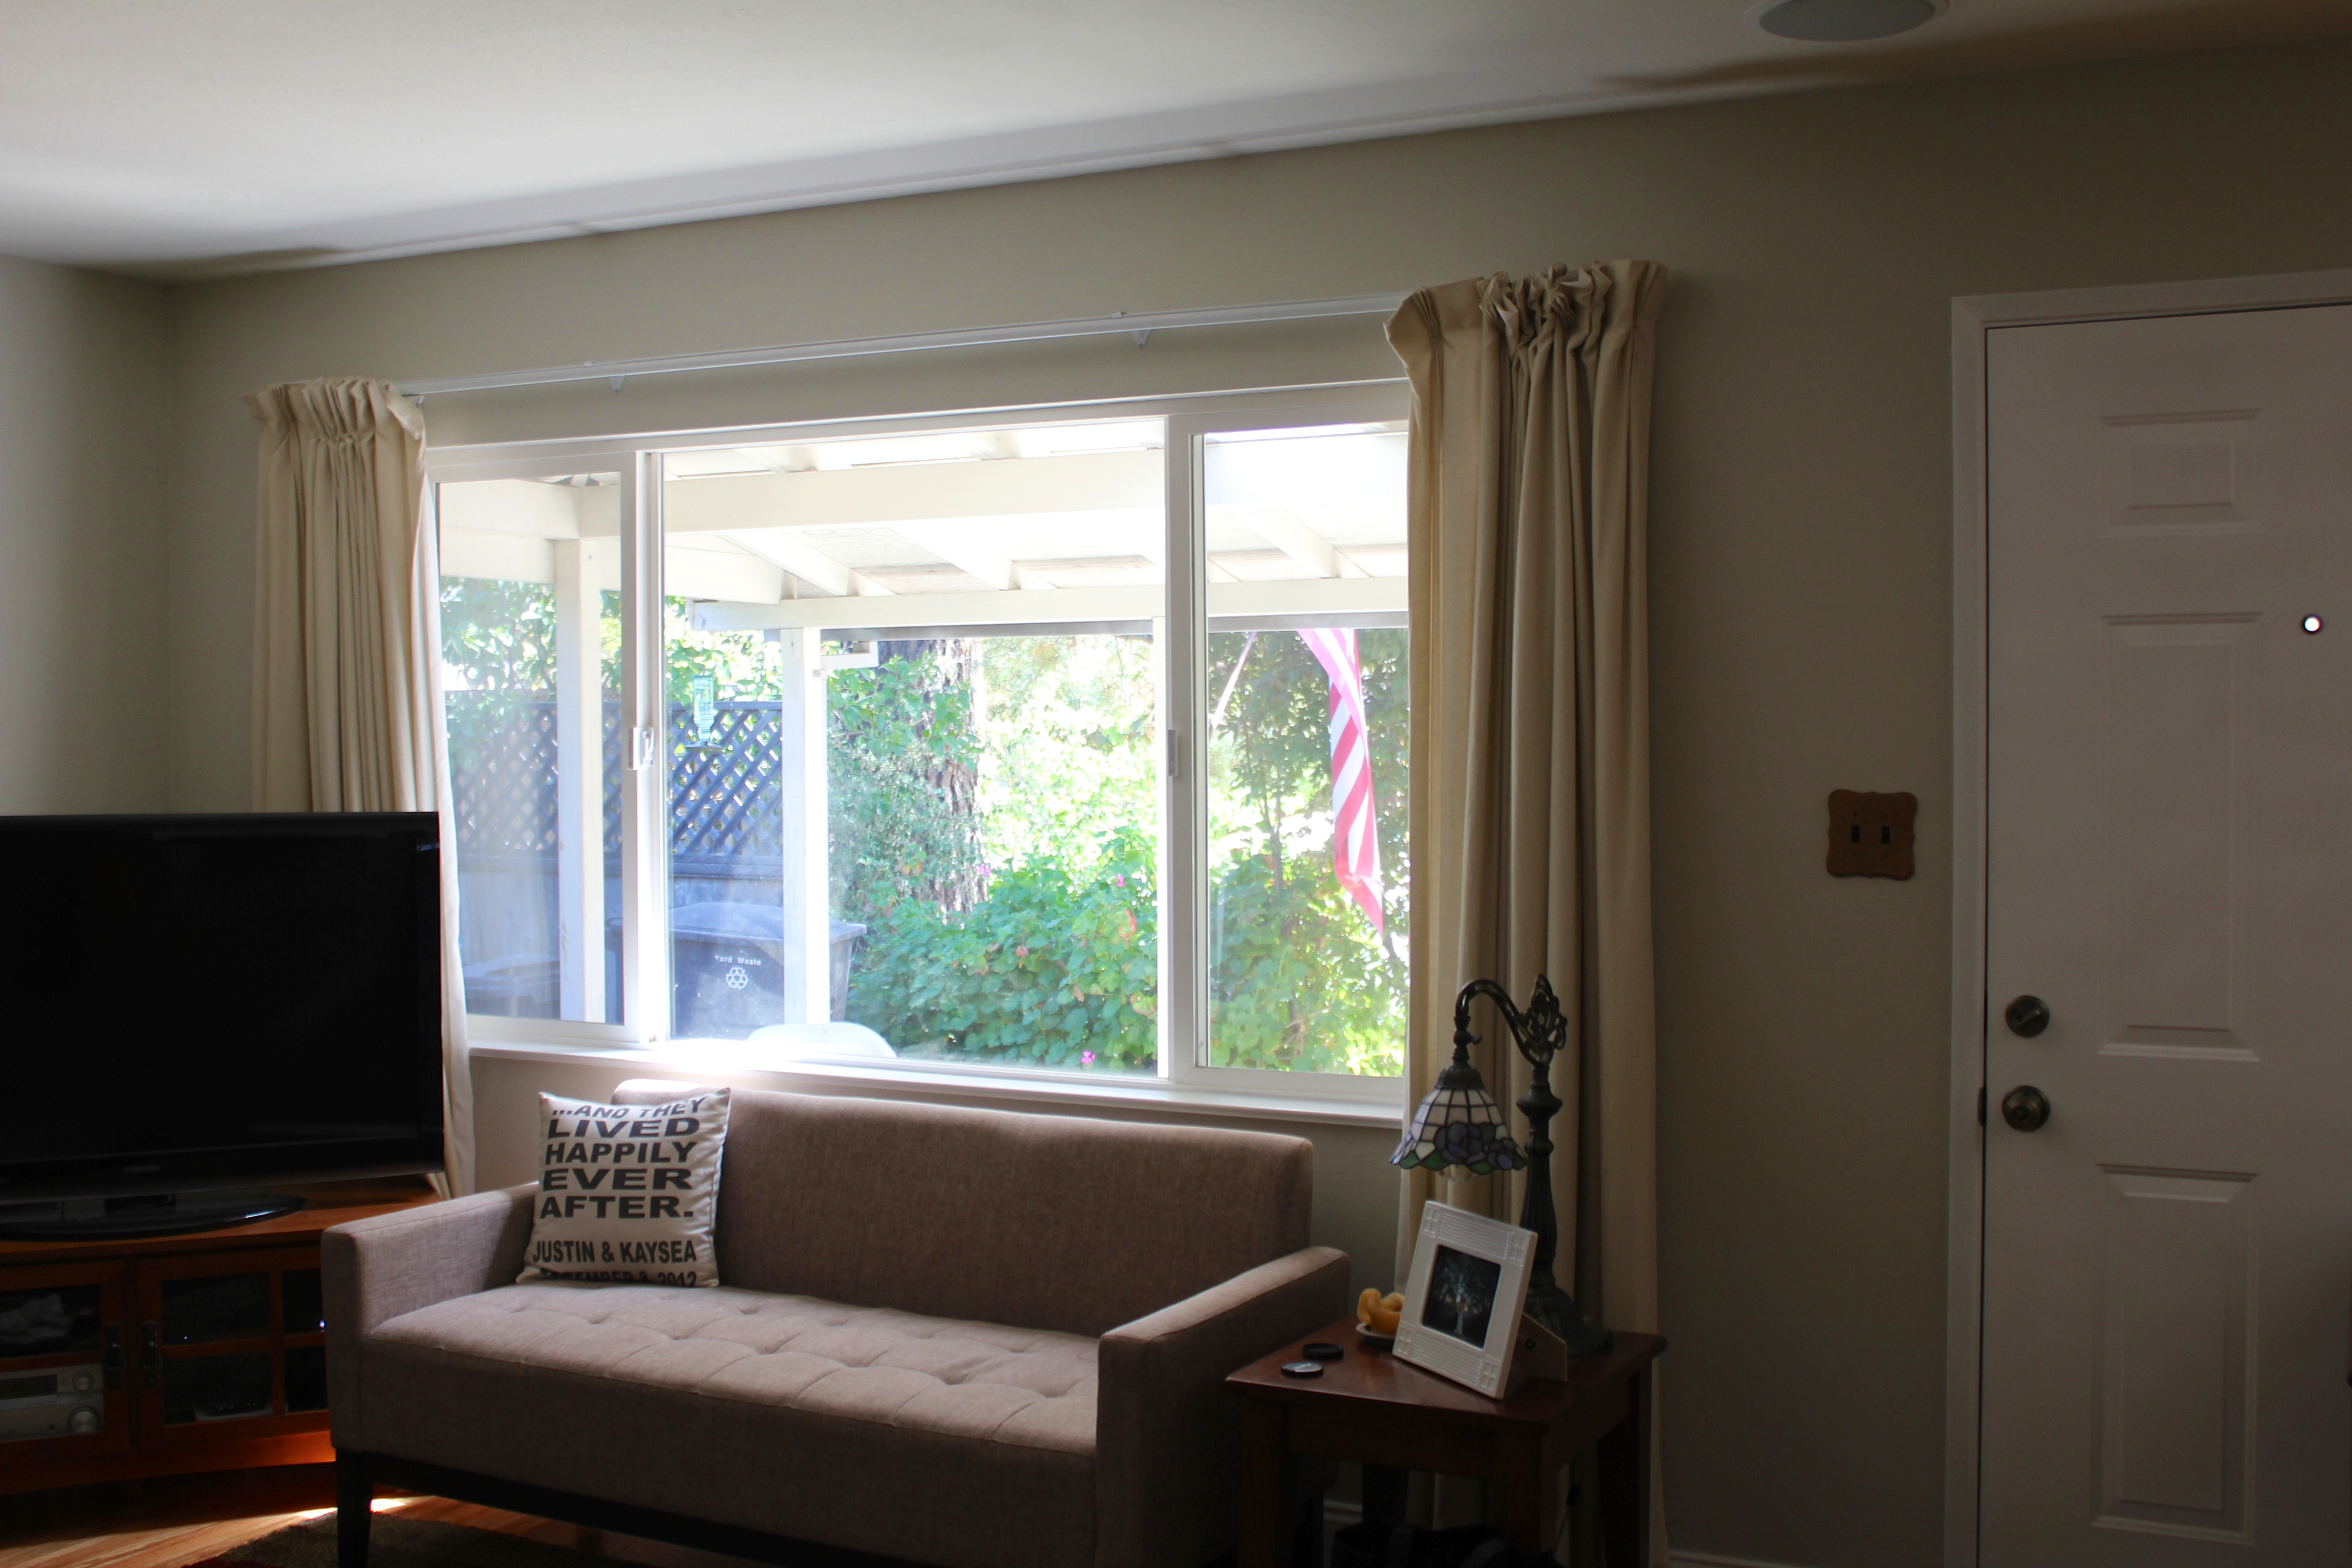
See what I mean? Just all-around bad. Definitely not the vibe we are going for in our first home! So we found a reasonably priced vendor, picked out our shutter style, and swiped the credit card. Next thing we knew, our living spaces had been transformed into more modern rooms with a cleaner, brighter feel. I must say, the splurge was well spent!
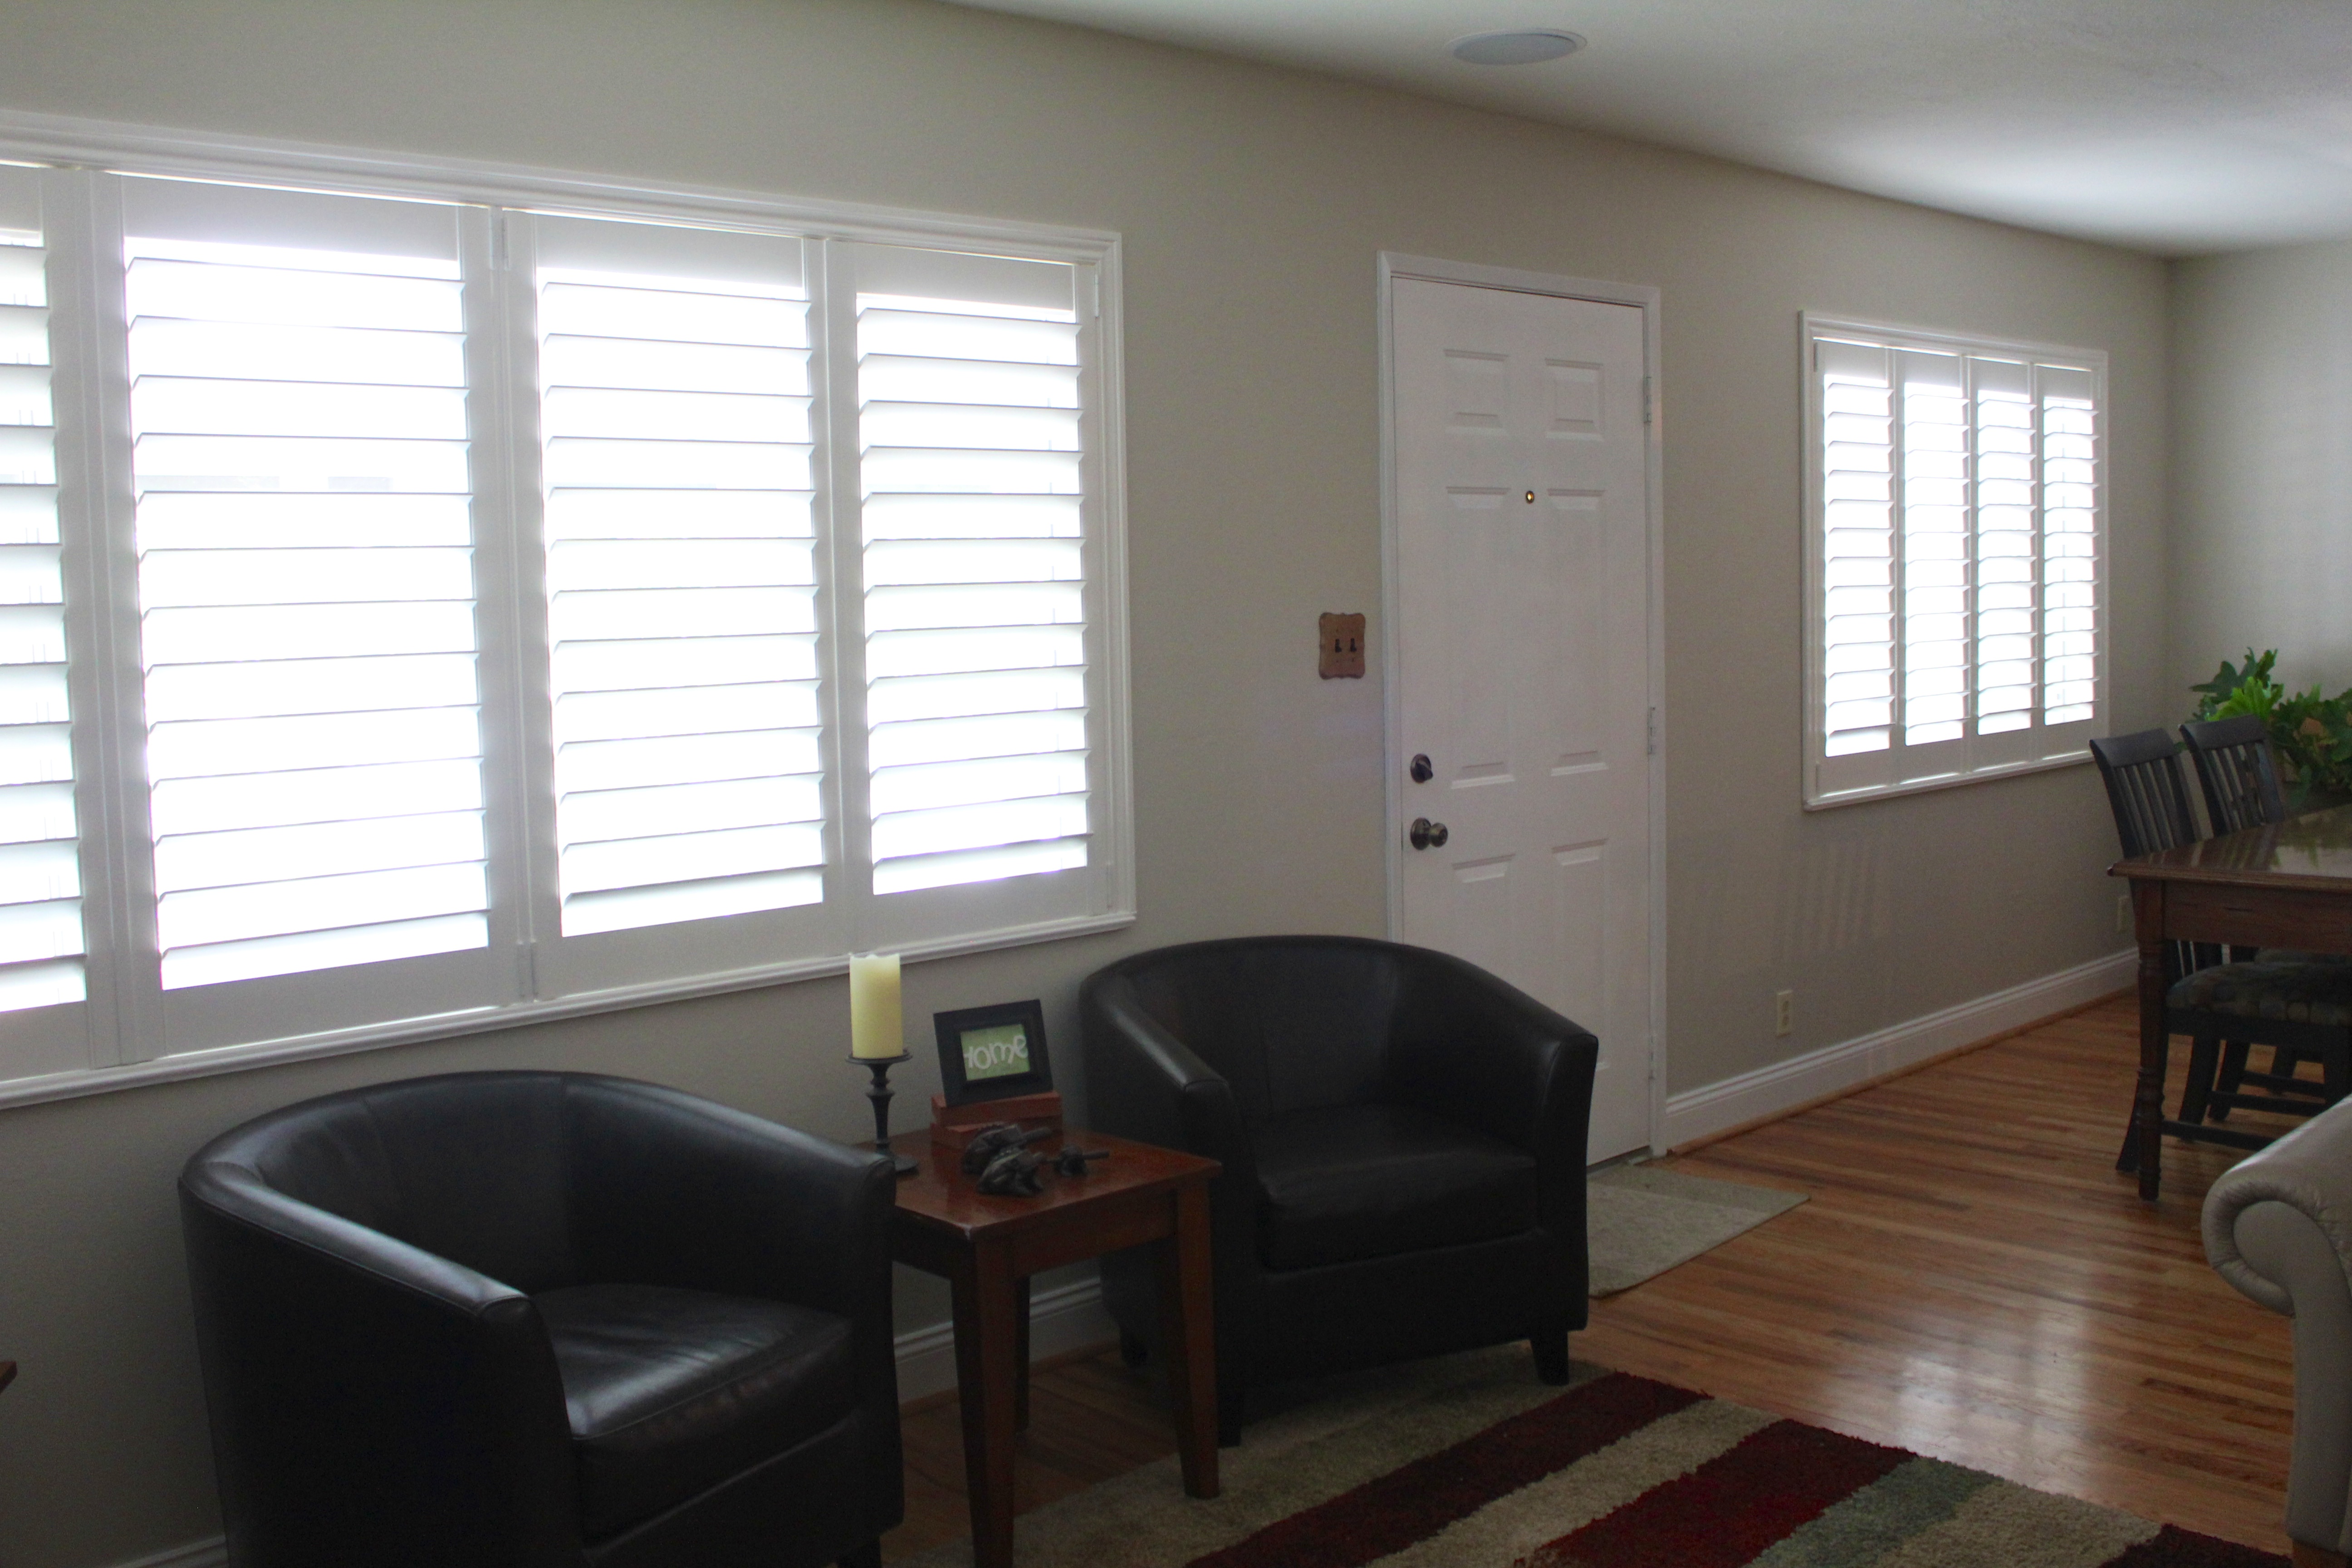
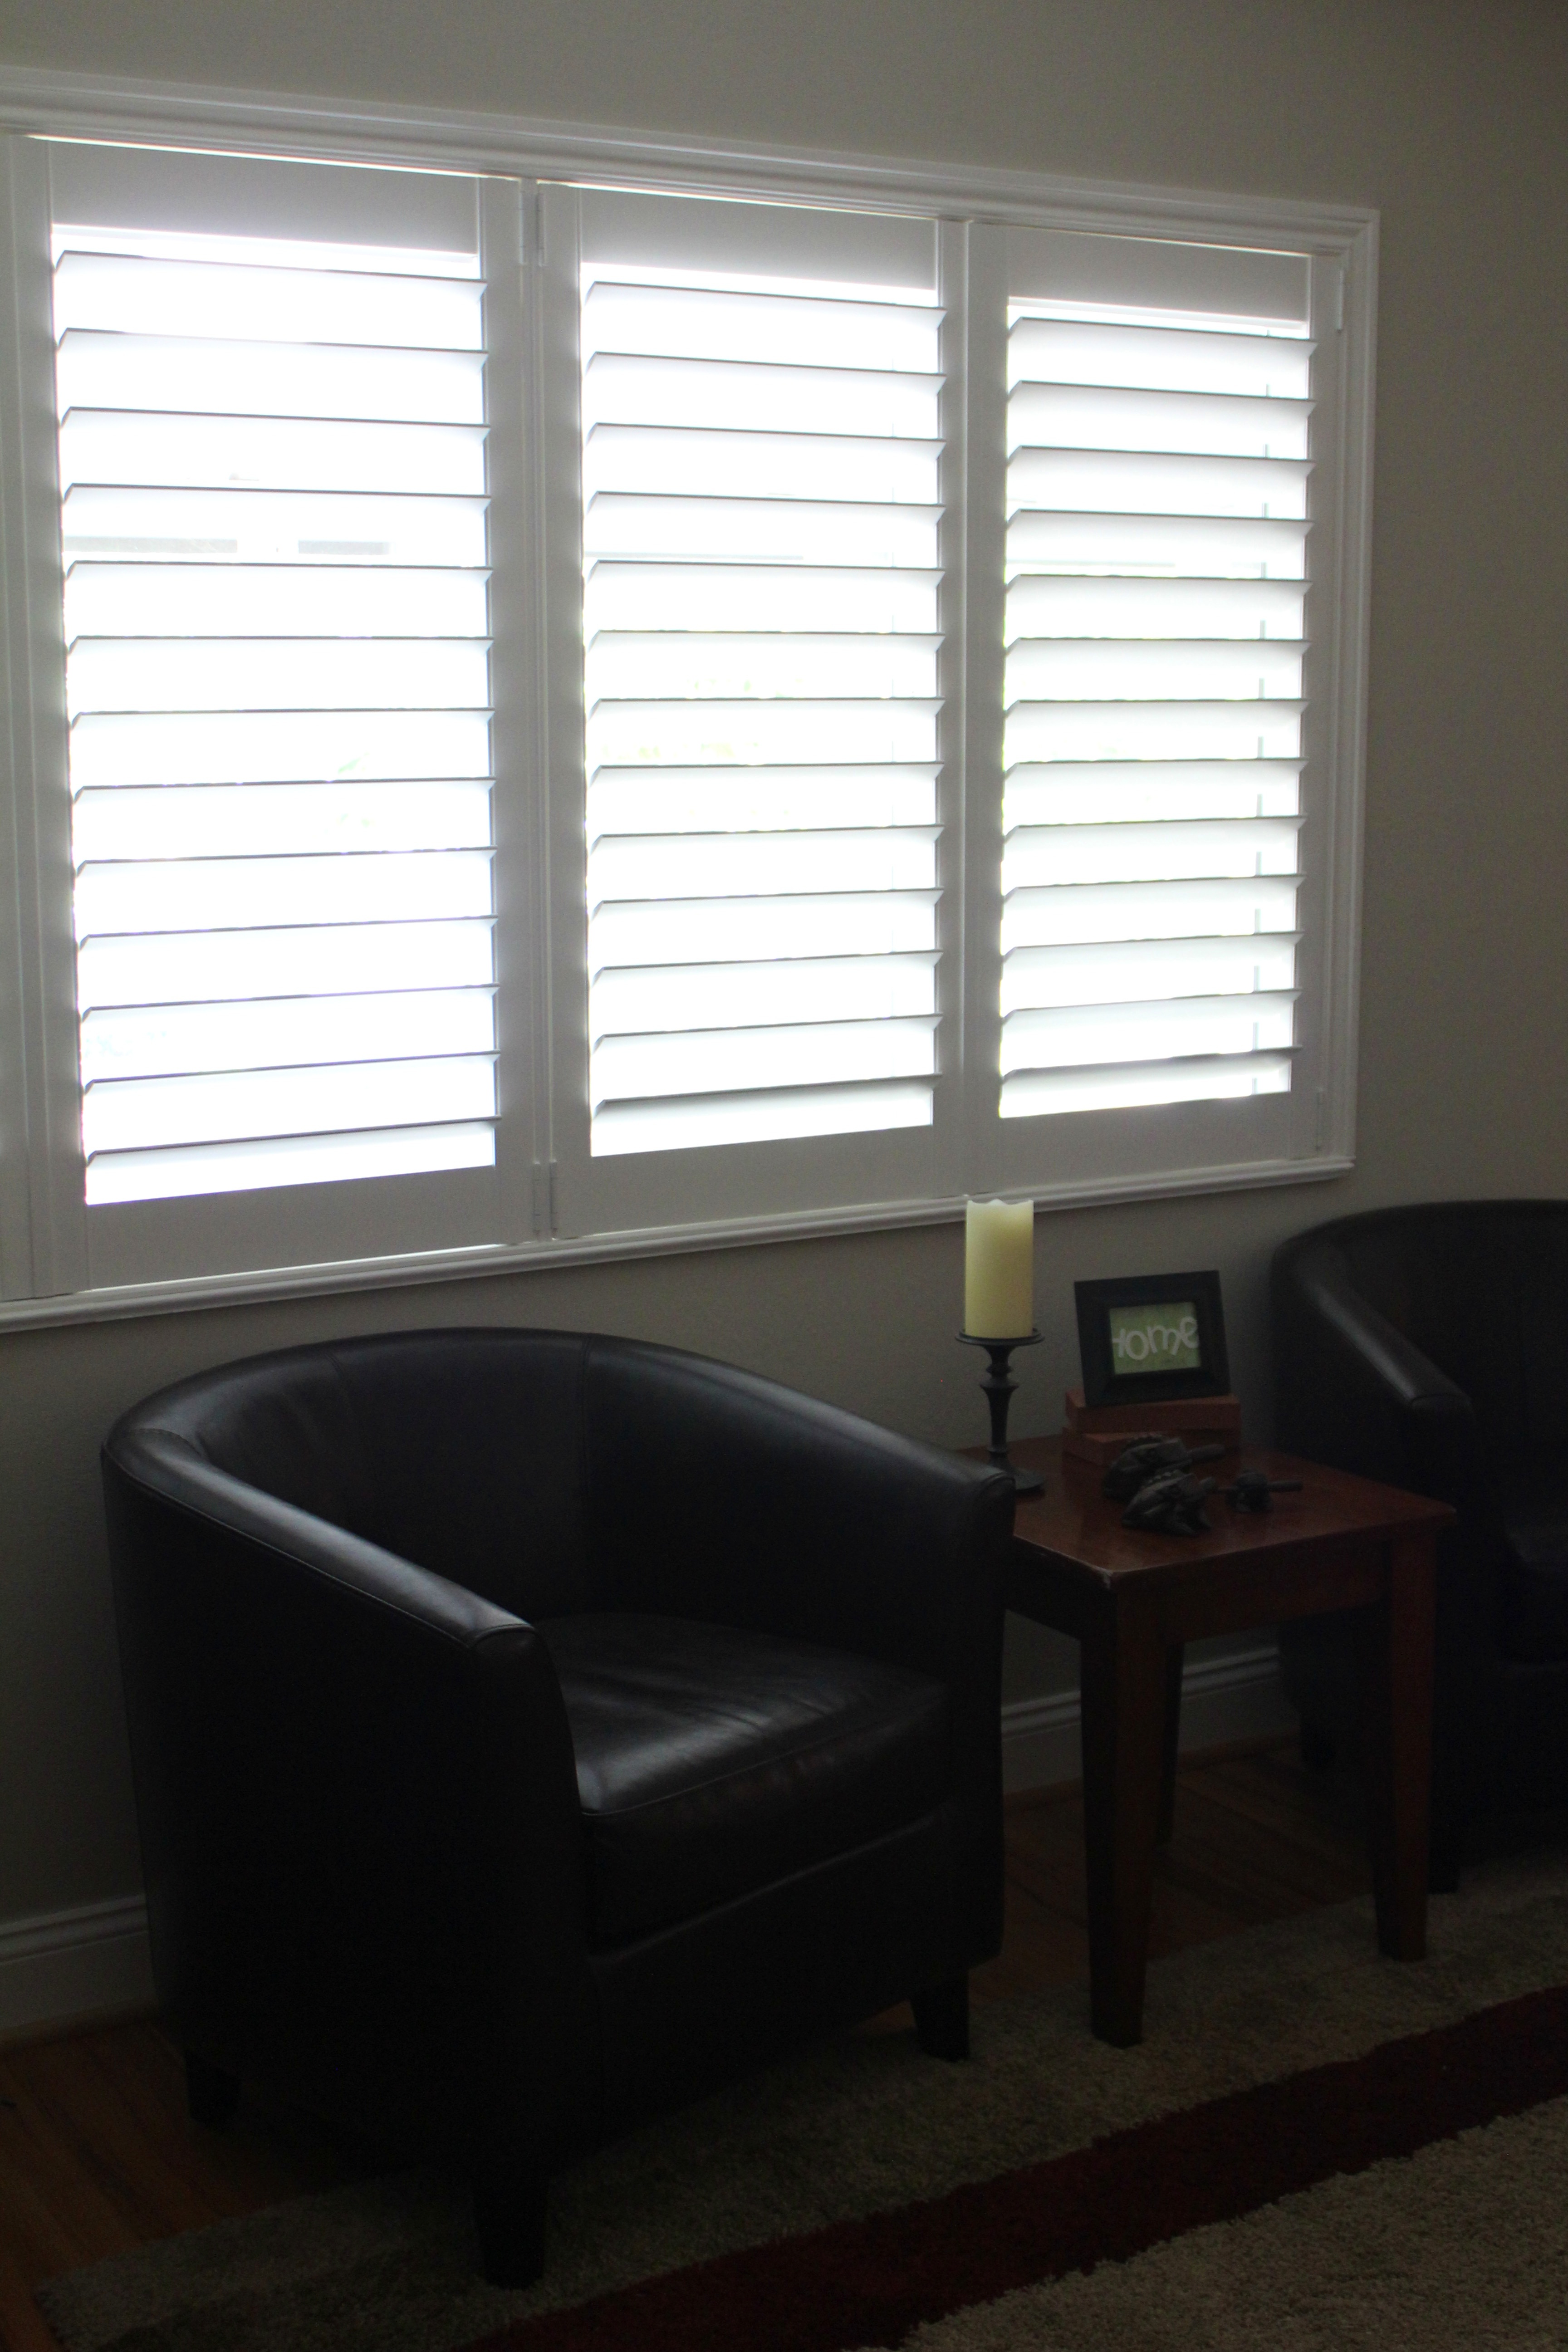

LOVE LOVE LOVE!!! That’s all I can say, and I sincerely hope you agree.

I should also mention that we snagged these dark brown leather chairs on craigslist for a steal and just love what they do to the room. Plus, they are sooo comfy. The couch that was previously under the window has rejoined its twin in storage. I also feel inclined to mention that the shutters do a surprisingly good job of blocking out the street noise. A nice, unexpected perk. With every project, our house feels more and more like our home 🙂
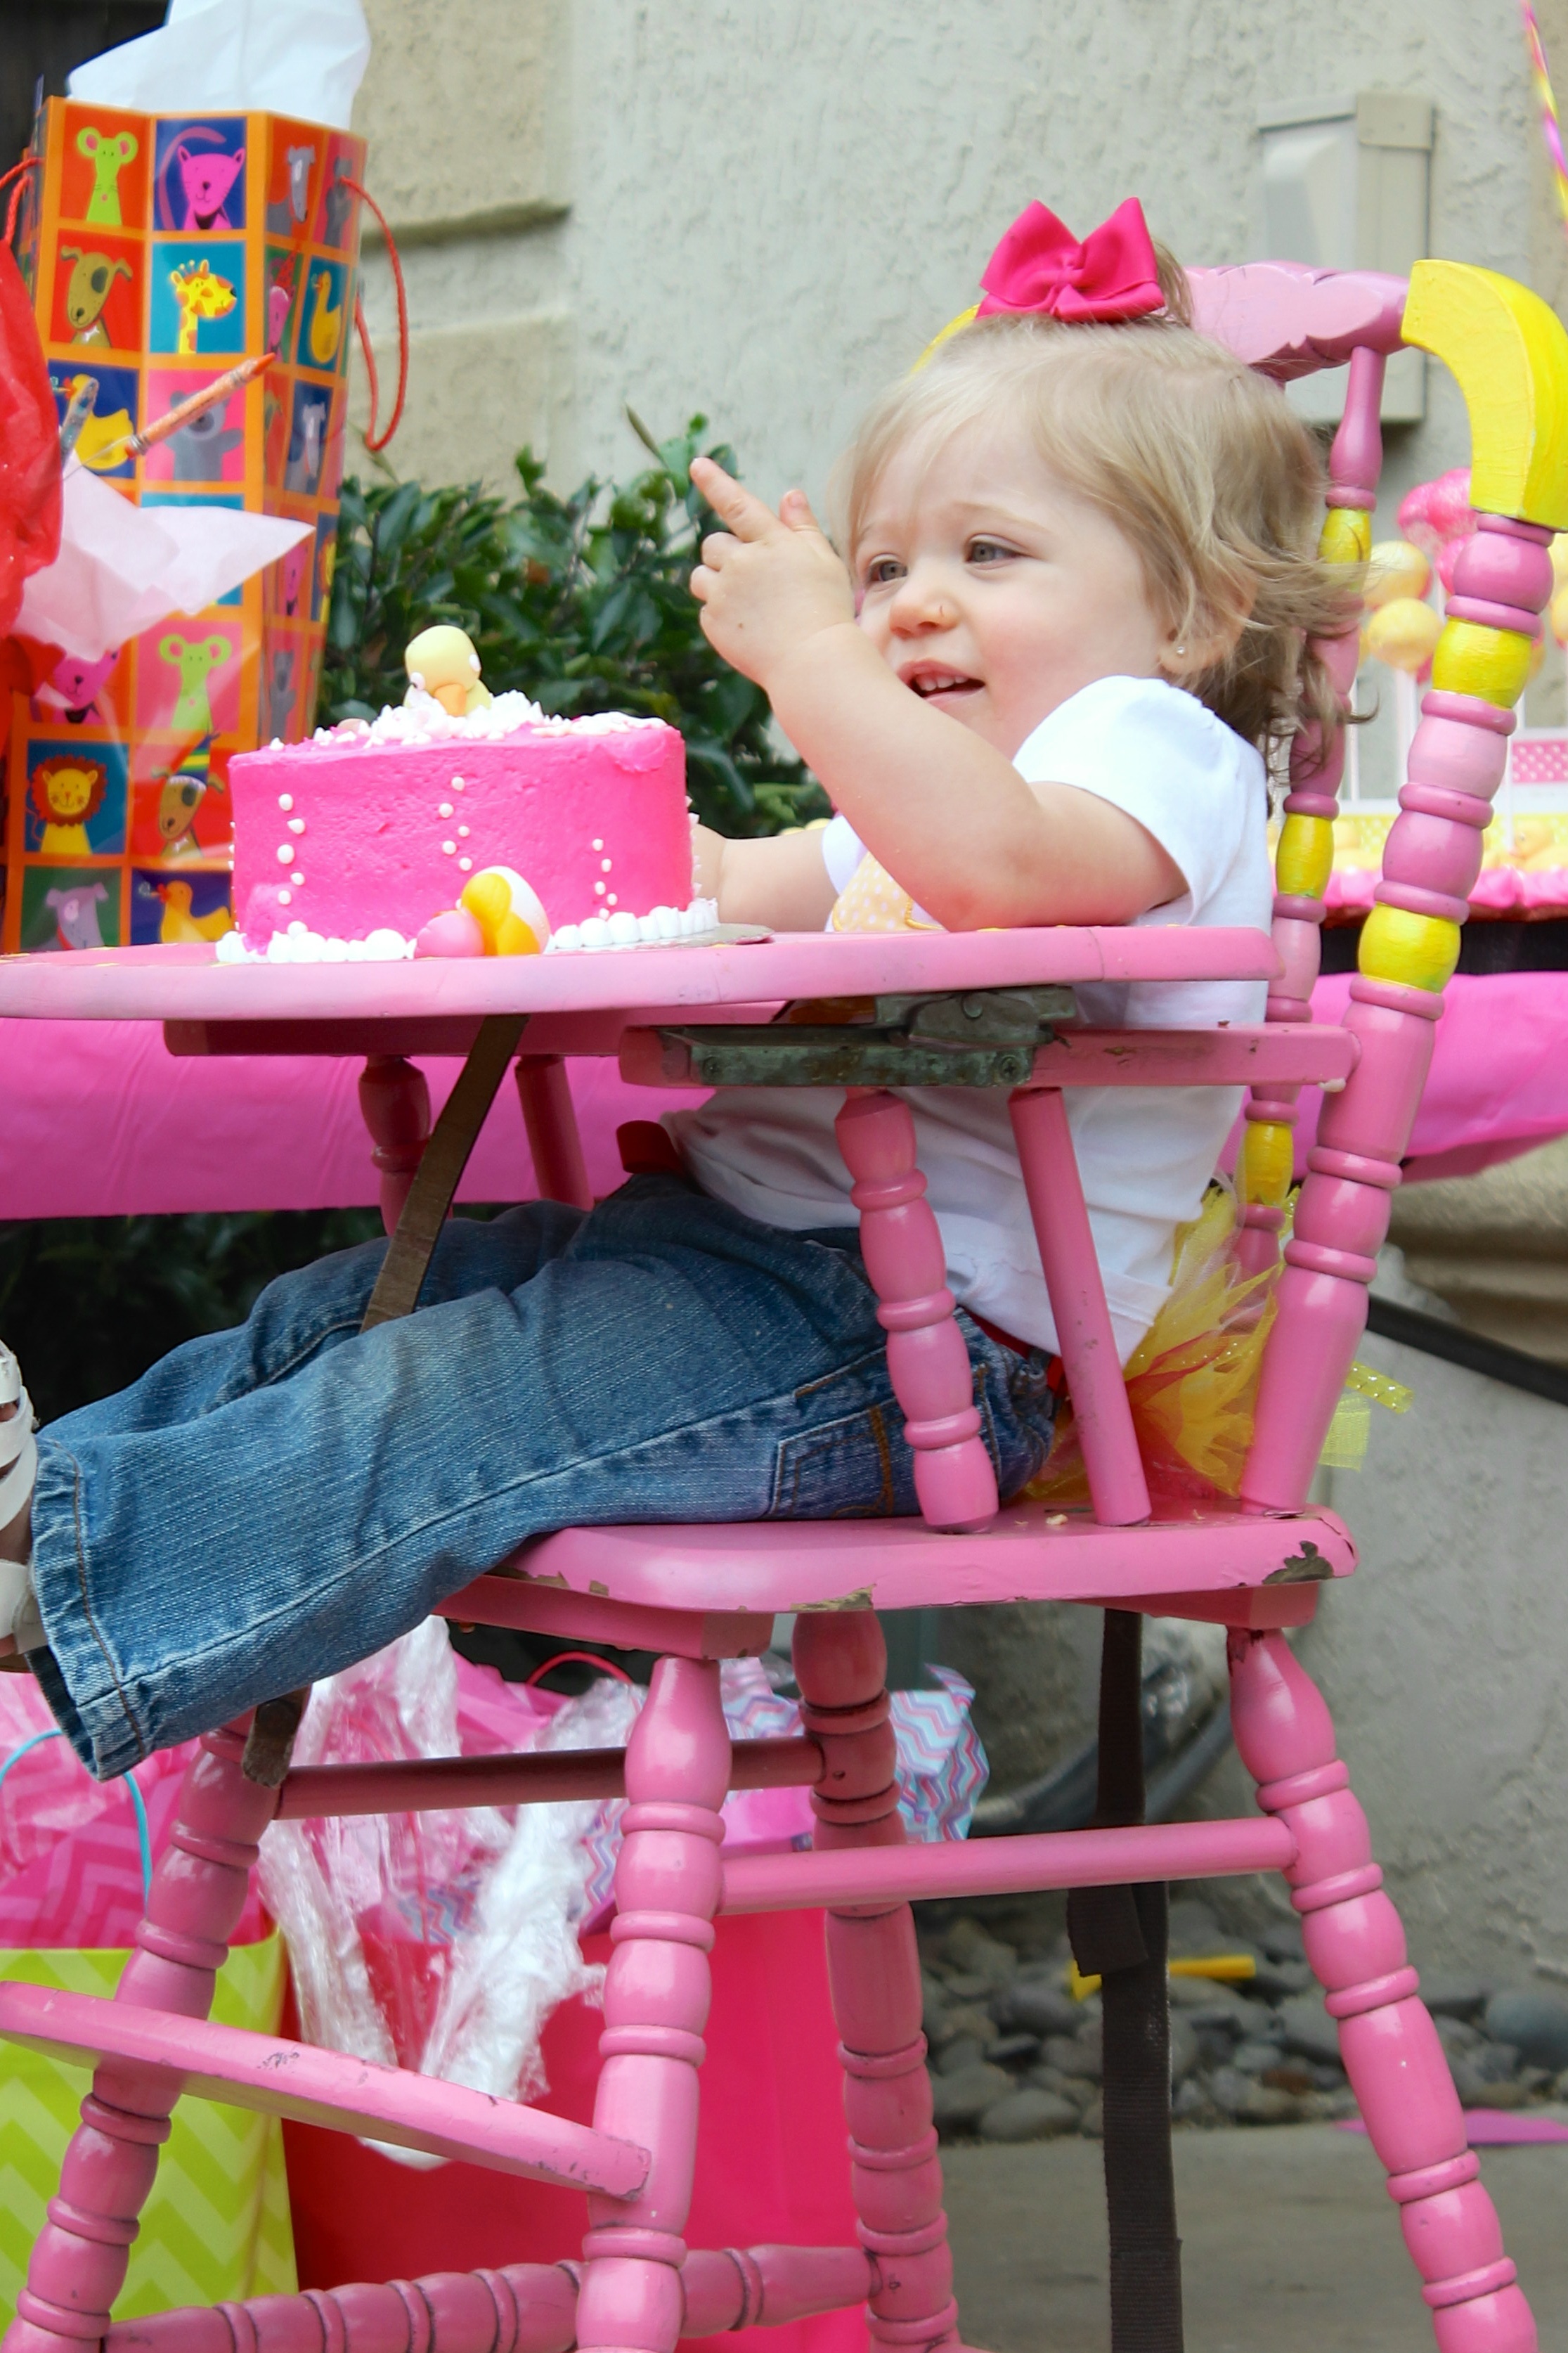
We have this niece. Her name is Aspen. She is the cutest thing in the world. End of story.

Actually, we may be slightly biased. As her aunt and uncle, we are obliged to think she is the cutest thing in the world. But she makes it so easy because its true! Anyway, enough of that. We love our niece to pieces, and recently went up to Lodi to celebrate her first birthday. Dan and Brigitte threw a great party for their little one, and I’m pretty sure Aspen loved every second of it. Especially the cake! Here are some photos of the day and Aspen’s progress through her first birthday cake:


And a few more photos from Aspen’s first year, just because!


And on the subject of aunts and uncles, we recently found out that we will become an aunt and uncle to another little bundle of joy, due to arrive in October 🙂

Yaaaay!
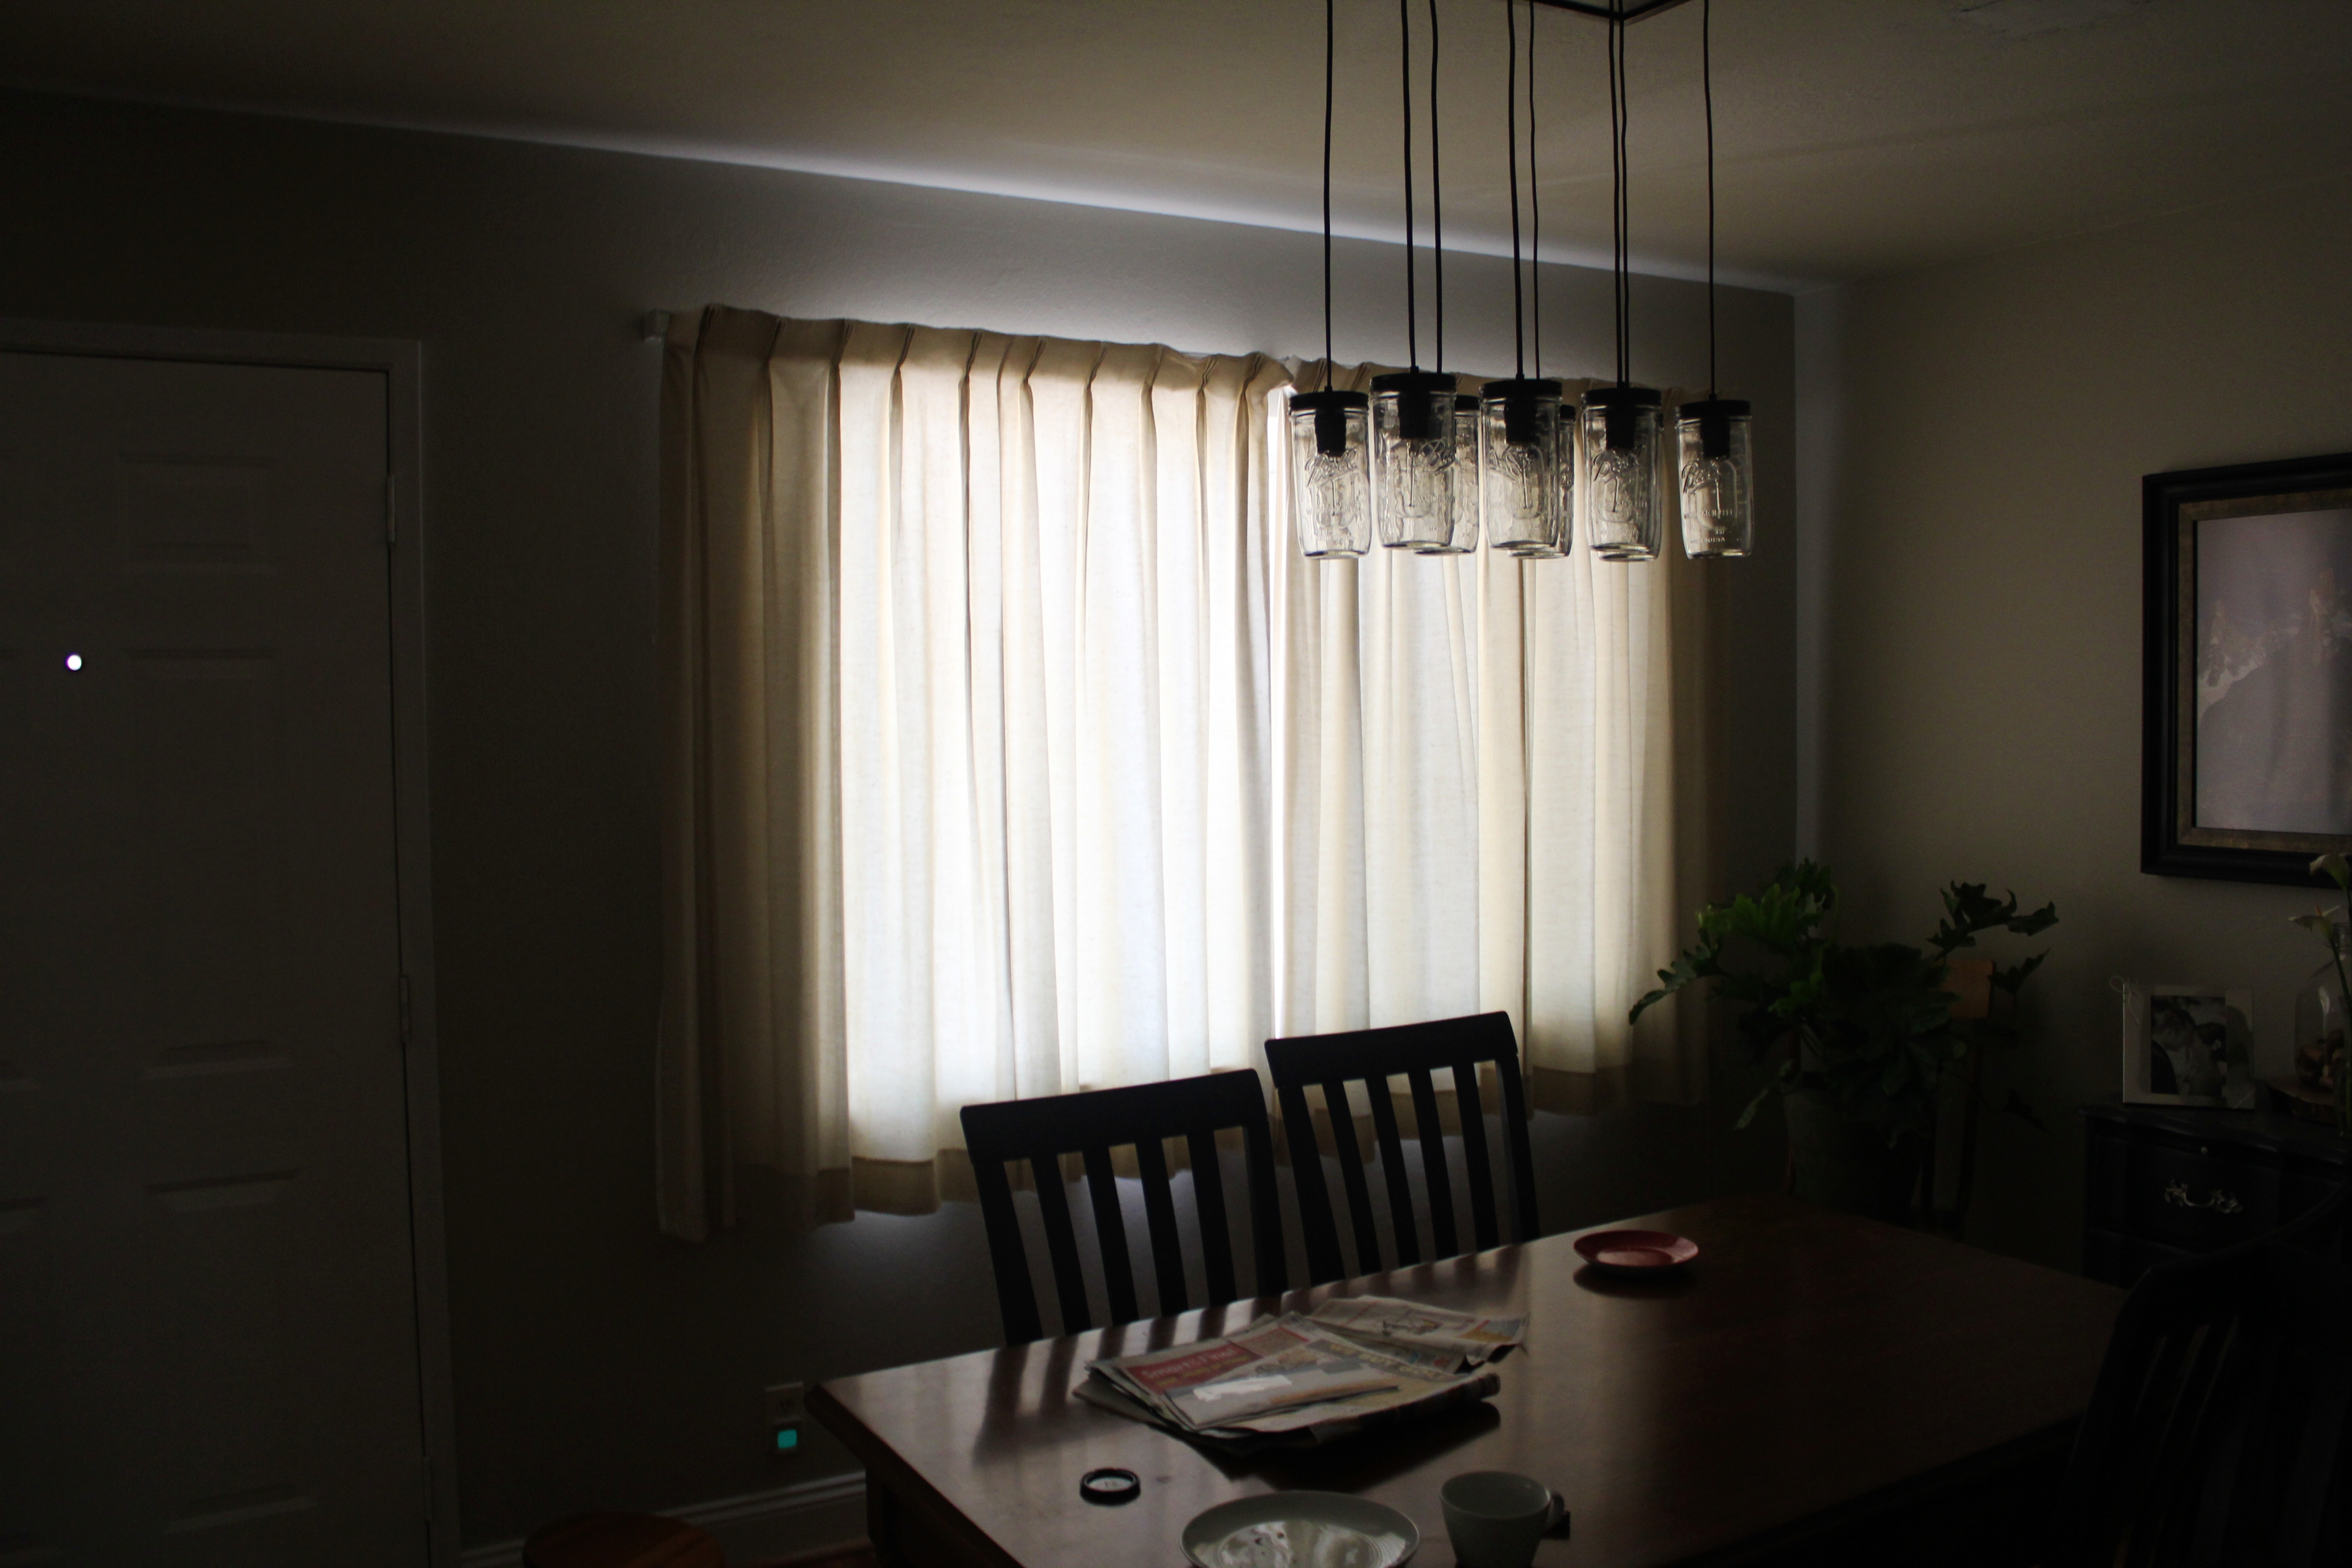
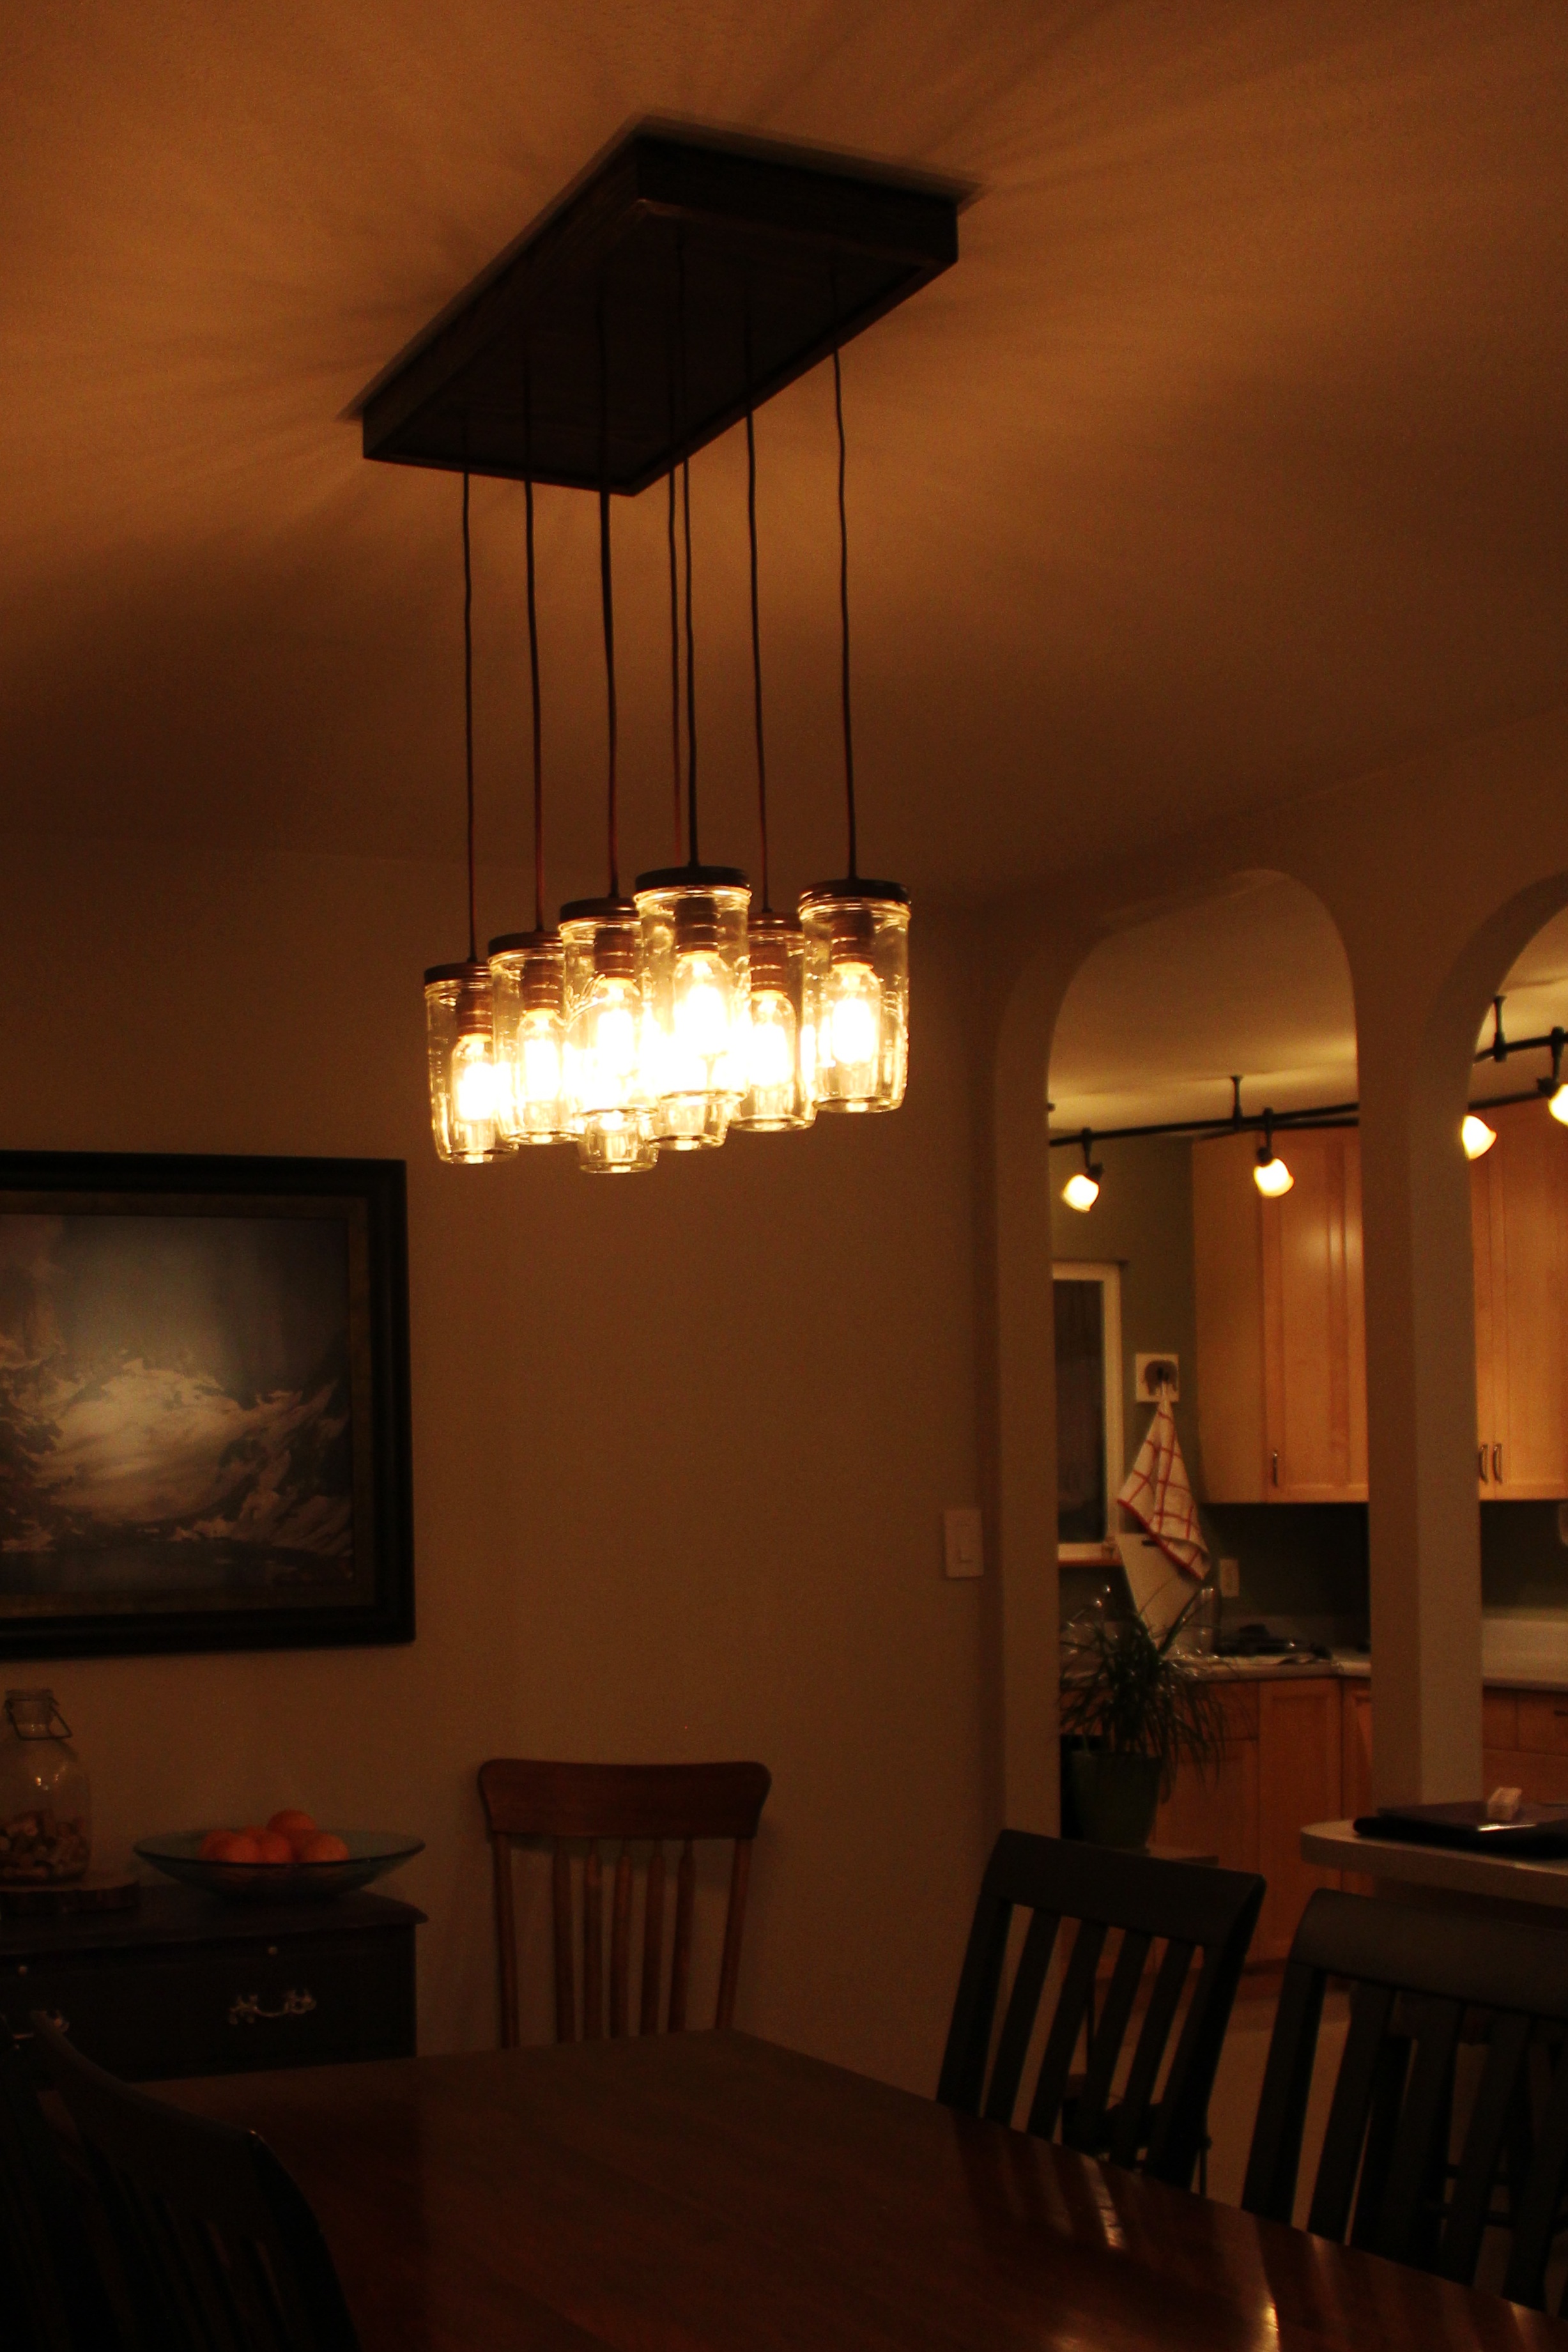
The lighting in the dining room has been driving Justin crazy for months. Probably since before we moved in. Don’t get me wrong, I’m not crazy about our dingy, uncentered light either. But I just figured it would be one of those things we would get around to changing eventually, when we had a little more time and money. Well, my assumption was completely incorrect. Apparently, I forgot who I am married to? Regardless of my miscalculated assumptions, my wonderful husband had big plans to change the lighting in our dining room, and to change it right now.
We took inspiration from a chandelier that we saw on an unrelated trip to the hardware store, that looked something like this:

Inspiration
We liked the casual feel of the mason jars, and thought this was the kind of design that we could handle for our first chandelier. Actually, for our first real electrical project… we’ve installed new lights and added a few new outlets around the house, but this was the first project that would involve some serious electrical knowledge and prowess (of which I still do not possess, so I won’t go into detail for fear of sounding light an idiot). All I know, is that we had to do some serious wiring and relocate the existing, incredibly off-center junction box. Needless to say, Justin learned a lot about all things electrical, I did as I was told, and we ended up with a gorgeous, one-of-a-kind, handmade chandelier!
This is the only picture I can find of “before”. We’ve done a lot to that frame, and I realize you can’t see the terrible off-center dining room light… but it’s a starting point at least?
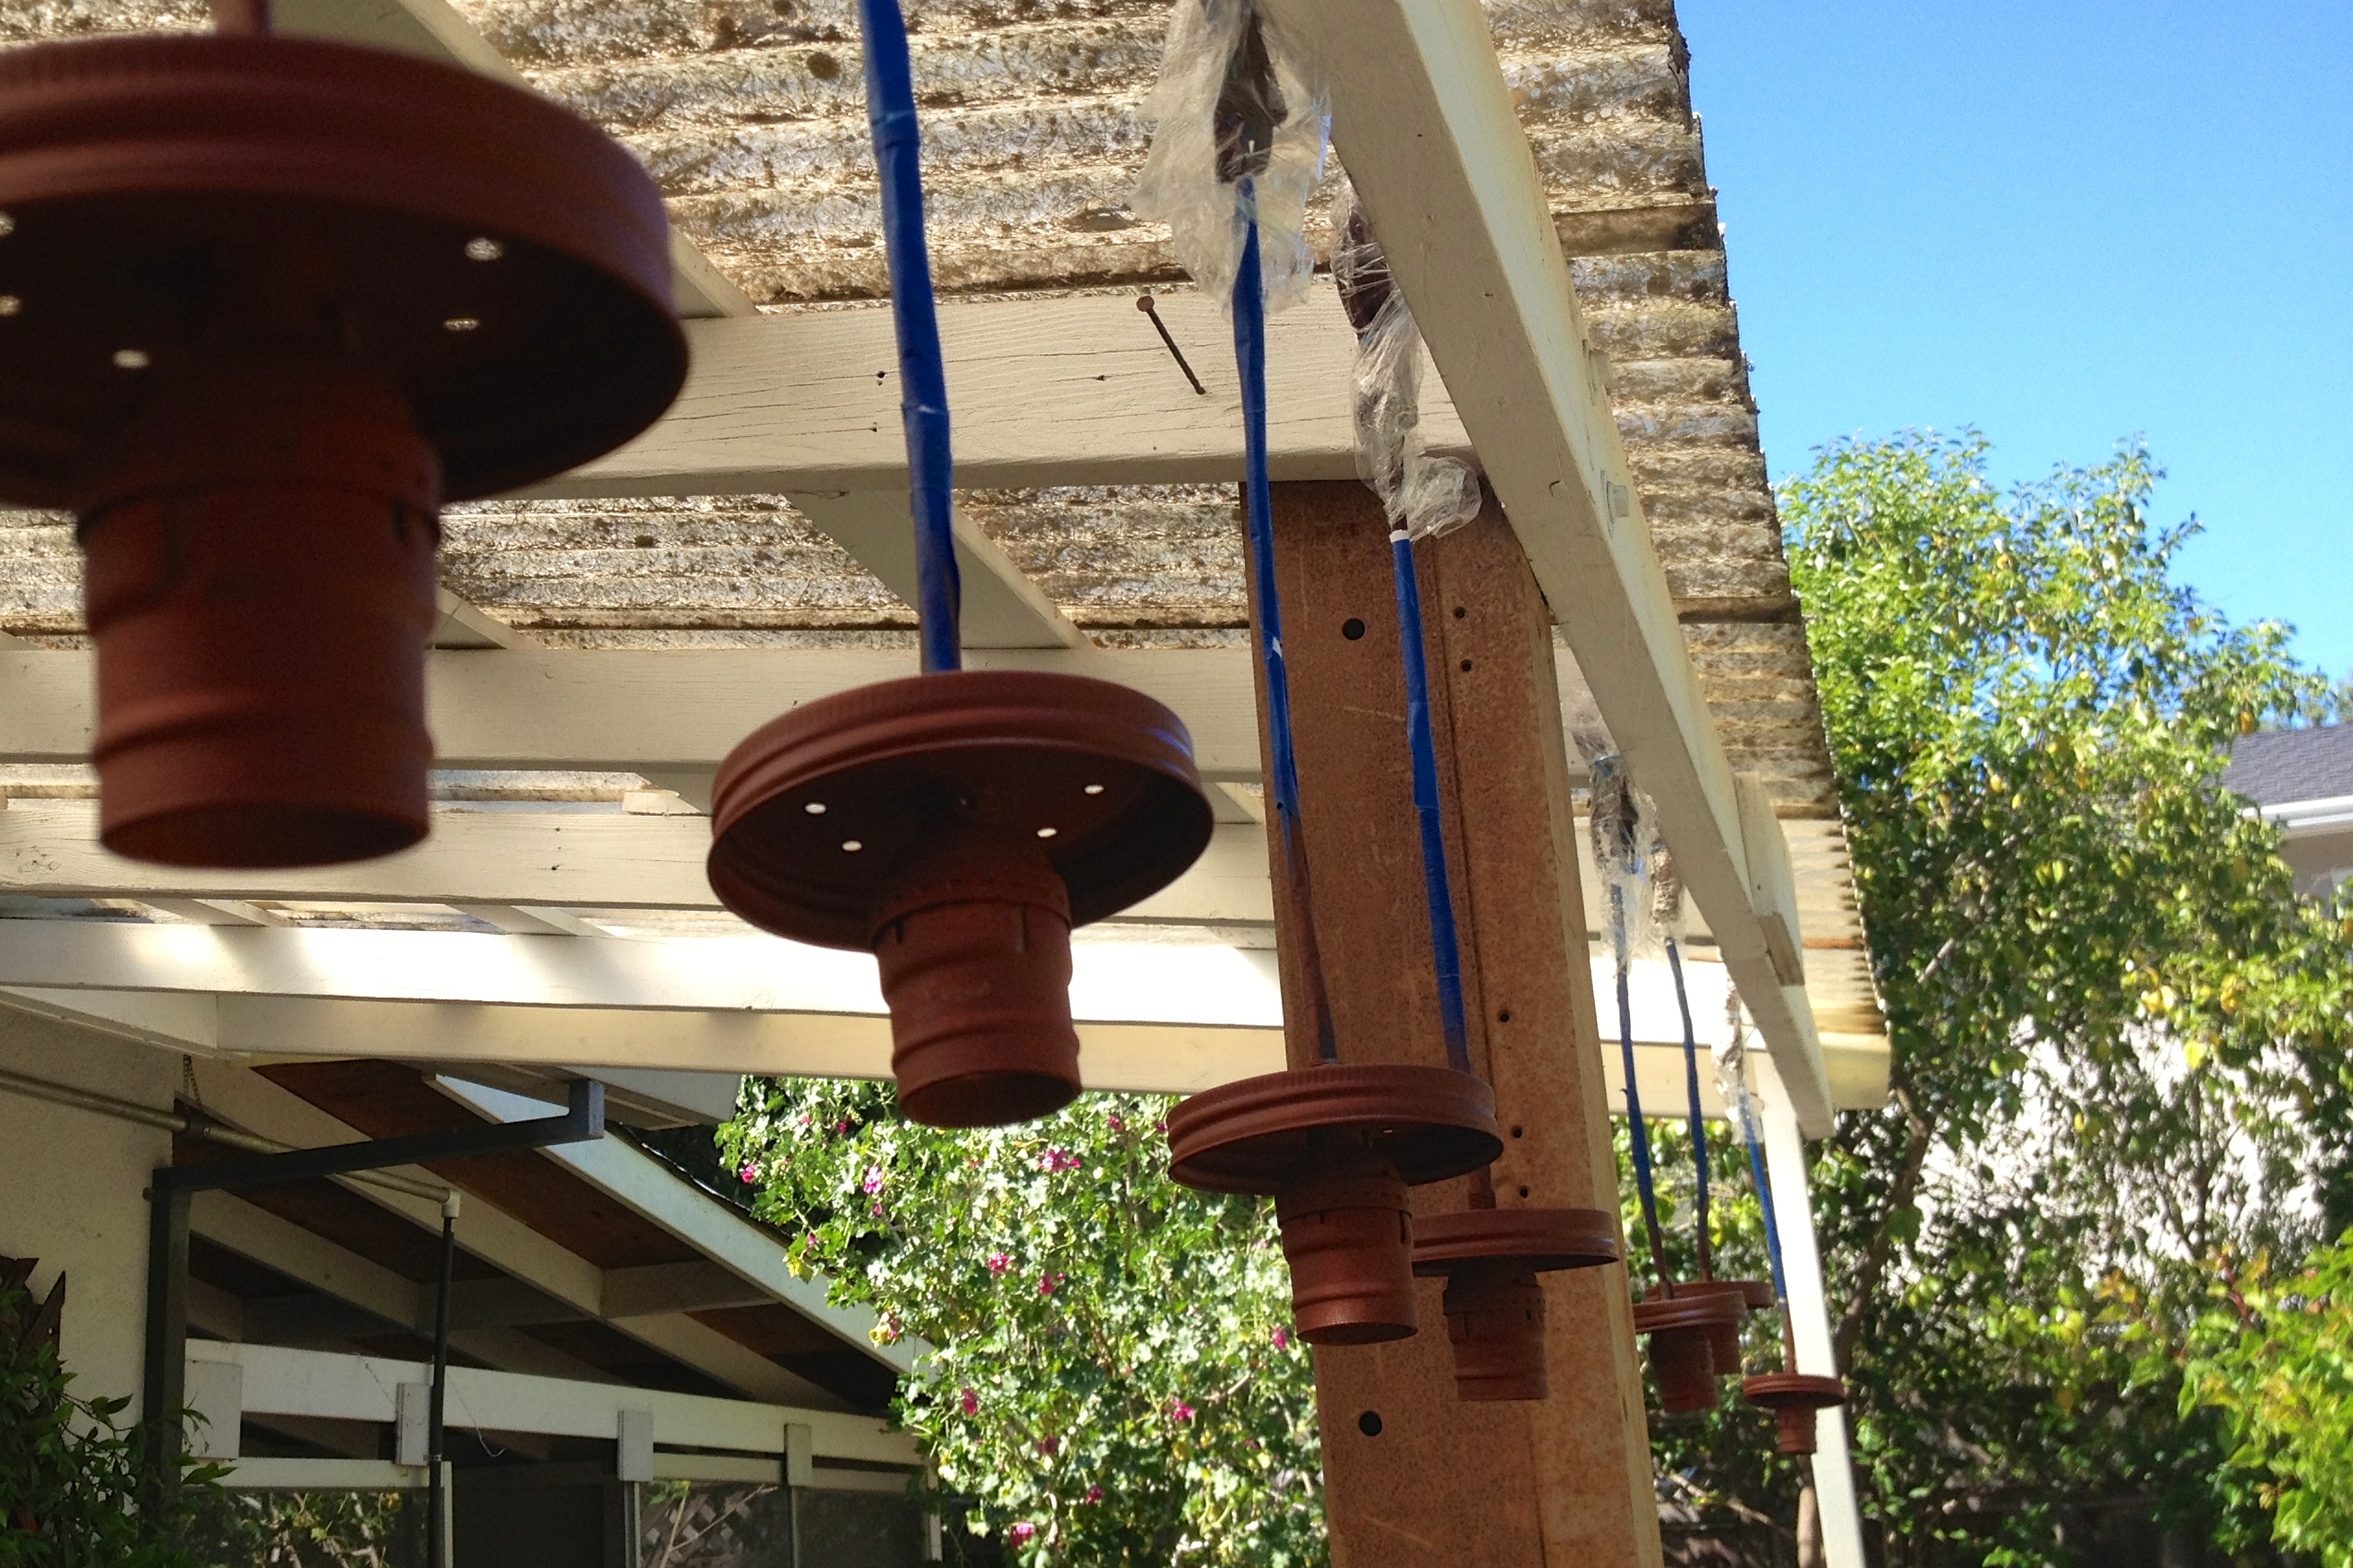
But I’m getting ahead of myself. Before we could do anything related to electricity, we had to design our chandelier. We settled on the longer, more slender mason jar style instead of the traditional more bulbous jars. We like the look of these jars better, but we also needed the extra jar height to ensure the light bulbs would fit inside with a little wiggle room. Which brings me to the next decision: light bulb types! When you have a lighting fixture with bare bulbs (or bulbs in clear glass jars), they are a definite focal point and they must be really cool. So we splurged a little bit on the light bulbs, and upgraded to the old school Edison-type light bulbs. And the splurge was worth it. Once we had our materials and our design all squared away (and delivered from that magical place called Amazon), we got to work.
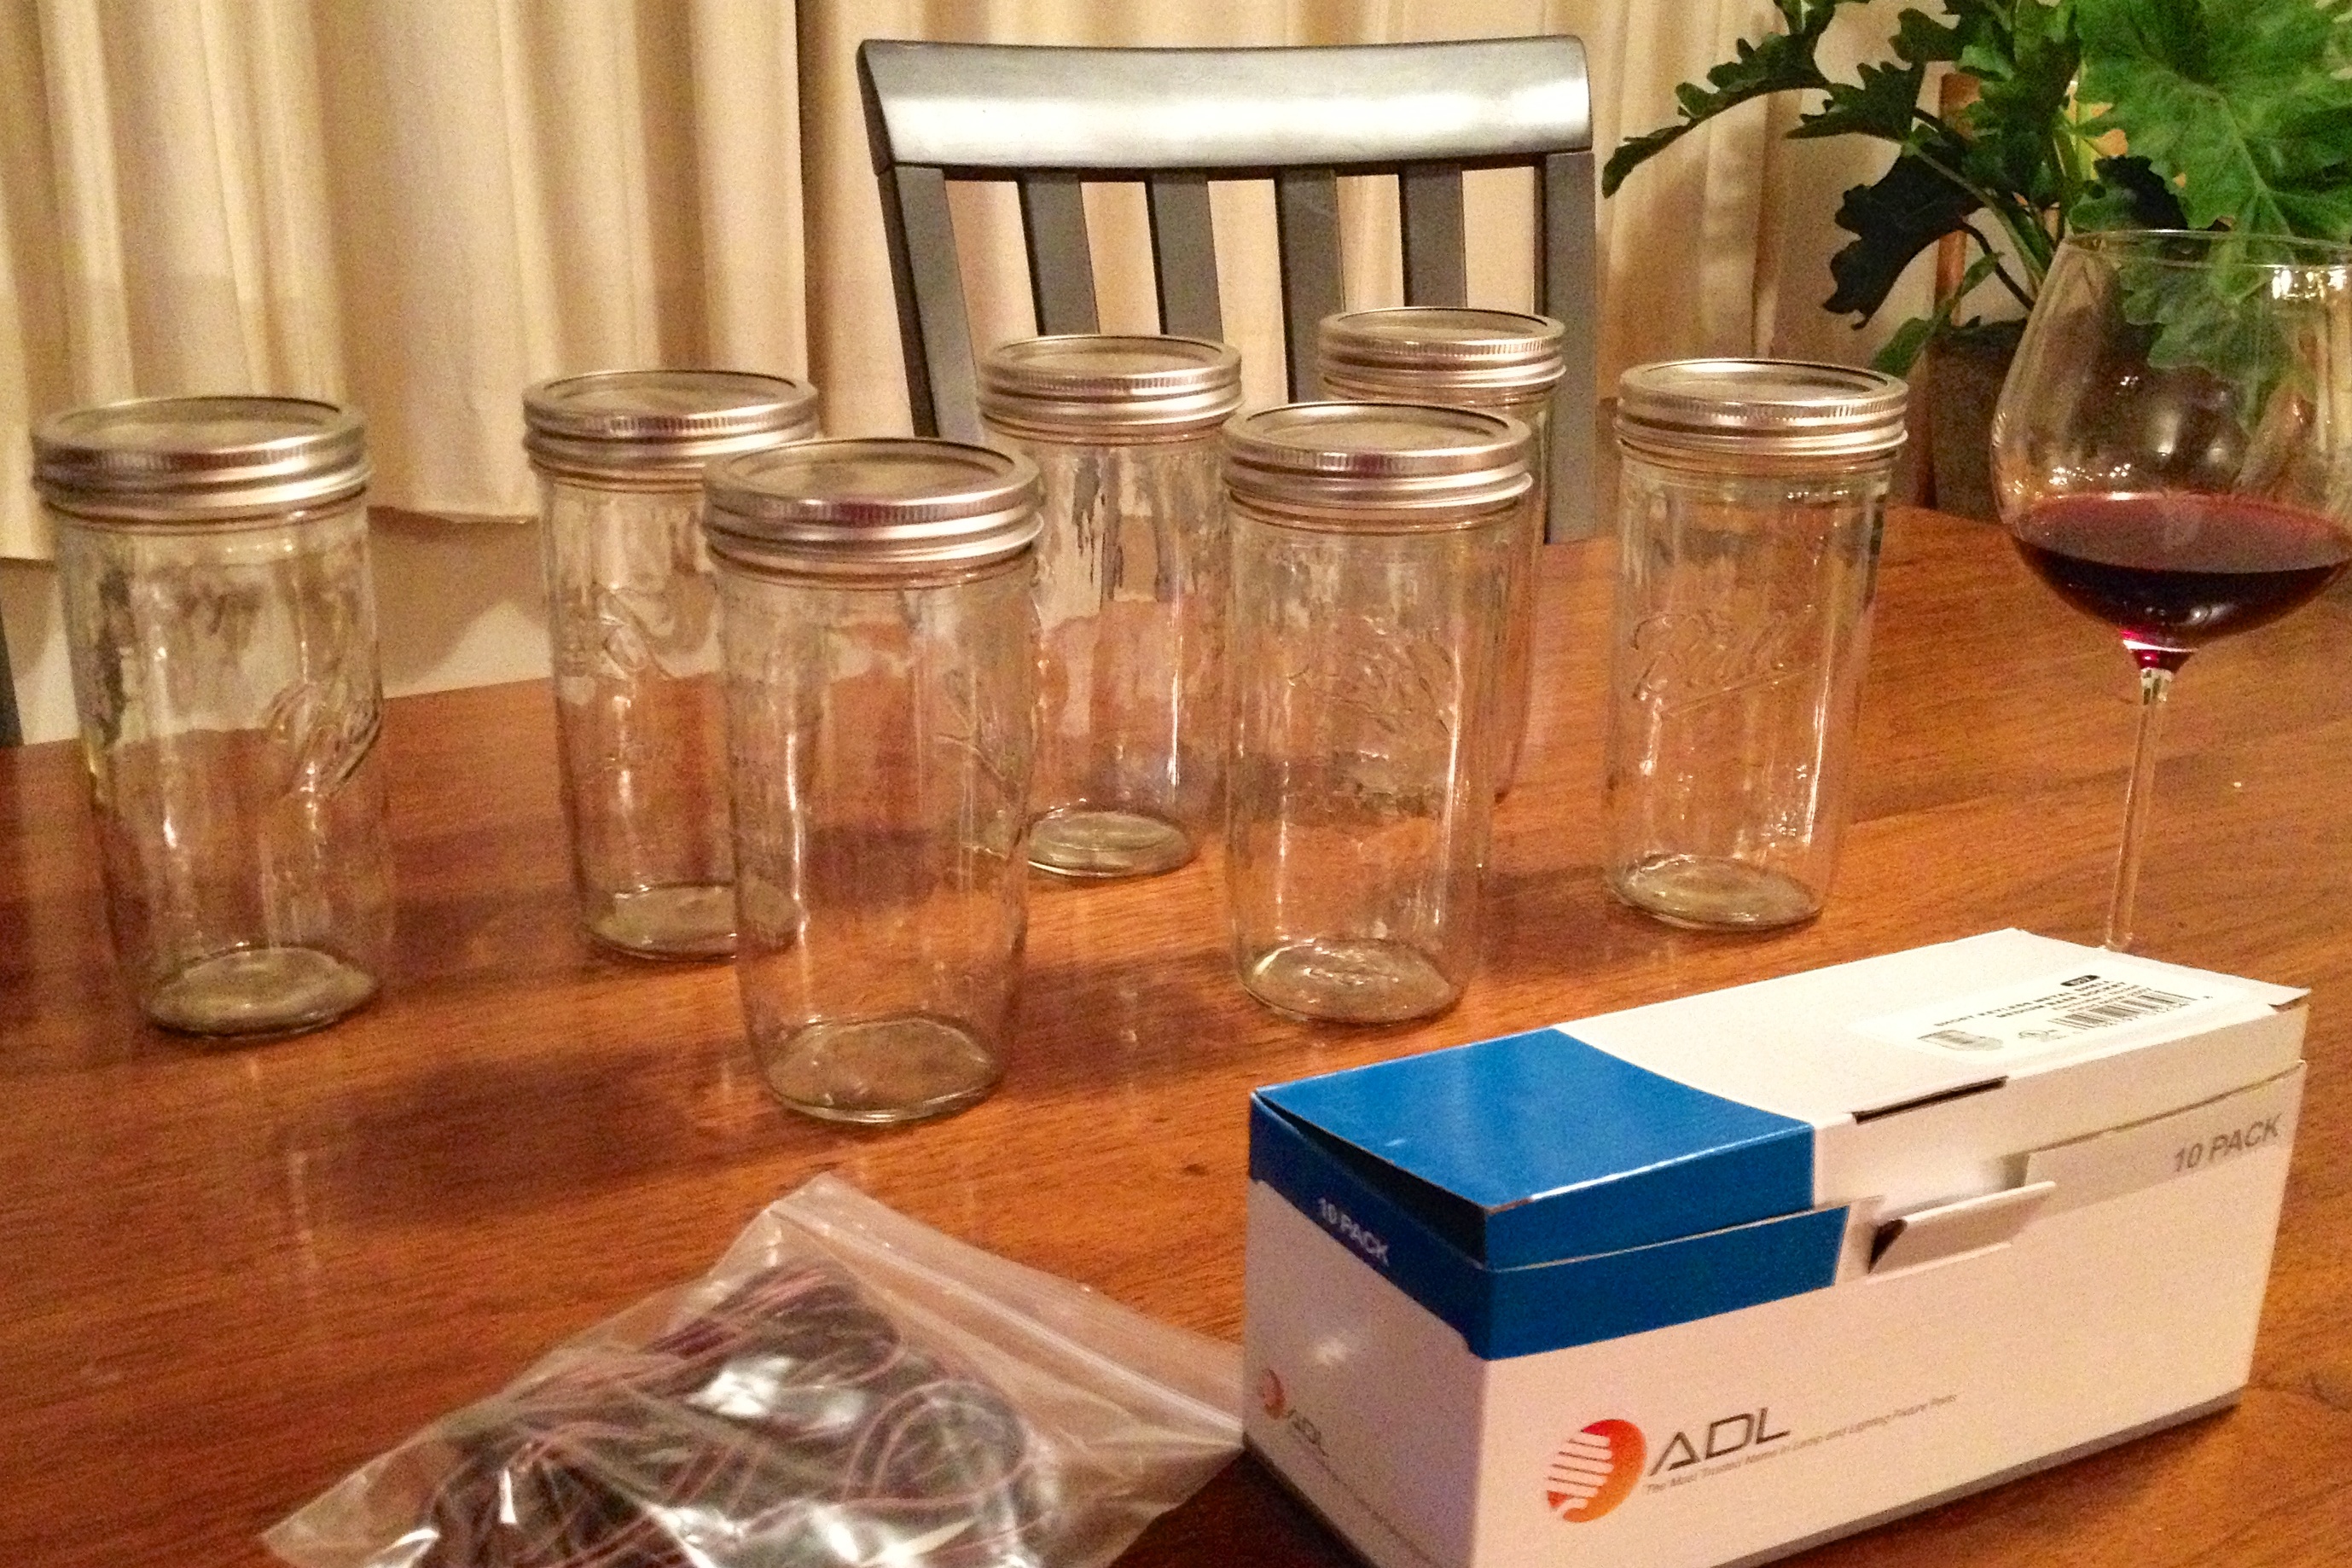
Chandelier materials. Yes, wine is a necessary chandelier-building material…
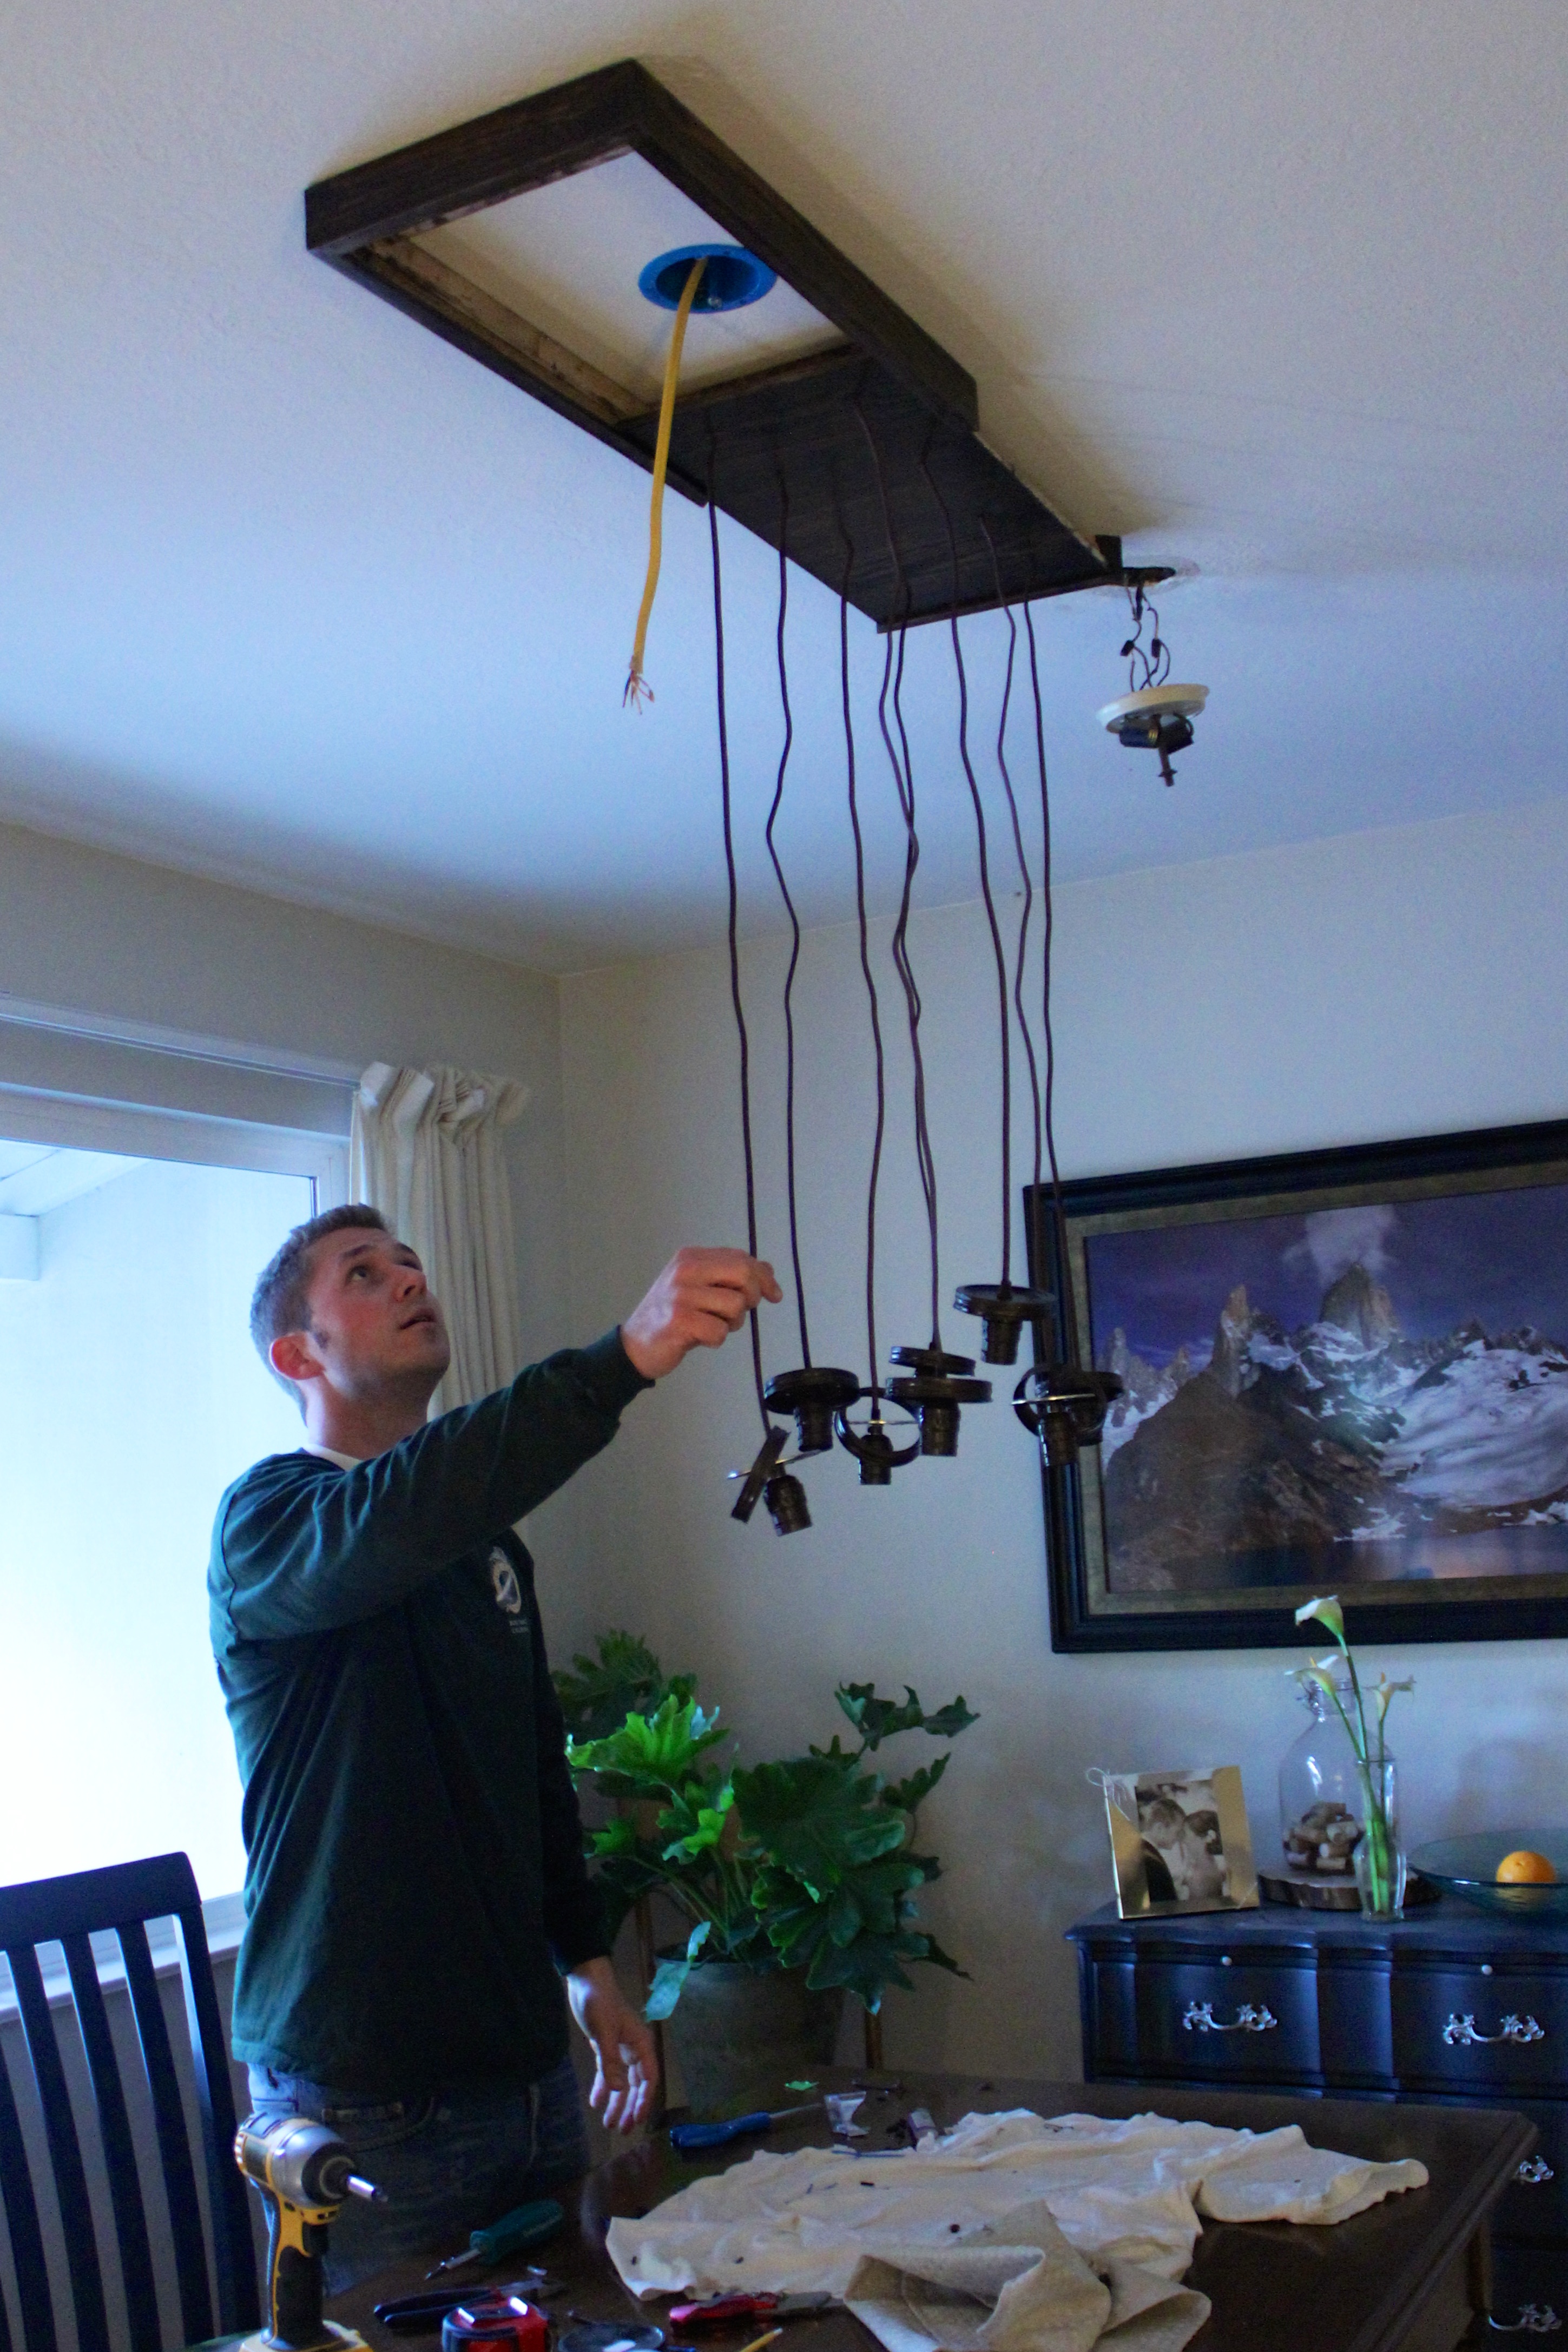
Justin started by constructing the “box” of the chandelier. The design he came up with involved a box that would be attached to the ceiling to conceal all of the wires and other unseemly parts of a light. The box consists of two pieces: the first piece has three sides, and the second piece is the final side and the top of the box. Justin cut a groove in the first piece of the box so that the second piece could slide in and out, to allow for any changes in the electrical work or to change the height of the jars. After the pieces of the box were constructed, we drilled holes for the “strings” to hang through and stained the box with our favorite espresso finish (this is starting to become a habit!).
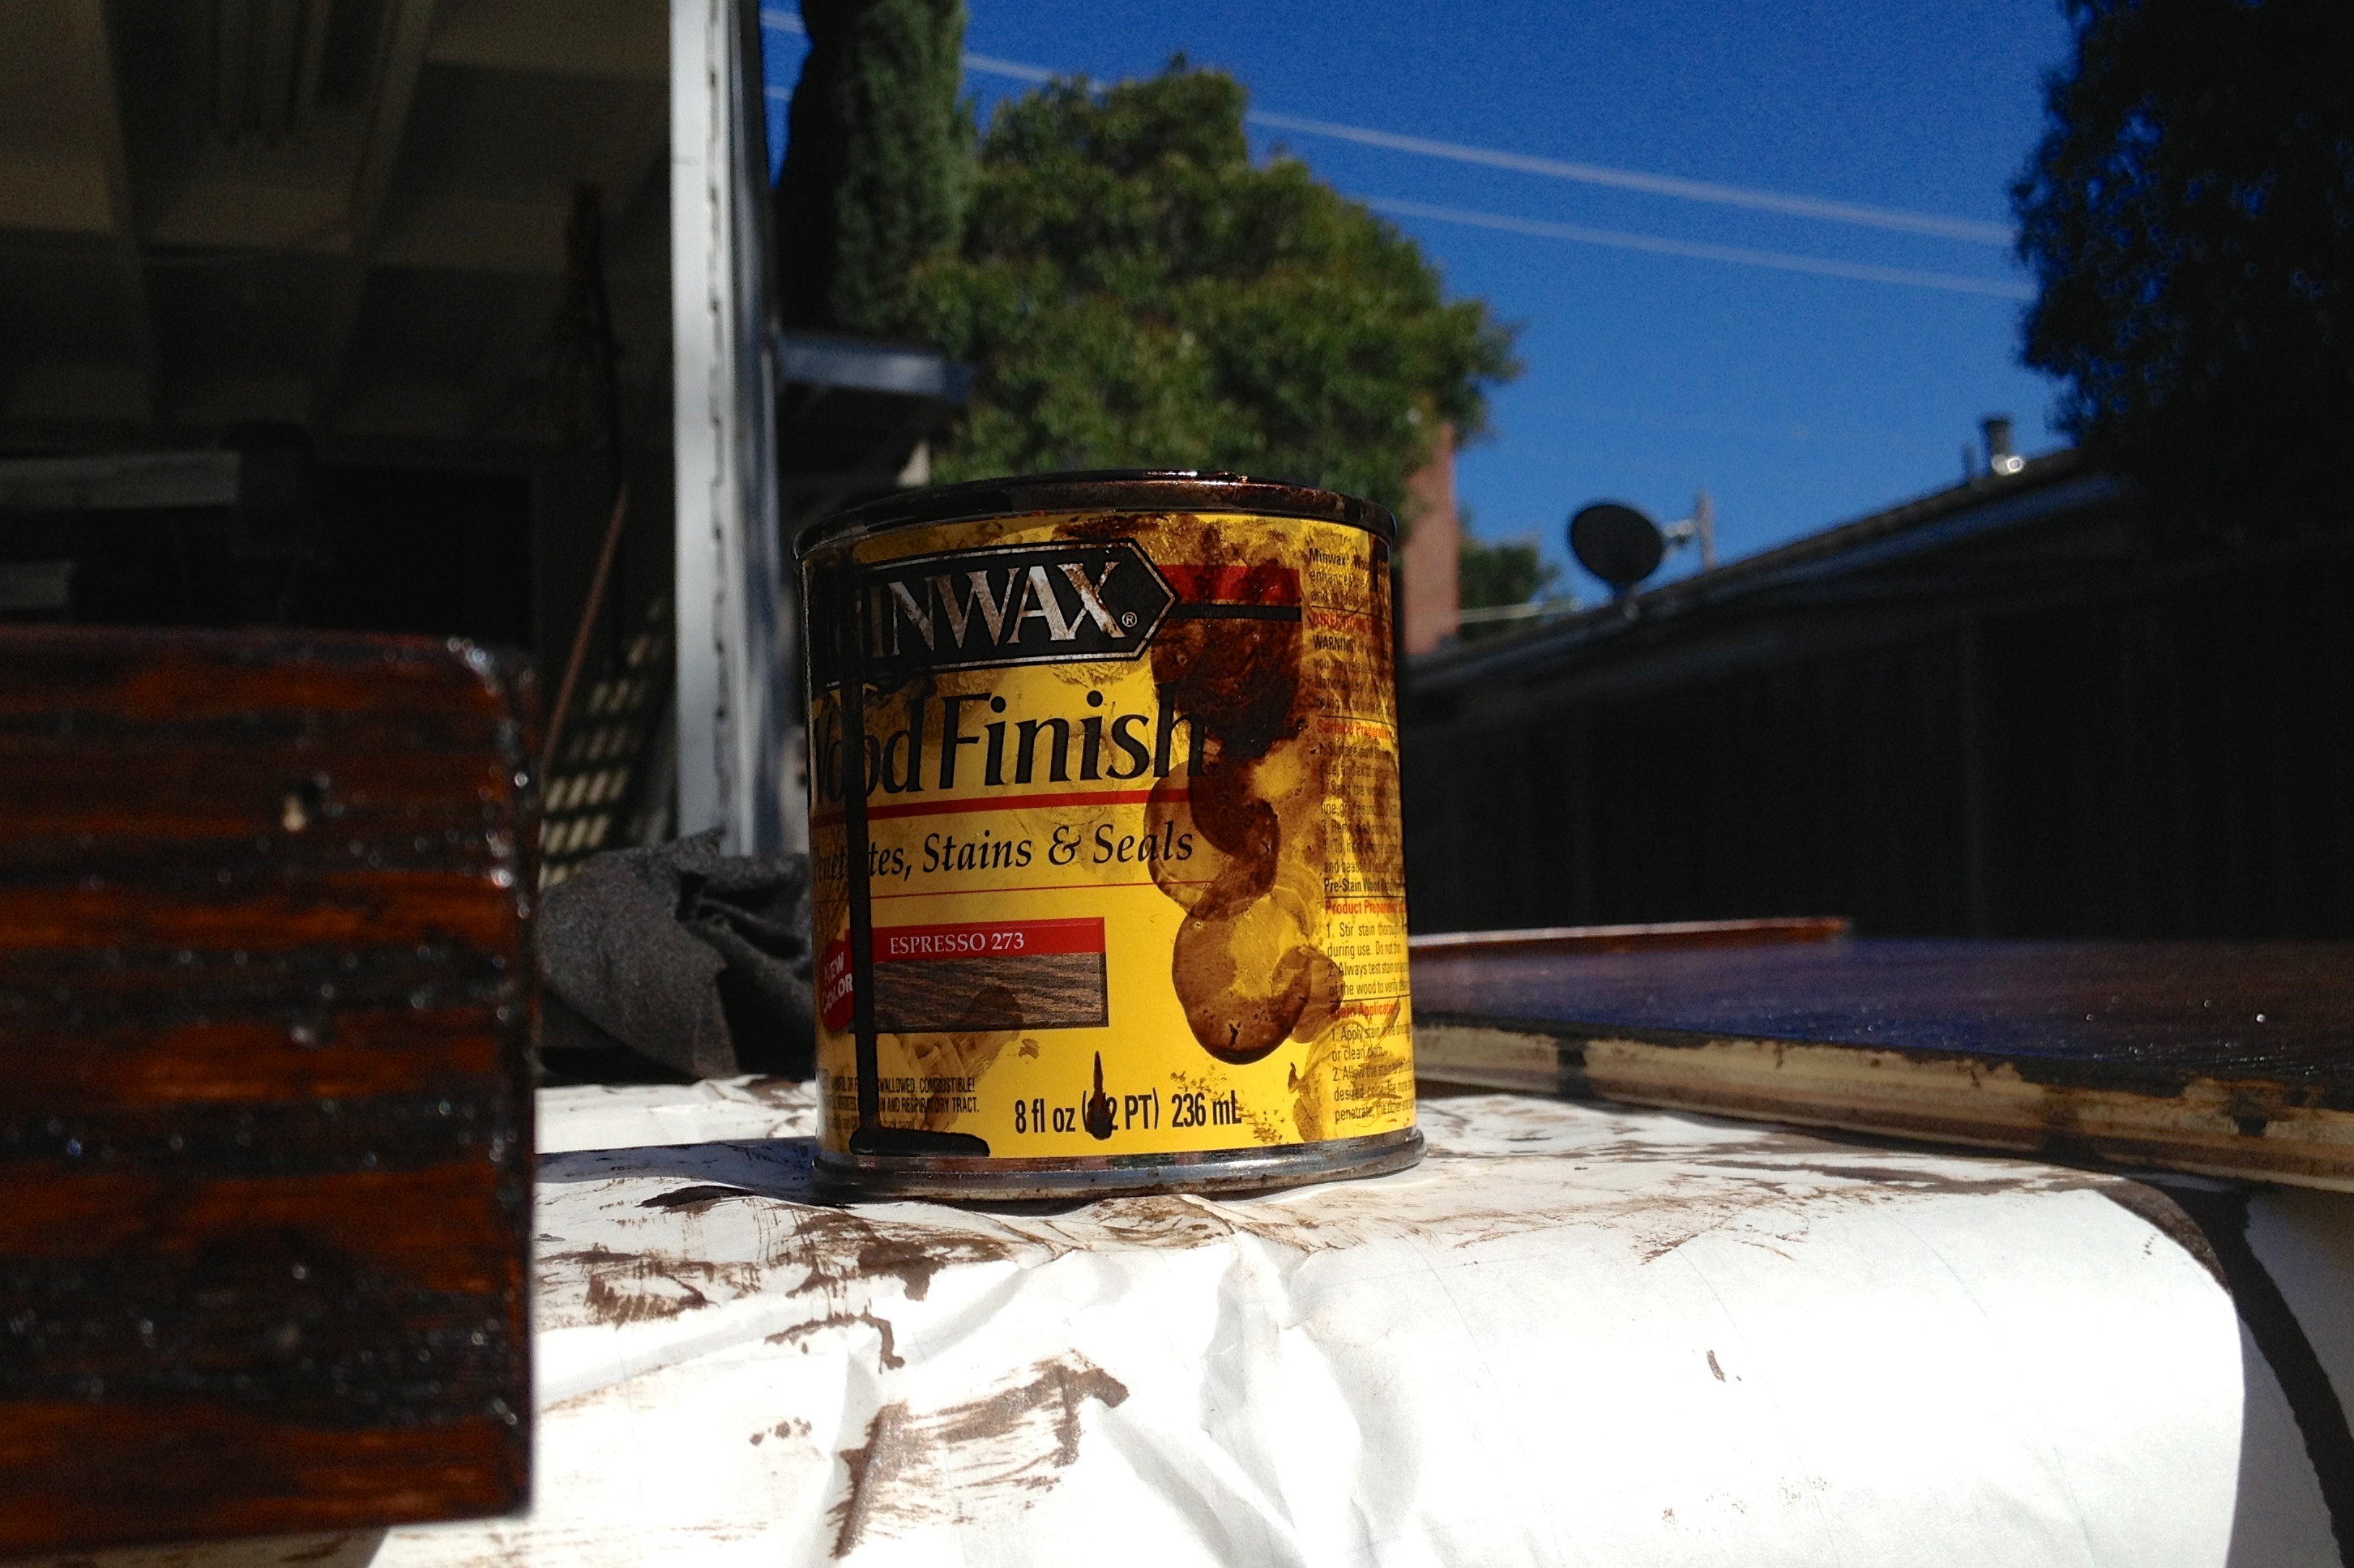
Mmmmm espresso. Oh, and you can see the two pieces of the box on either side of the can of finish.
While the box was drying, we started constructing the jars. We had to drill a large hole in the center of each jar lid (for the light bulb and string to go through) and several small holes for heat to escape through. Have you ever tried to put a round hole in the dead center of a round lid? Sounds pretty easy, but it’s actually surprisingly difficult. Justin ended up making a template and printing it out, making the process a lot smoother!
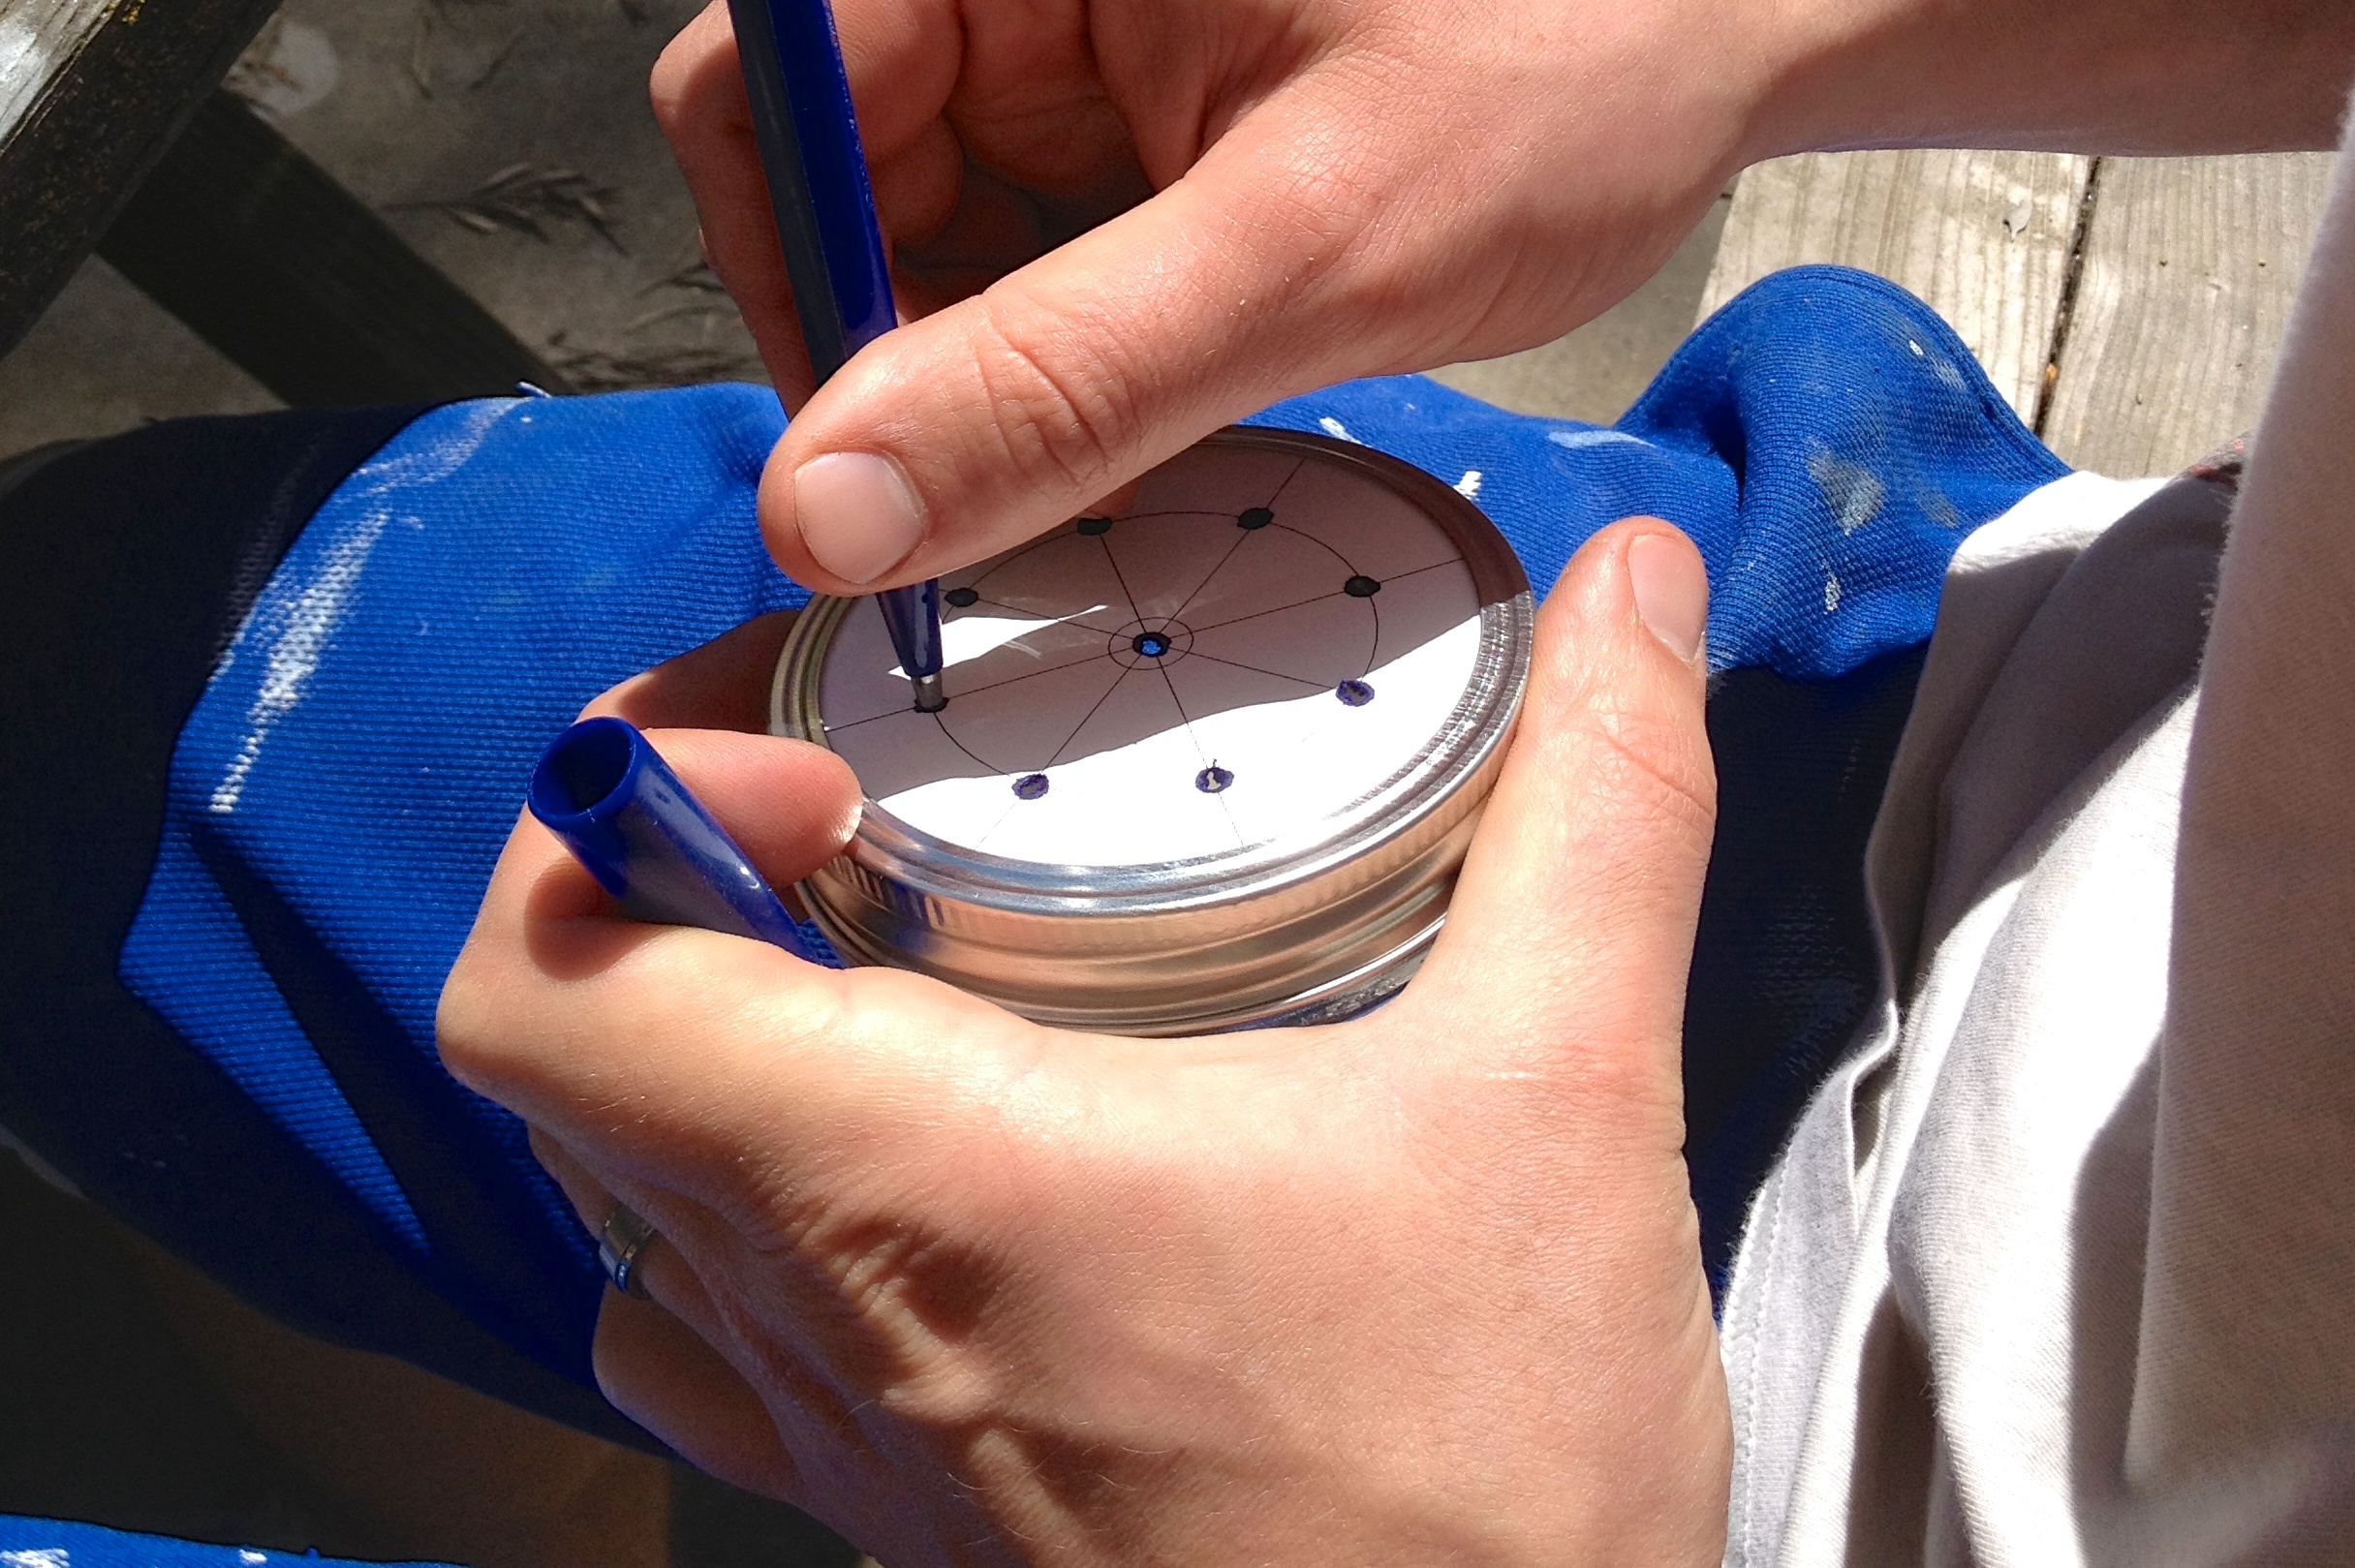
Impromptu template = huge time saver
With the holes, drilled, we assembled the jar lids, light bulb sockets (I have no idea if this is the proper term?), and fabric-wrapped wire from which the jars were to hang. We protected the wire to keep it clean during painting, and painted the jar-lid apparatuses (apparati?). We had decided in the design phase that we didn’t want to leave the jar lids and light bulb sockets silver. Instead, we wanted them to match the fabric-wrapped wire and at least somewhat match the espresso stained wood. In essence, we wanted everything to be a shade of dark brown so the light reflecting from the bulbs would be warmer and less metallic.
Painted jar lid ensembles
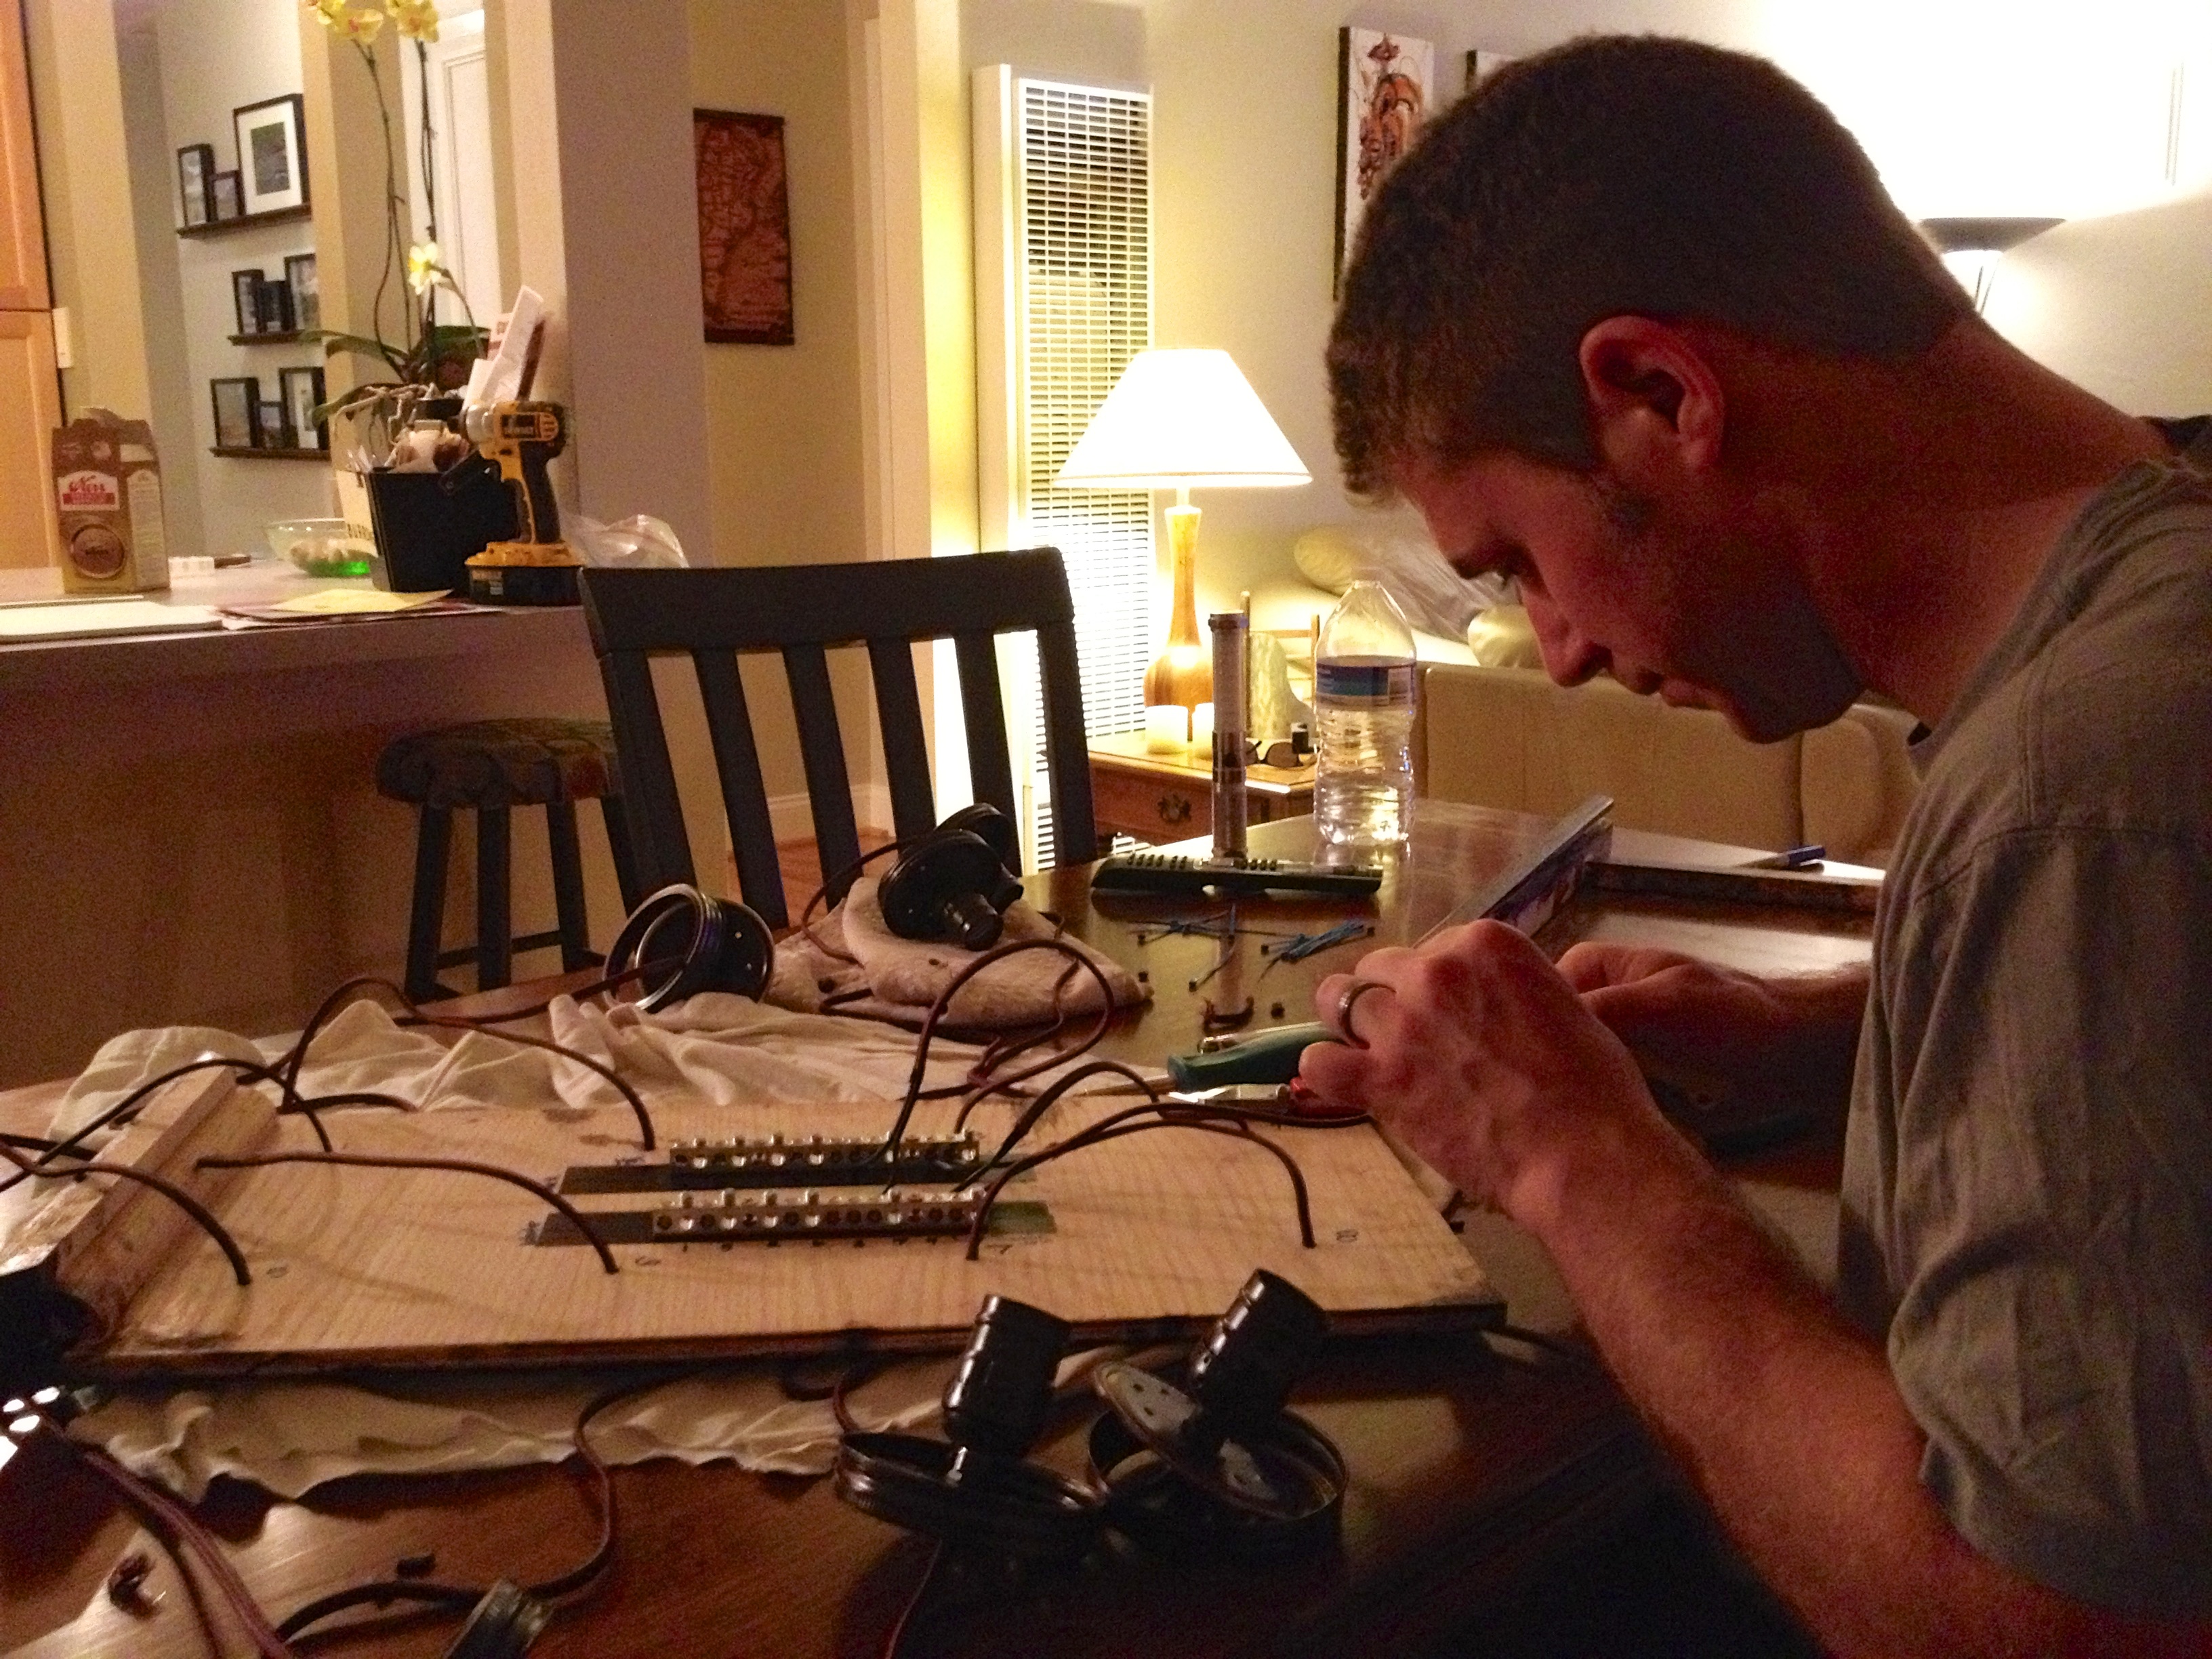
Now that we had all the pieces built/assembled/procured, it was time for the electrical work, that I know not much about. I’ll just show you a few photos and tell you that there was some swearing and lots of time spent in the attic. However, there were no electrocutions and the junction box relocation was successful, so all in all I would say things went rather well.
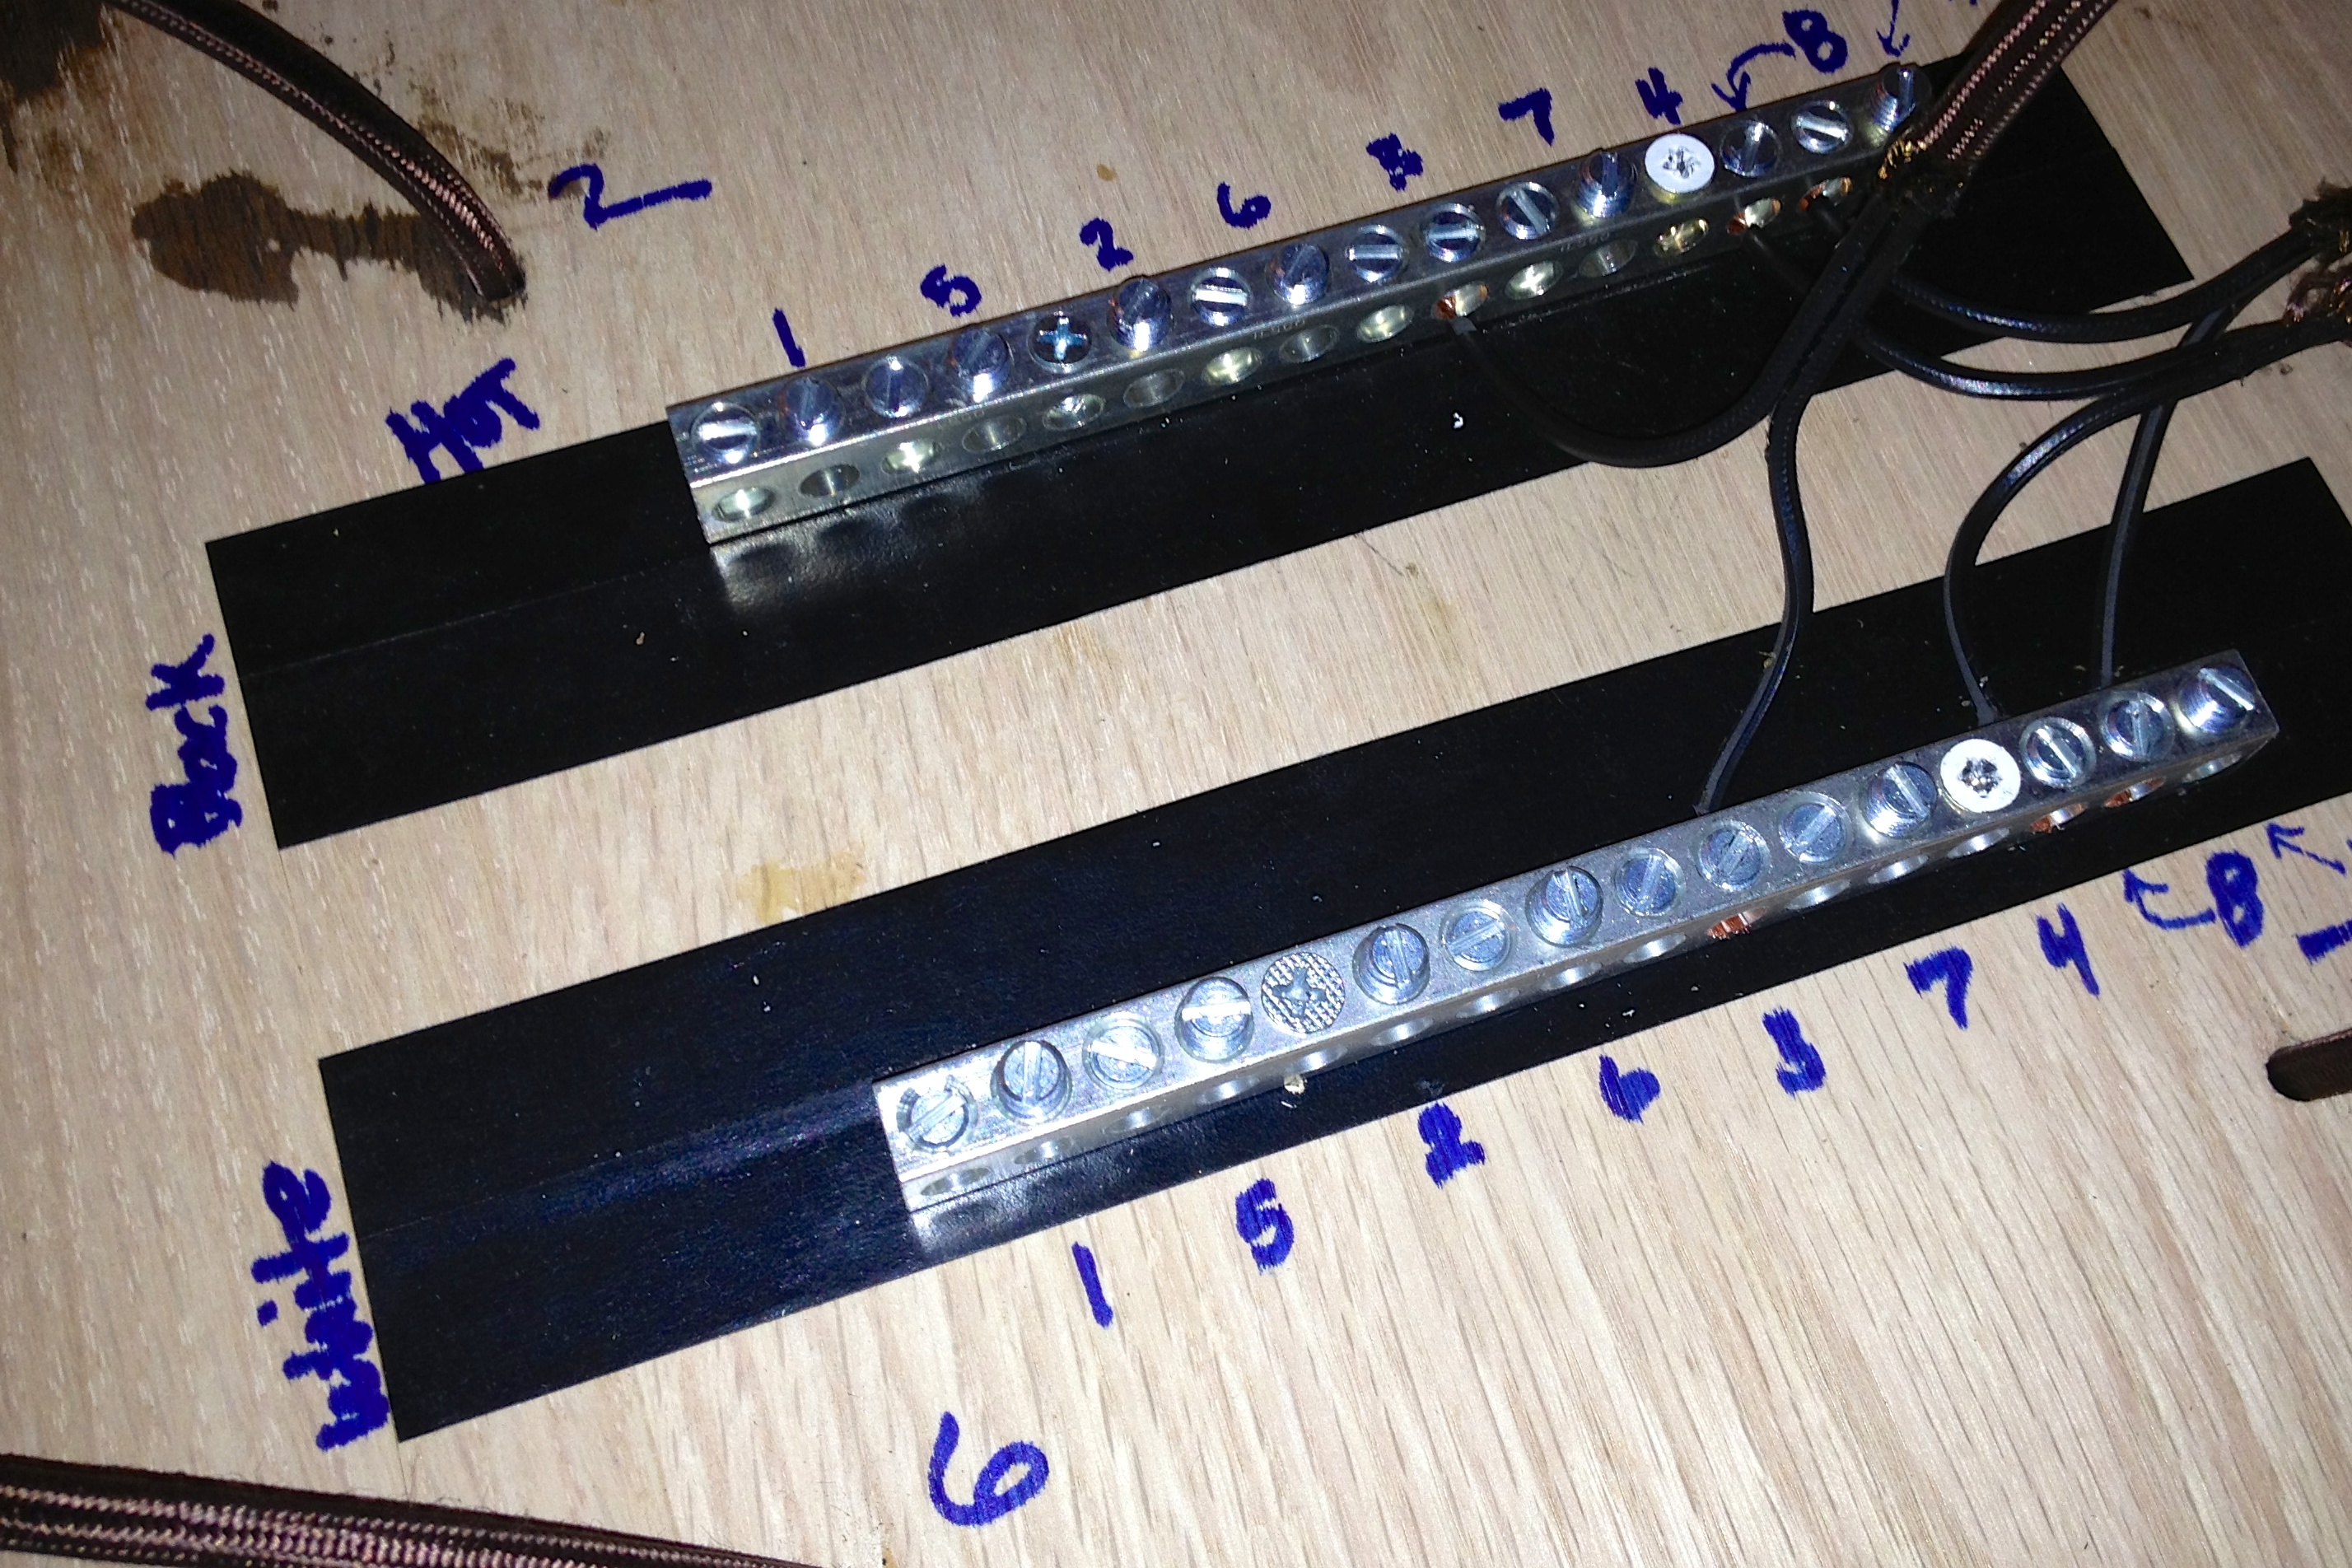
Electrical mumbo-jumbo. That’s all I have to say about that…
Chandelier, assemble!
We had already decided where the chandelier was going to go, and had marked out exactly where the box would go on the ceiling. Now was the time to put it up! This was actually a relatively simple act, because Justin had designed it to be so. I just held up the box while Justin screwed it in, then slide in the second piece of the box to hide the wires, screws, junction box, etc., then we added the light bulbs, and finally the jars!
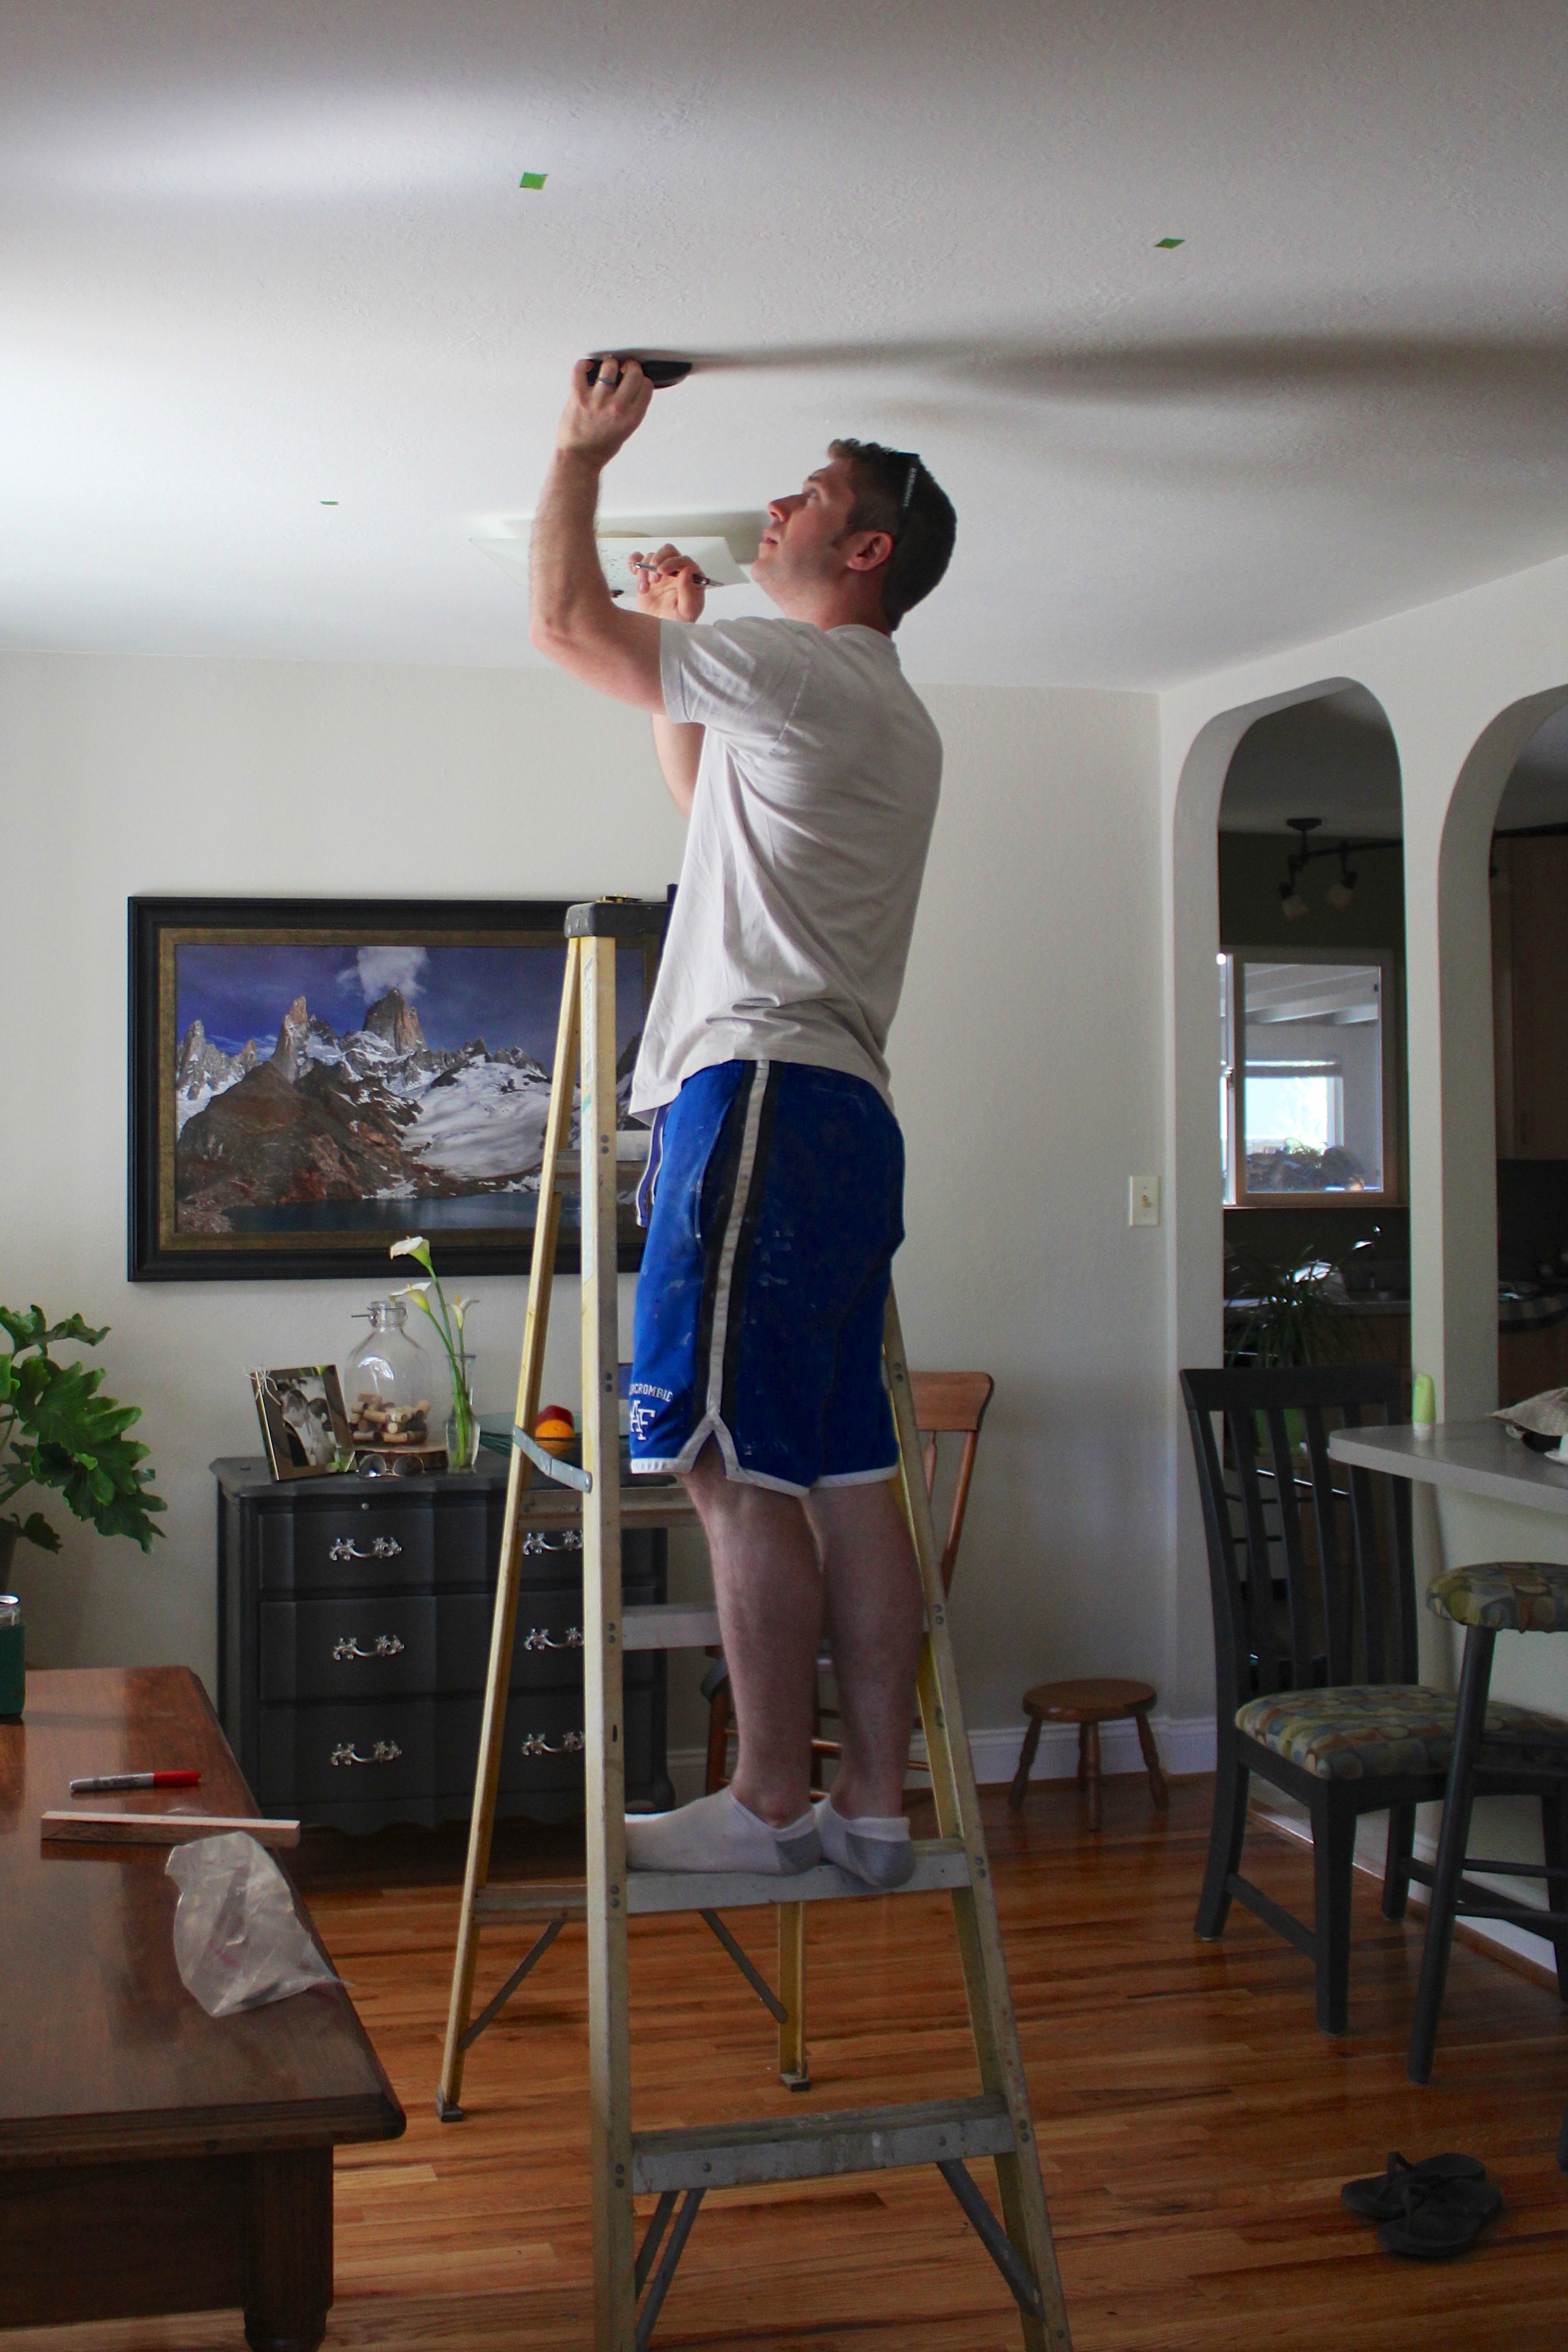
New chandelier location marked on the ceiling. If you look closely, you can see the old light fixture on the other side of Justin
Here you can really see the “box” construction. You know, how one piece slides into the other piece to hide all of the electrical uglies? Yeah, I know… there is probably a better way to describe that, but hopefully the picture helps!
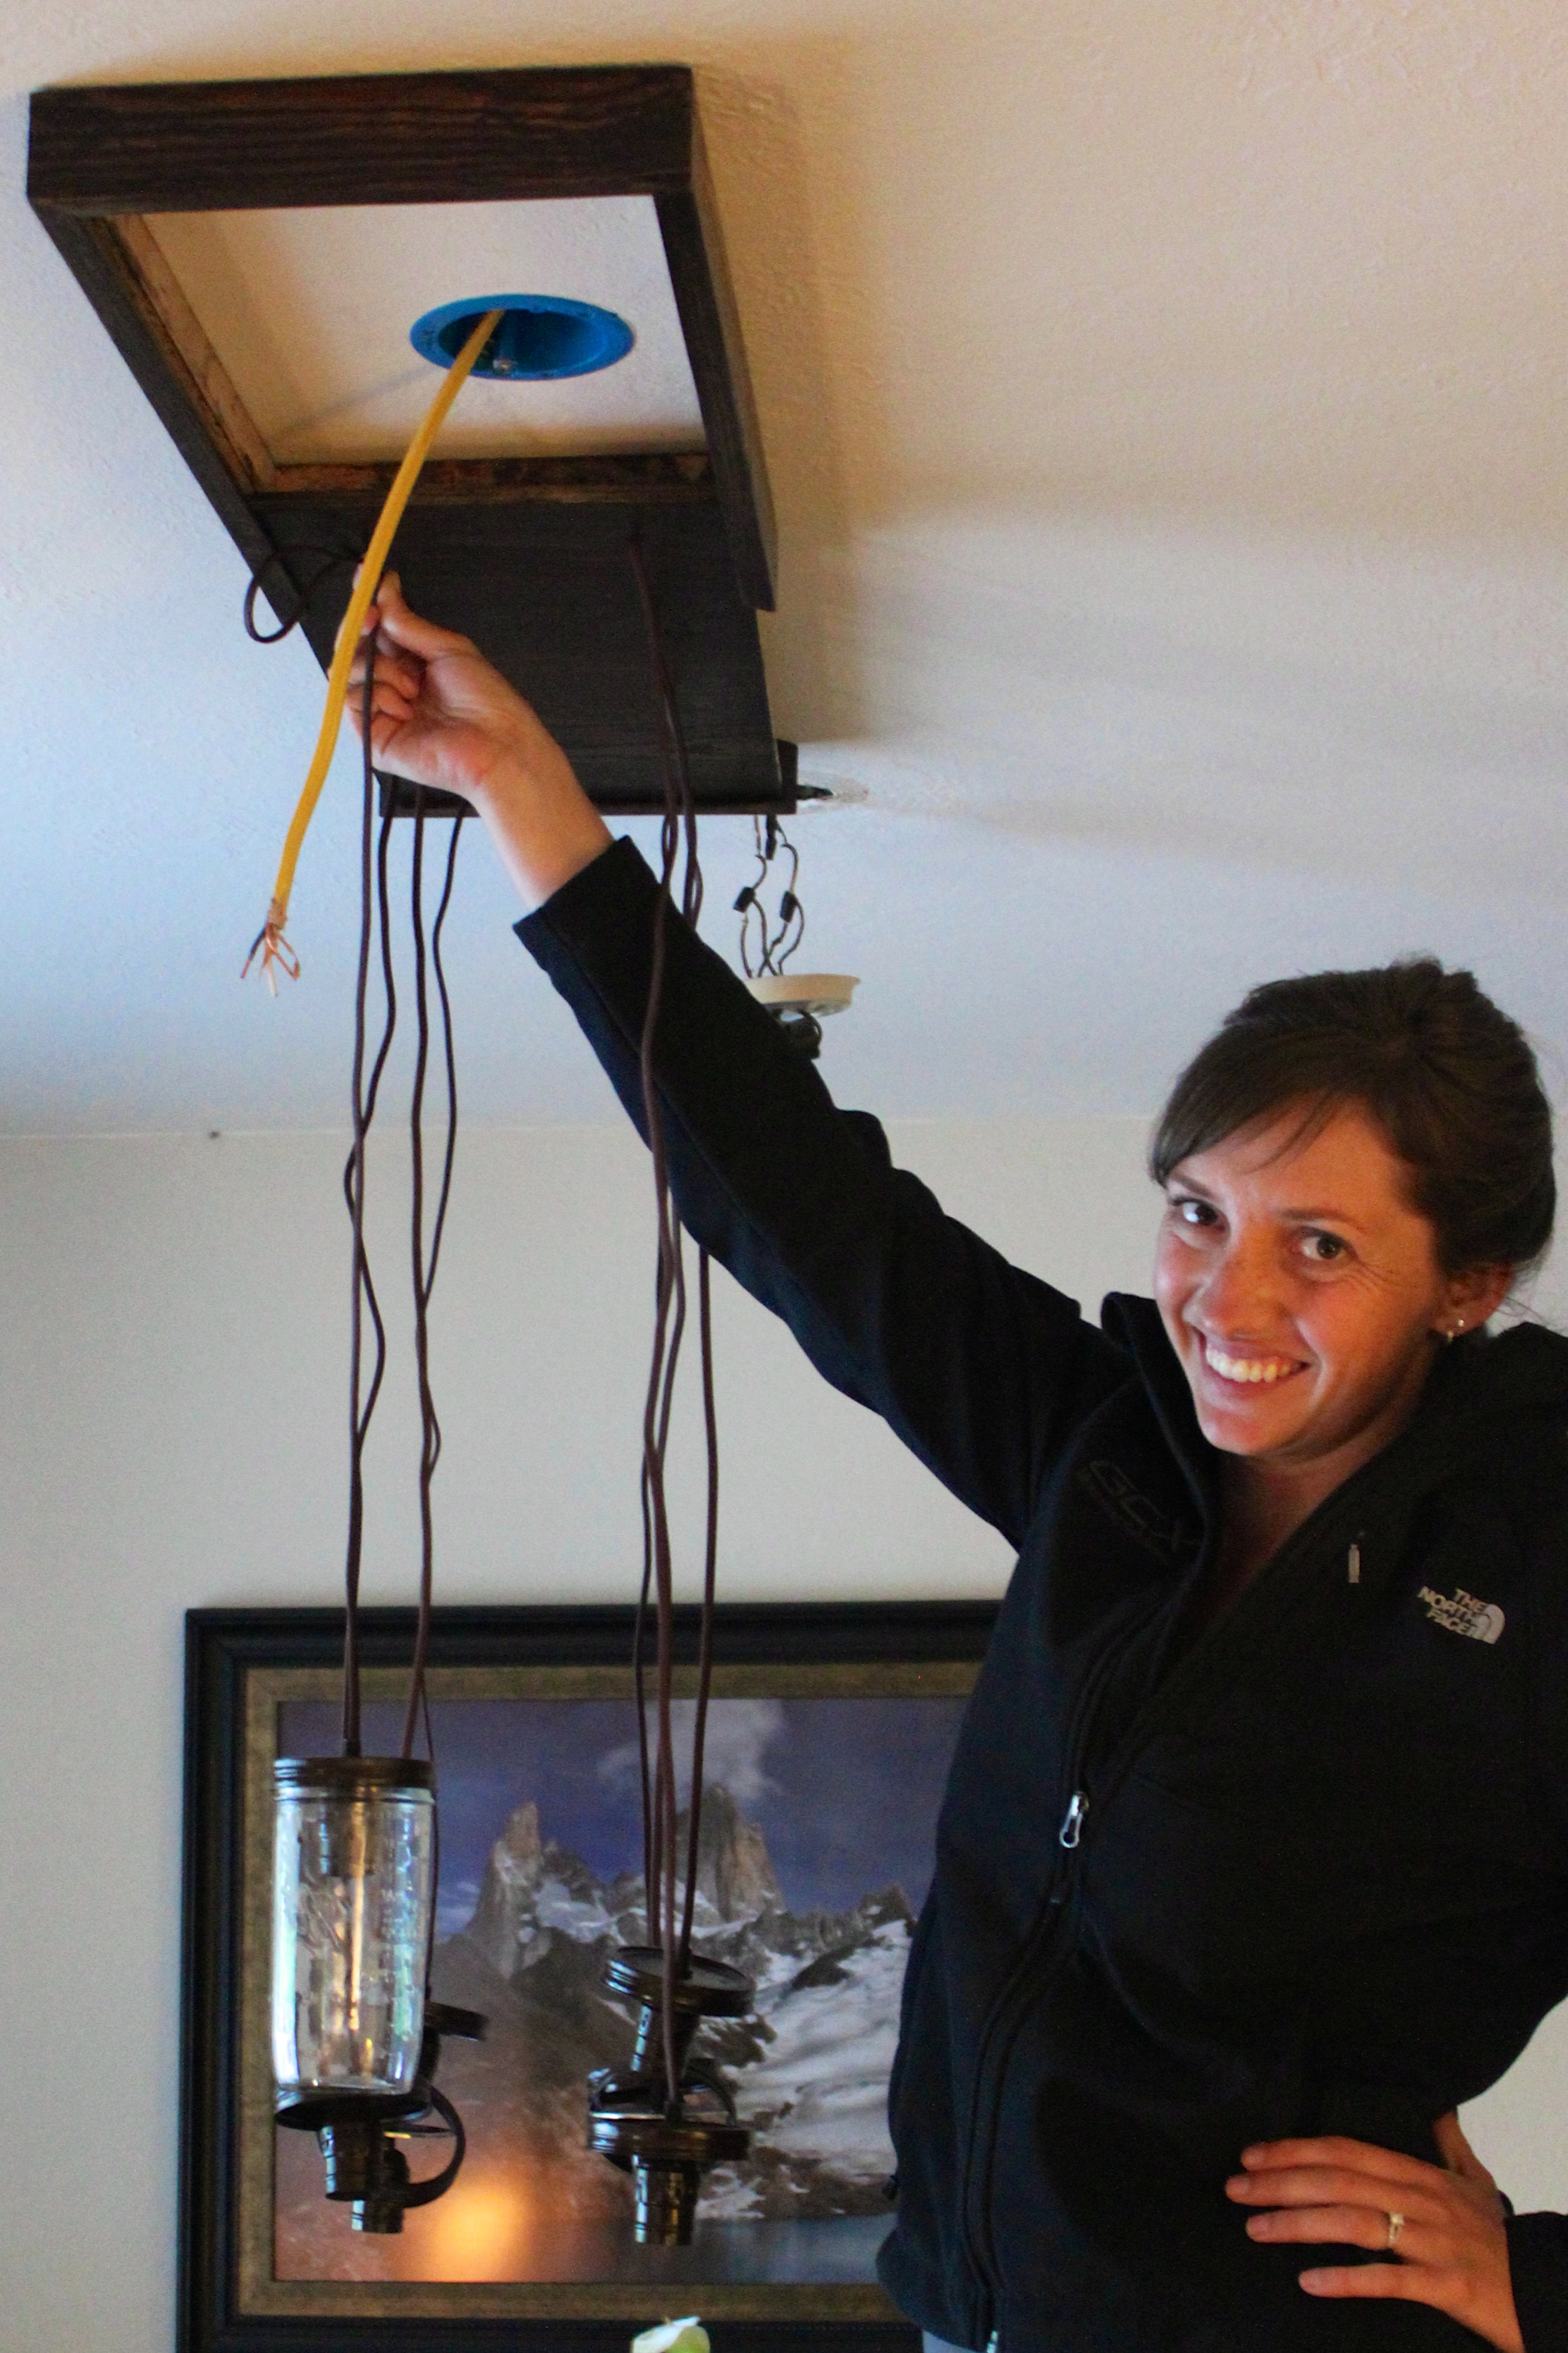
Determining the height of the jars
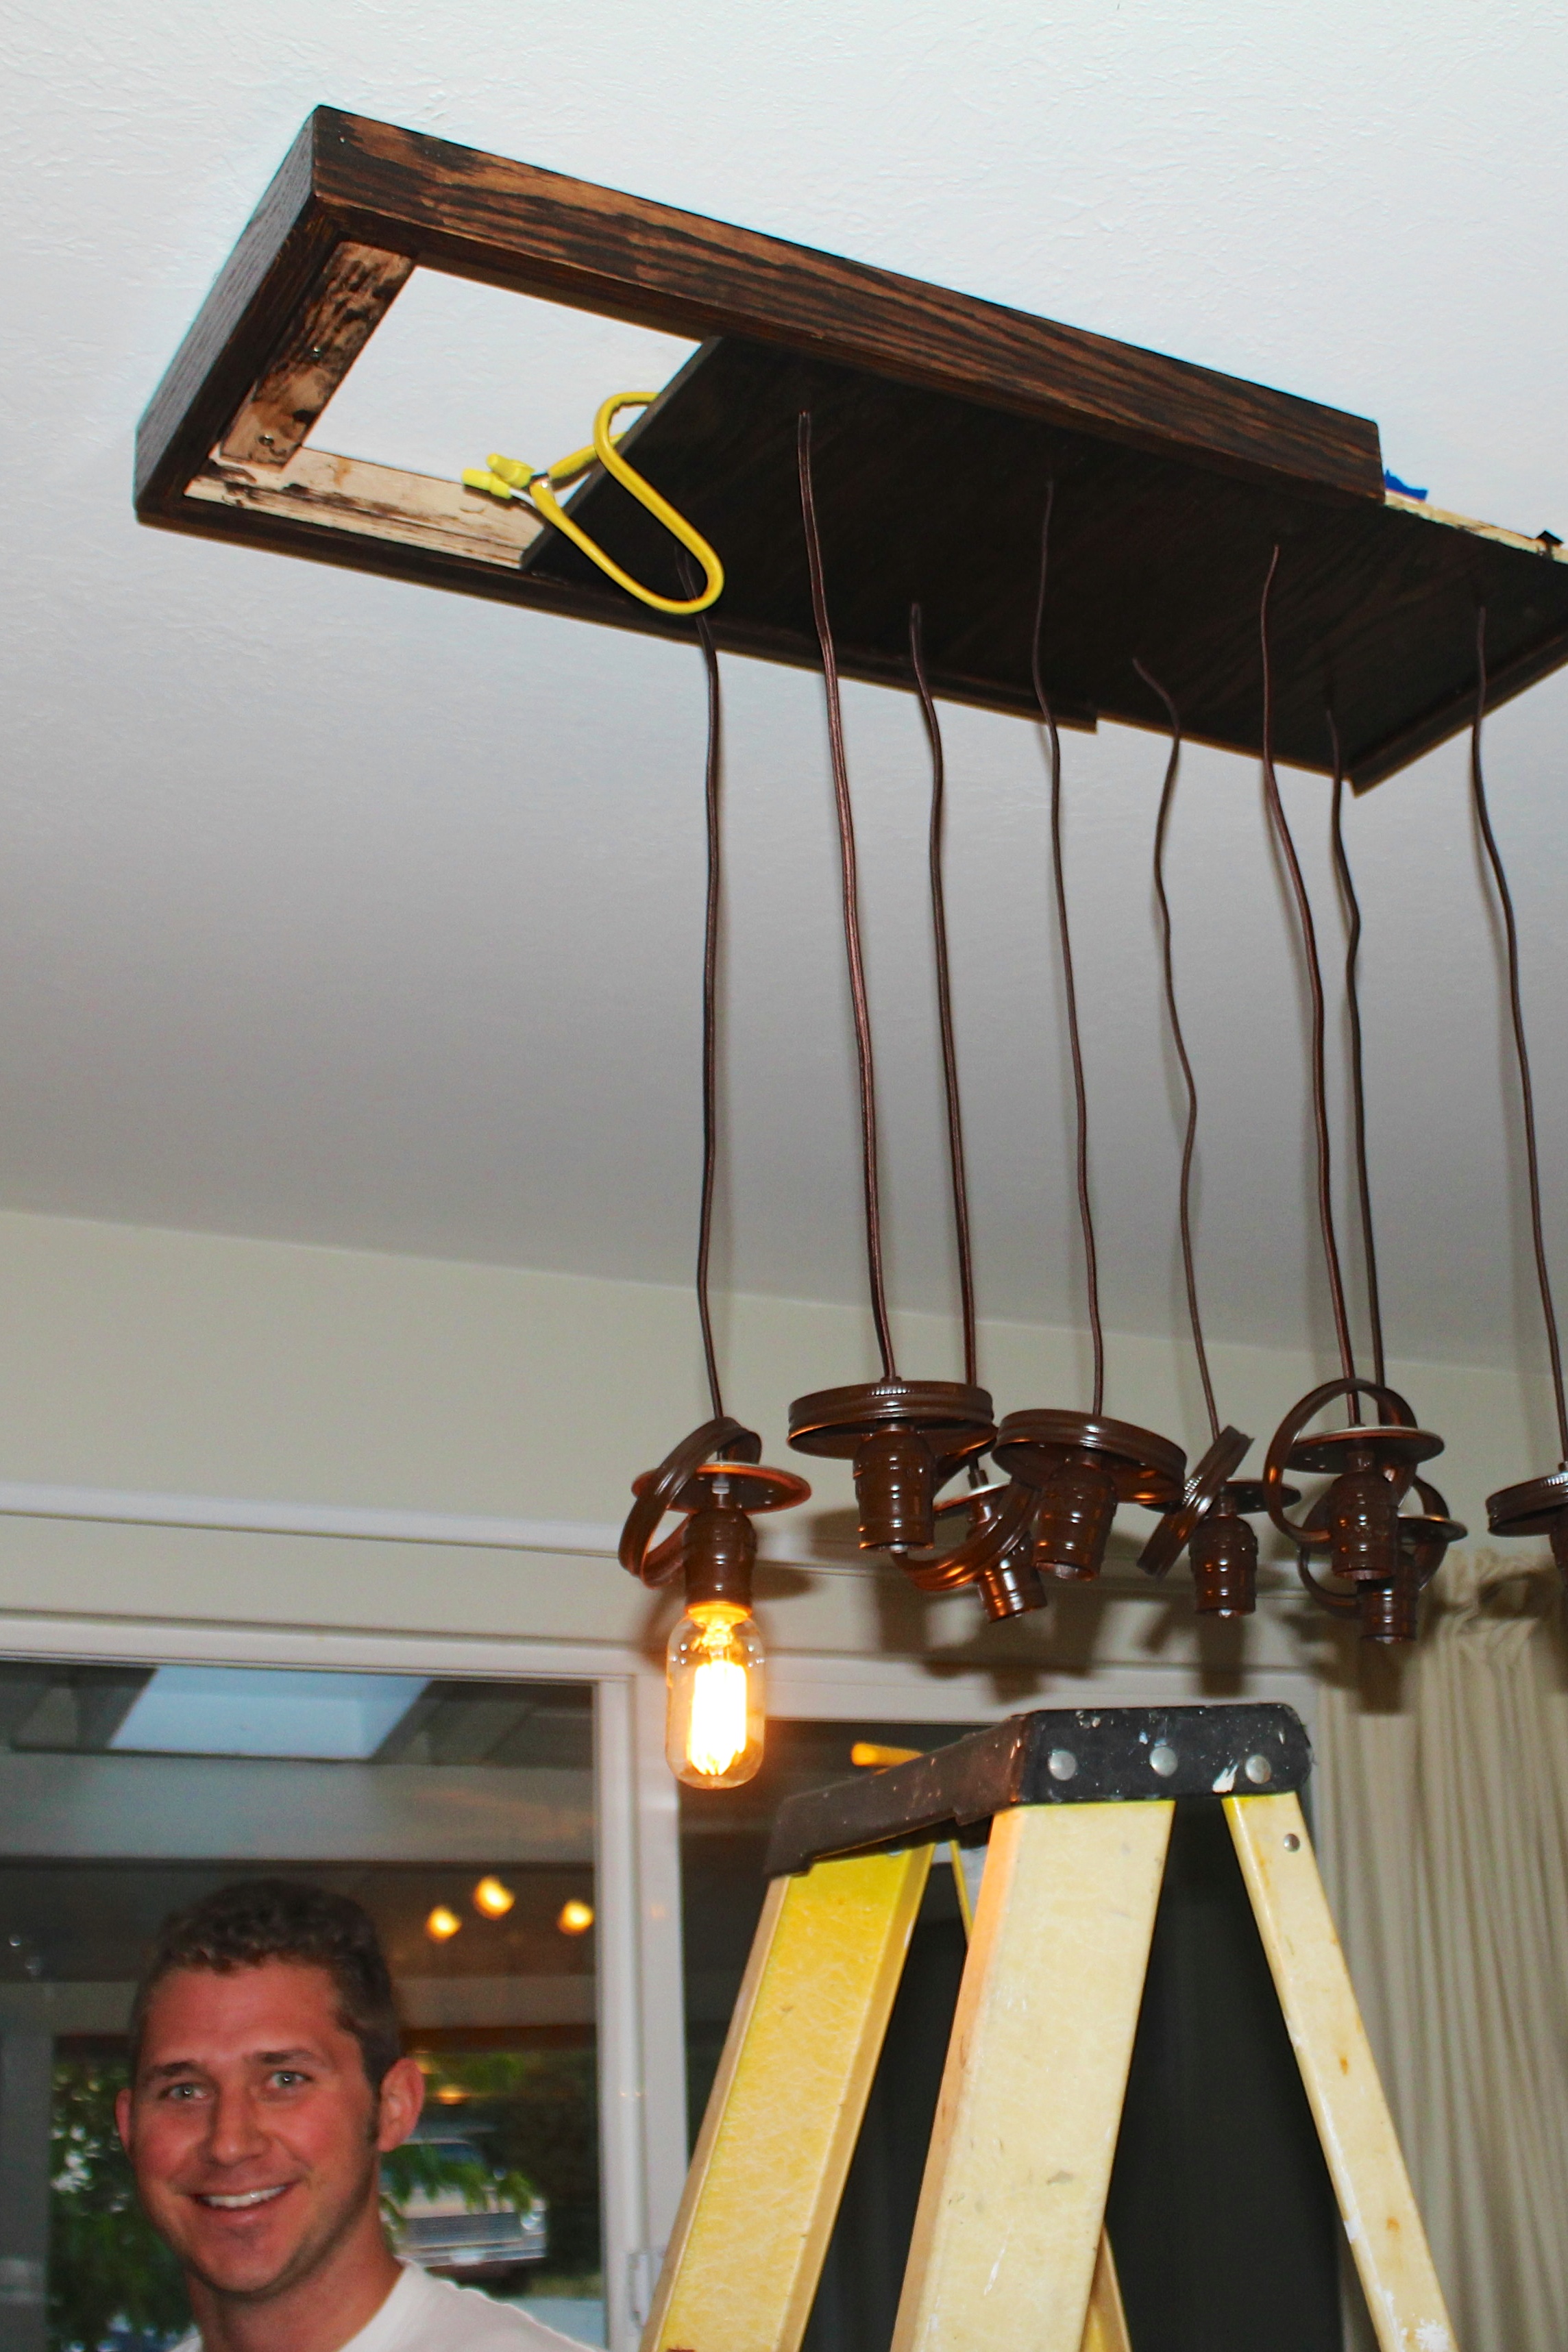
We screwed in the first light bulb and… ta-da! It worked!!! Justin was really excited. Actually, we did a little dance around the house at this point in the project 🙂
At the end of the weekend, we had this work of art:
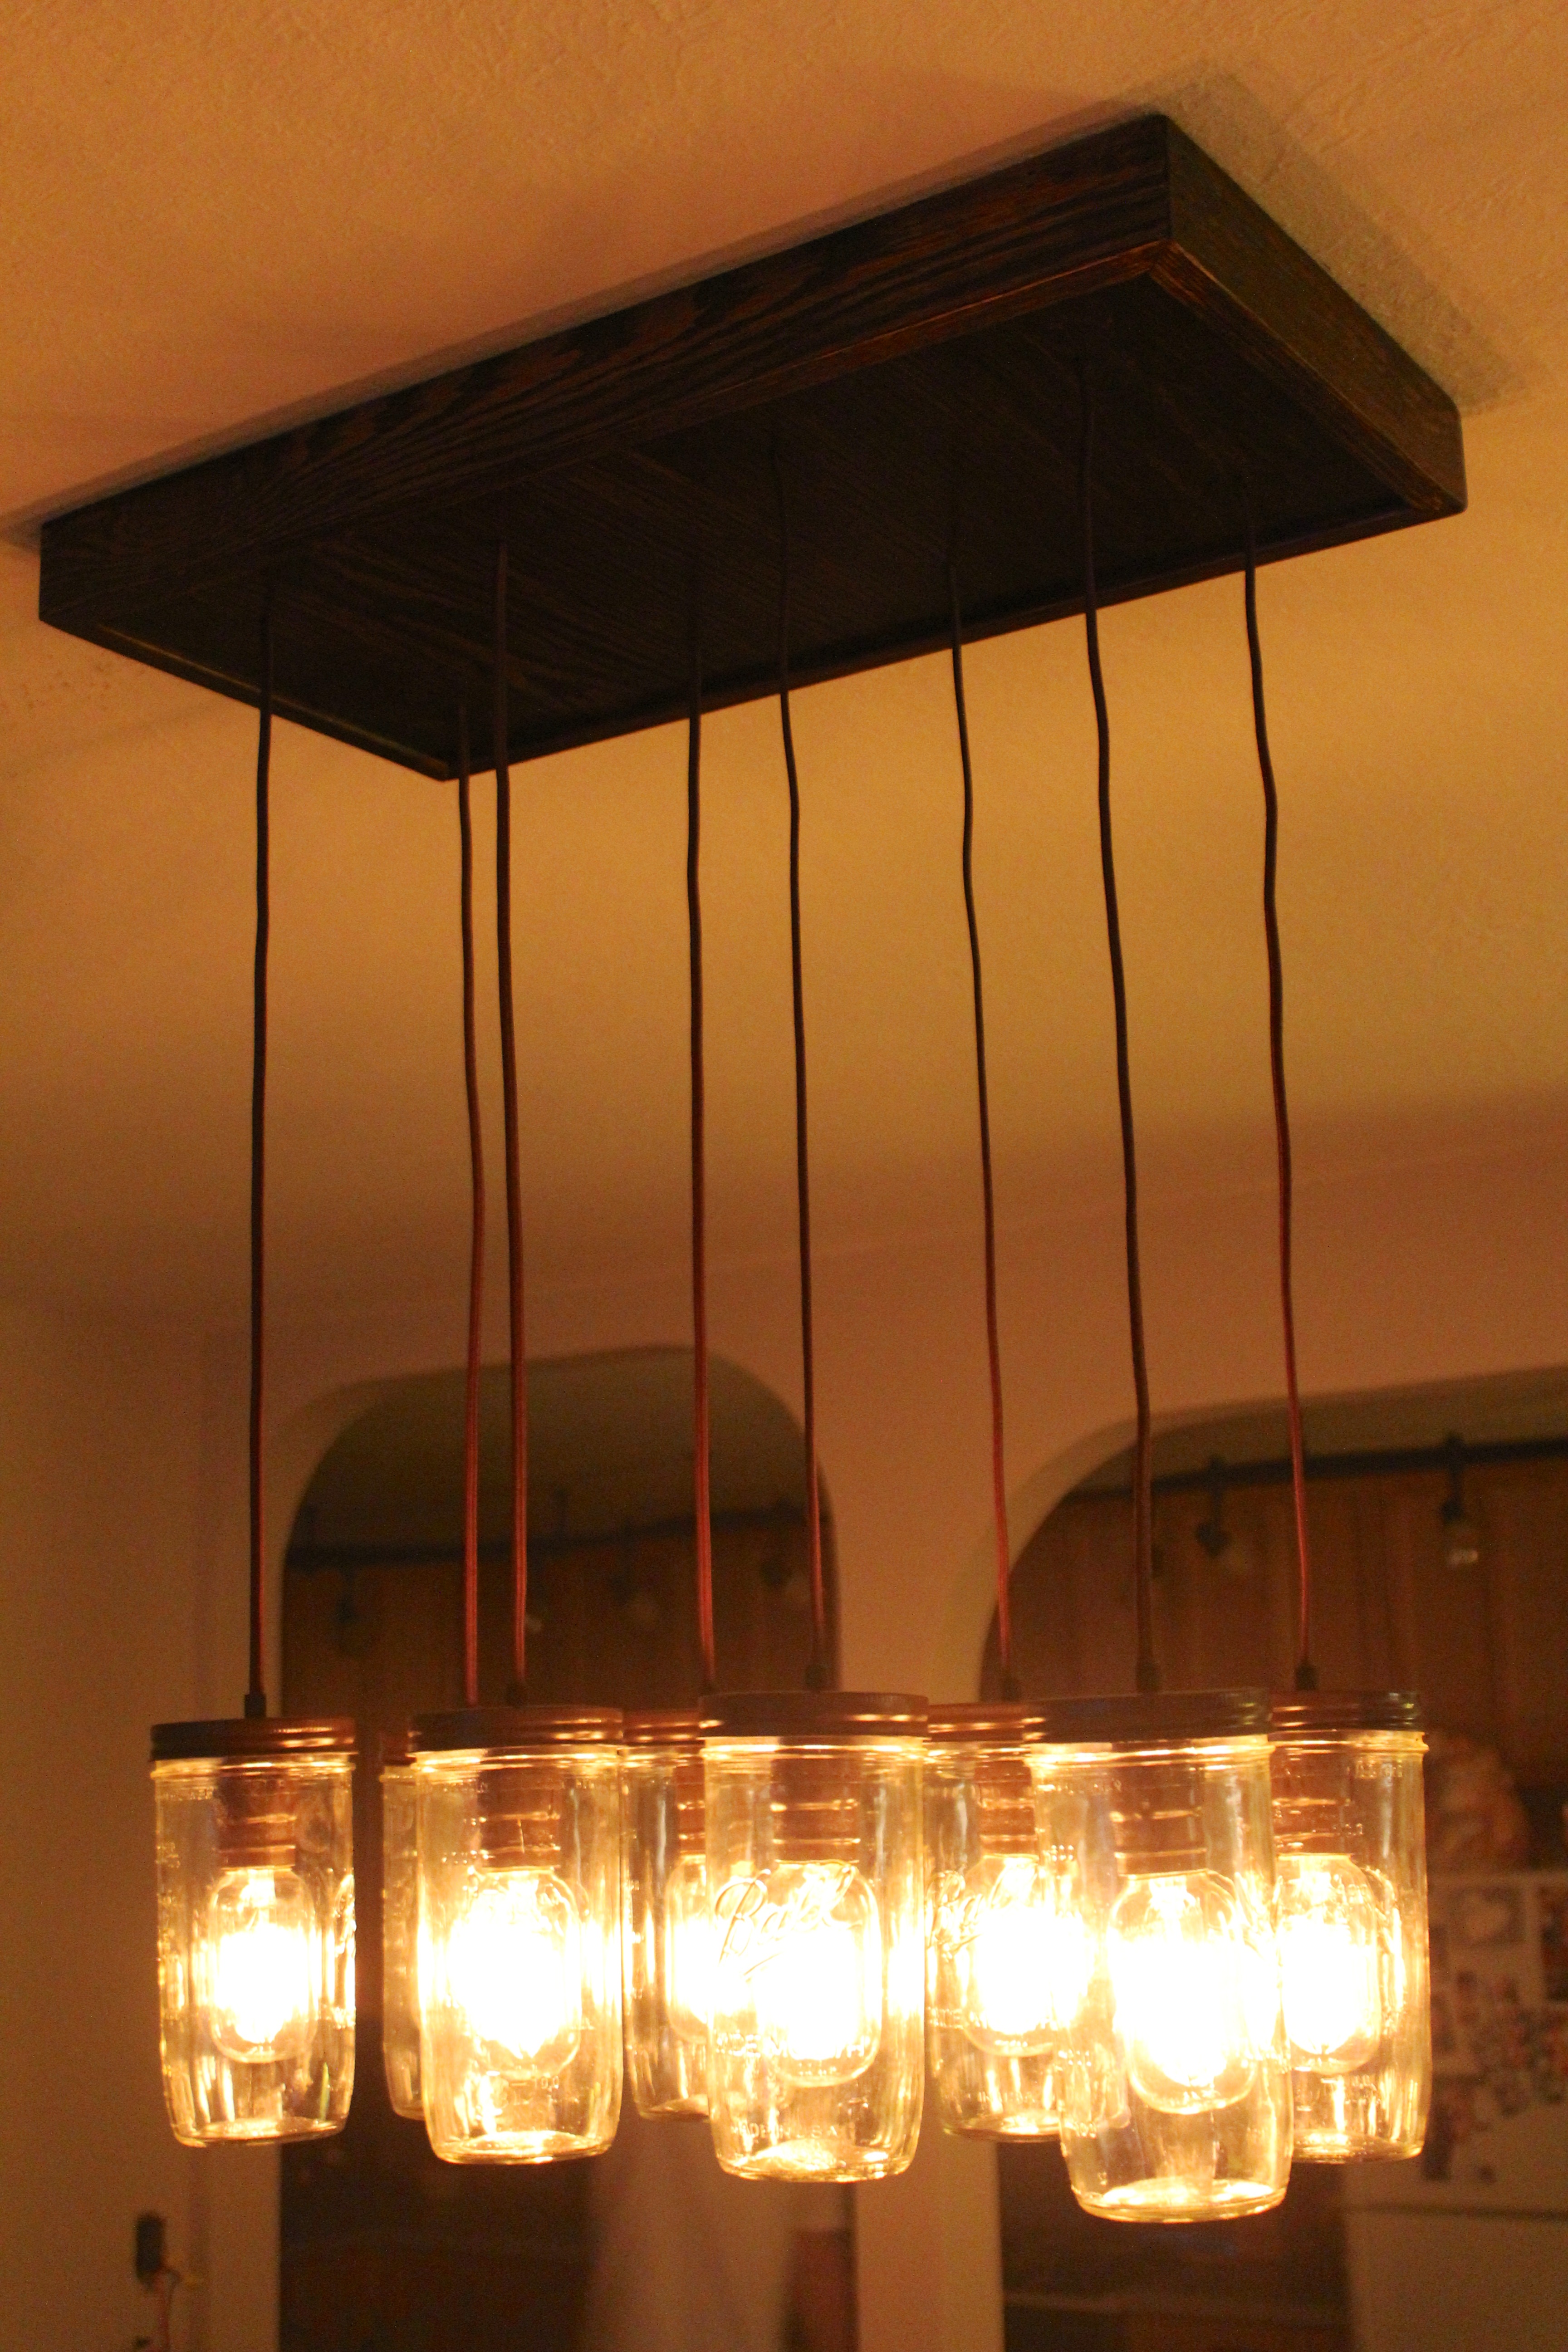
So pretty 🙂
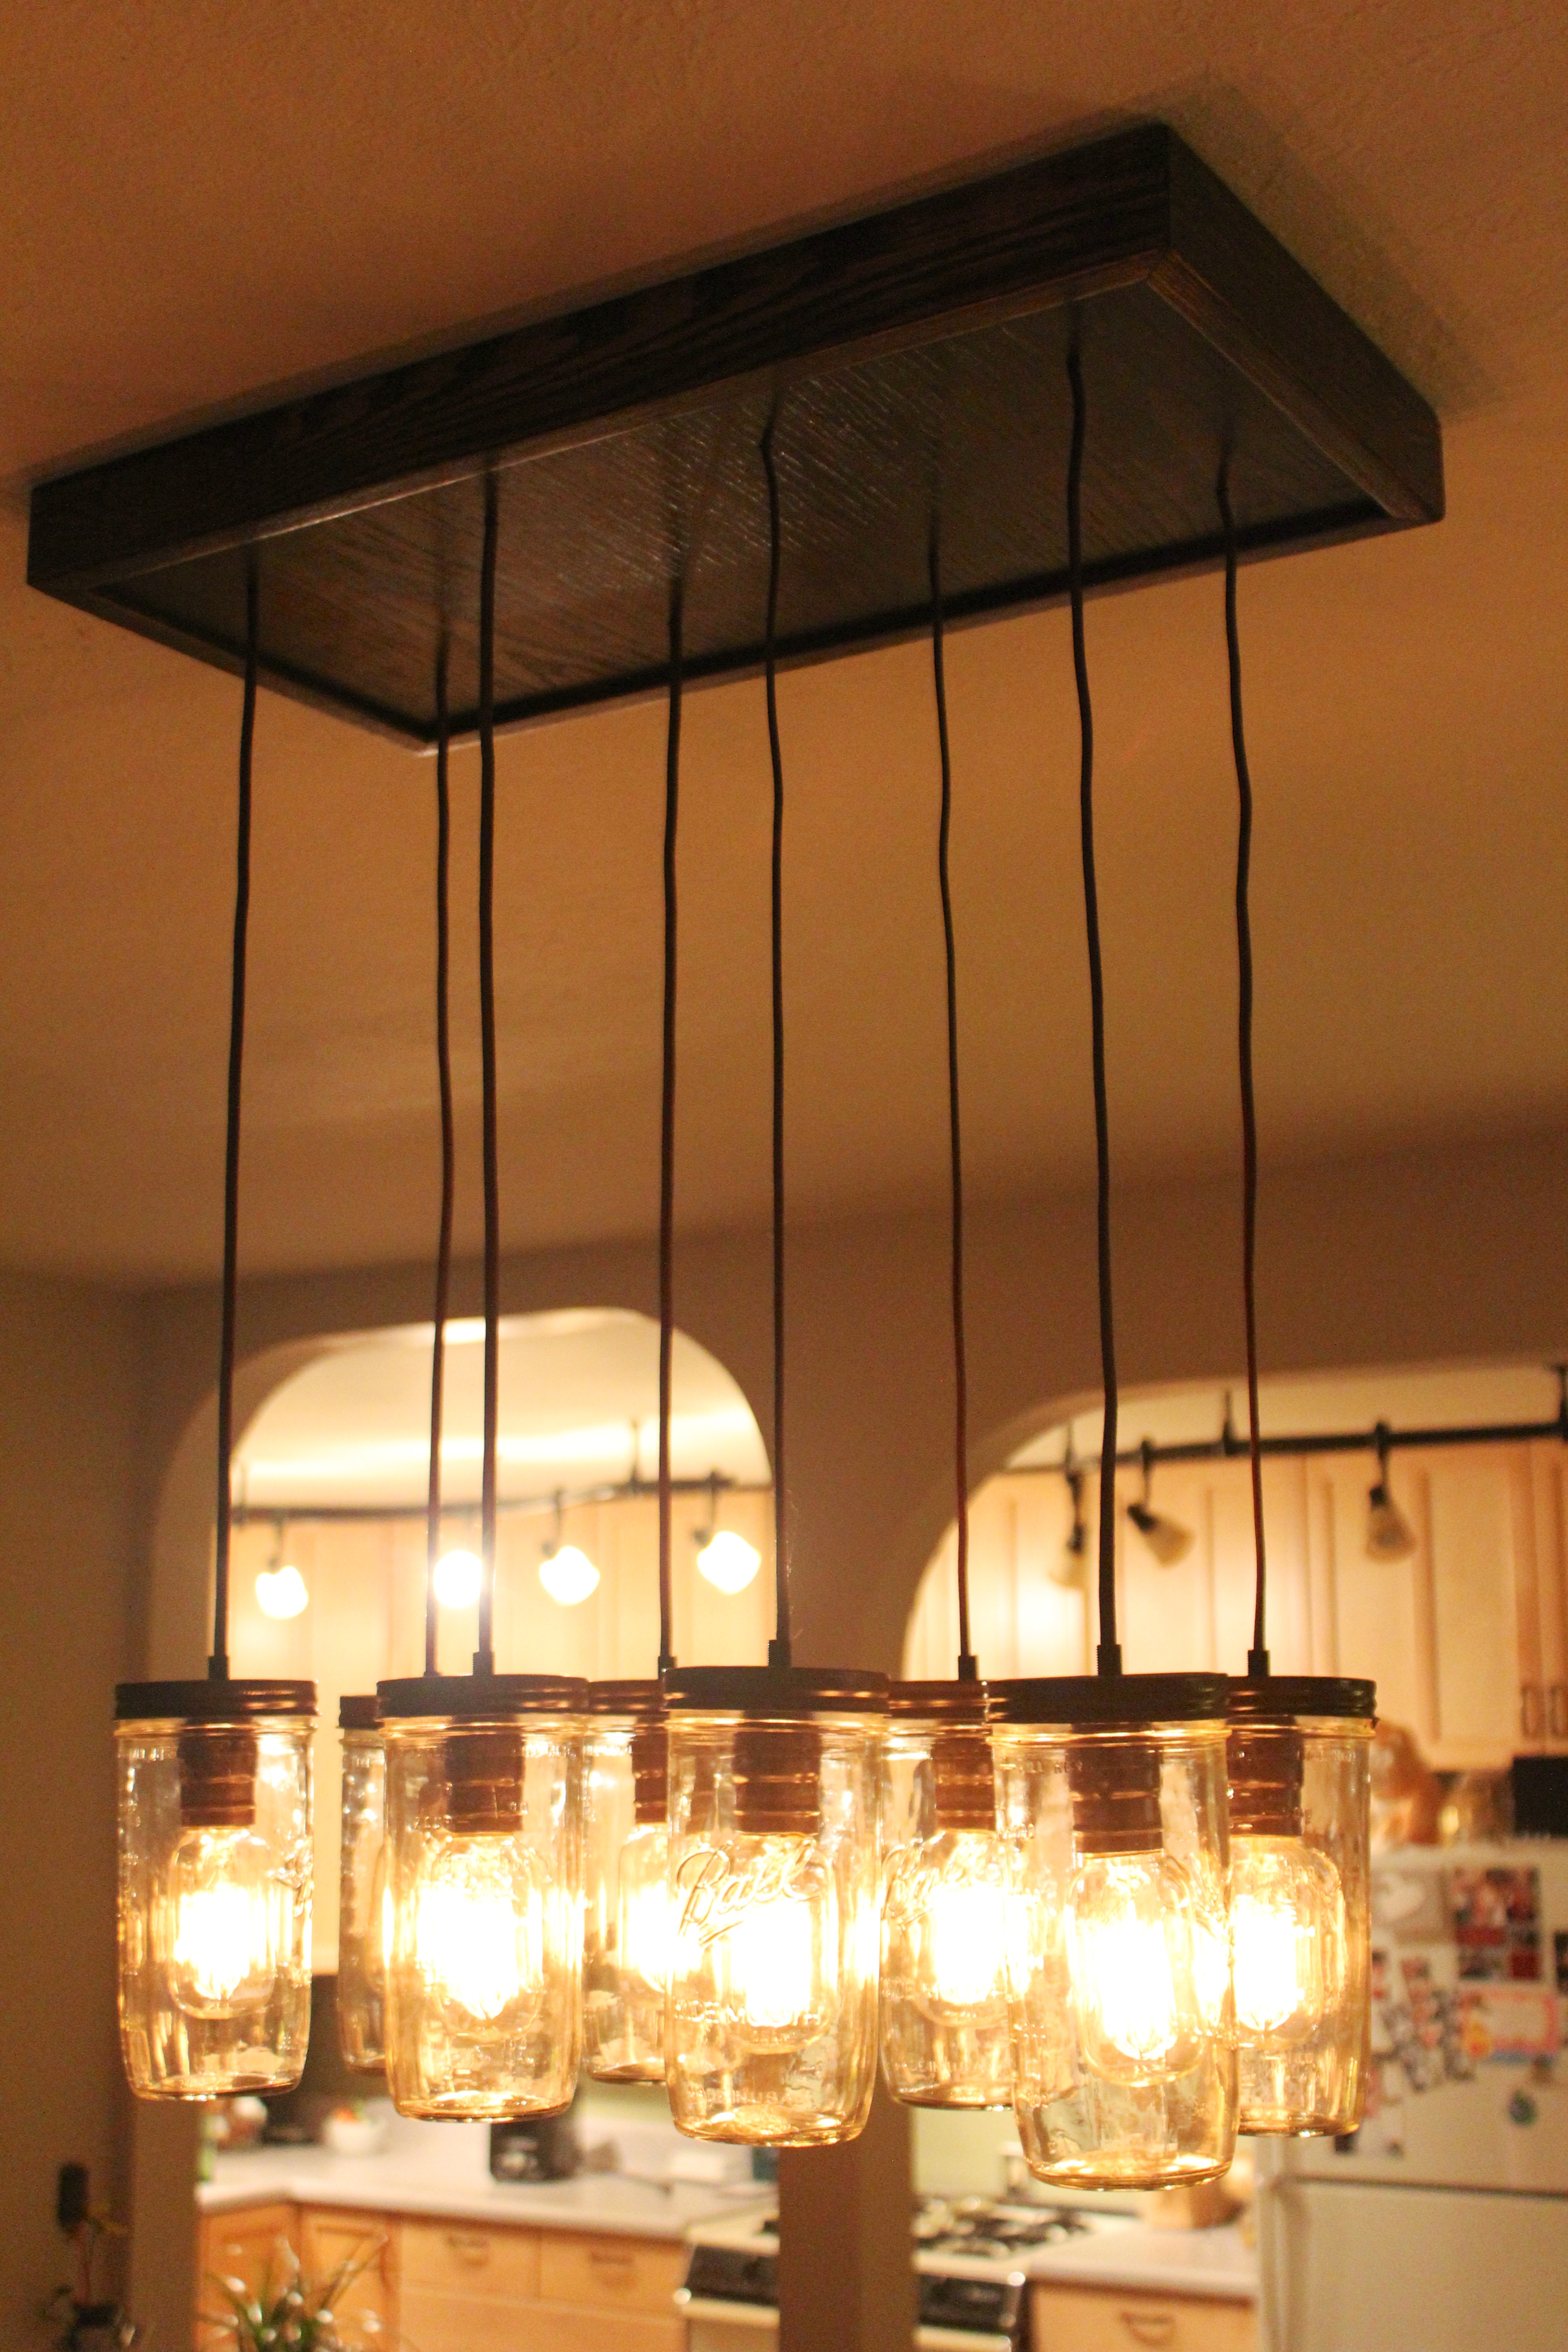
And with the kitchen lights on
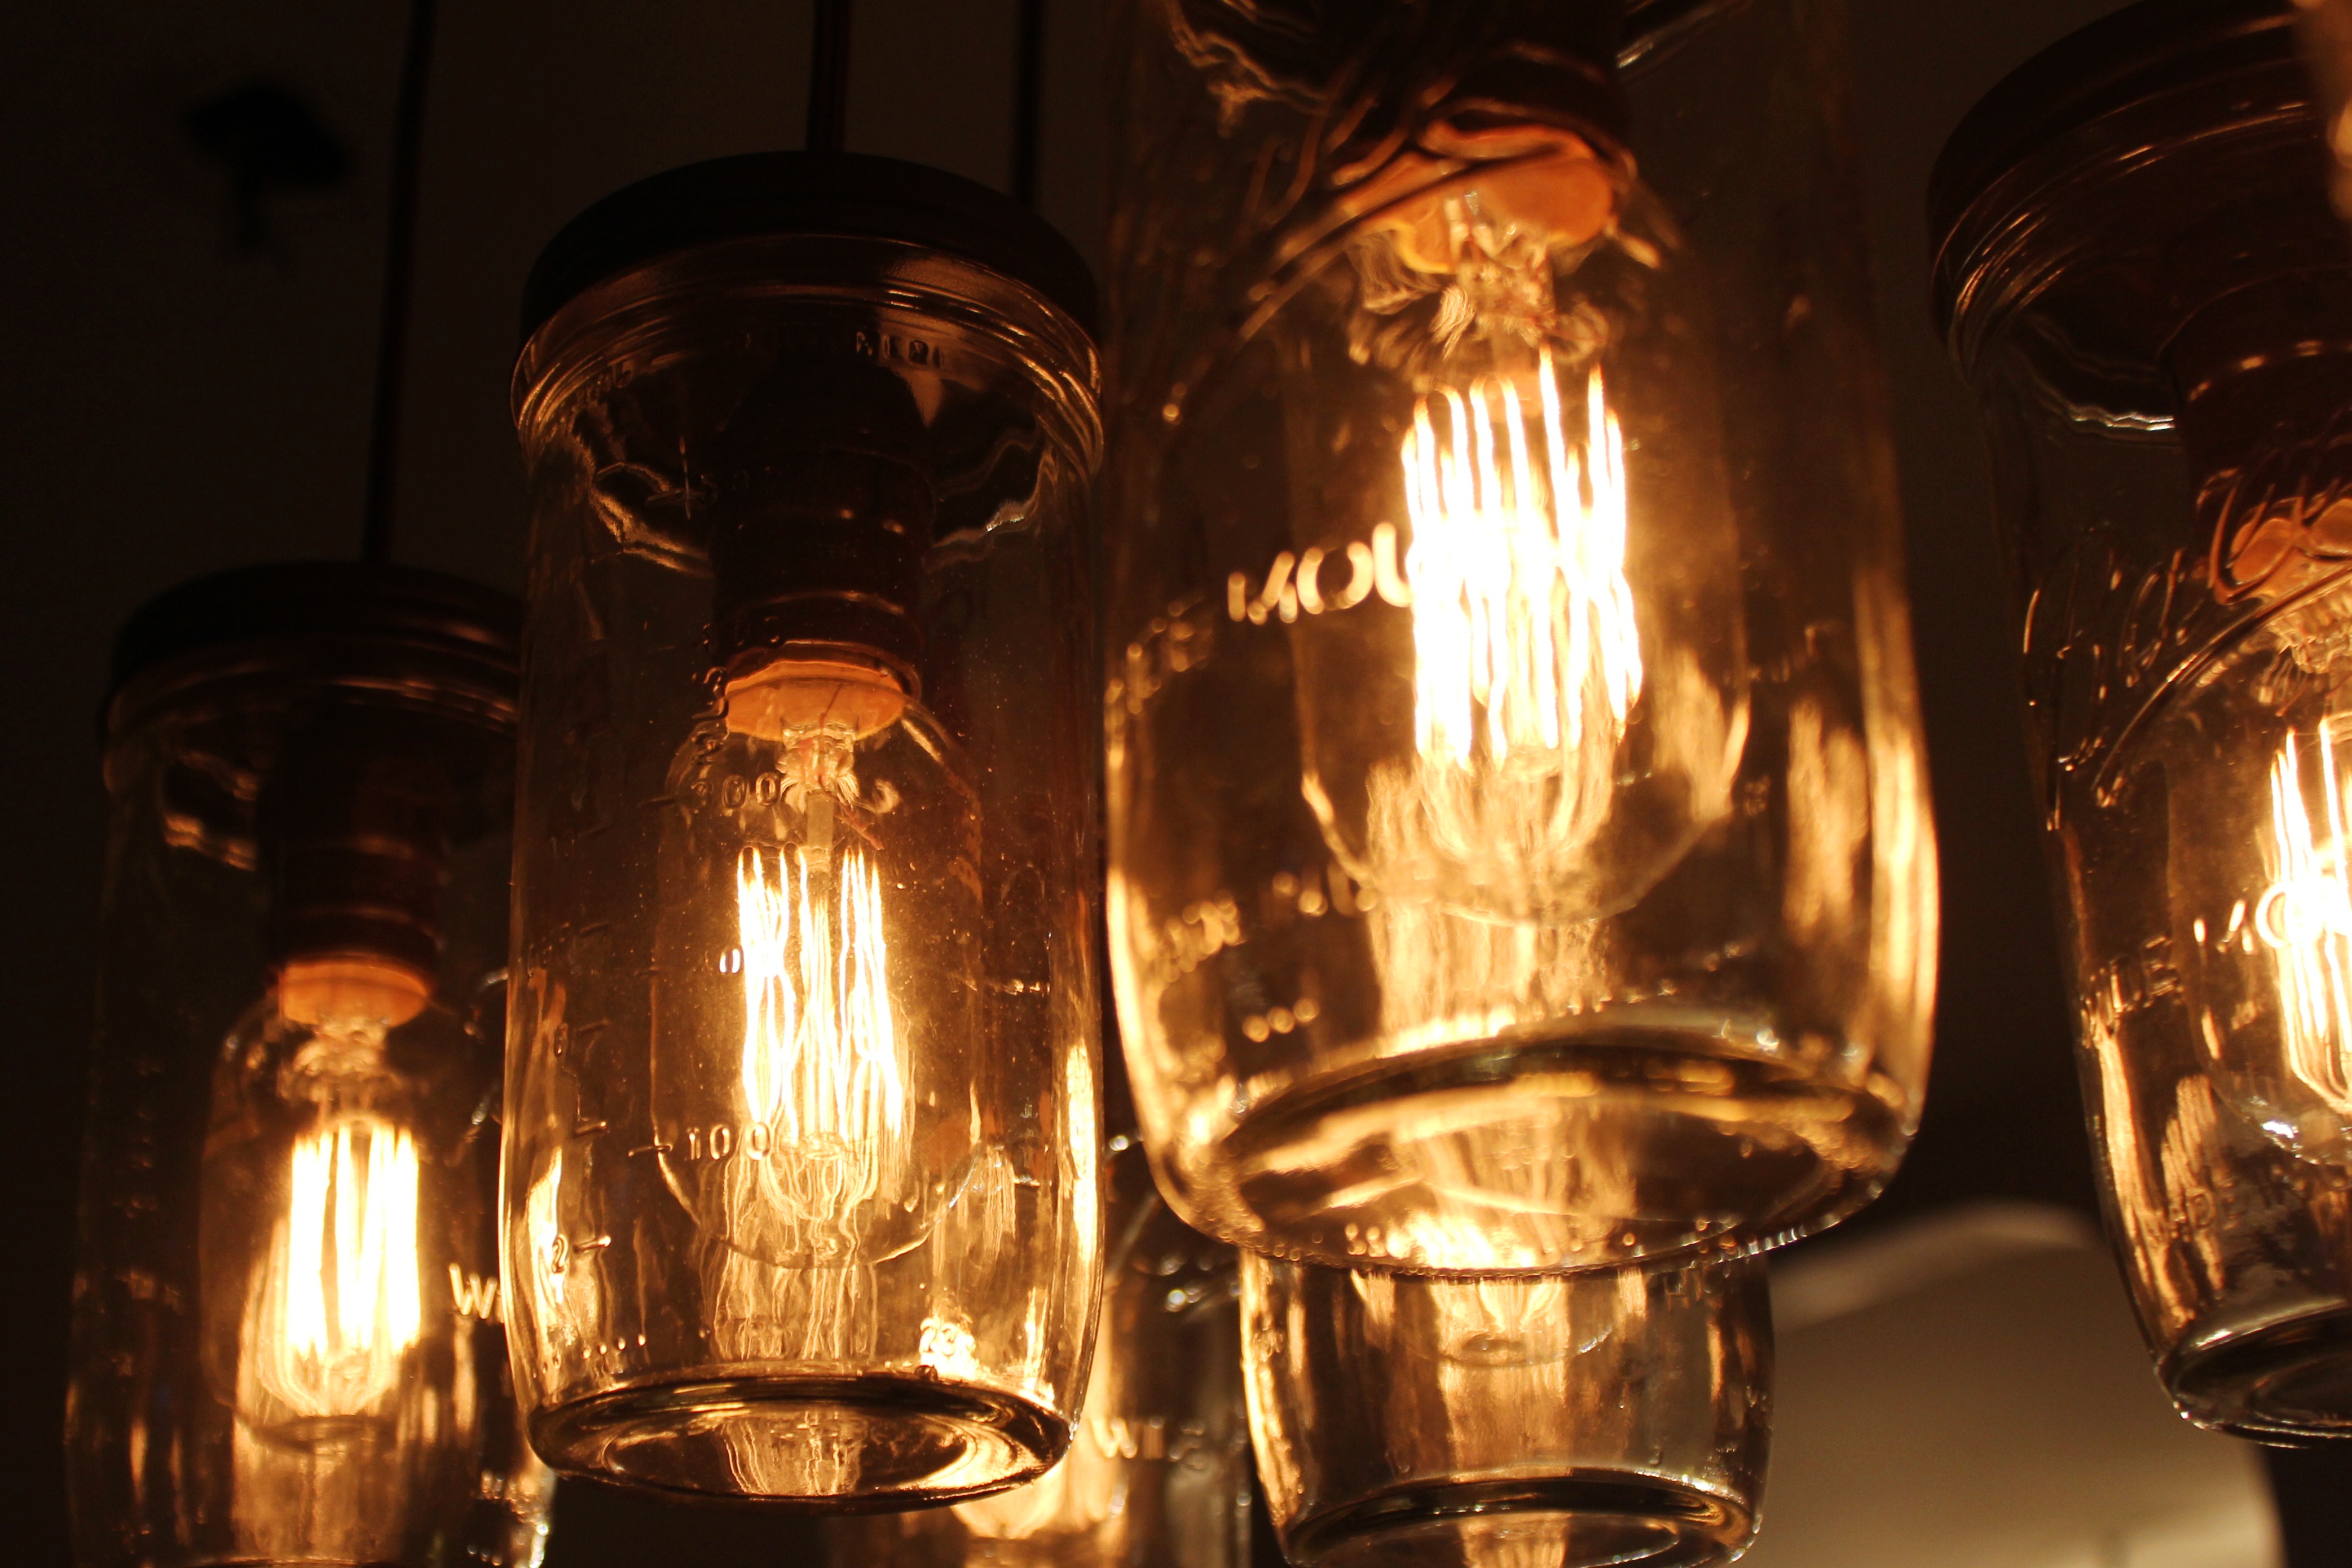
Up close and personal
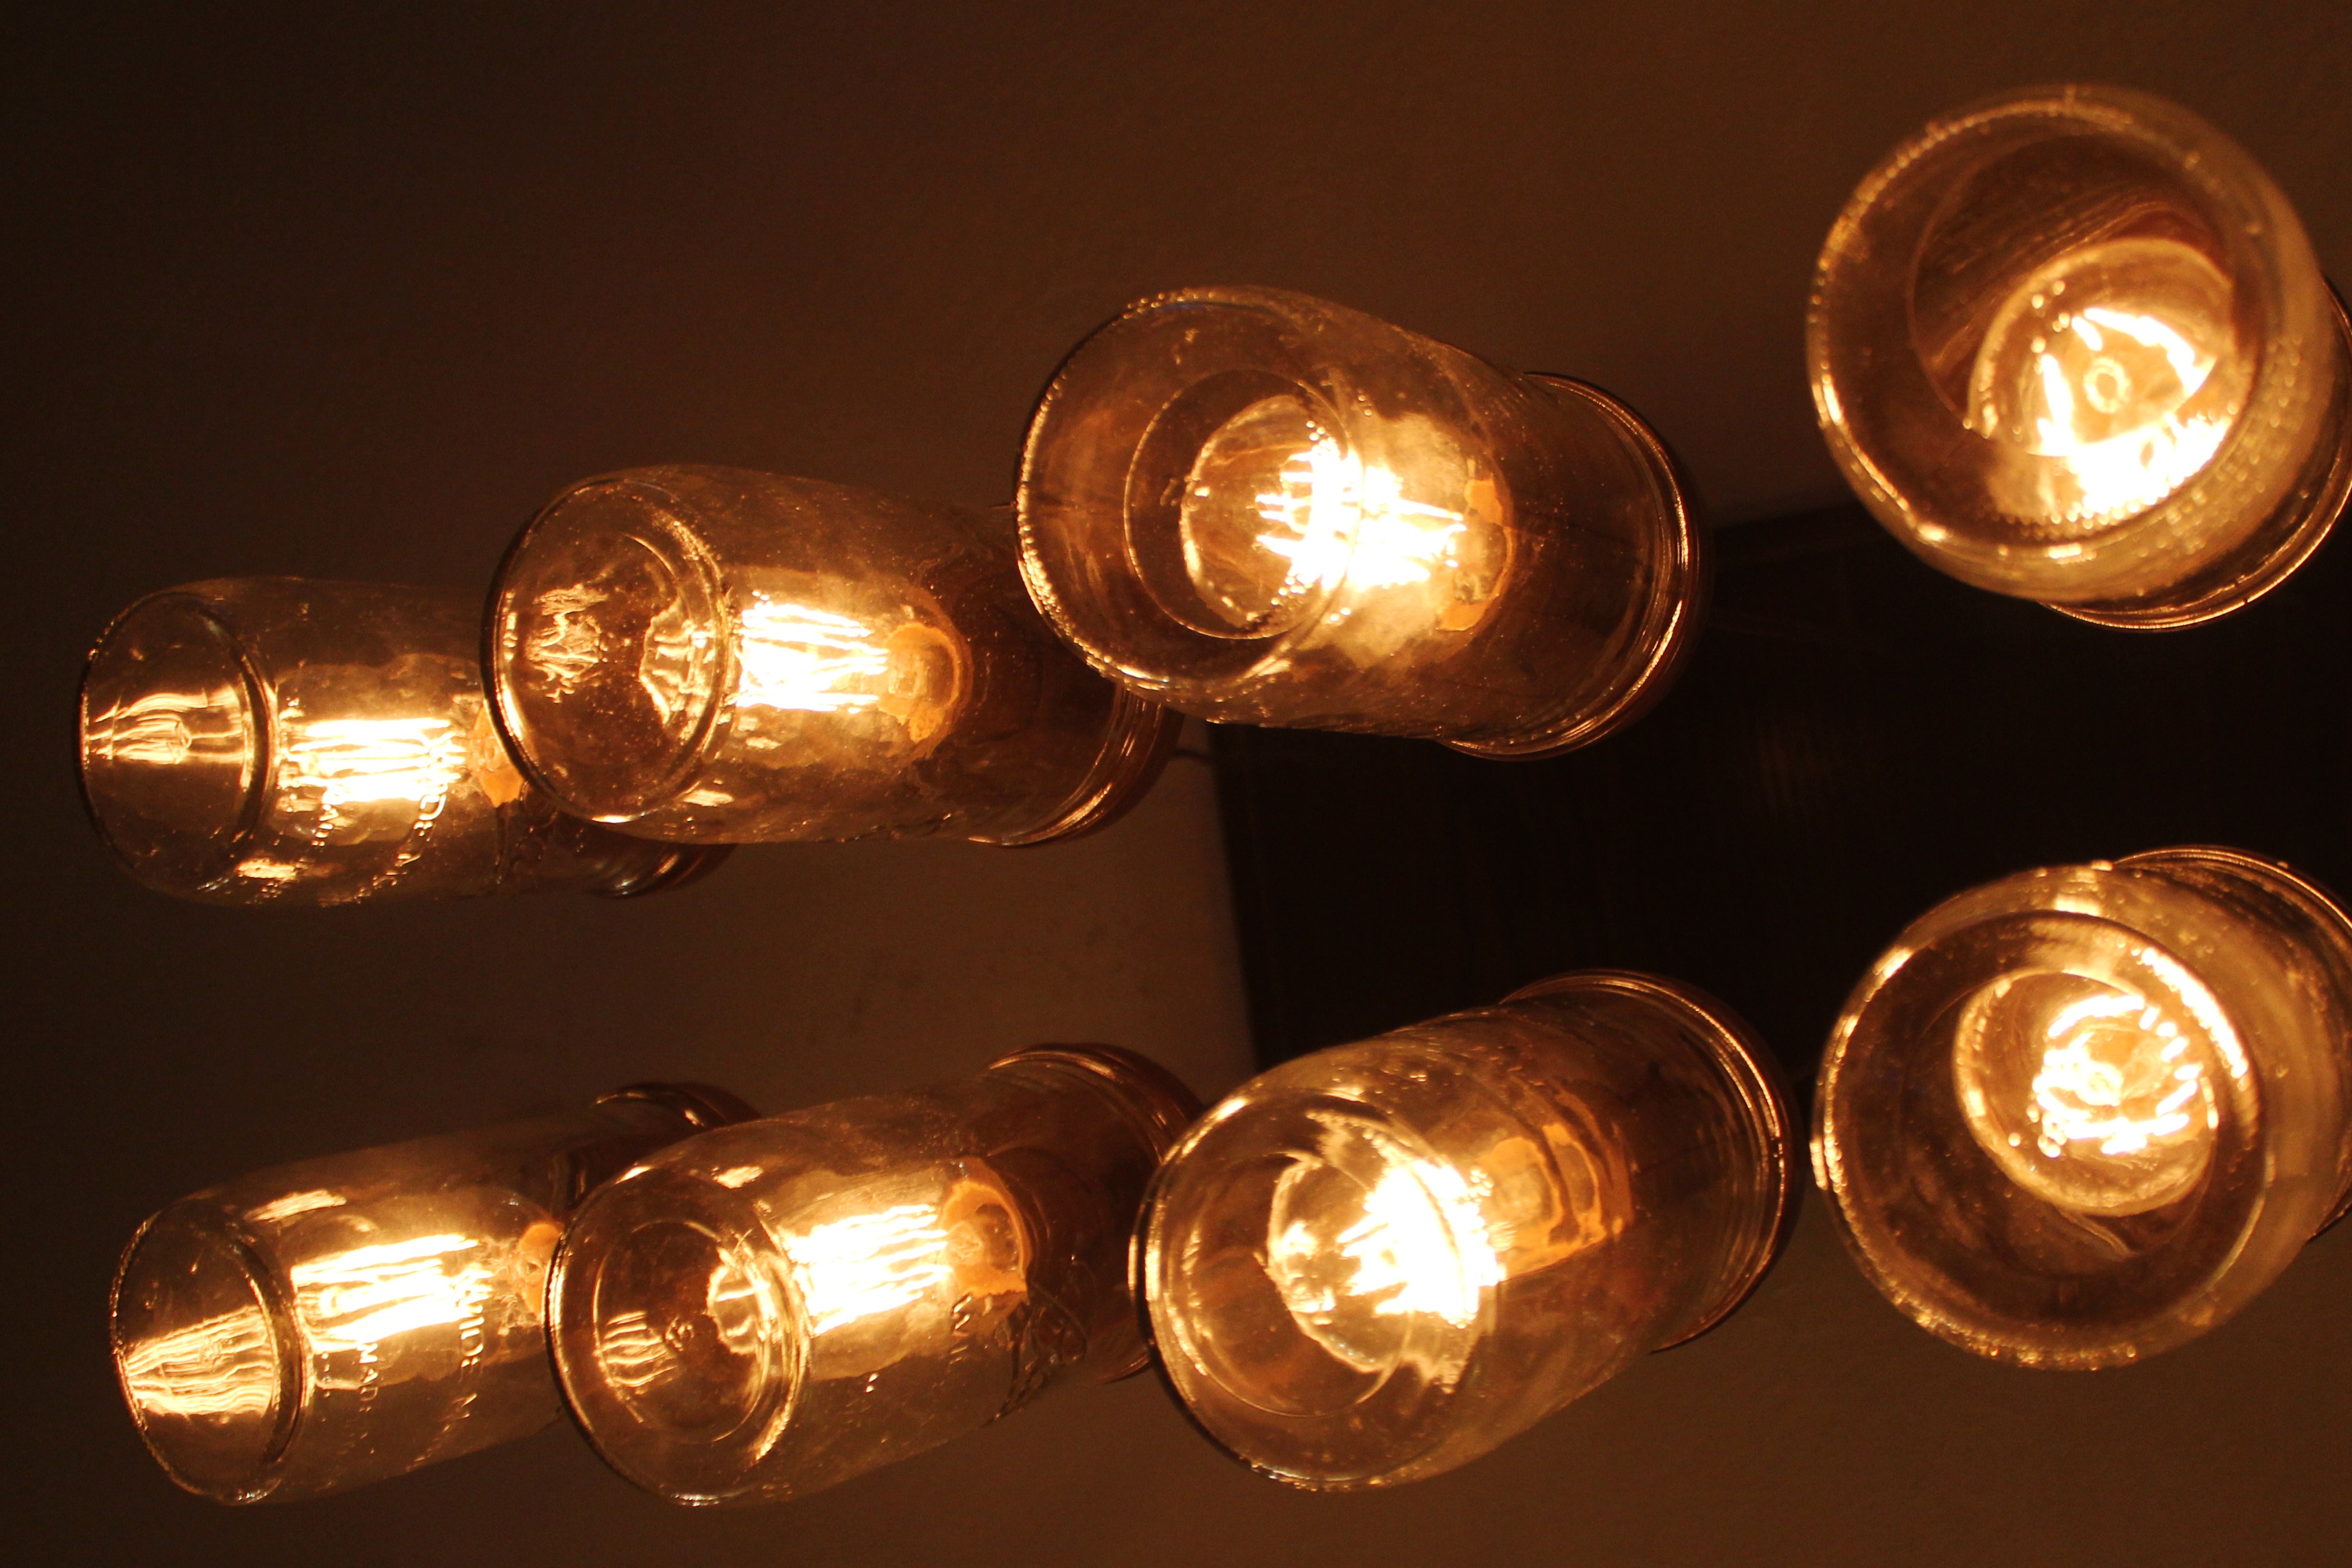
From below
We couldn’t be happier with how things turned out. We definitely learned a few things along the way and got frustrated a few times, but it was worth it. I find it highly amusing that when someone asked me what I did last weekend, I replied: “My husband and I built a chandelier.” I didn’t think much of this response, because it’s not that out of the ordinary for us to make/build/improve on the weekends, but apparently building a chandelier as a weekend project is not all that common for most people!
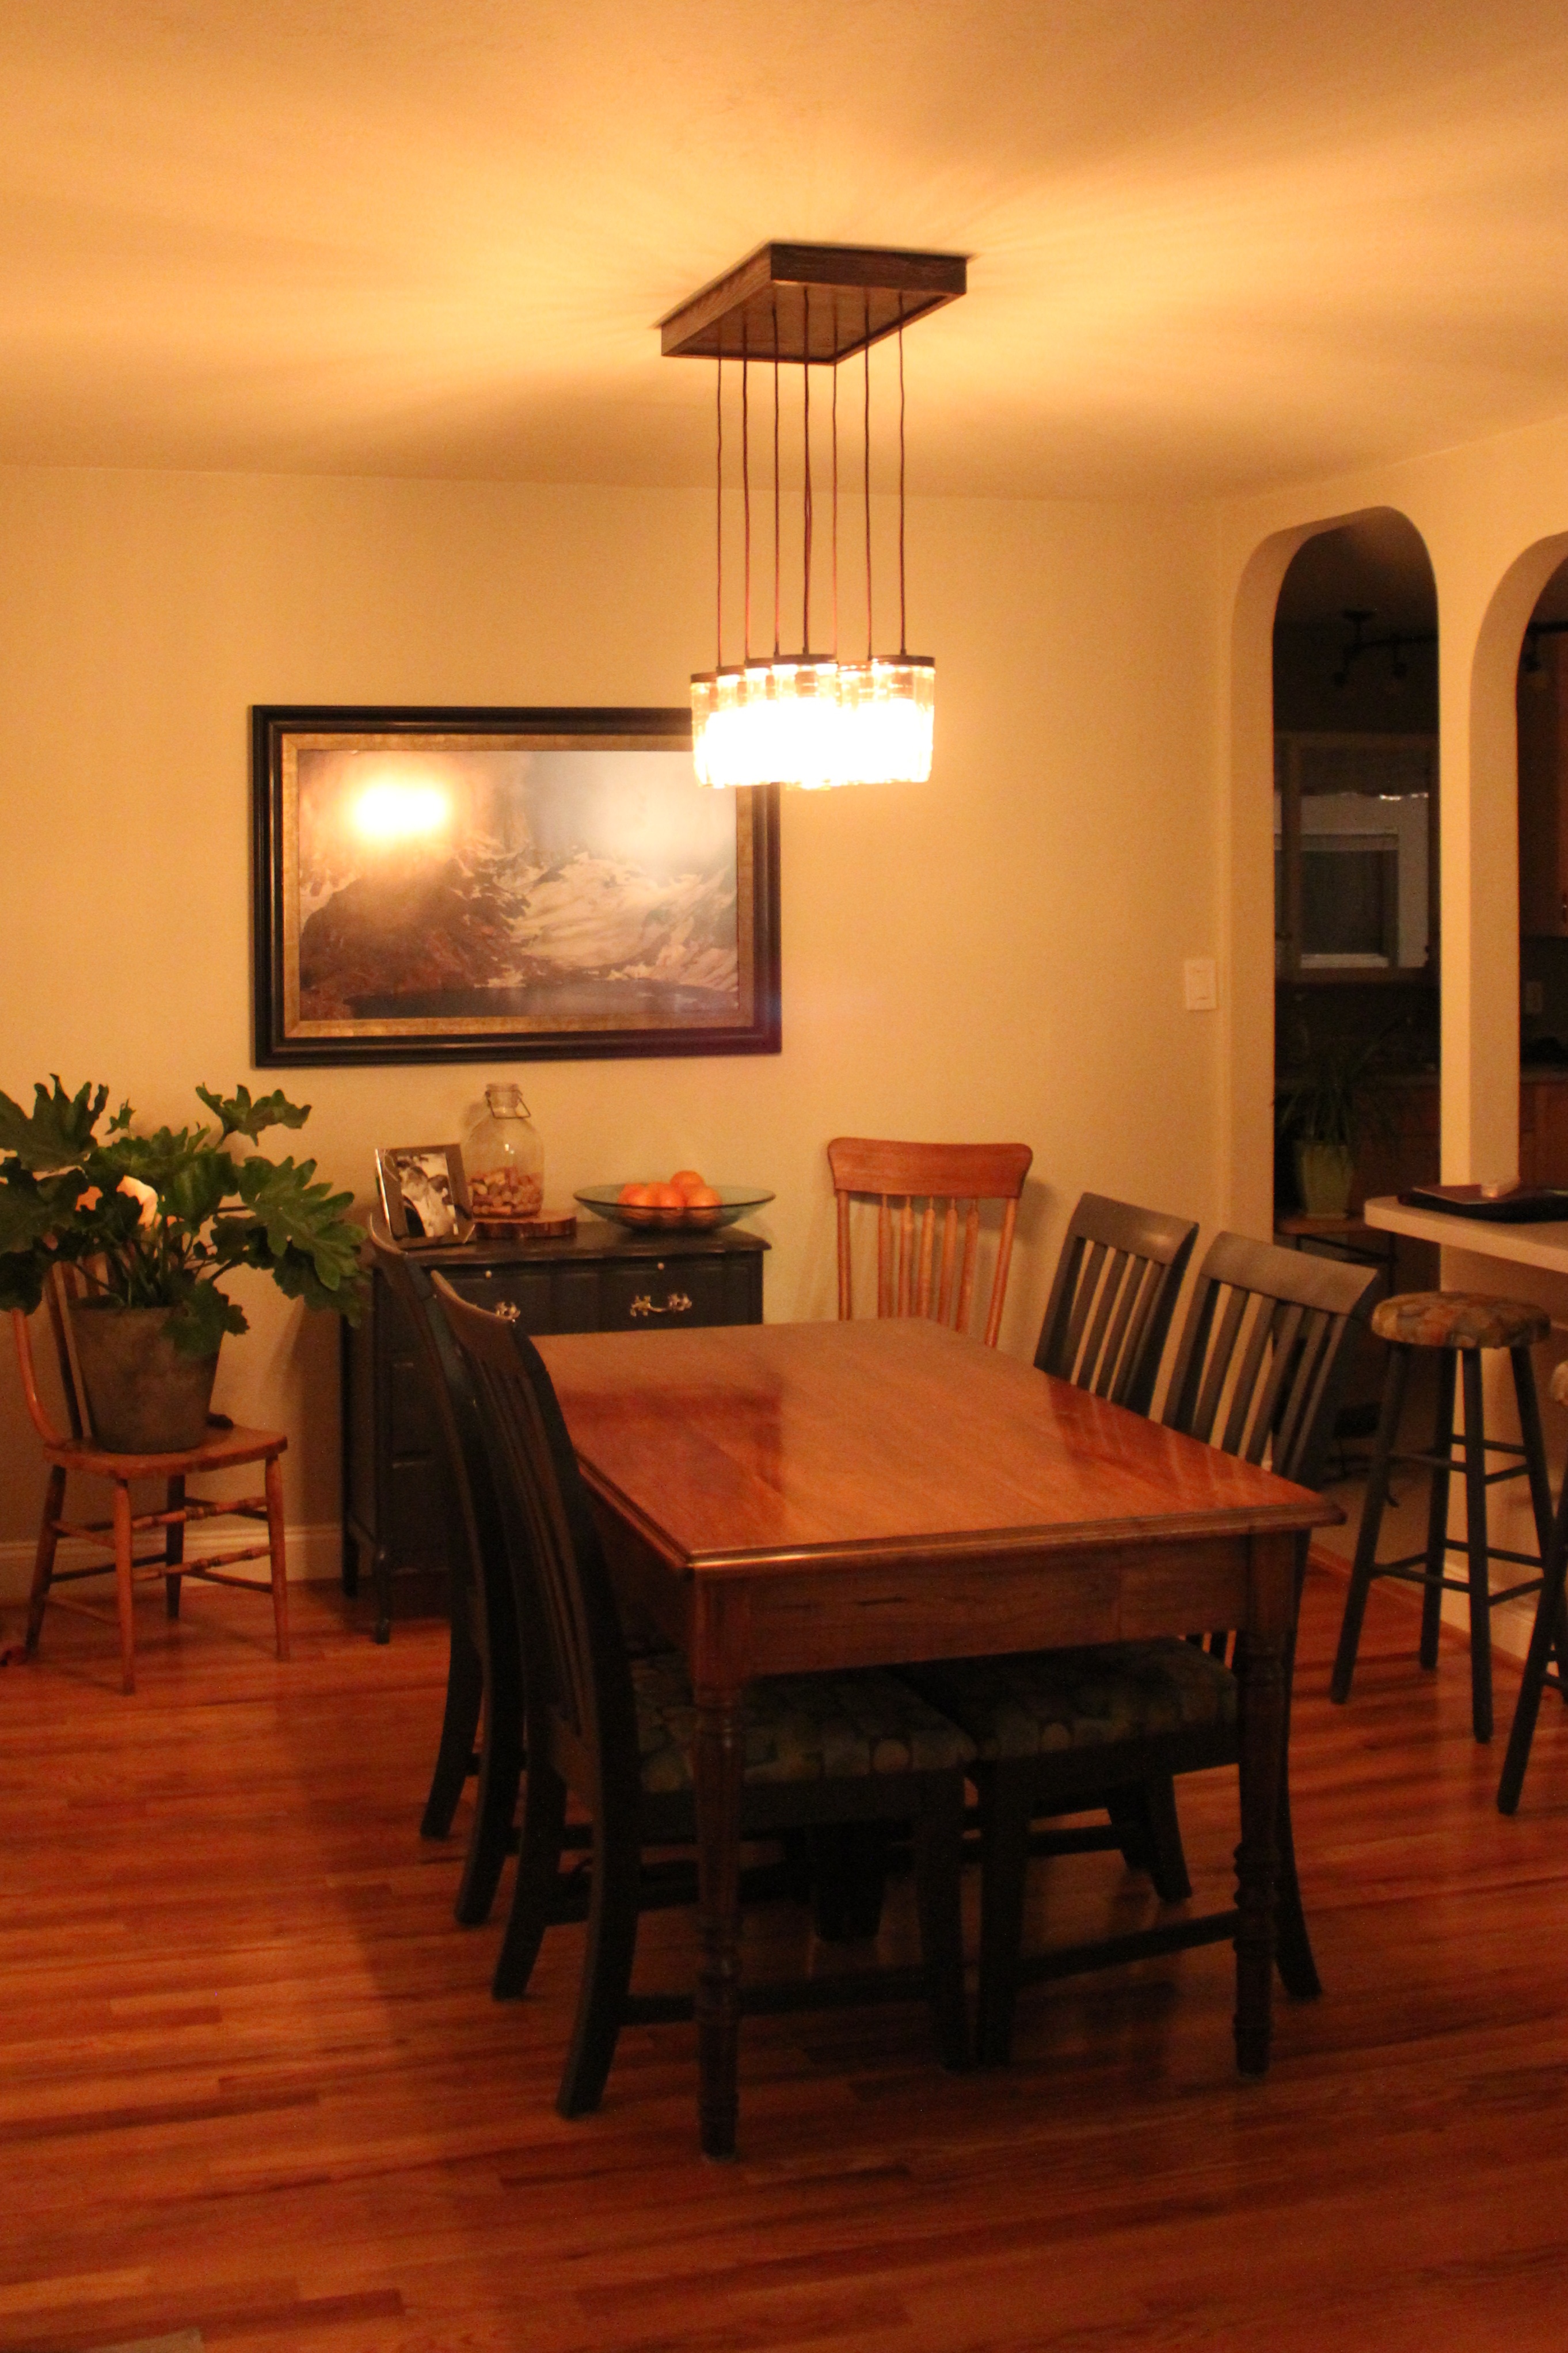
And another one… of the whole room this time
Last one, I promise. Isn’t the light pattern on the ceiling gorgeous??

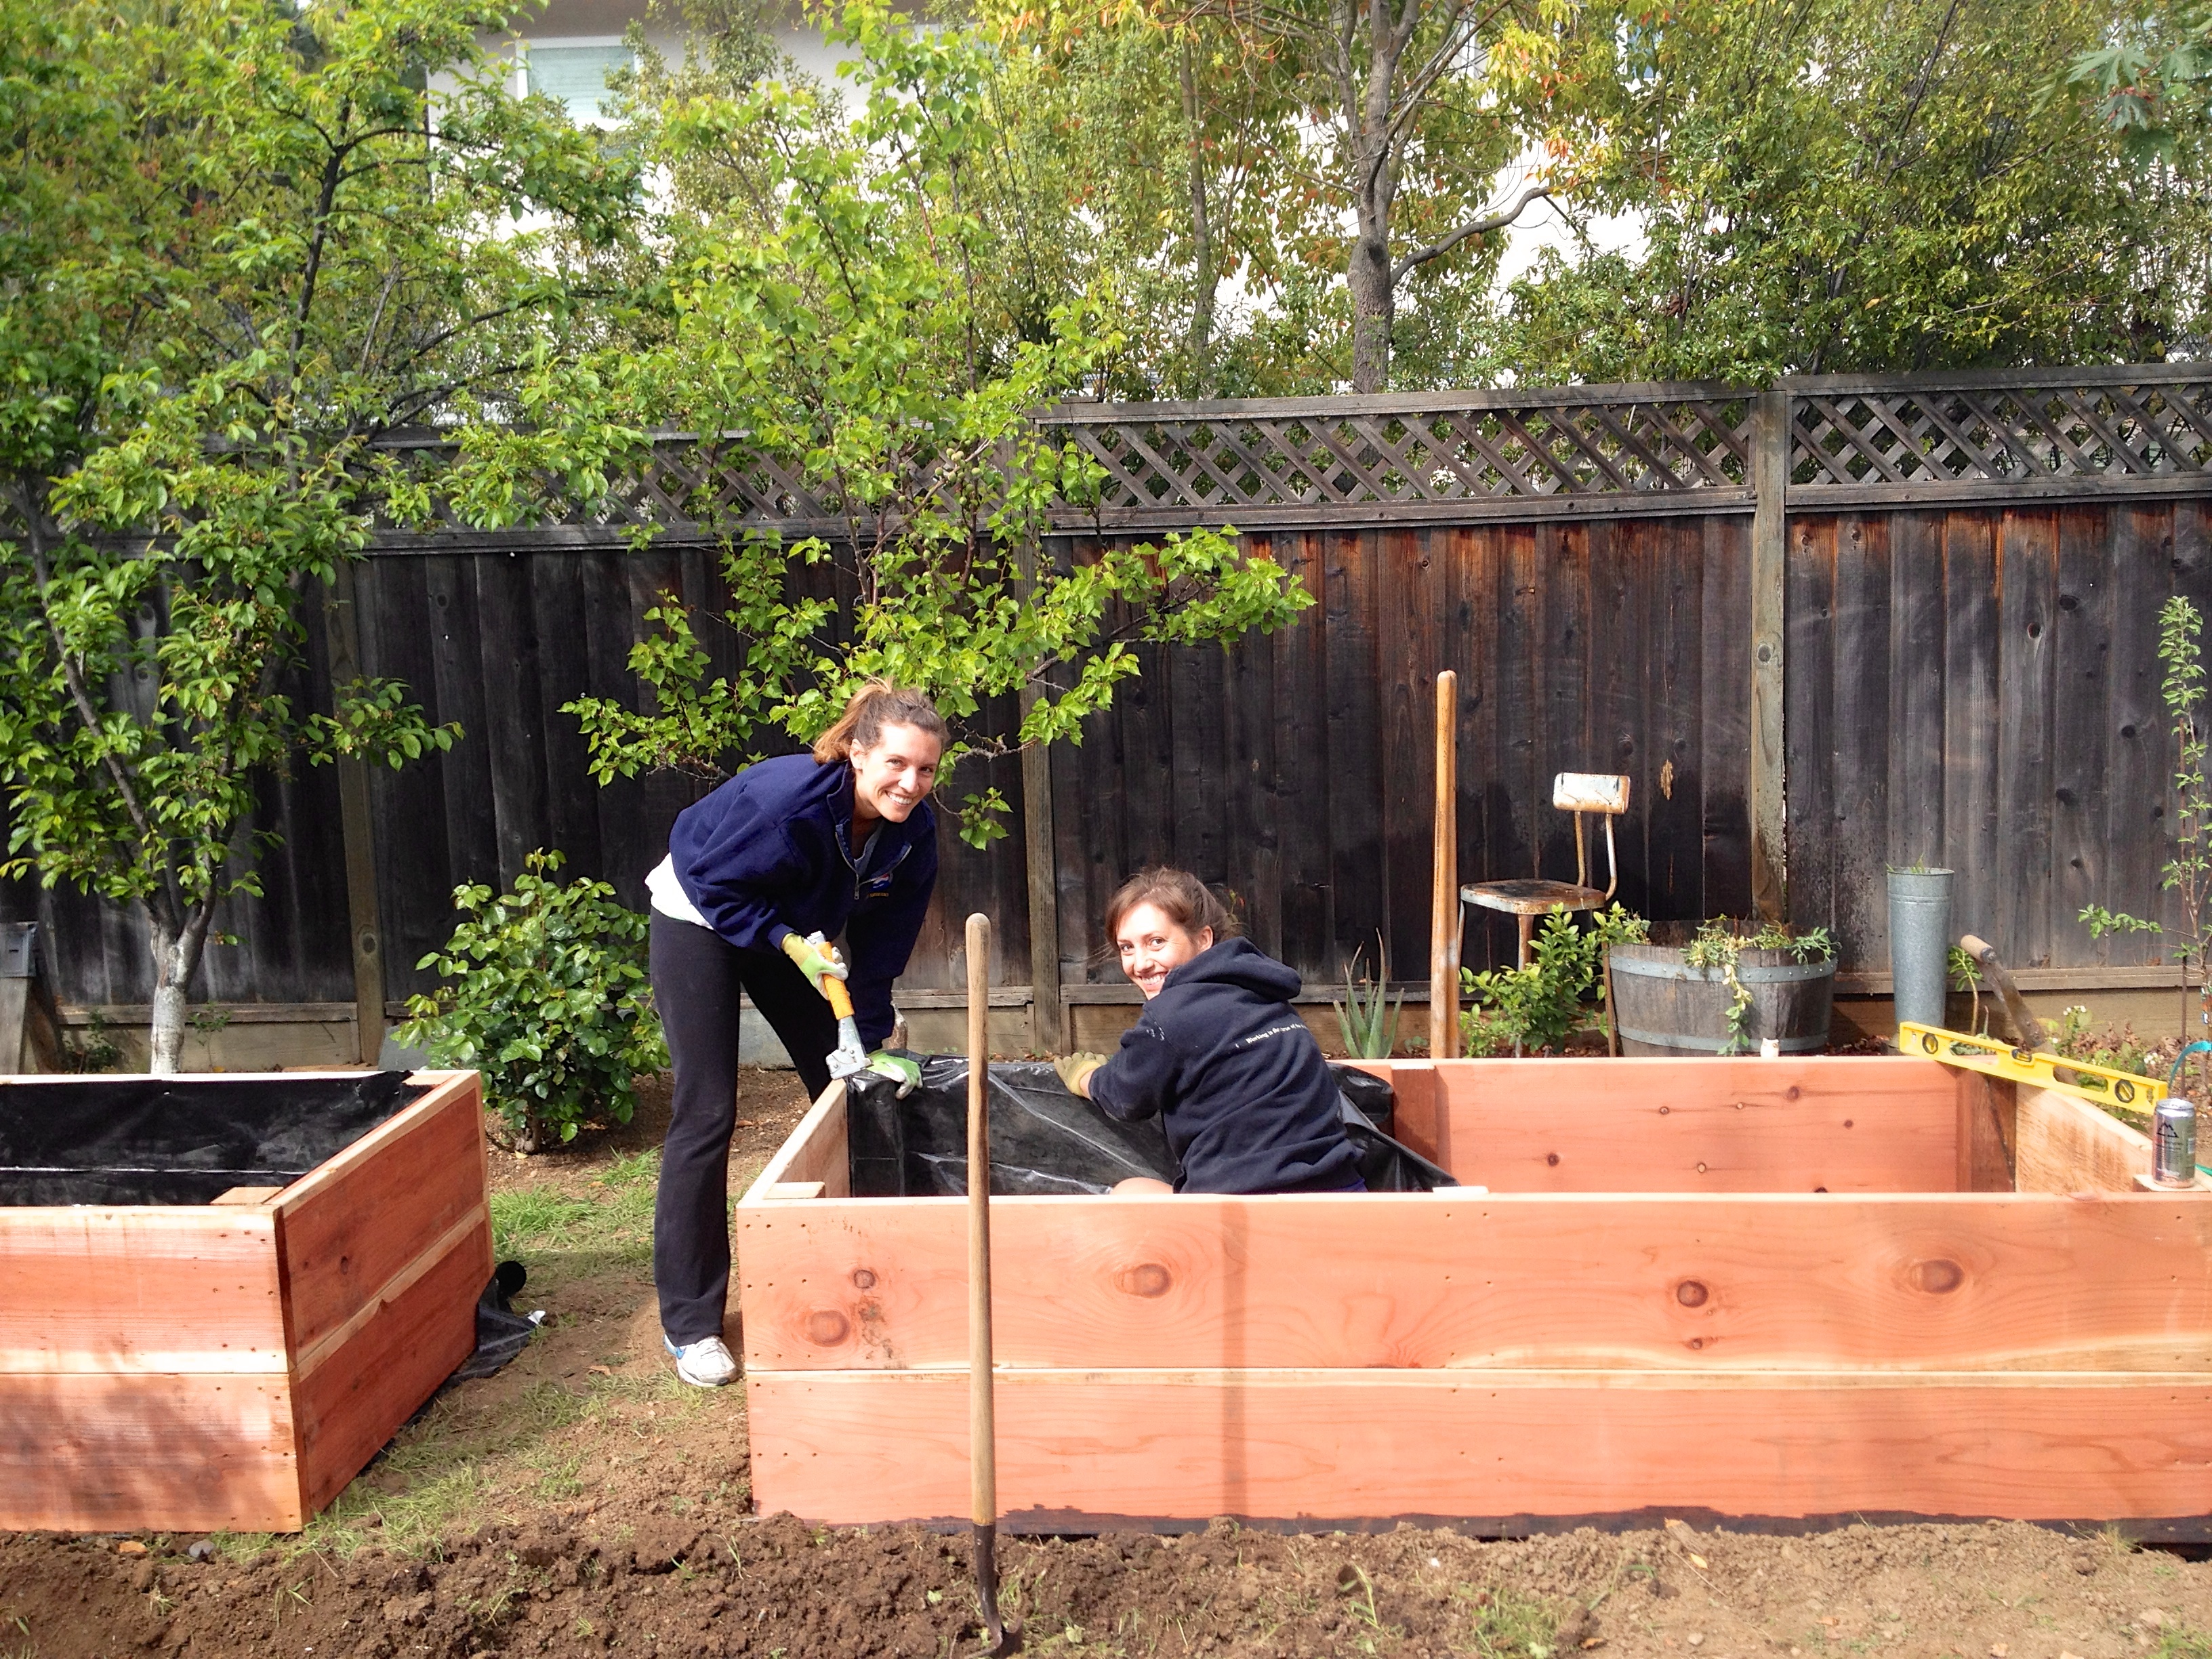
Dirt is my favorite 🙂
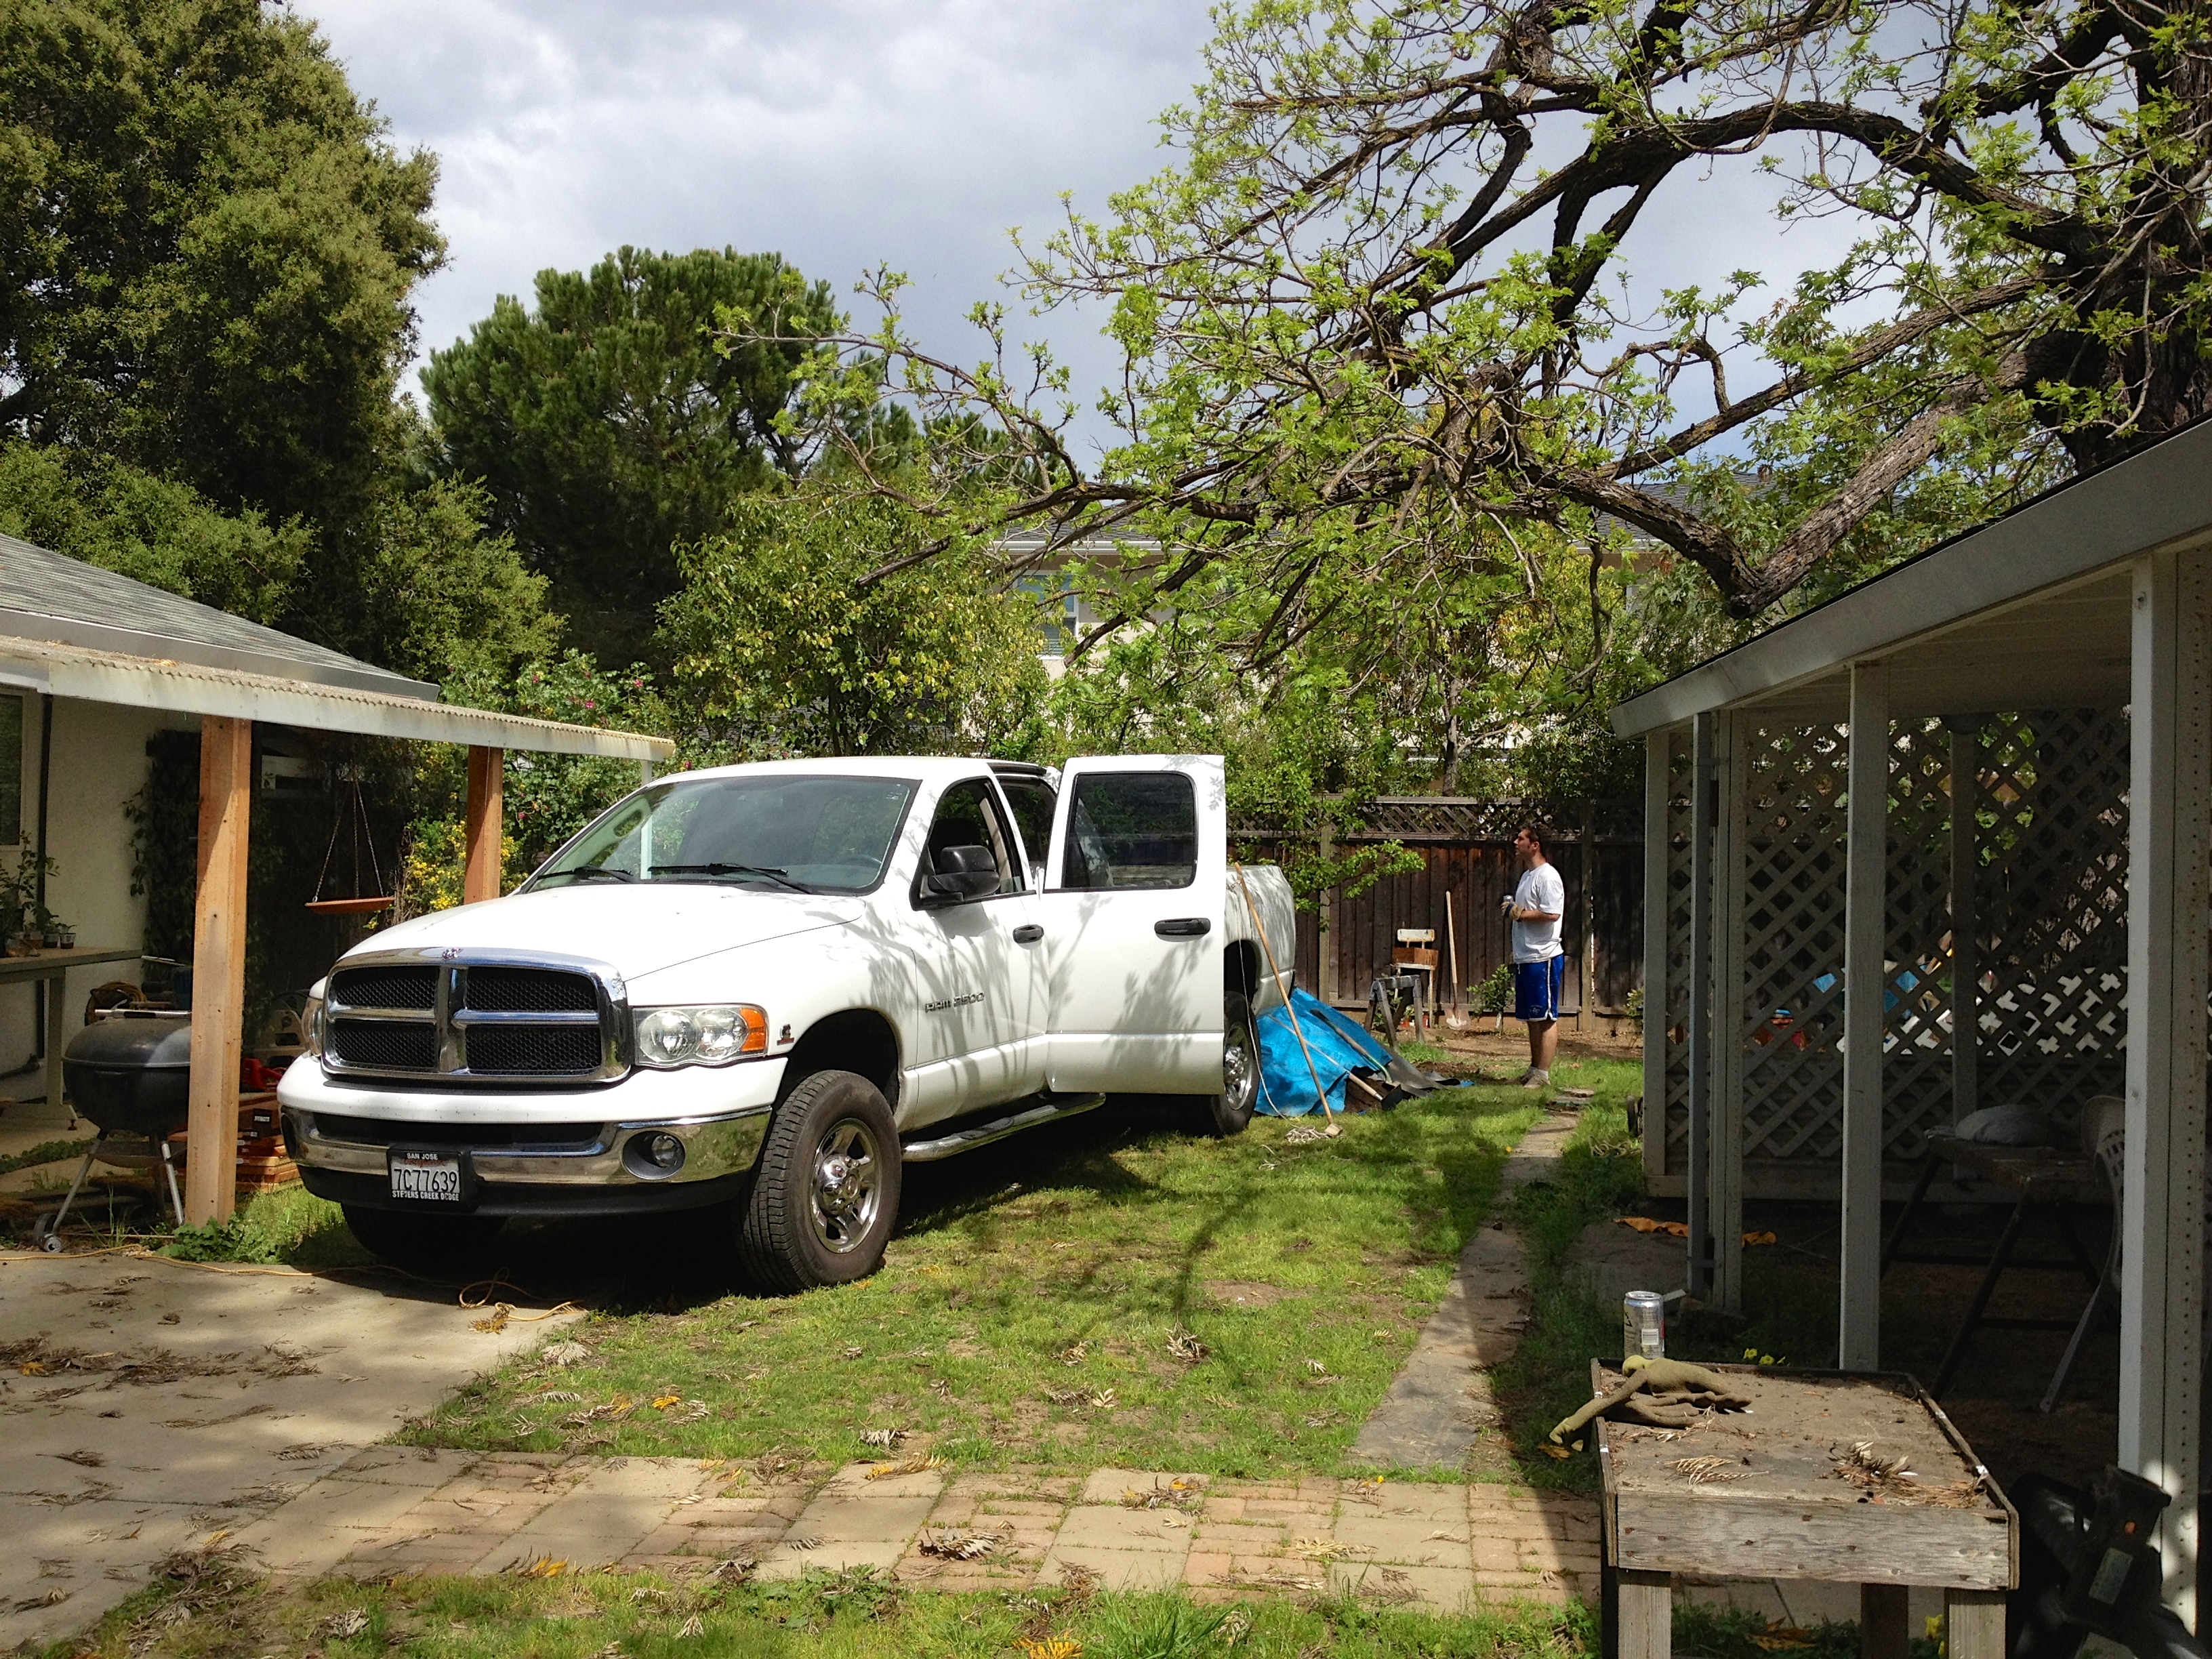
Getting the truck into this spot definitely involve some coercing, but it was well worth it. So much time saved!

Recruitment may or may not have been dependent on shots of Bushmills…
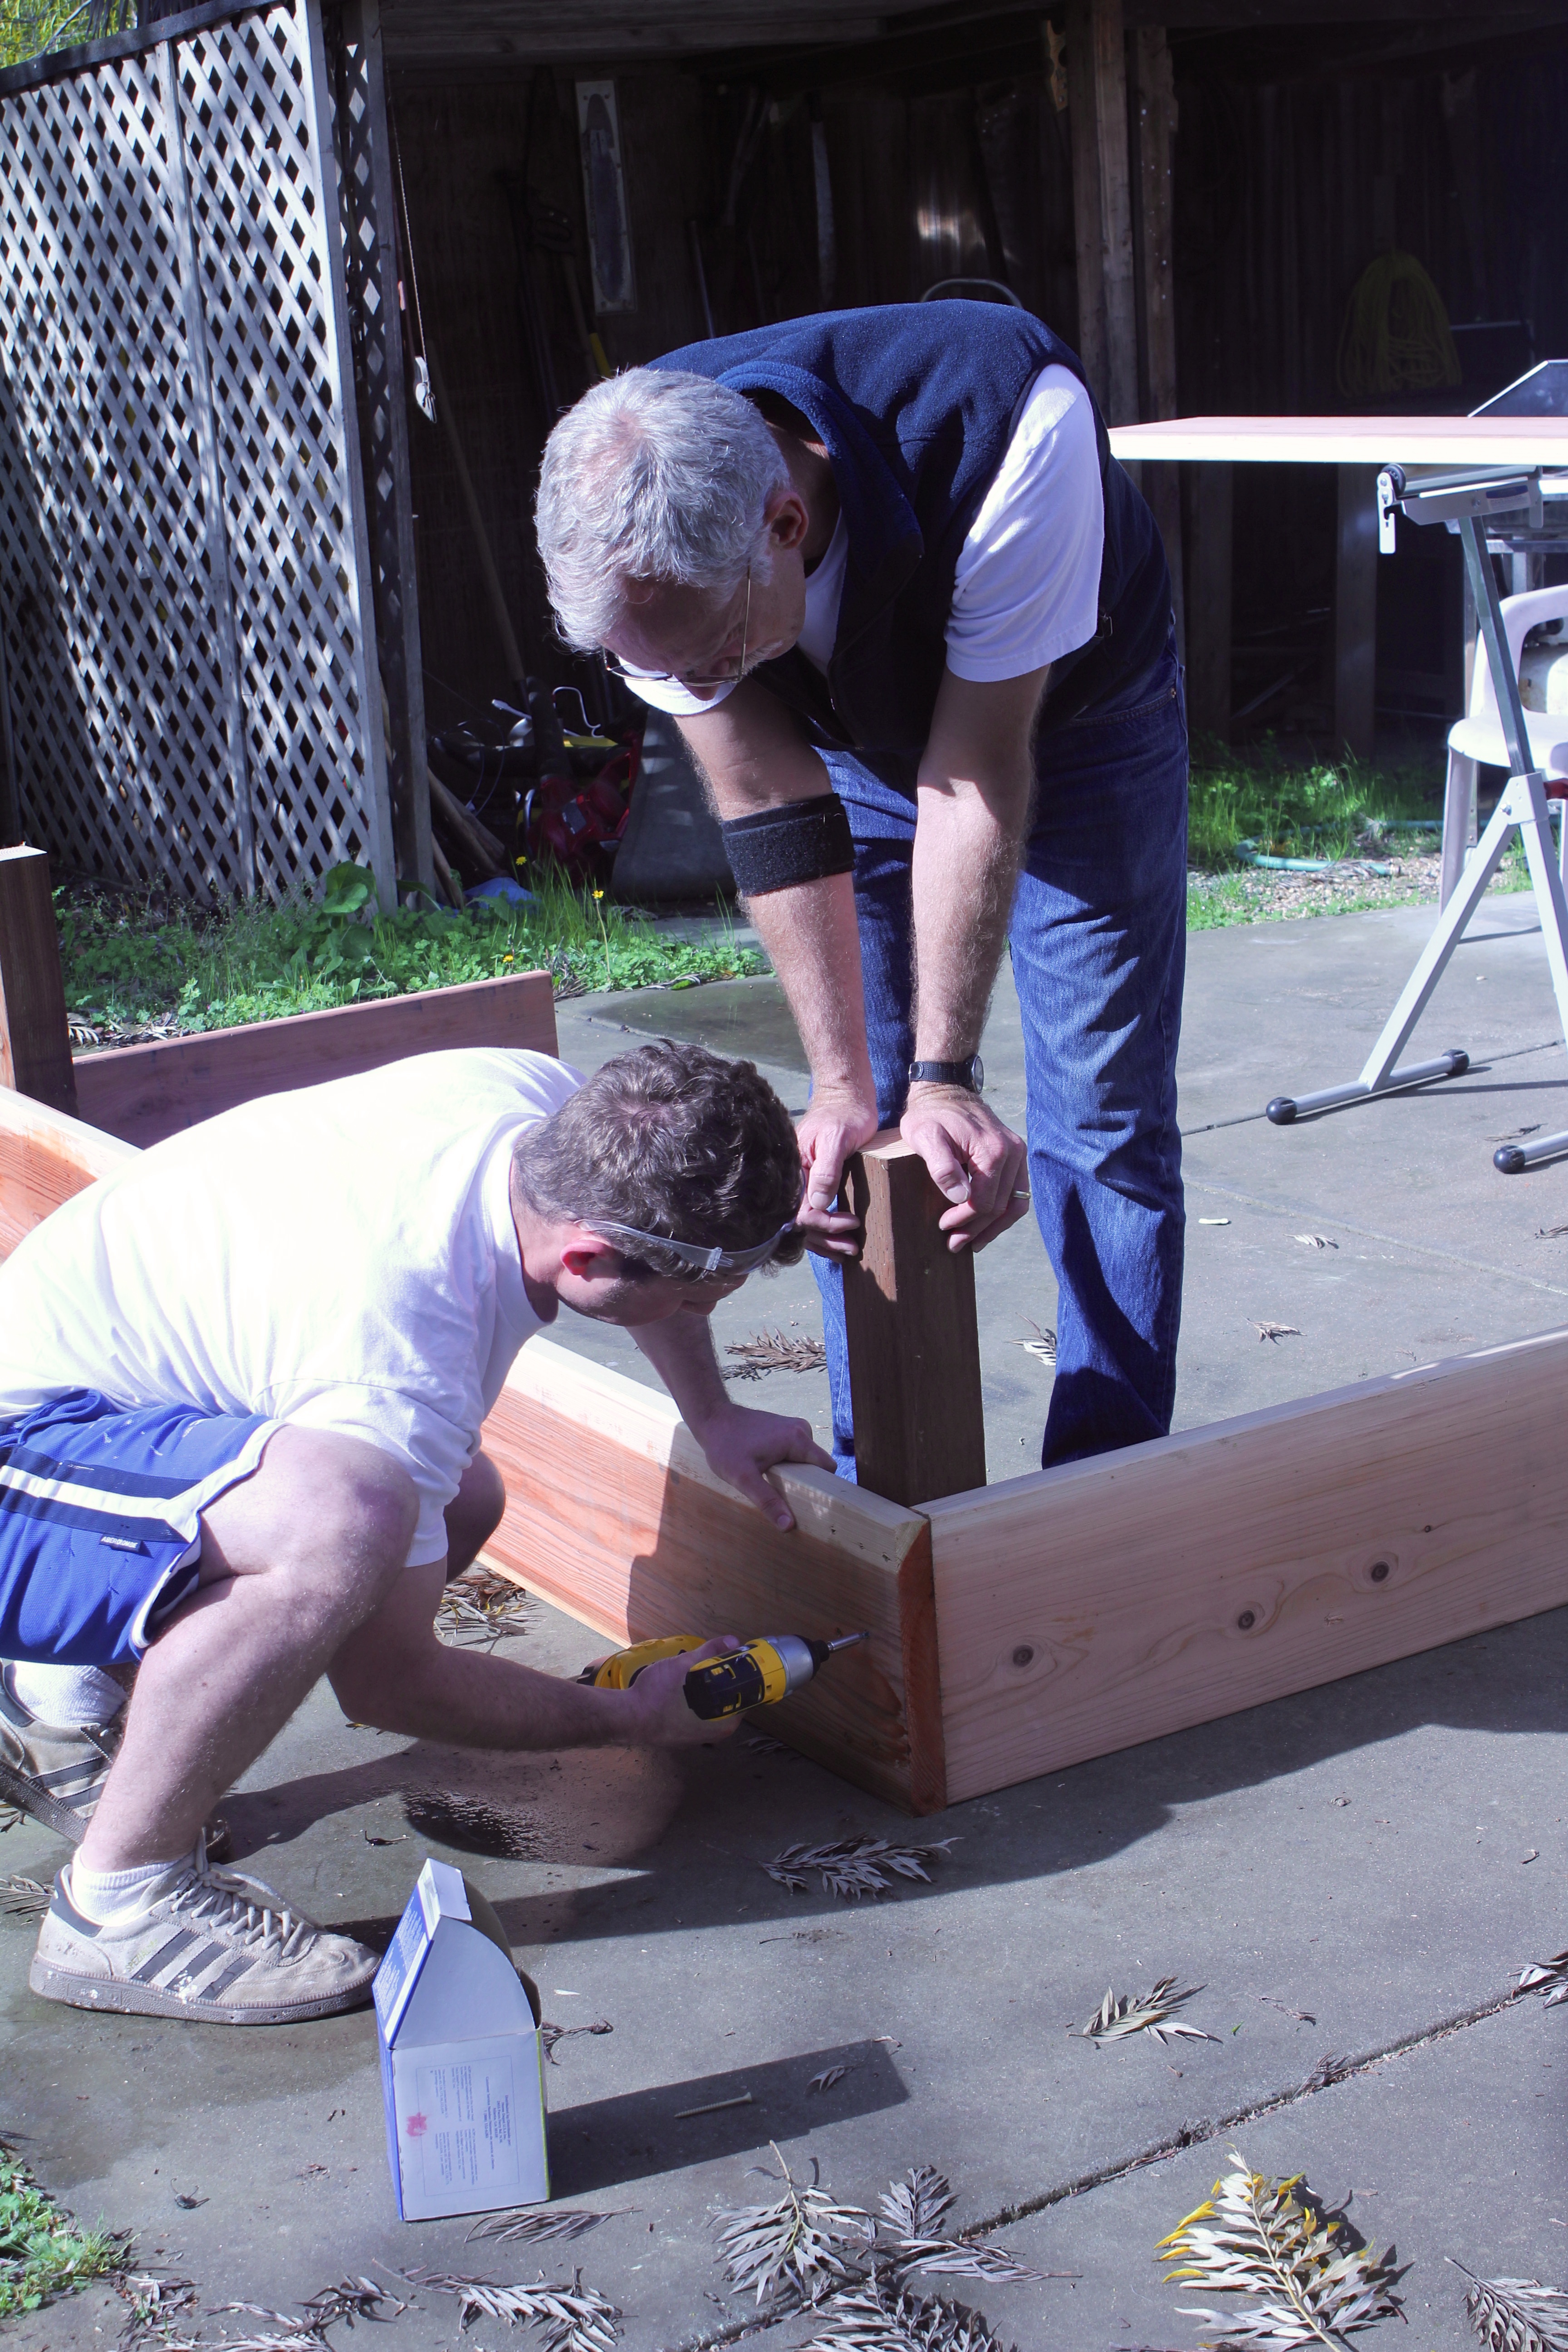
Building, building, building
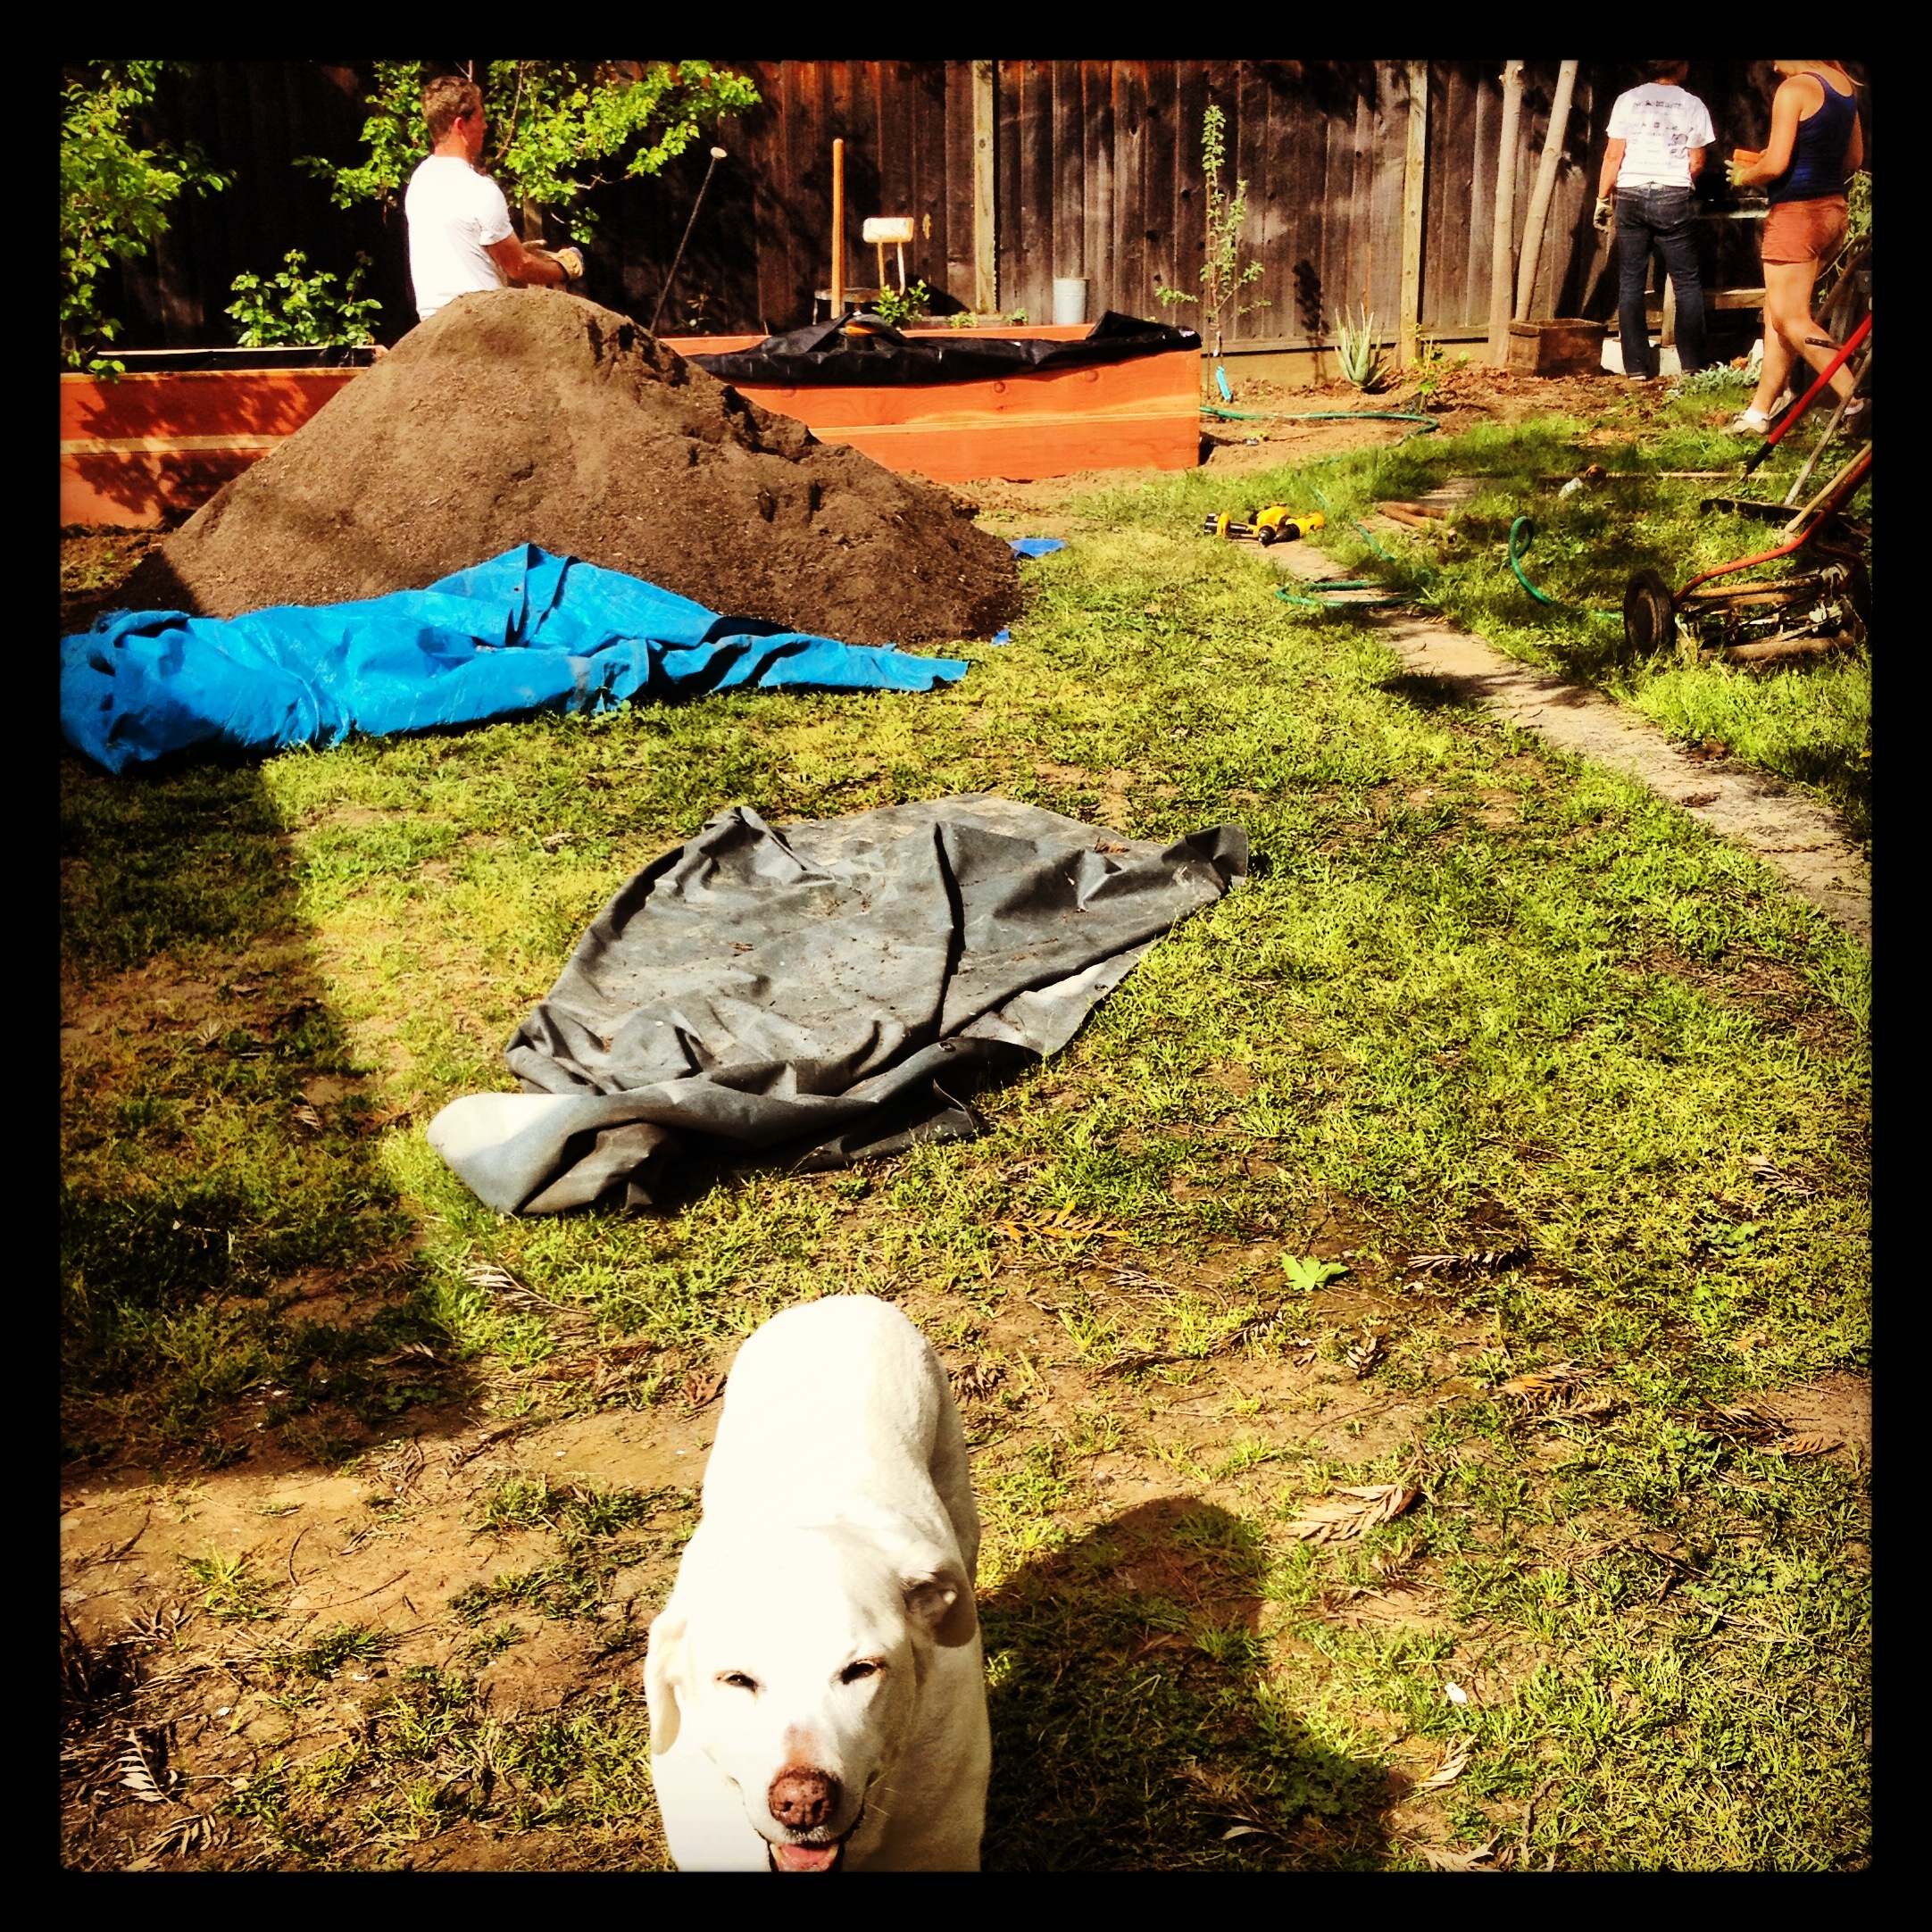
Kirbie the mascot, a large pile of dirt, and lots of discussion
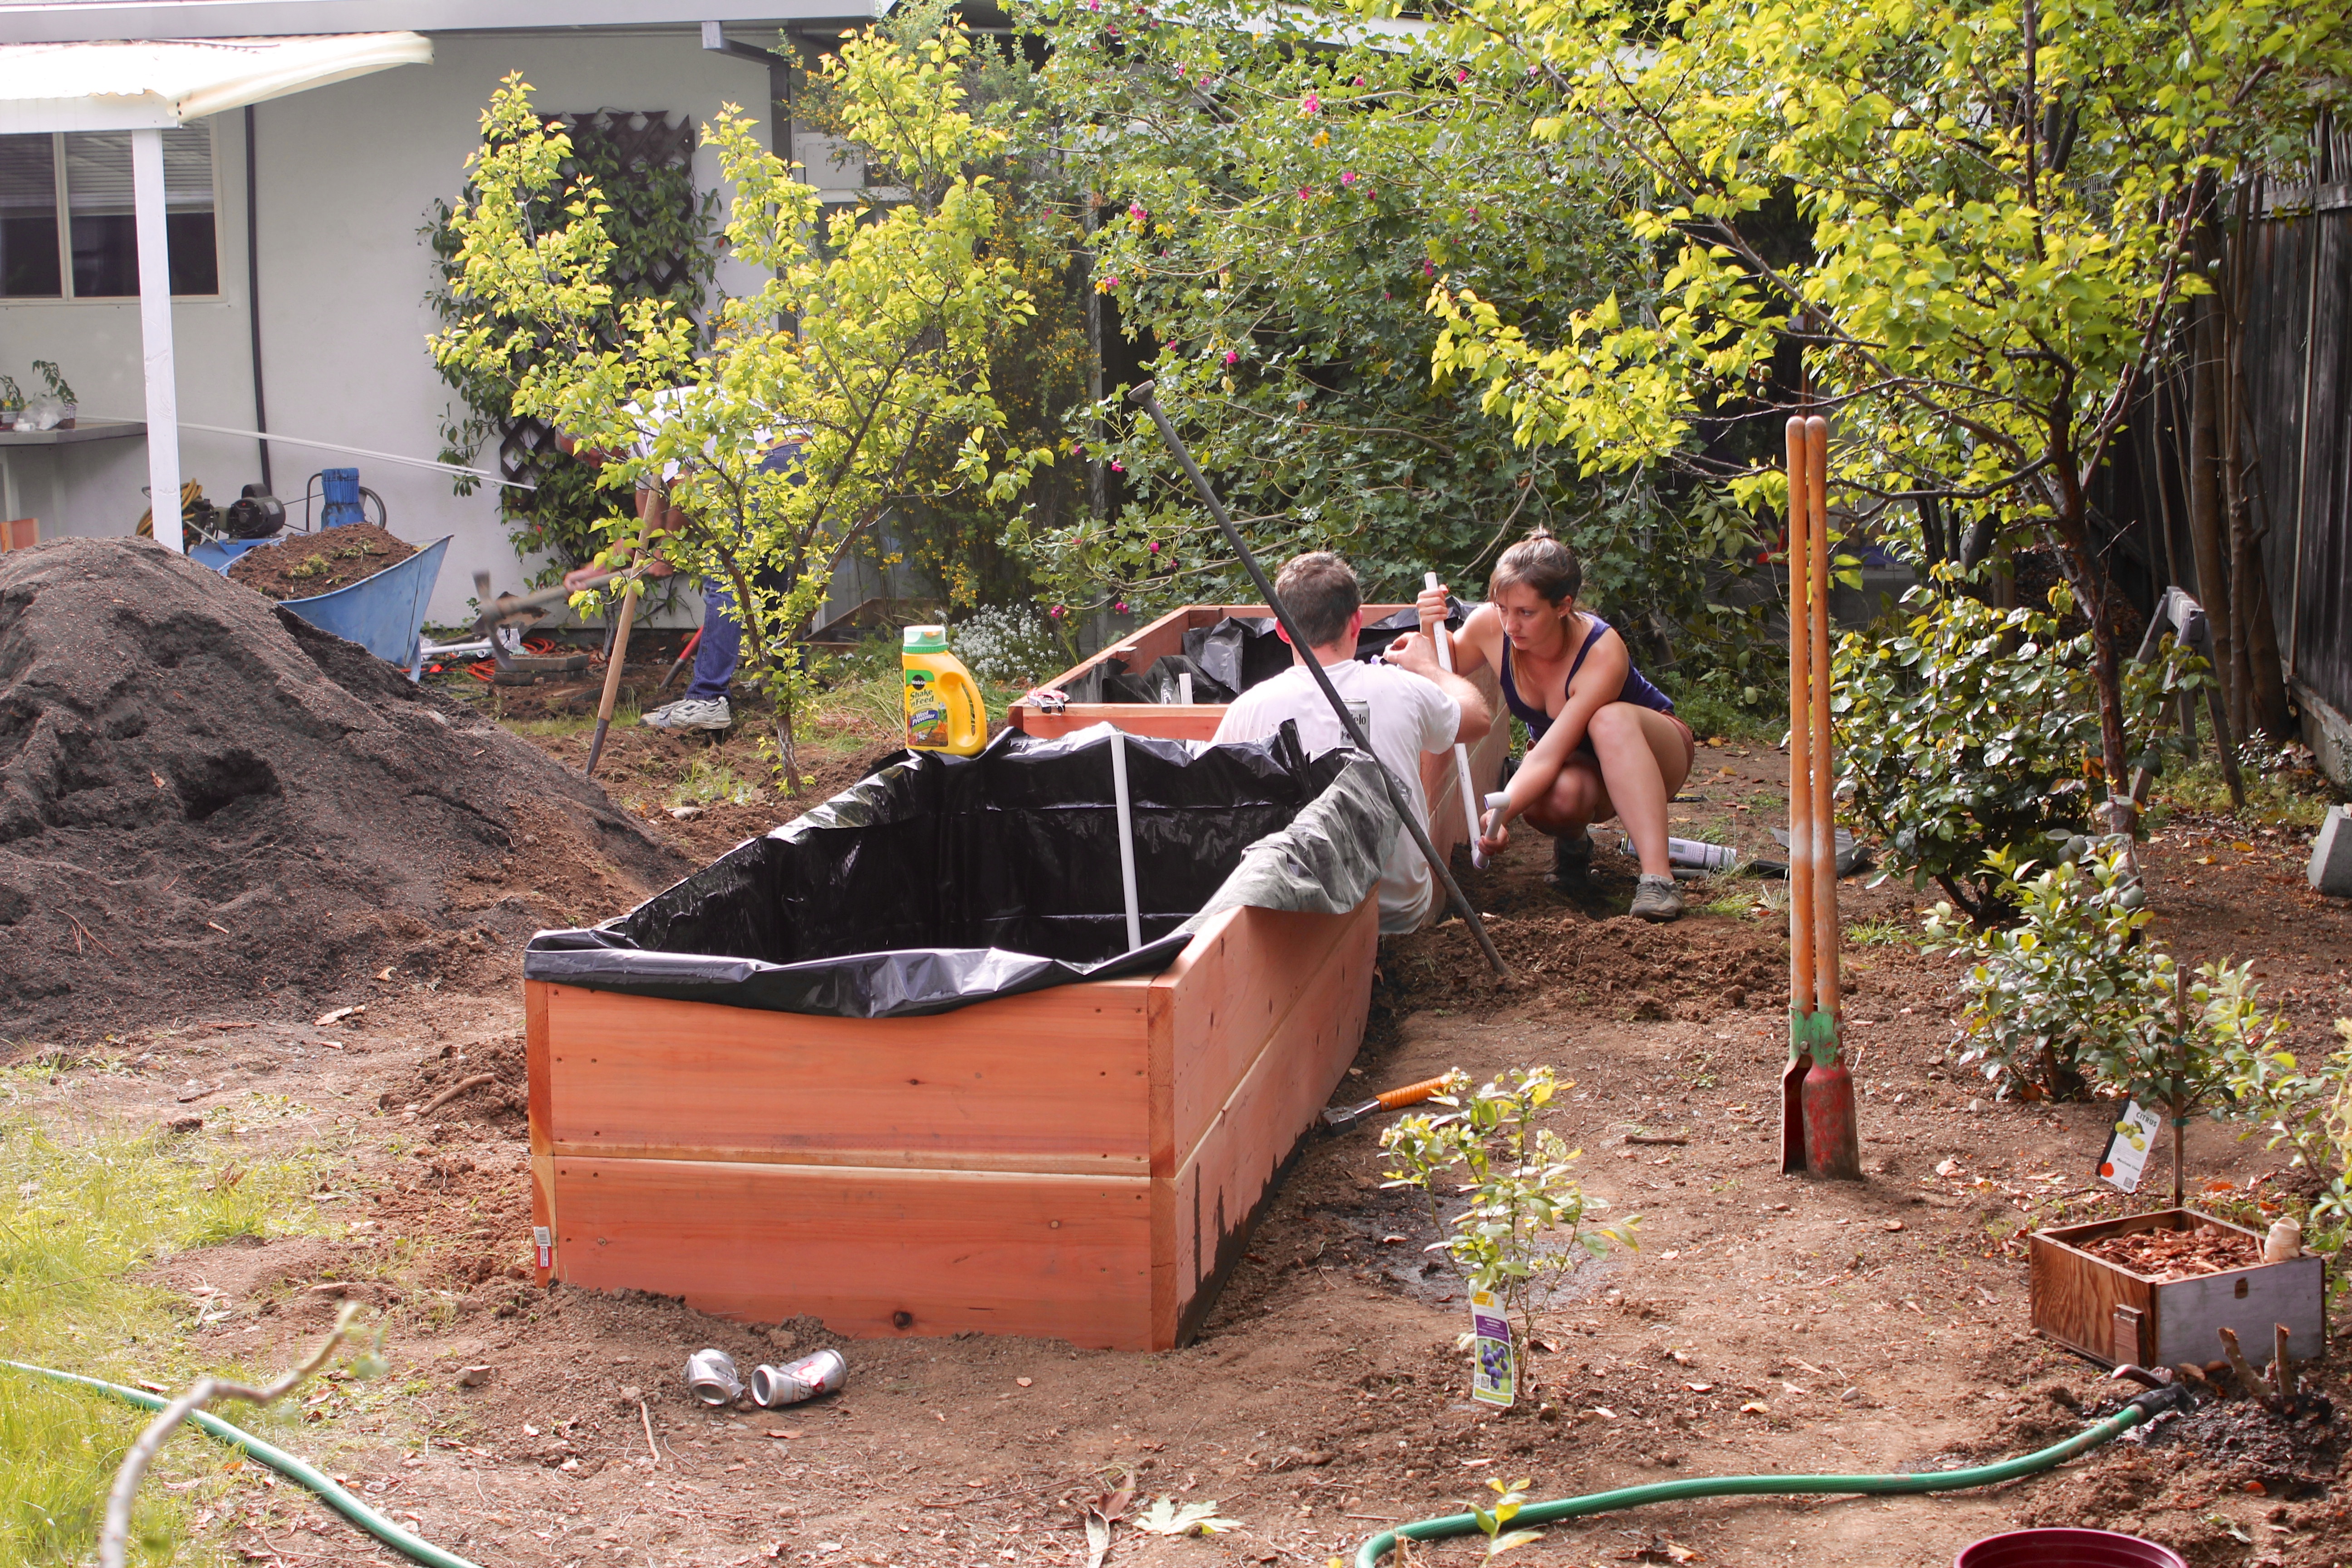
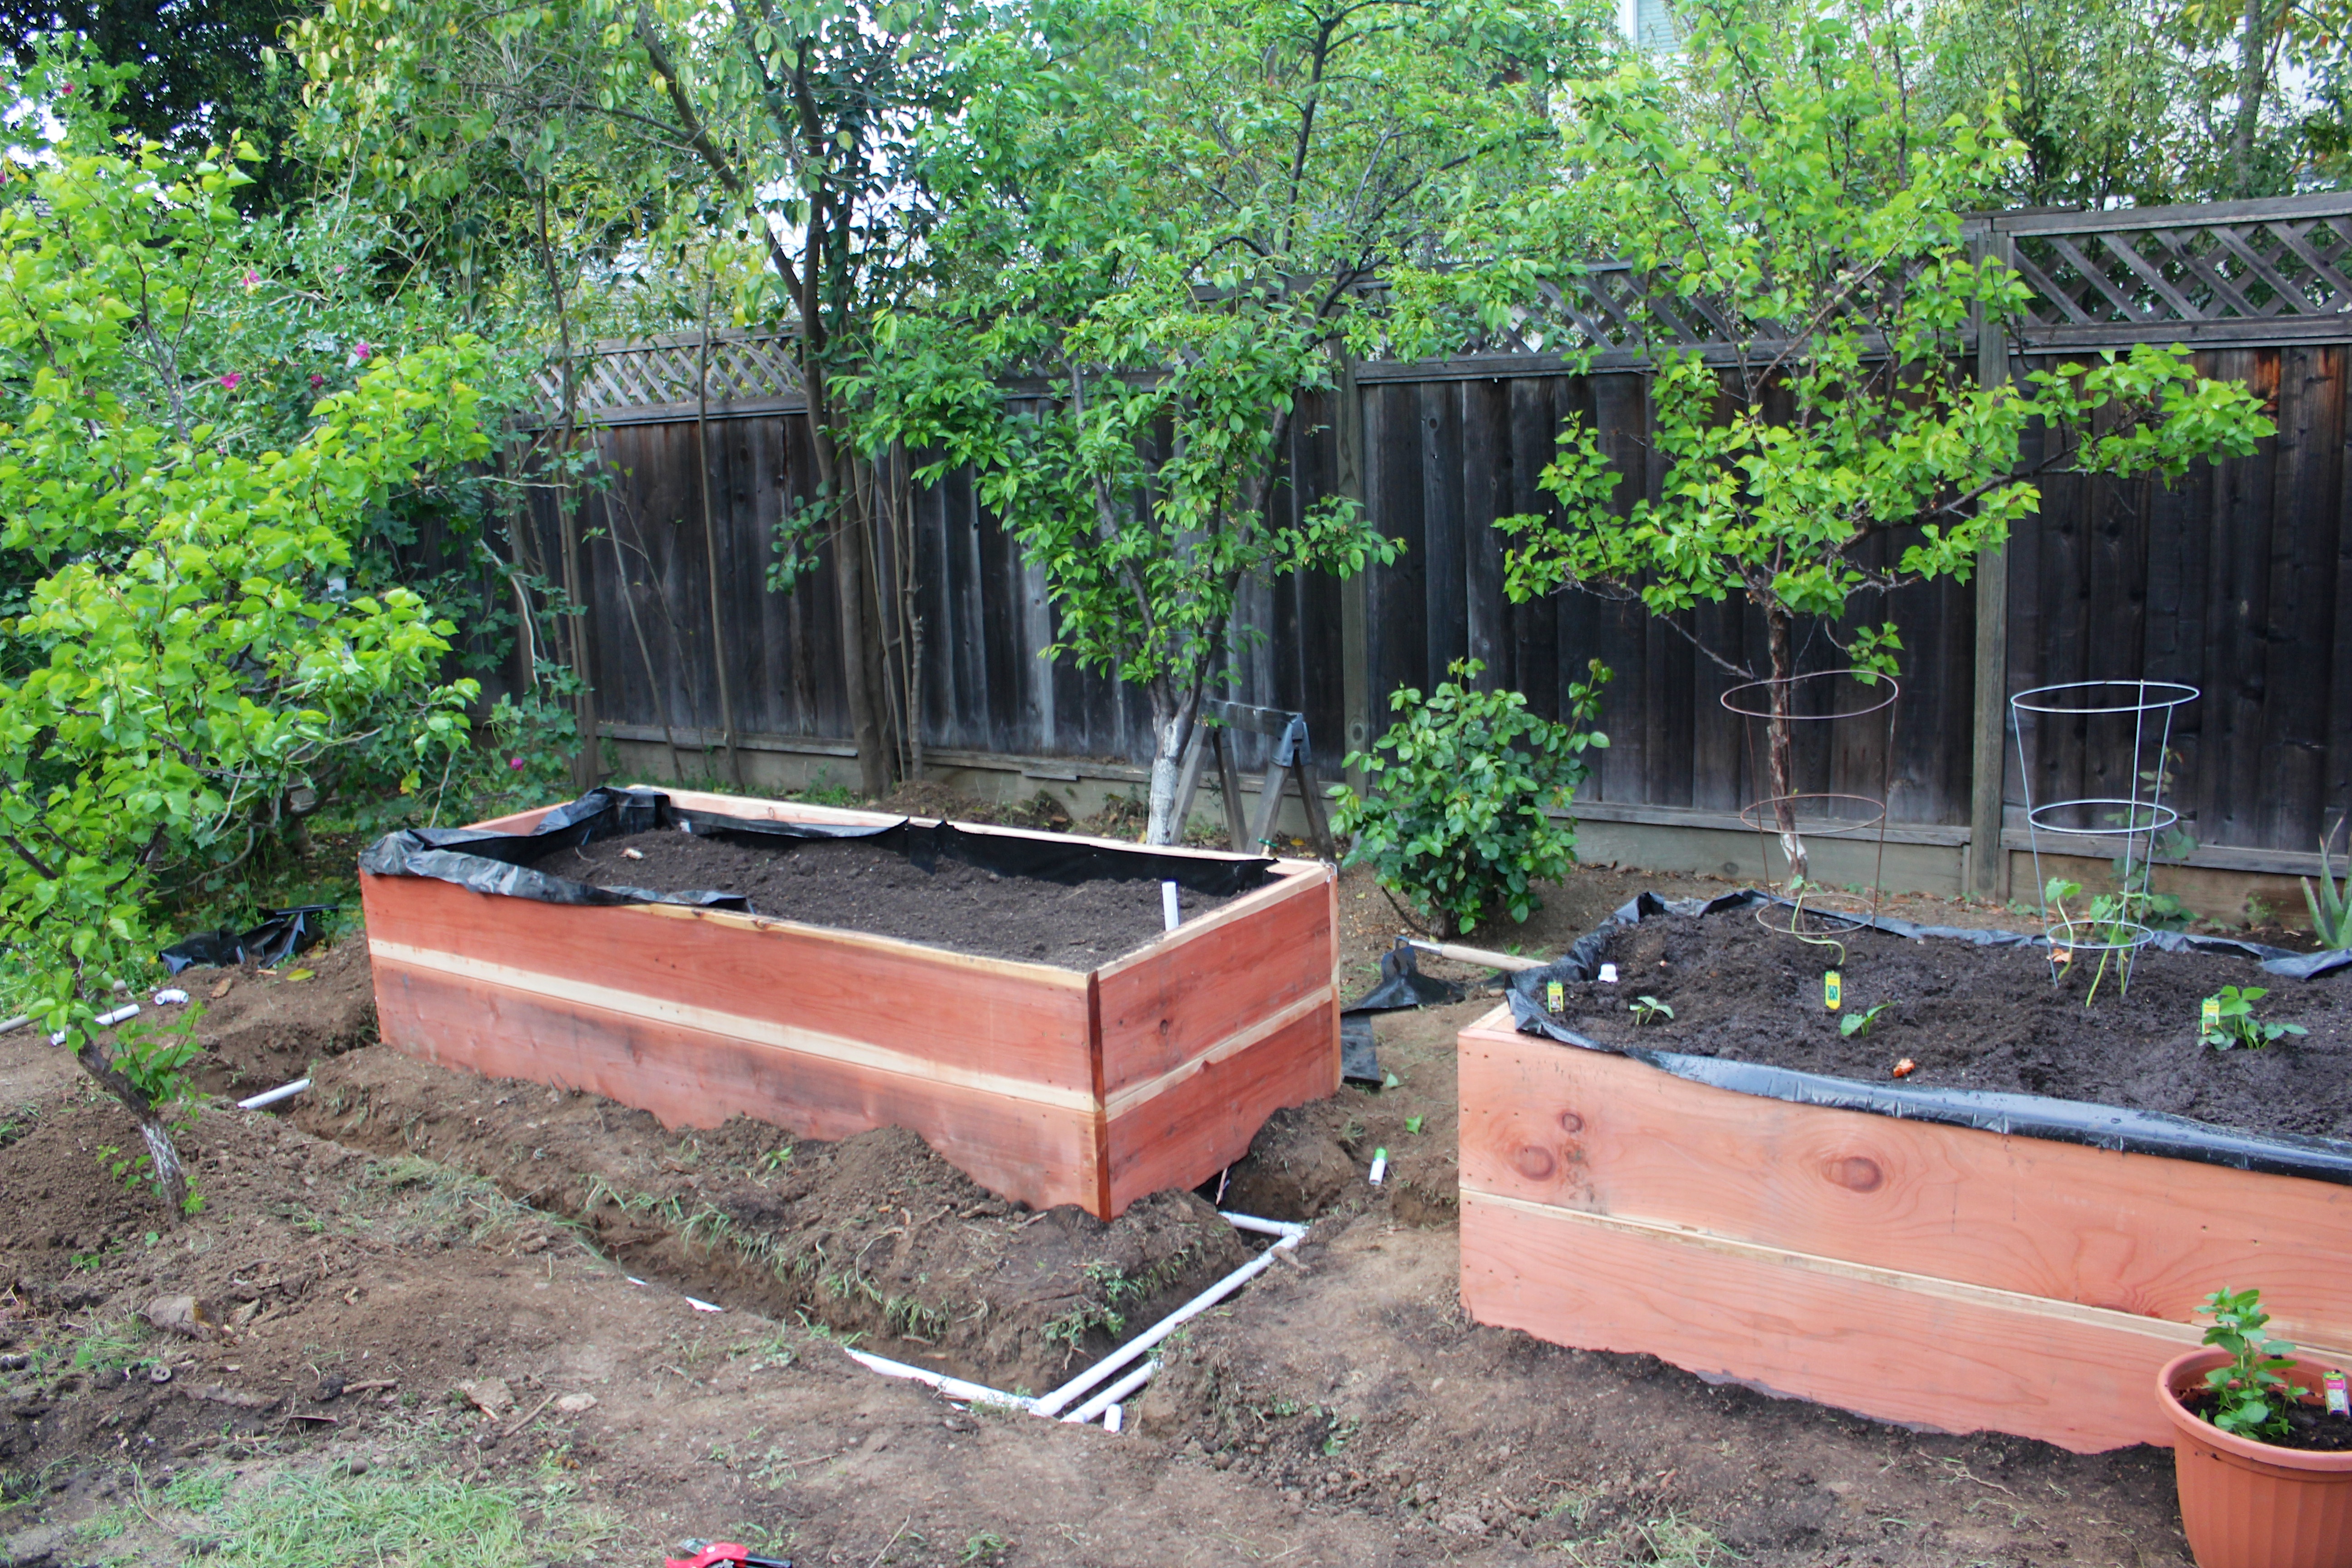
Installation! Getting ready to add the dirt, drippers, and plants.
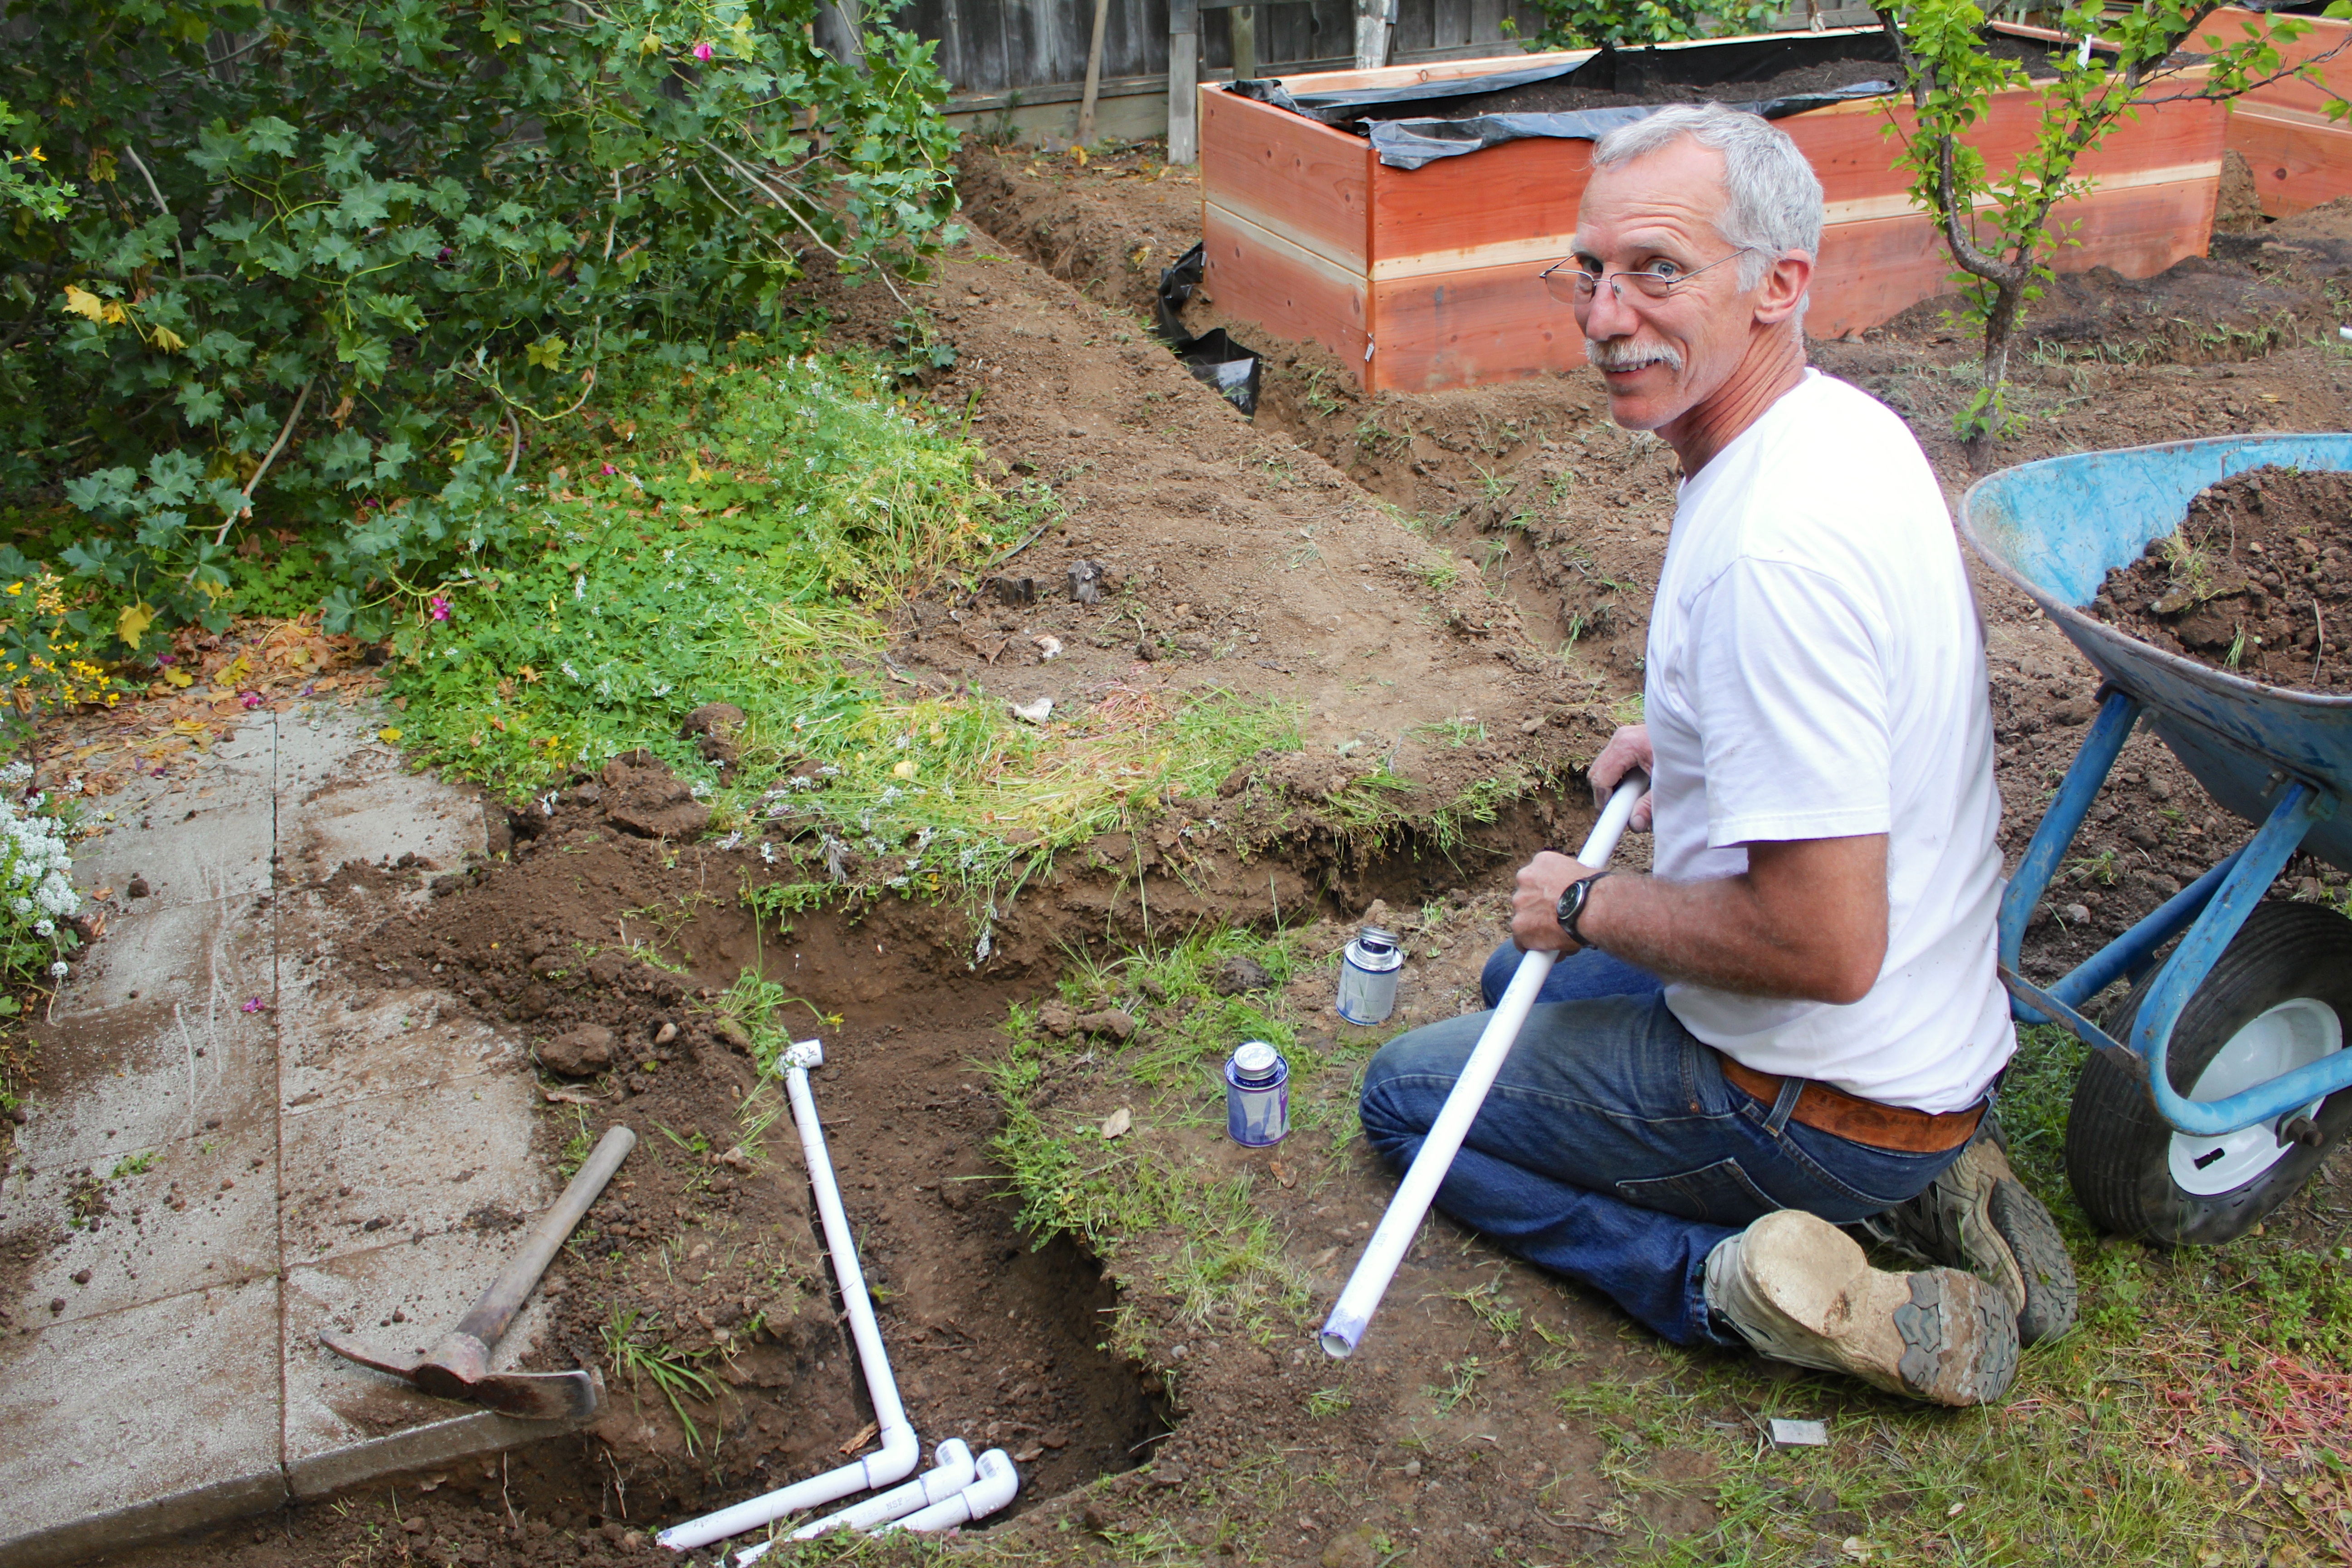
Operation: irrigation!
Operation irrigation, part II
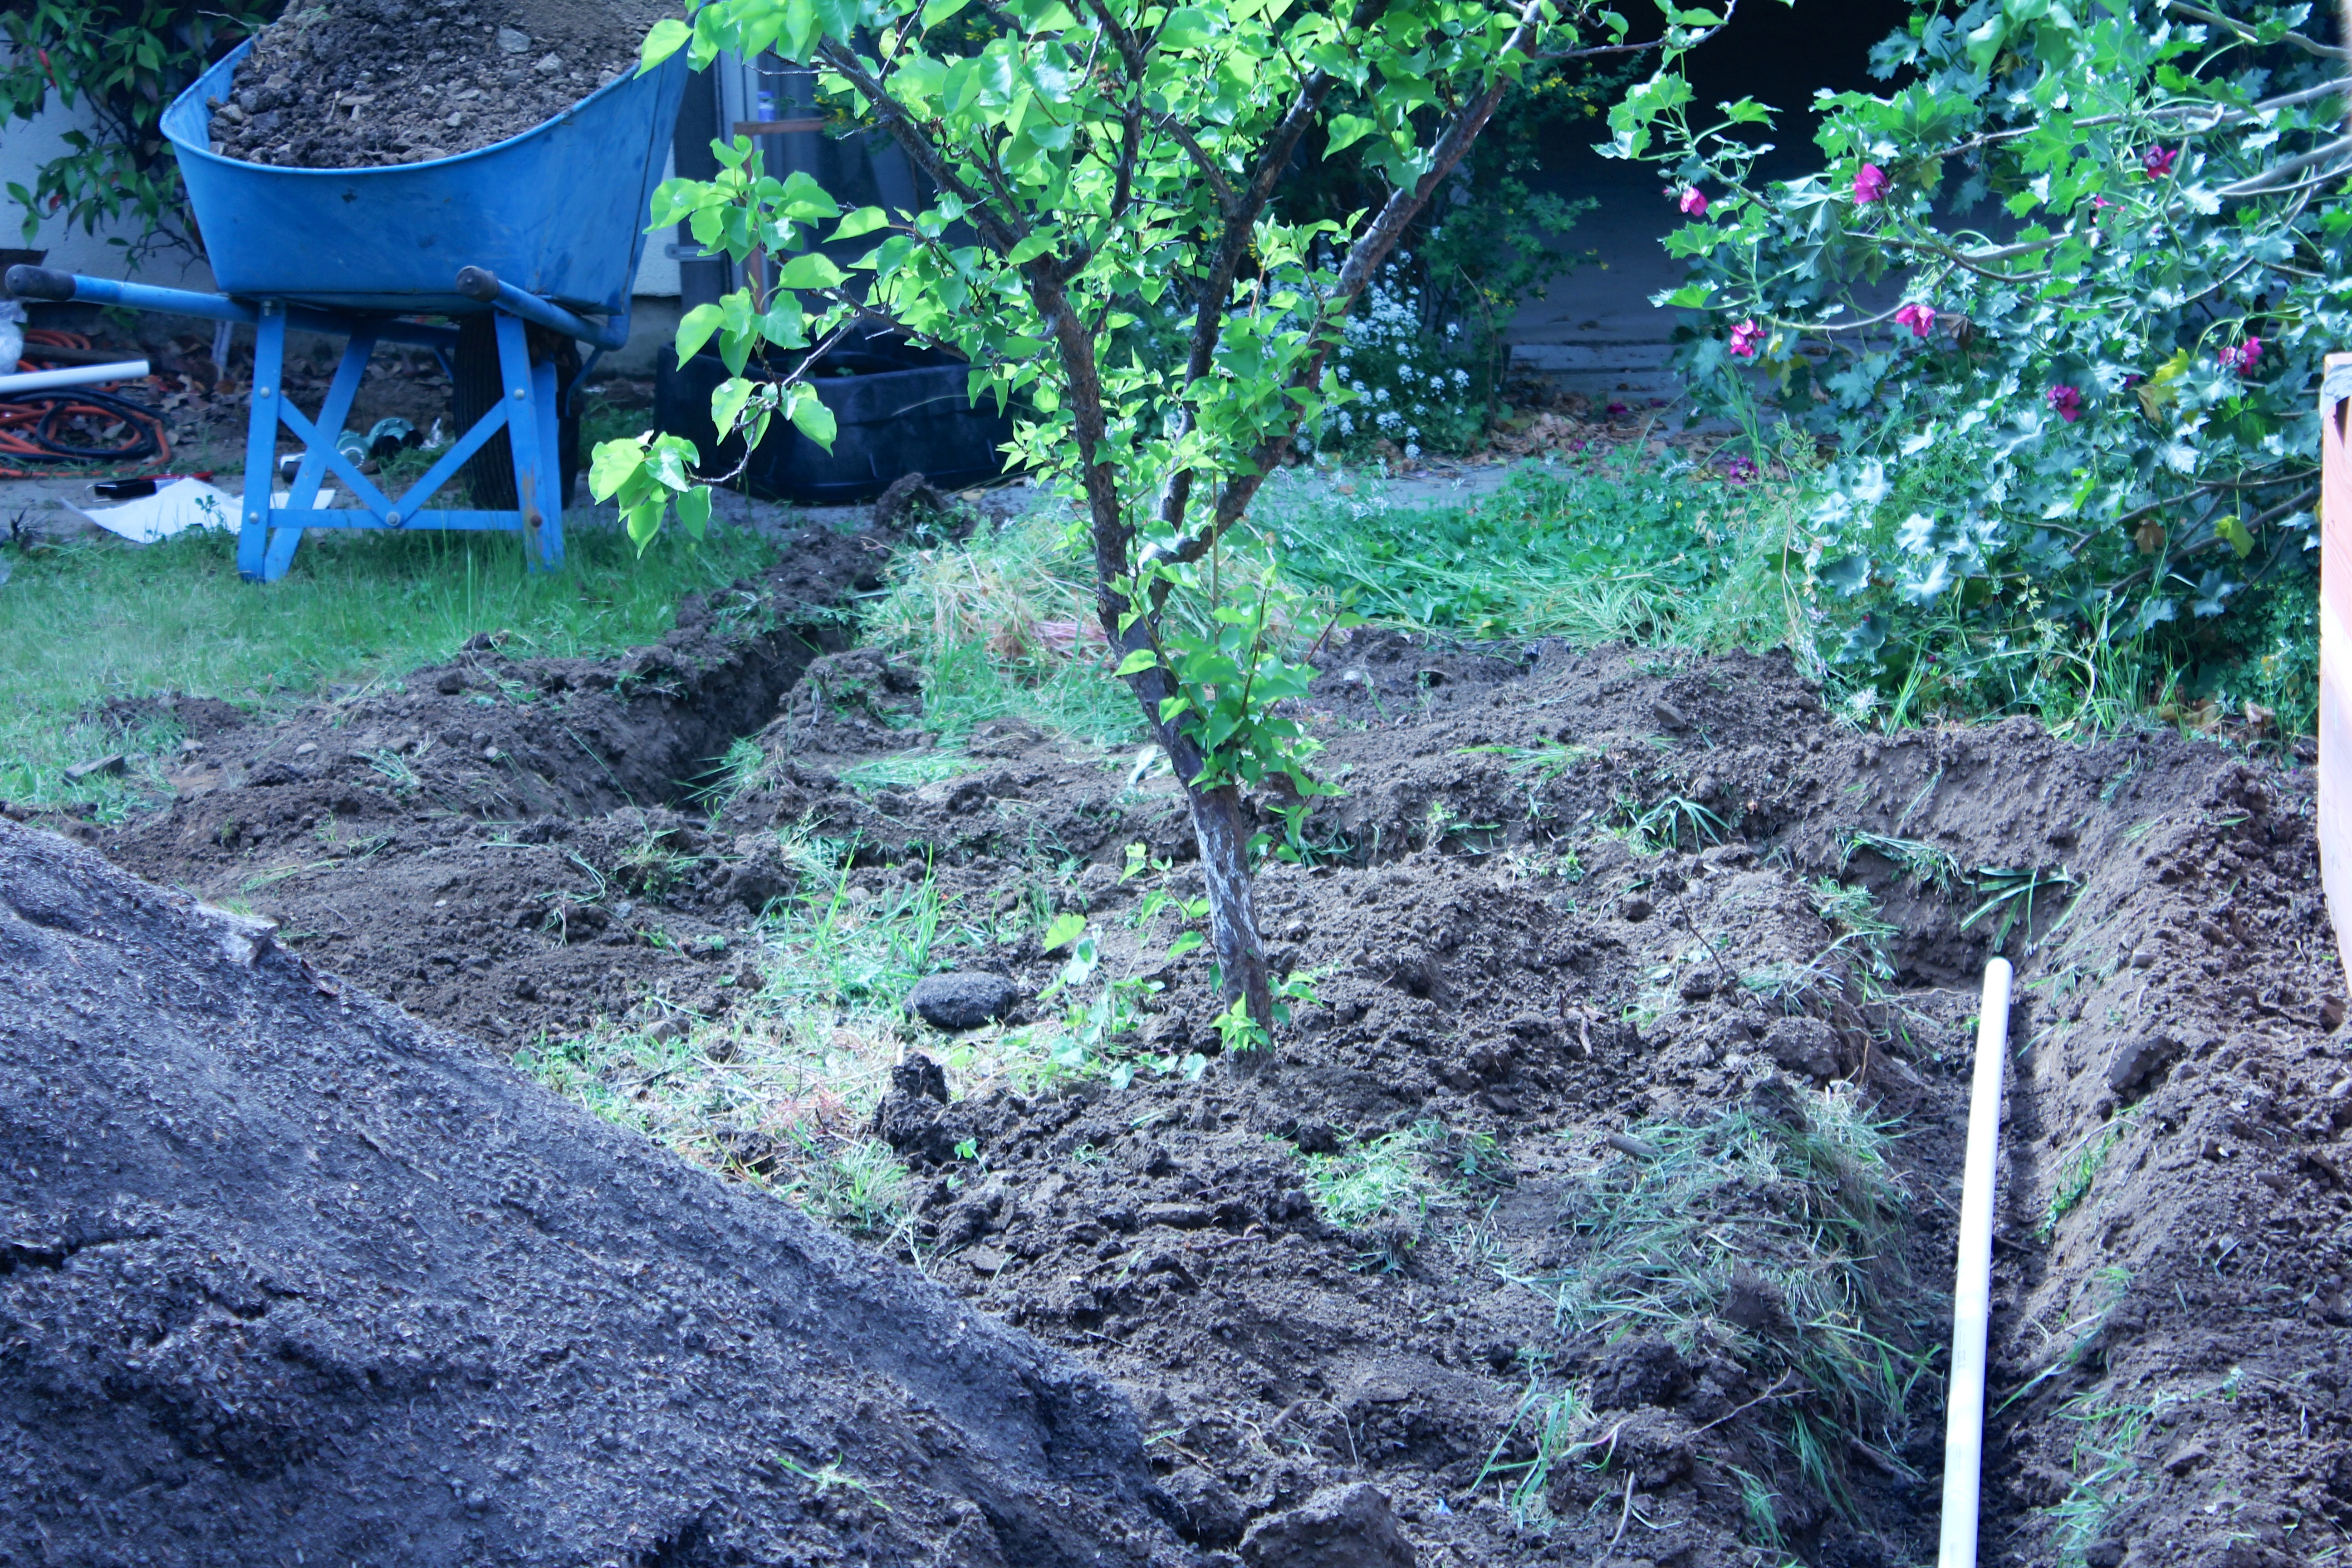
Look at that trench. Gorgeous!
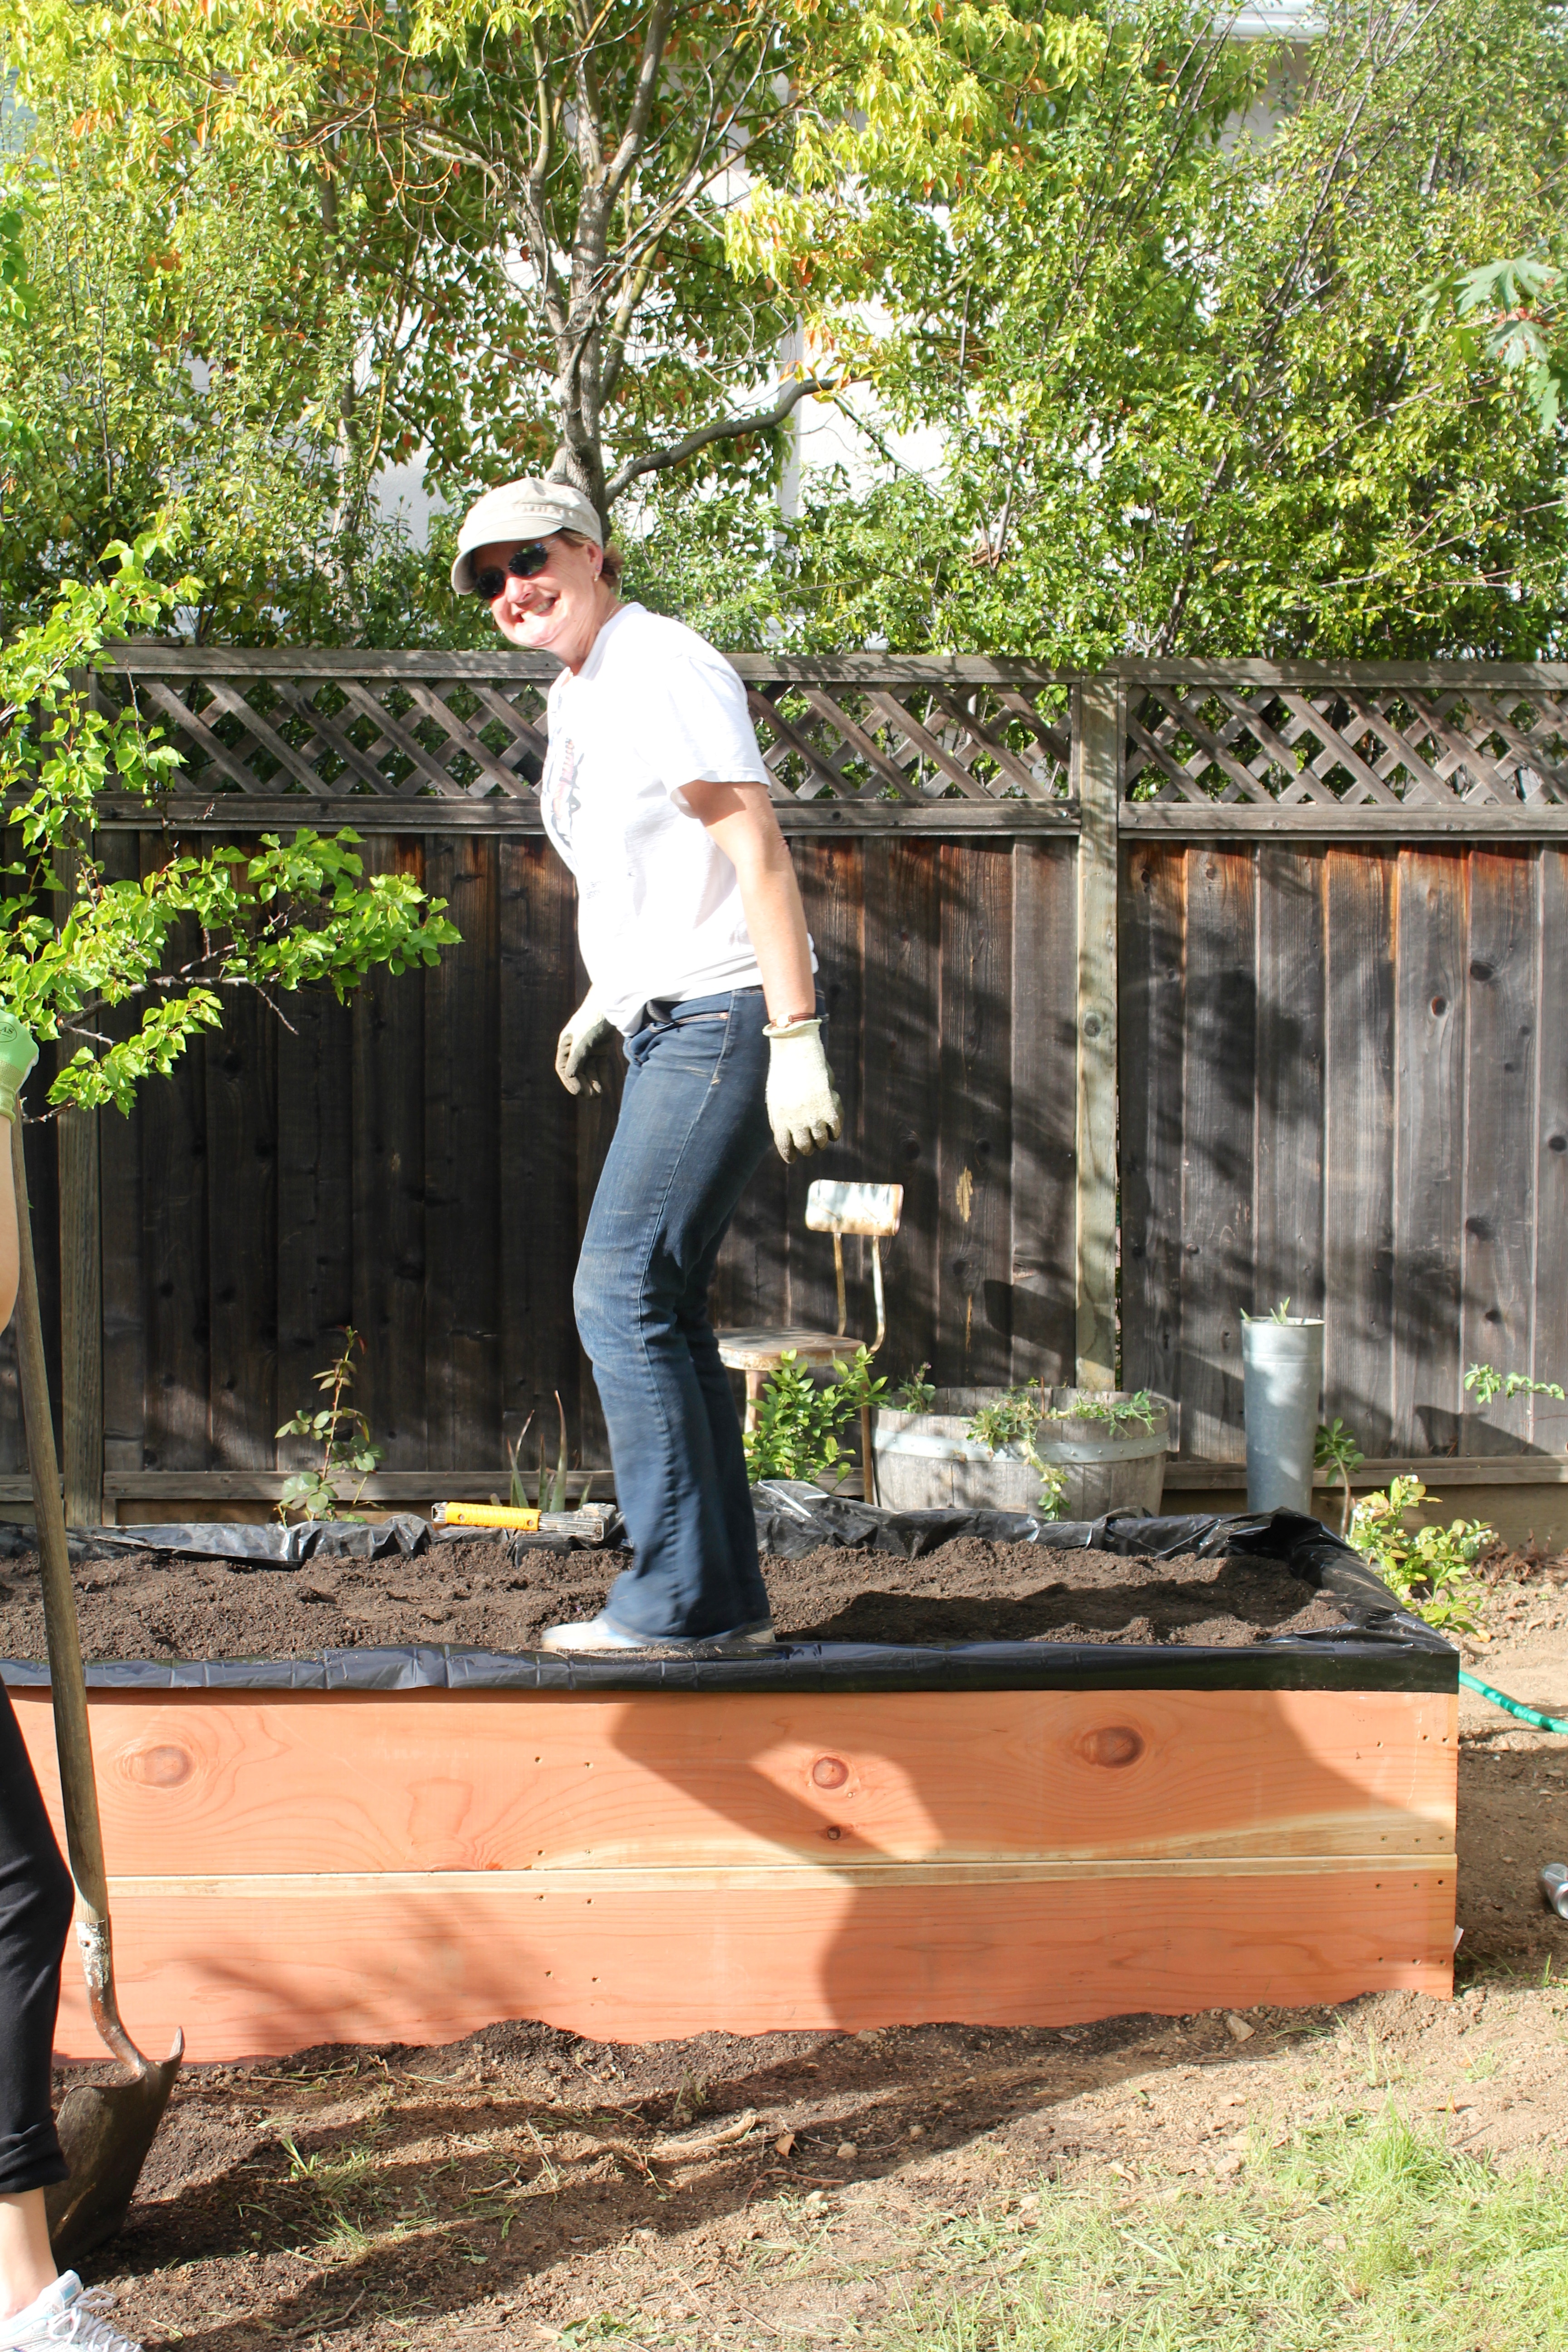
Dirt added! Time to compact.

And finally, planting. All this work for these little plants 🙂
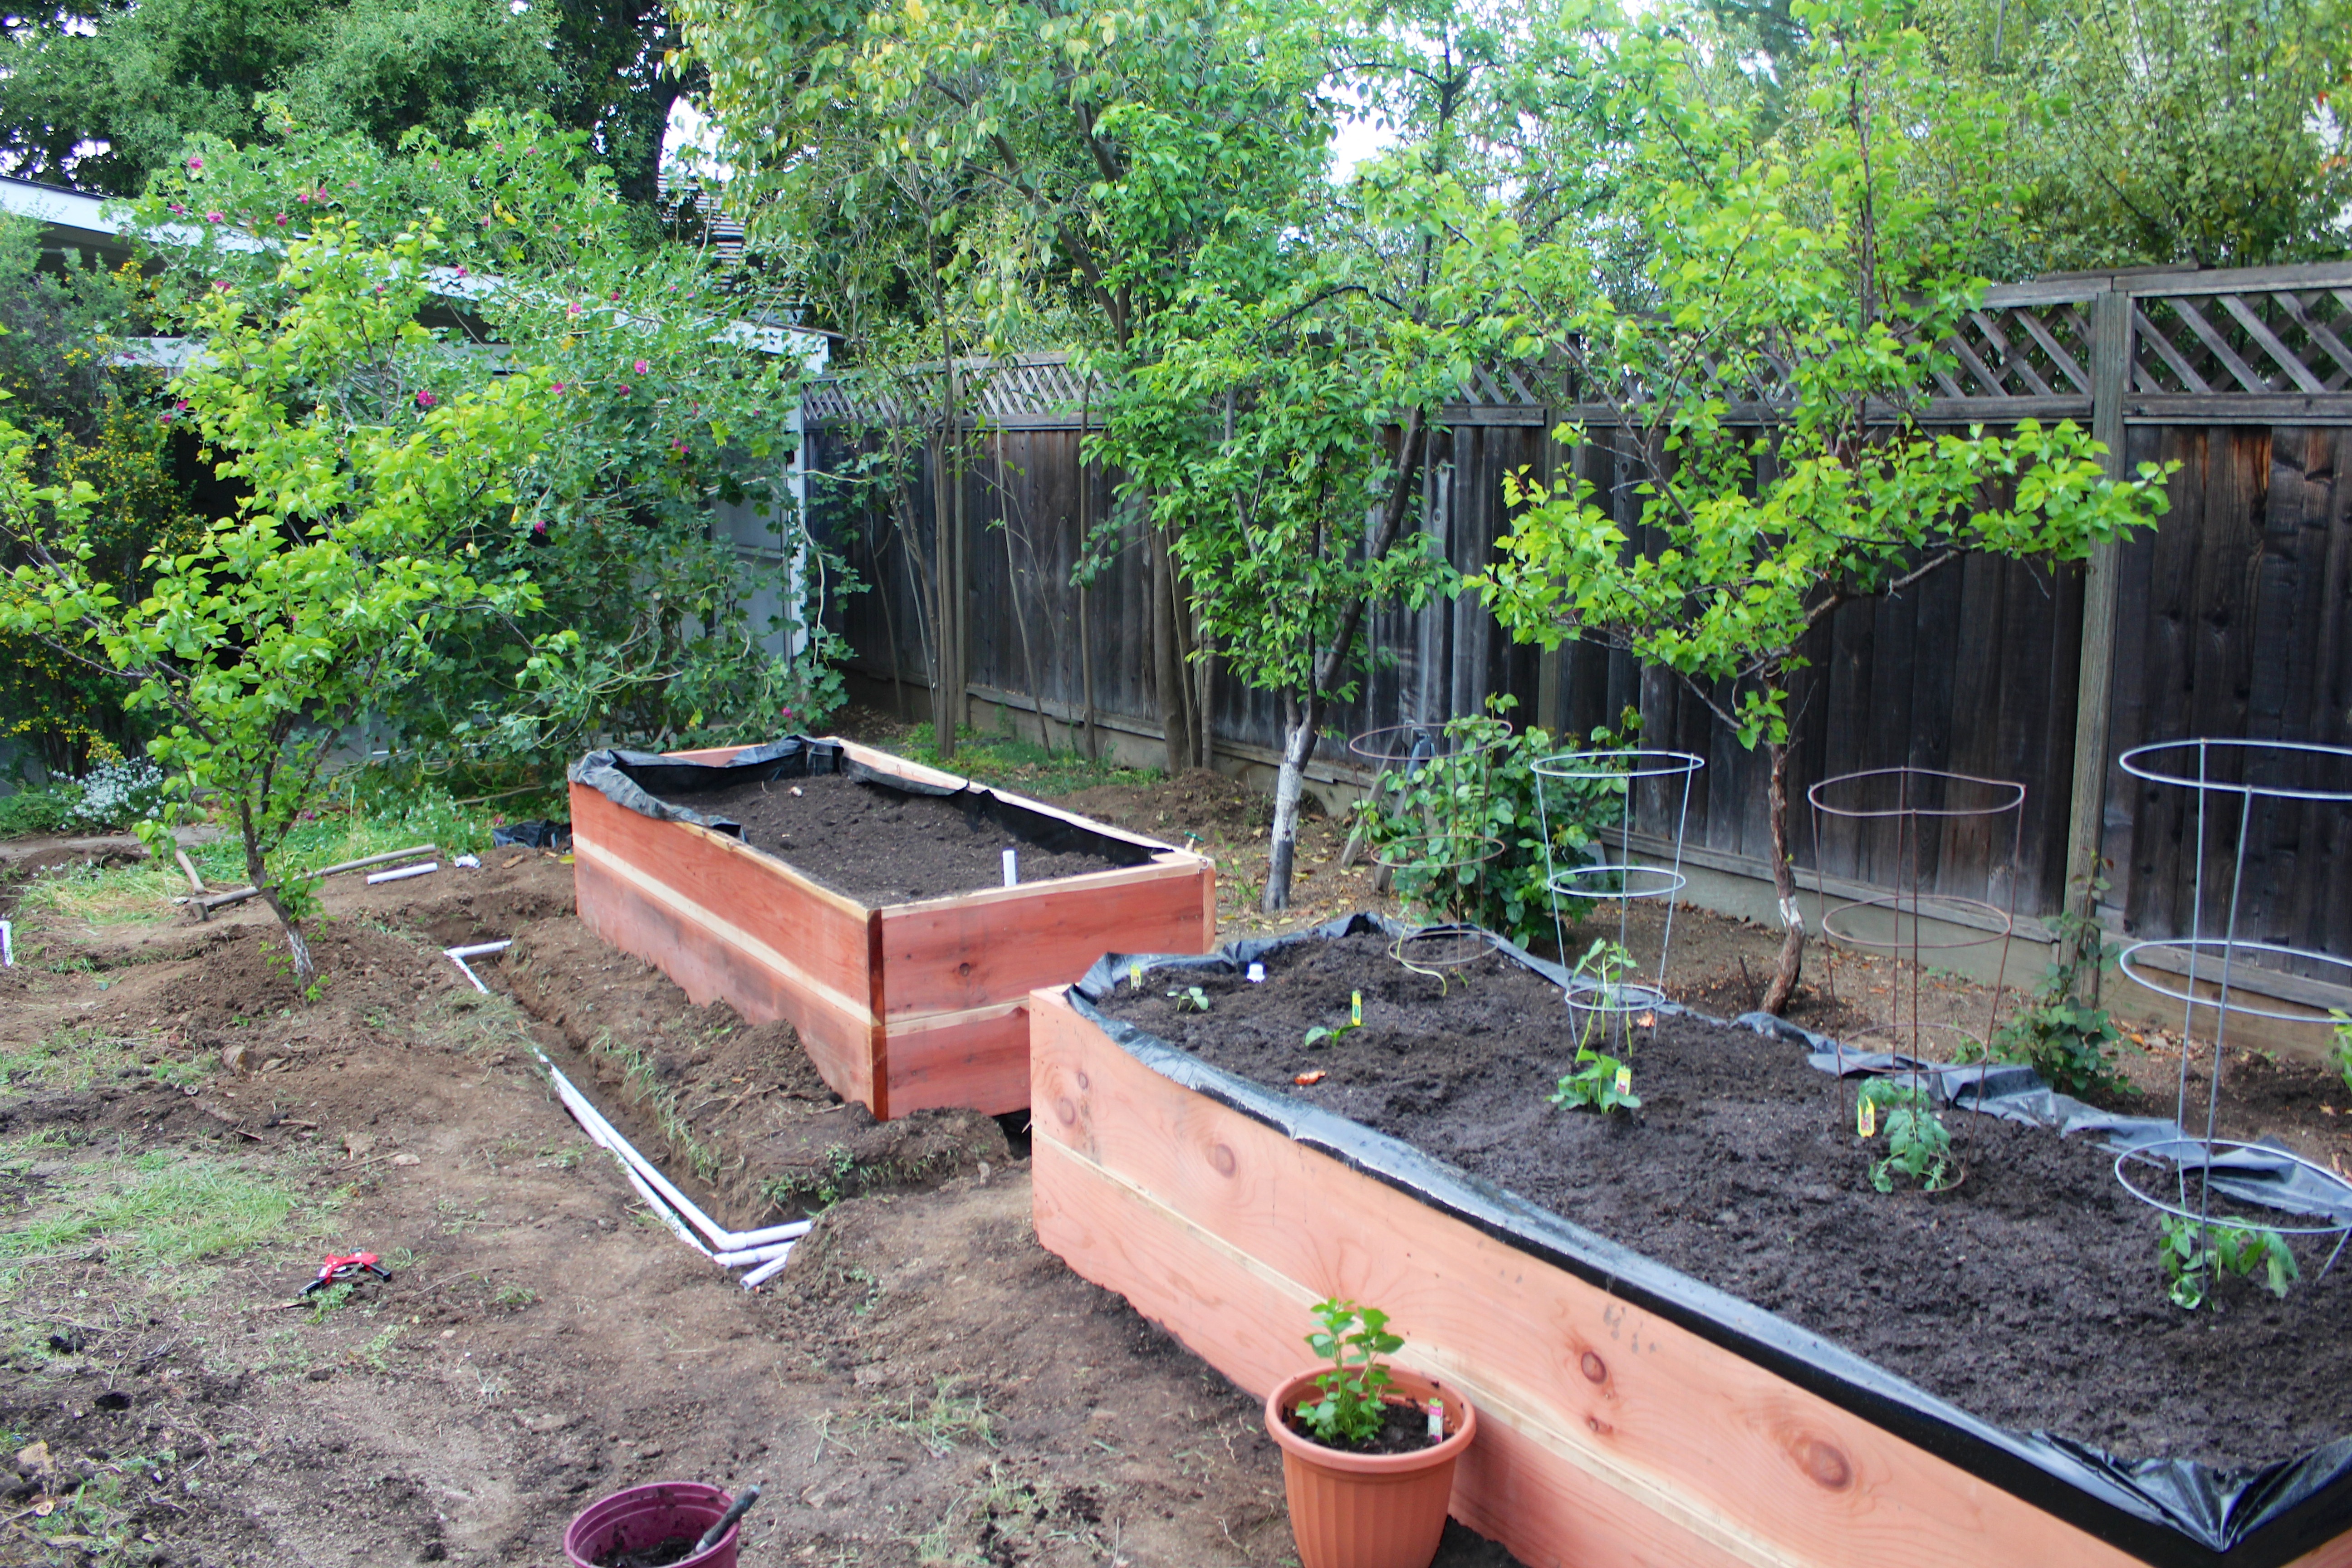
Planters, installed. Since we’ve put them in, the plants have really gone to town. Especially this week with all the heat!
And one more, for good measure!

To give you a little perspective on how behind I am on blogging (sorry, life is crazy!), we did this work Easter weekend. And what Easter is complete without deviled eggs and Coors Light?!
San Diego, January 2012

San Diego, January 2012

Free drinks at hotel check in. Good start to the weekend!

Best brunch in San Diego, two years running

Spicy Bloody Mary’s in the princess chair. Yes, I felt special

Natural History Museum

Purple succulents… I was so tempted to try to take this home and get it into our garden!

People watching at Balboa Park is highly entertaining. A great way to waste a few hours on a warm afternoon

rose gardens

🙂

We kind of like museums. And Balboa Park is full of them!

more roses

This weekend wouldn’t have been complete without a return to the scene of the crime, so to speak

So here we are!

