
Chandelier Shenanigans: An Adventure in DIY Lighting
The lighting in the dining room has been driving Justin crazy for months. Probably since before we moved in. Don’t get me wrong, I’m not crazy about our dingy, uncentered light either. But I just figured it would be one of those things we would get around to changing eventually, when we had a little more time and money. Well, my assumption was completely incorrect. Apparently, I forgot who I am married to? Regardless of my miscalculated assumptions, my wonderful husband had big plans to change the lighting in our dining room, and to change it right now.
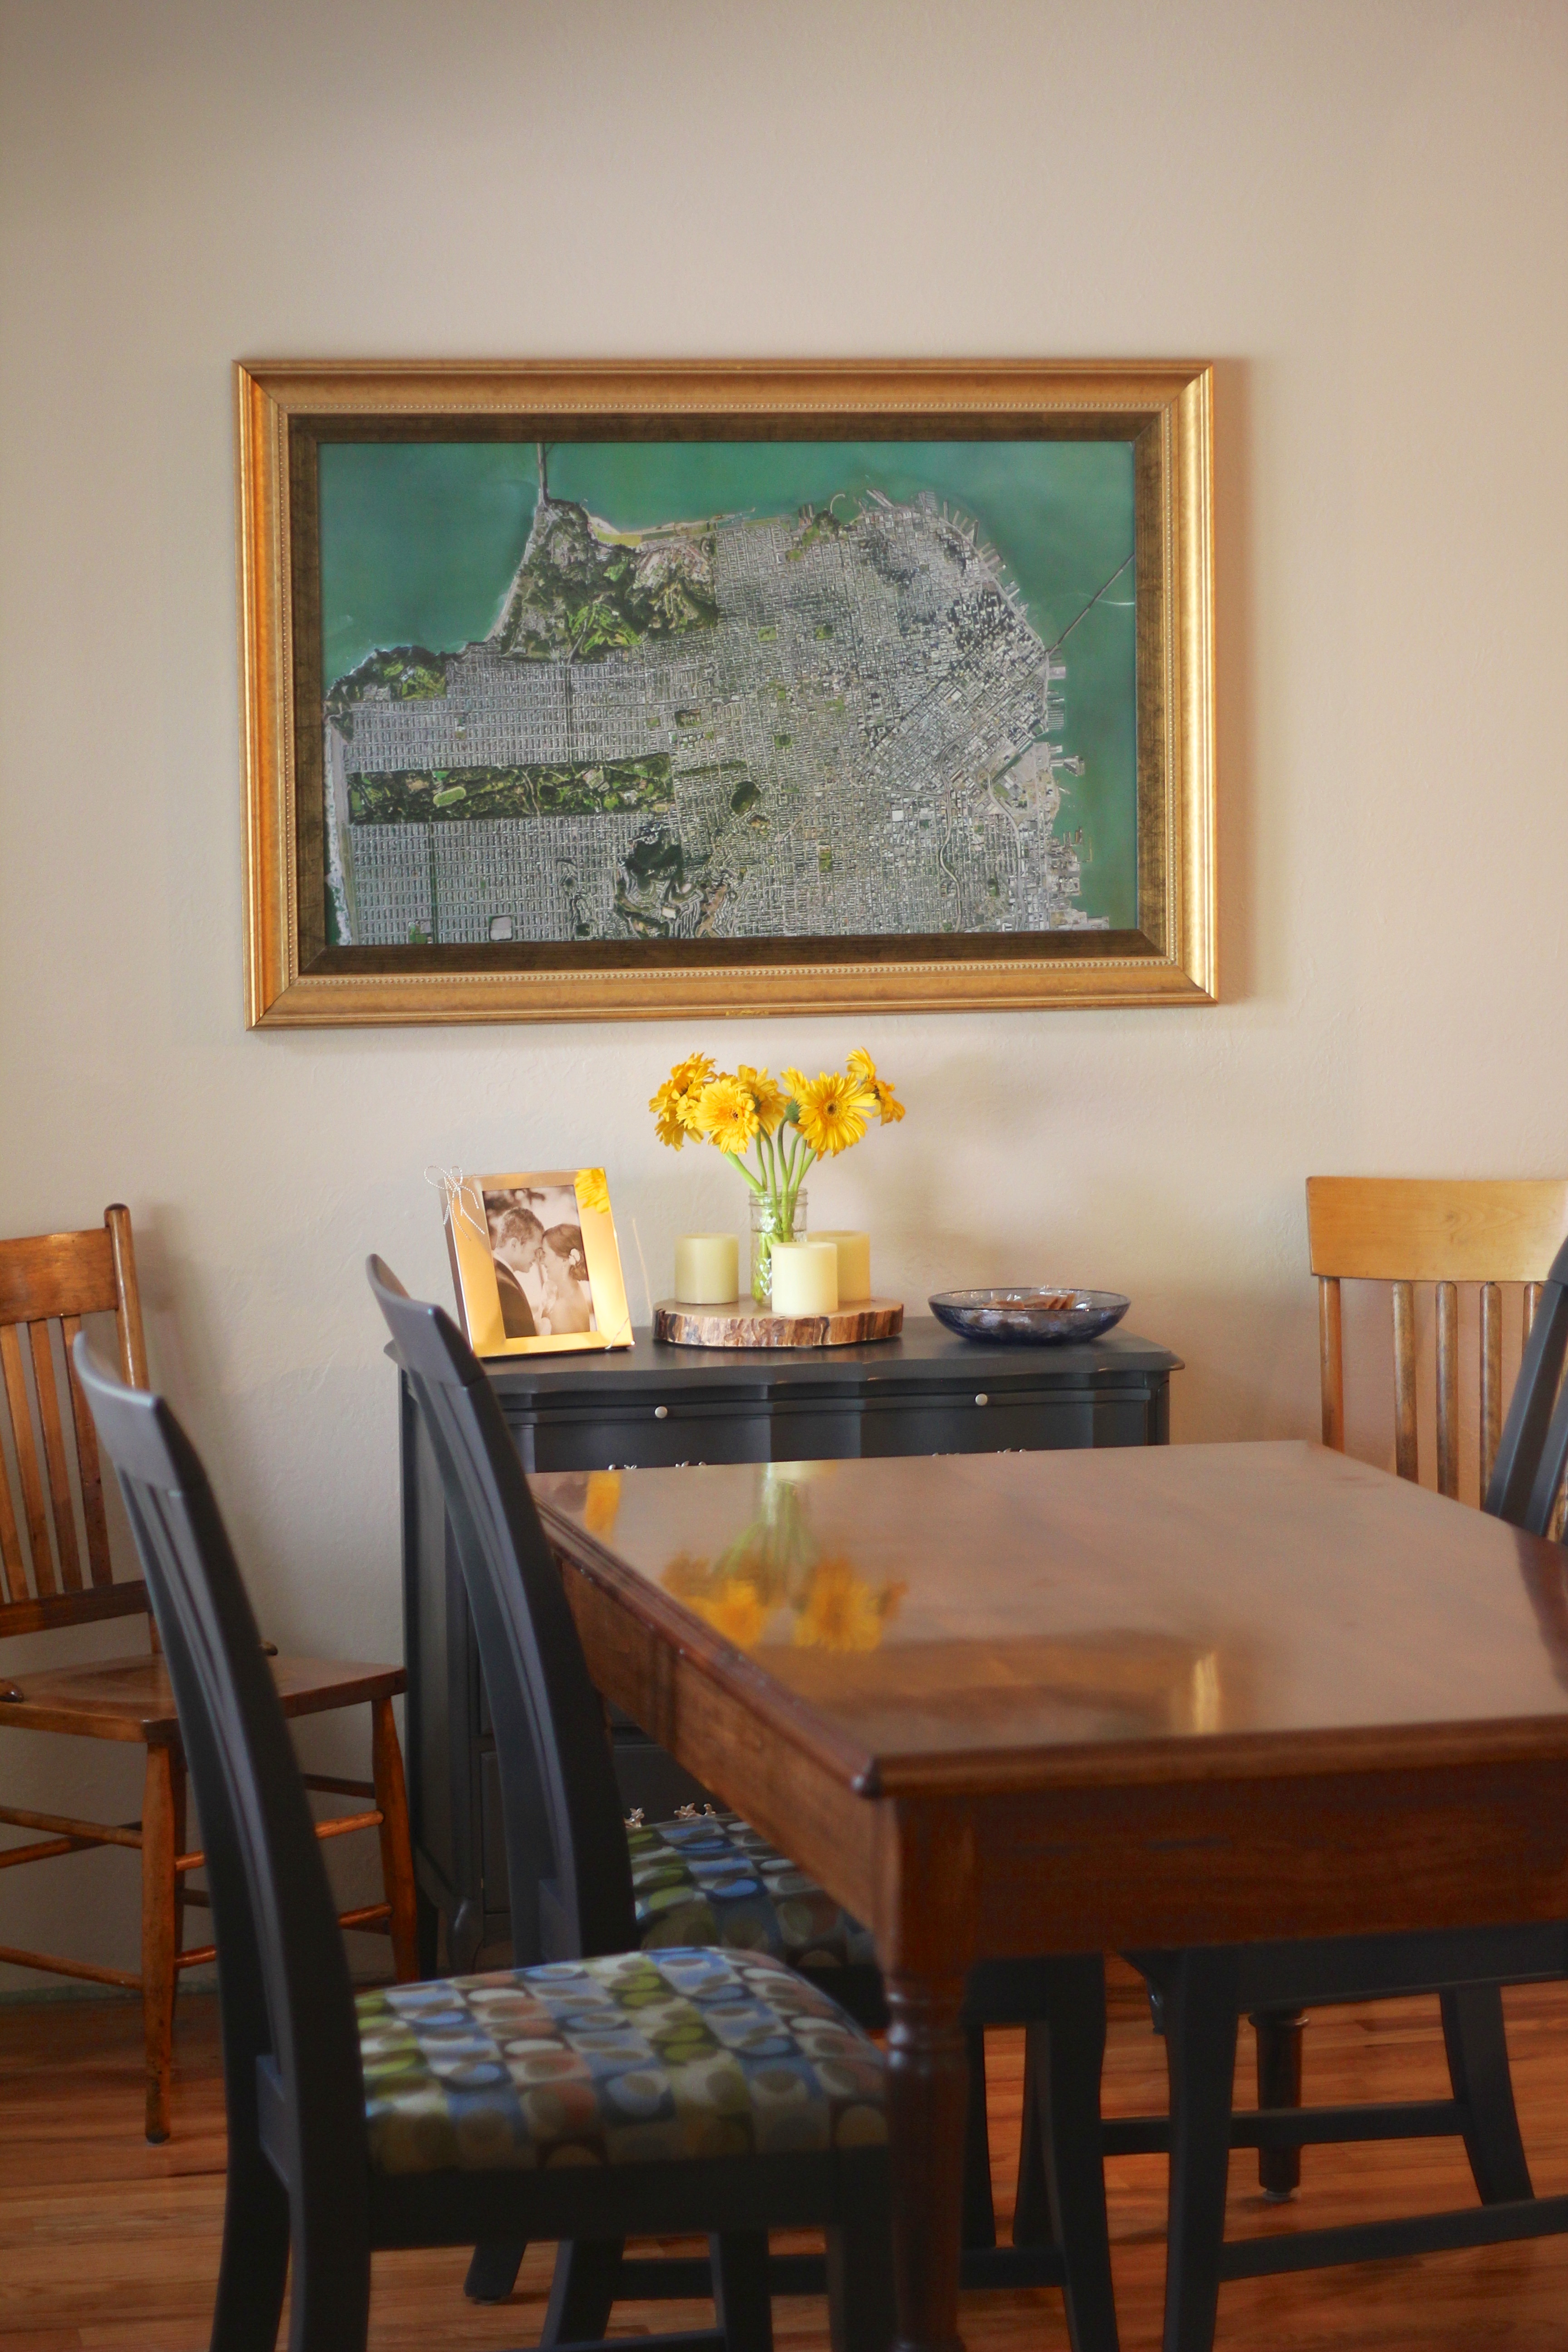
We took inspiration from a chandelier that we saw on an unrelated trip to the hardware store, that looked something like this:

Inspiration
We liked the casual feel of the mason jars, and thought this was the kind of design that we could handle for our first chandelier. Actually, for our first real electrical project… we’ve installed new lights and added a few new outlets around the house, but this was the first project that would involve some serious electrical knowledge and prowess (of which I still do not possess, so I won’t go into detail for fear of sounding light an idiot). All I know, is that we had to do some serious wiring and relocate the existing, incredibly off-center junction box. Needless to say, Justin learned a lot about all things electrical, I did as I was told, and we ended up with a gorgeous, one-of-a-kind, handmade chandelier!
This is the only picture I can find of “before”. We’ve done a lot to that frame, and I realize you can’t see the terrible off-center dining room light… but it’s a starting point at least?
But I’m getting ahead of myself. Before we could do anything related to electricity, we had to design our chandelier. We settled on the longer, more slender mason jar style instead of the traditional more bulbous jars. We like the look of these jars better, but we also needed the extra jar height to ensure the light bulbs would fit inside with a little wiggle room. Which brings me to the next decision: light bulb types! When you have a lighting fixture with bare bulbs (or bulbs in clear glass jars), they are a definite focal point and they must be really cool. So we splurged a little bit on the light bulbs, and upgraded to the old school Edison-type light bulbs. And the splurge was worth it. Once we had our materials and our design all squared away (and delivered from that magical place called Amazon), we got to work.
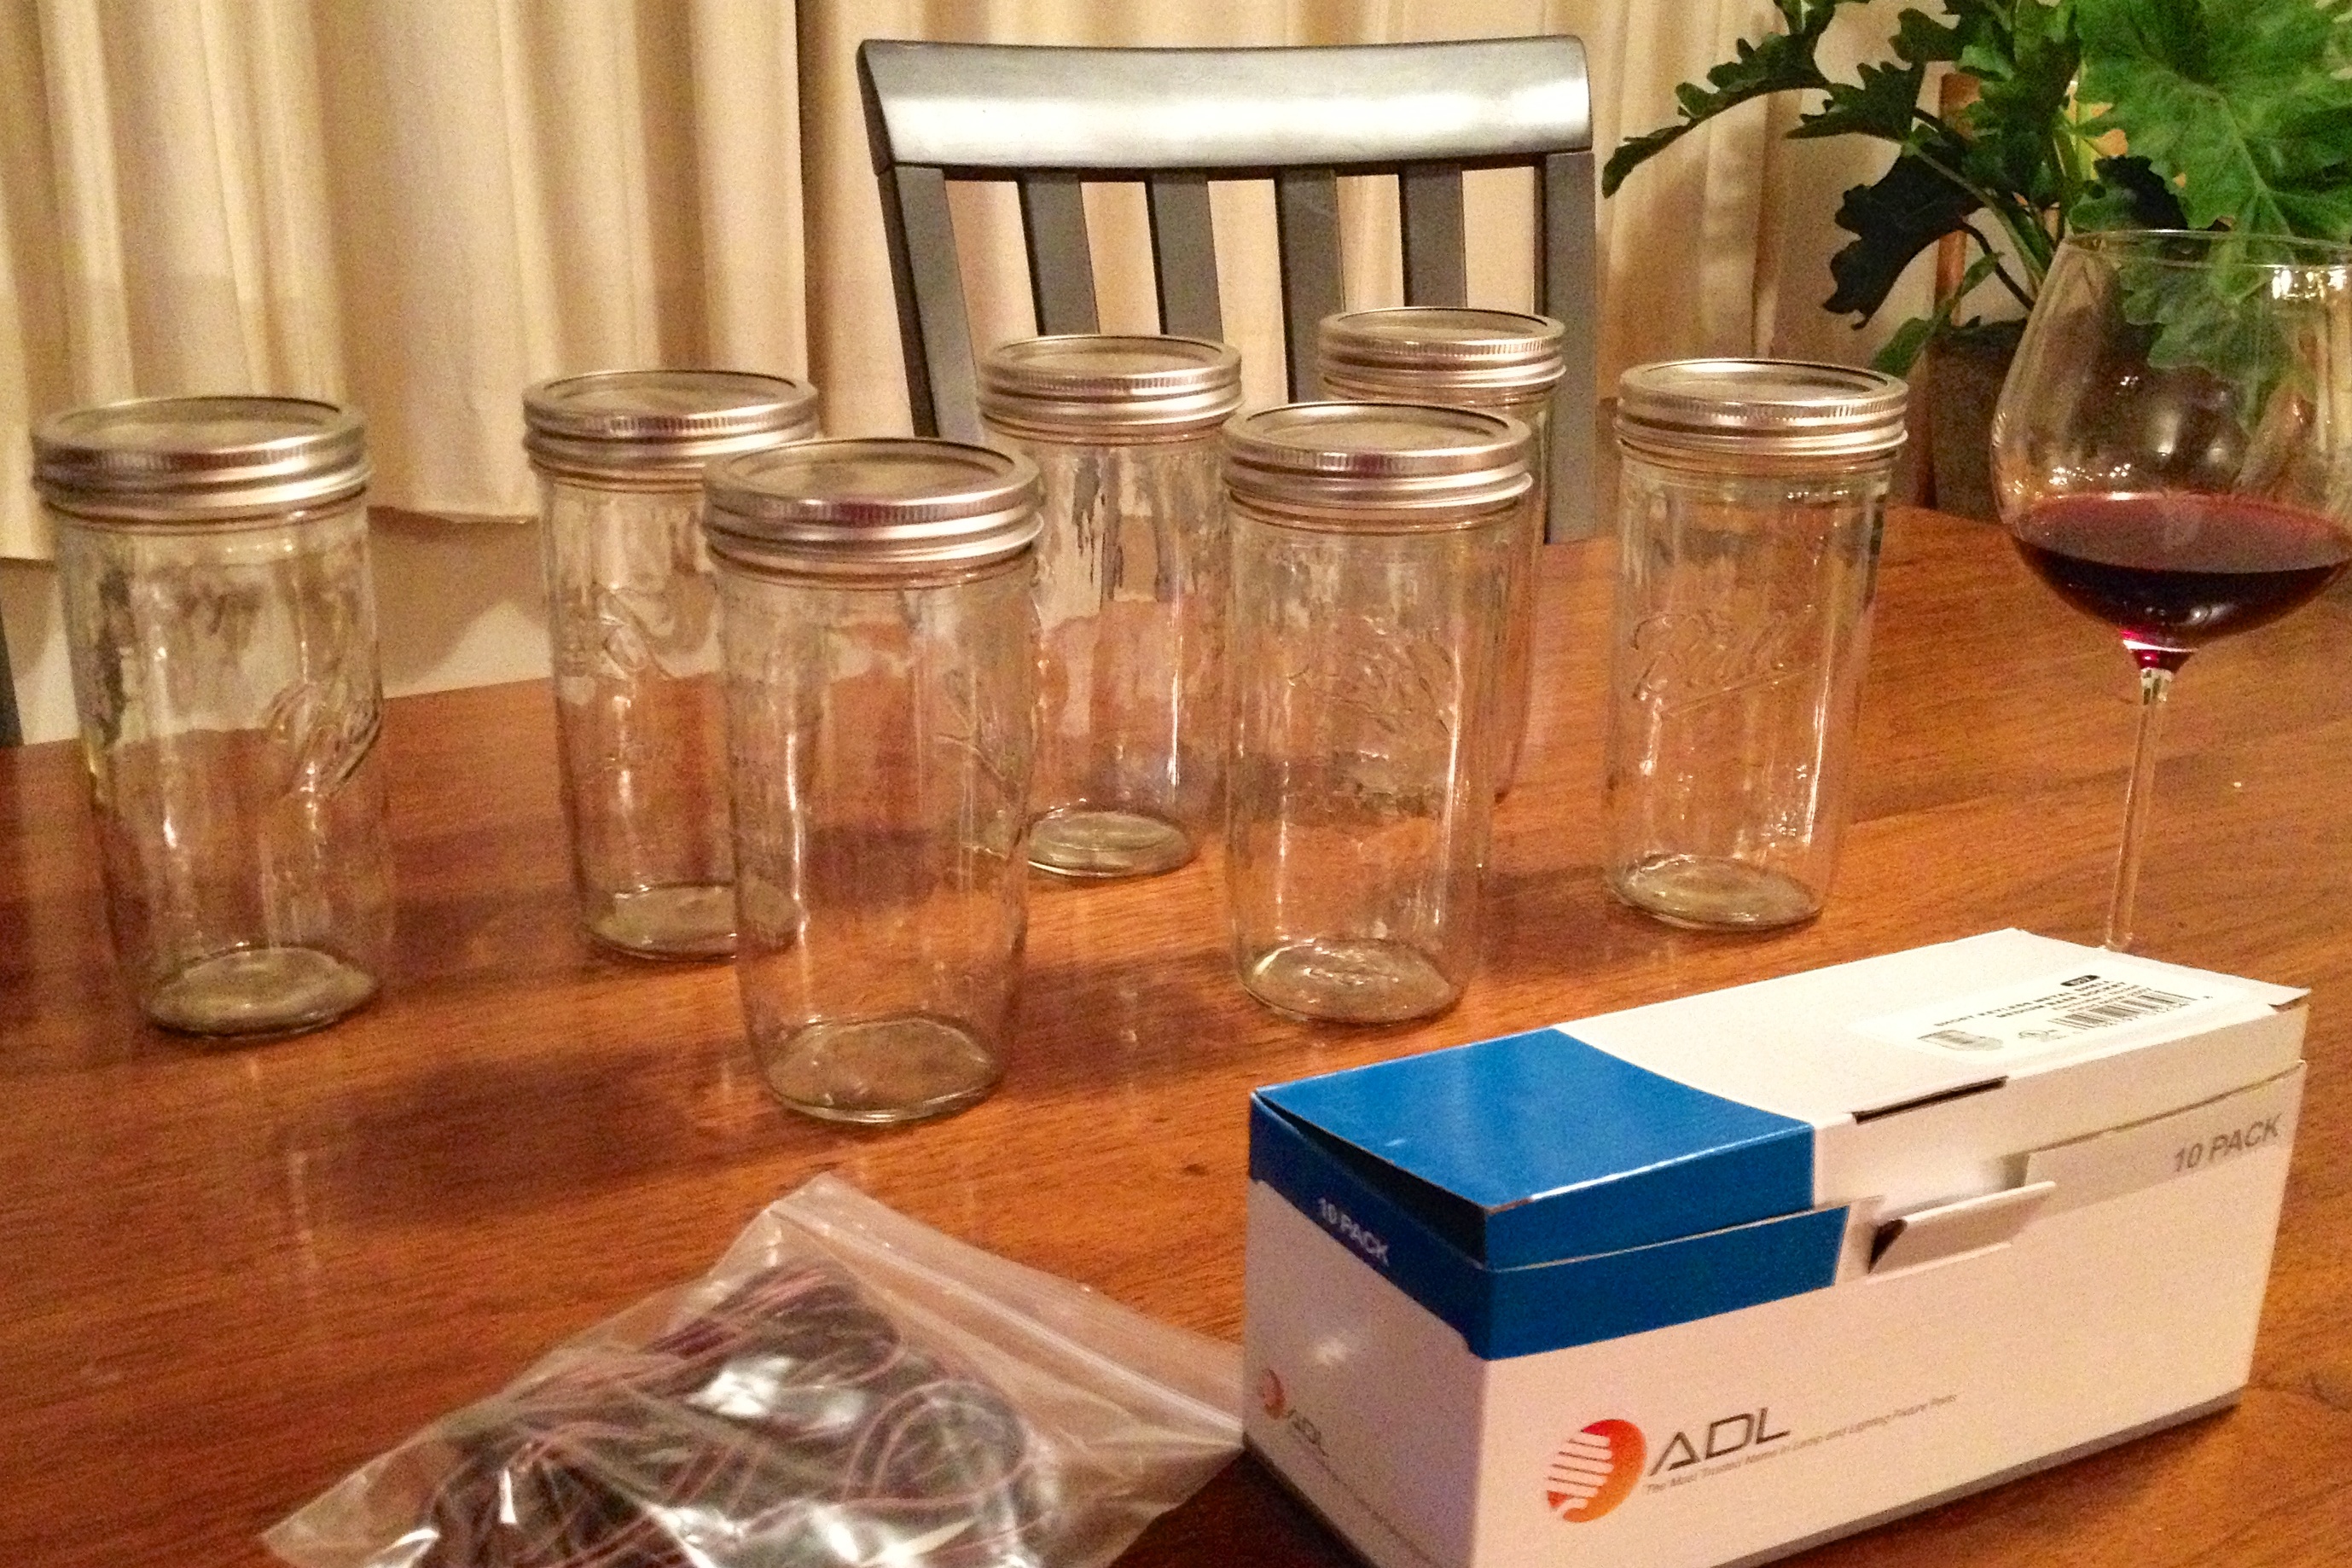
Chandelier materials. Yes, wine is a necessary chandelier-building material…
Justin started by constructing the “box” of the chandelier. The design he came up with involved a box that would be attached to the ceiling to conceal all of the wires and other unseemly parts of a light. The box consists of two pieces: the first piece has three sides, and the second piece is the final side and the top of the box. Justin cut a groove in the first piece of the box so that the second piece could slide in and out, to allow for any changes in the electrical work or to change the height of the jars. After the pieces of the box were constructed, we drilled holes for the “strings” to hang through and stained the box with our favorite espresso finish (this is starting to become a habit!).
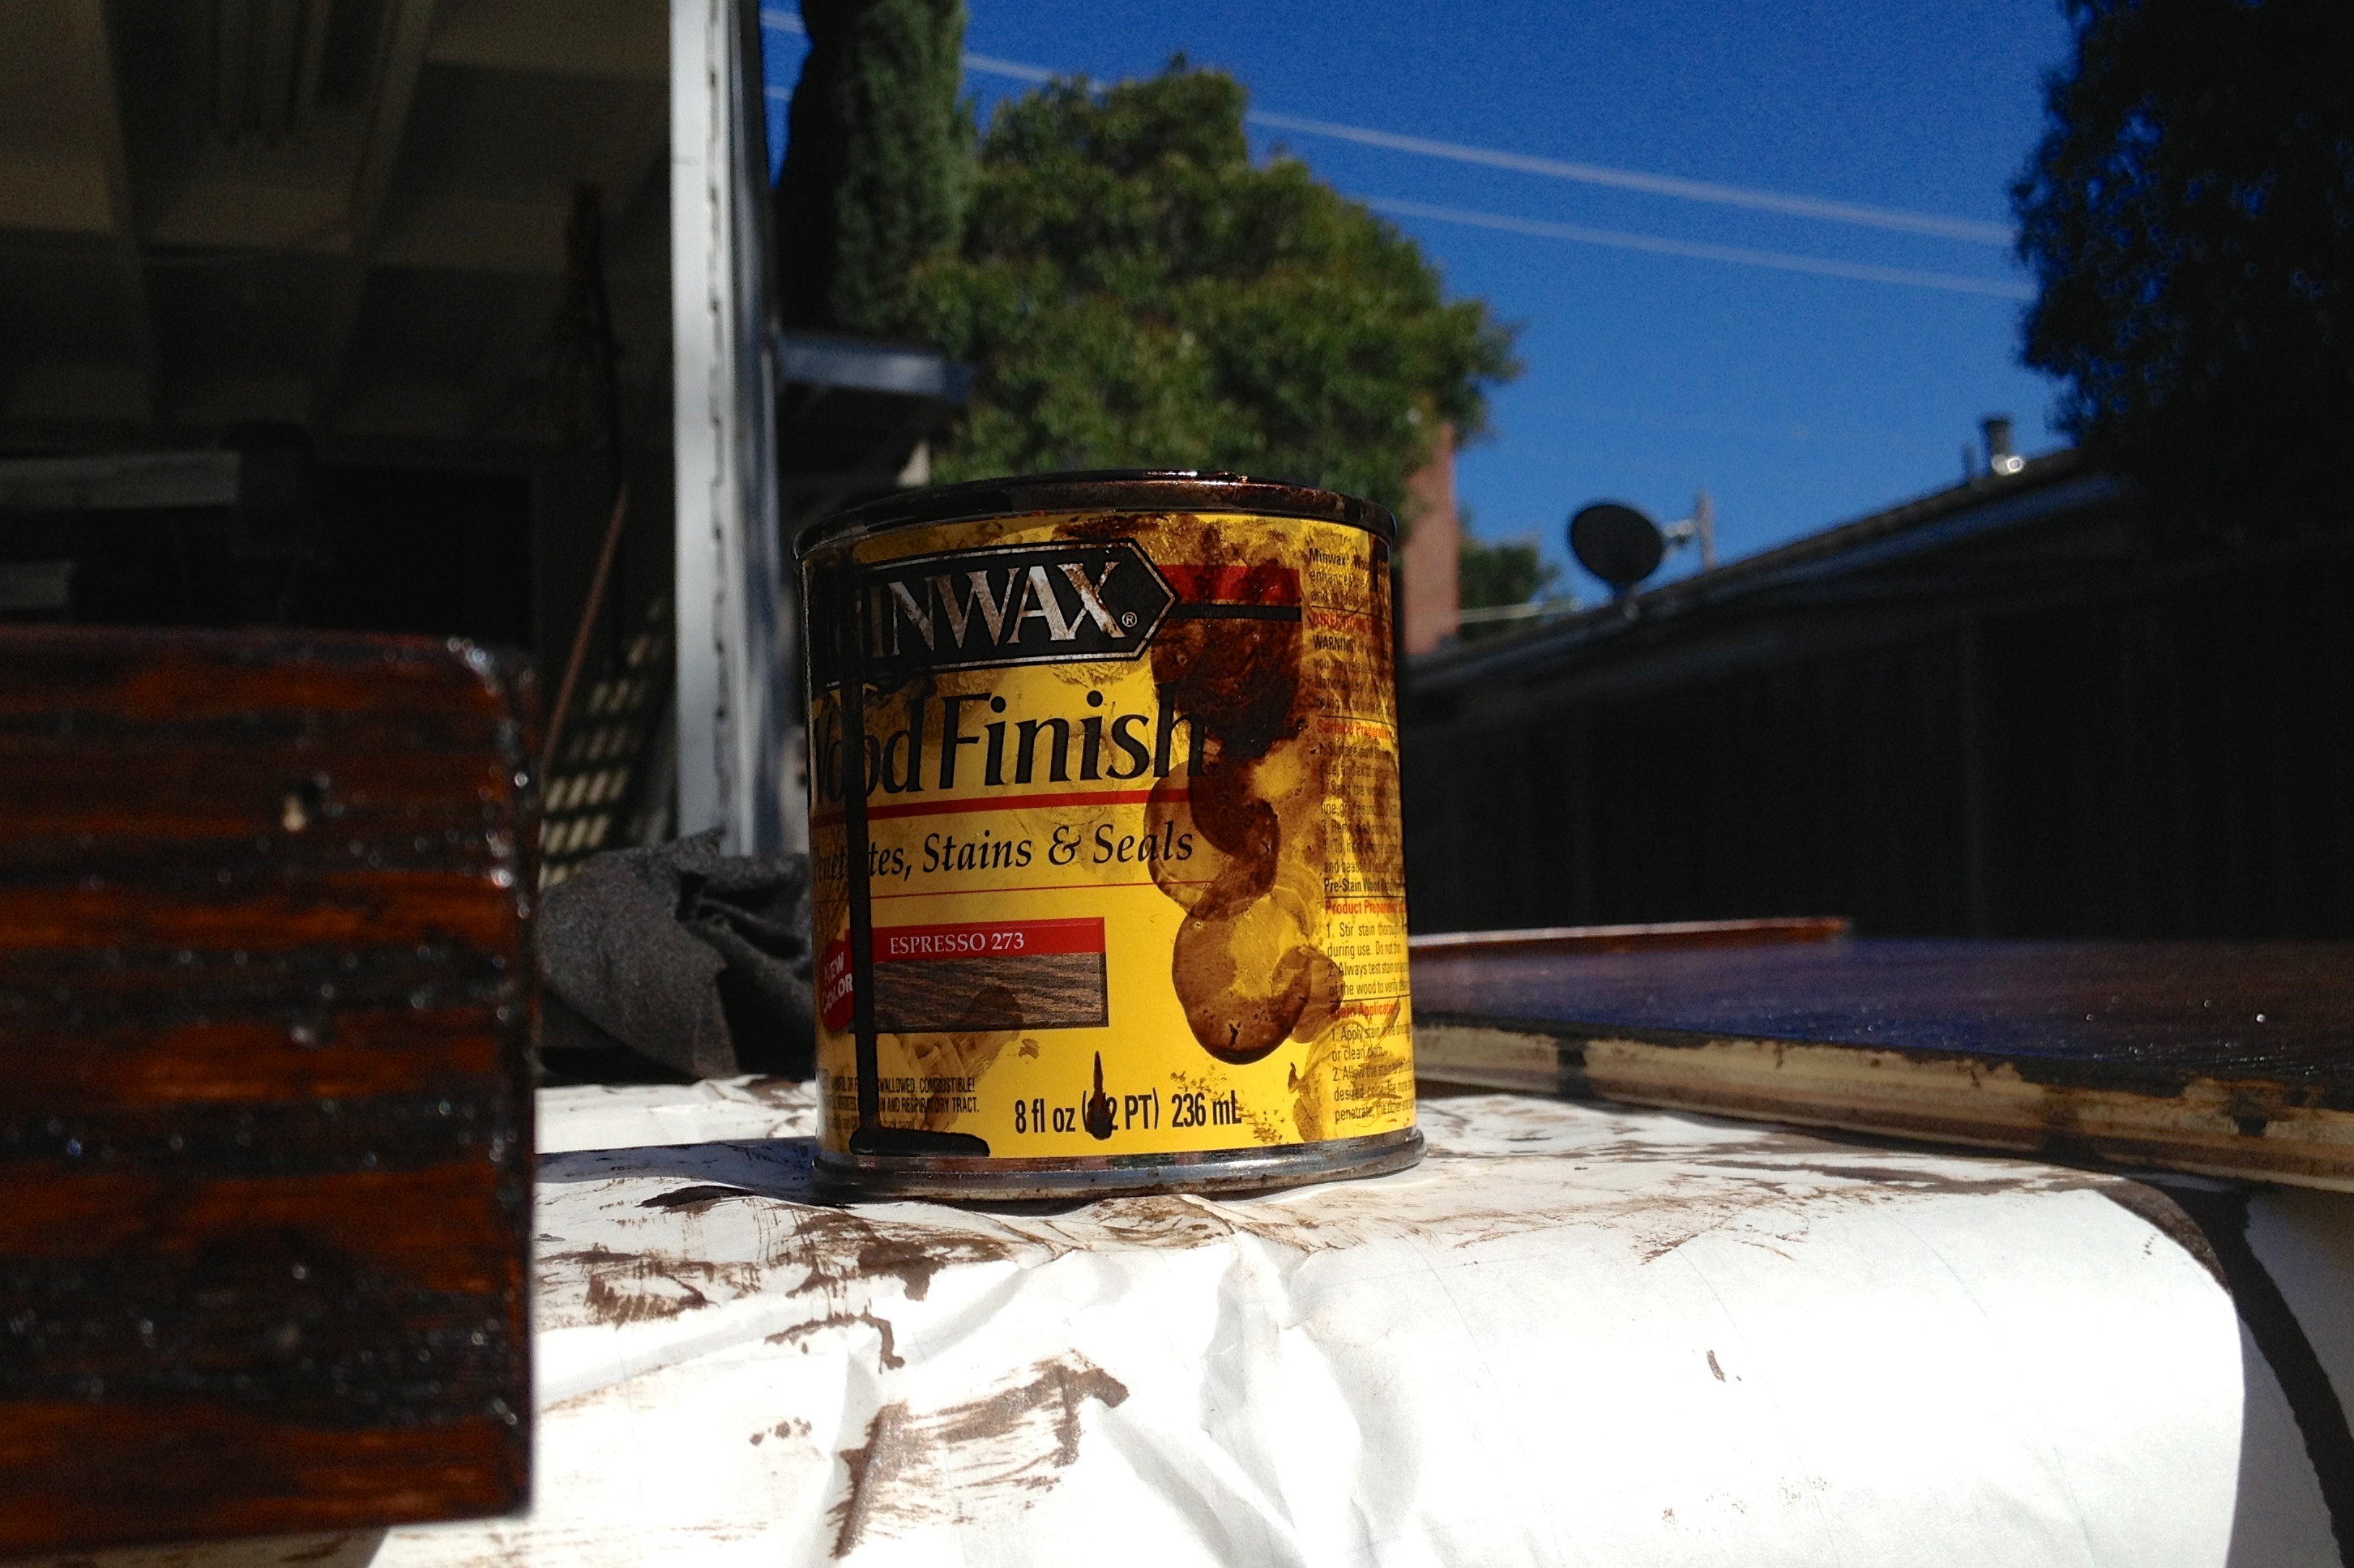
Mmmmm espresso. Oh, and you can see the two pieces of the box on either side of the can of finish.
While the box was drying, we started constructing the jars. We had to drill a large hole in the center of each jar lid (for the light bulb and string to go through) and several small holes for heat to escape through. Have you ever tried to put a round hole in the dead center of a round lid? Sounds pretty easy, but it’s actually surprisingly difficult. Justin ended up making a template and printing it out, making the process a lot smoother!
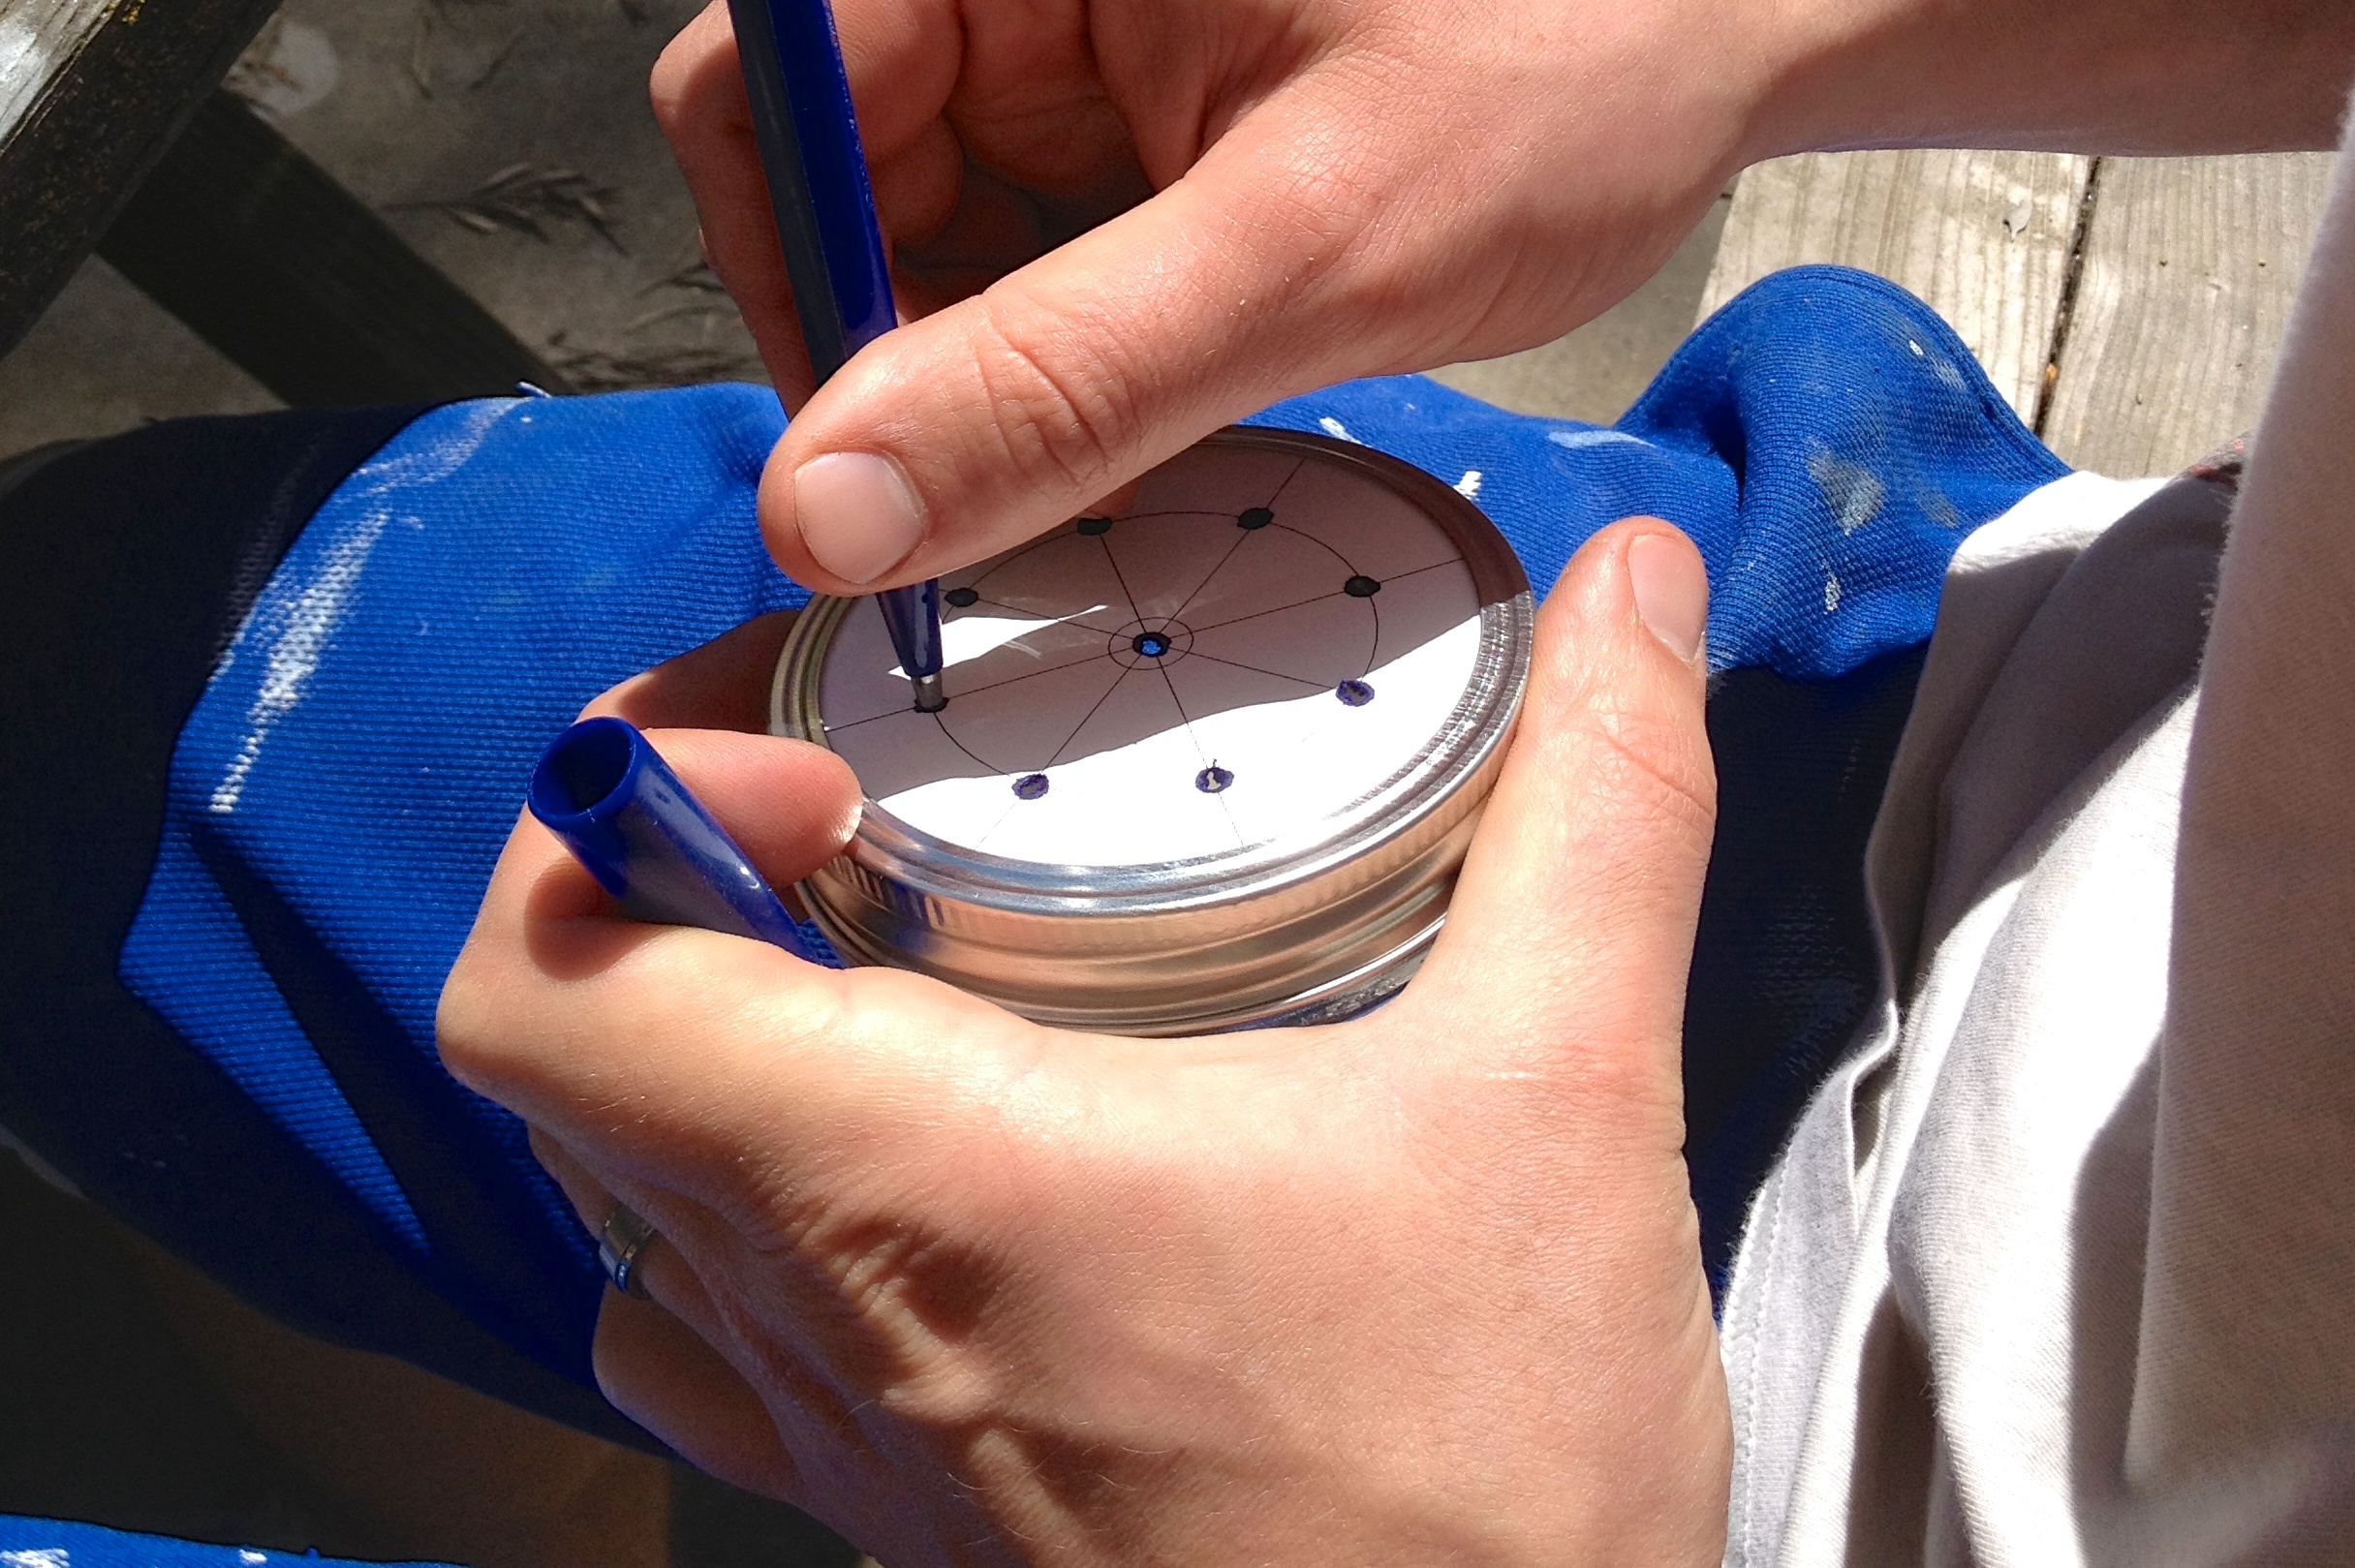
Impromptu template = huge time saver
With the holes, drilled, we assembled the jar lids, light bulb sockets (I have no idea if this is the proper term?), and fabric-wrapped wire from which the jars were to hang. We protected the wire to keep it clean during painting, and painted the jar-lid apparatuses (apparati?). We had decided in the design phase that we didn’t want to leave the jar lids and light bulb sockets silver. Instead, we wanted them to match the fabric-wrapped wire and at least somewhat match the espresso stained wood. In essence, we wanted everything to be a shade of dark brown so the light reflecting from the bulbs would be warmer and less metallic.
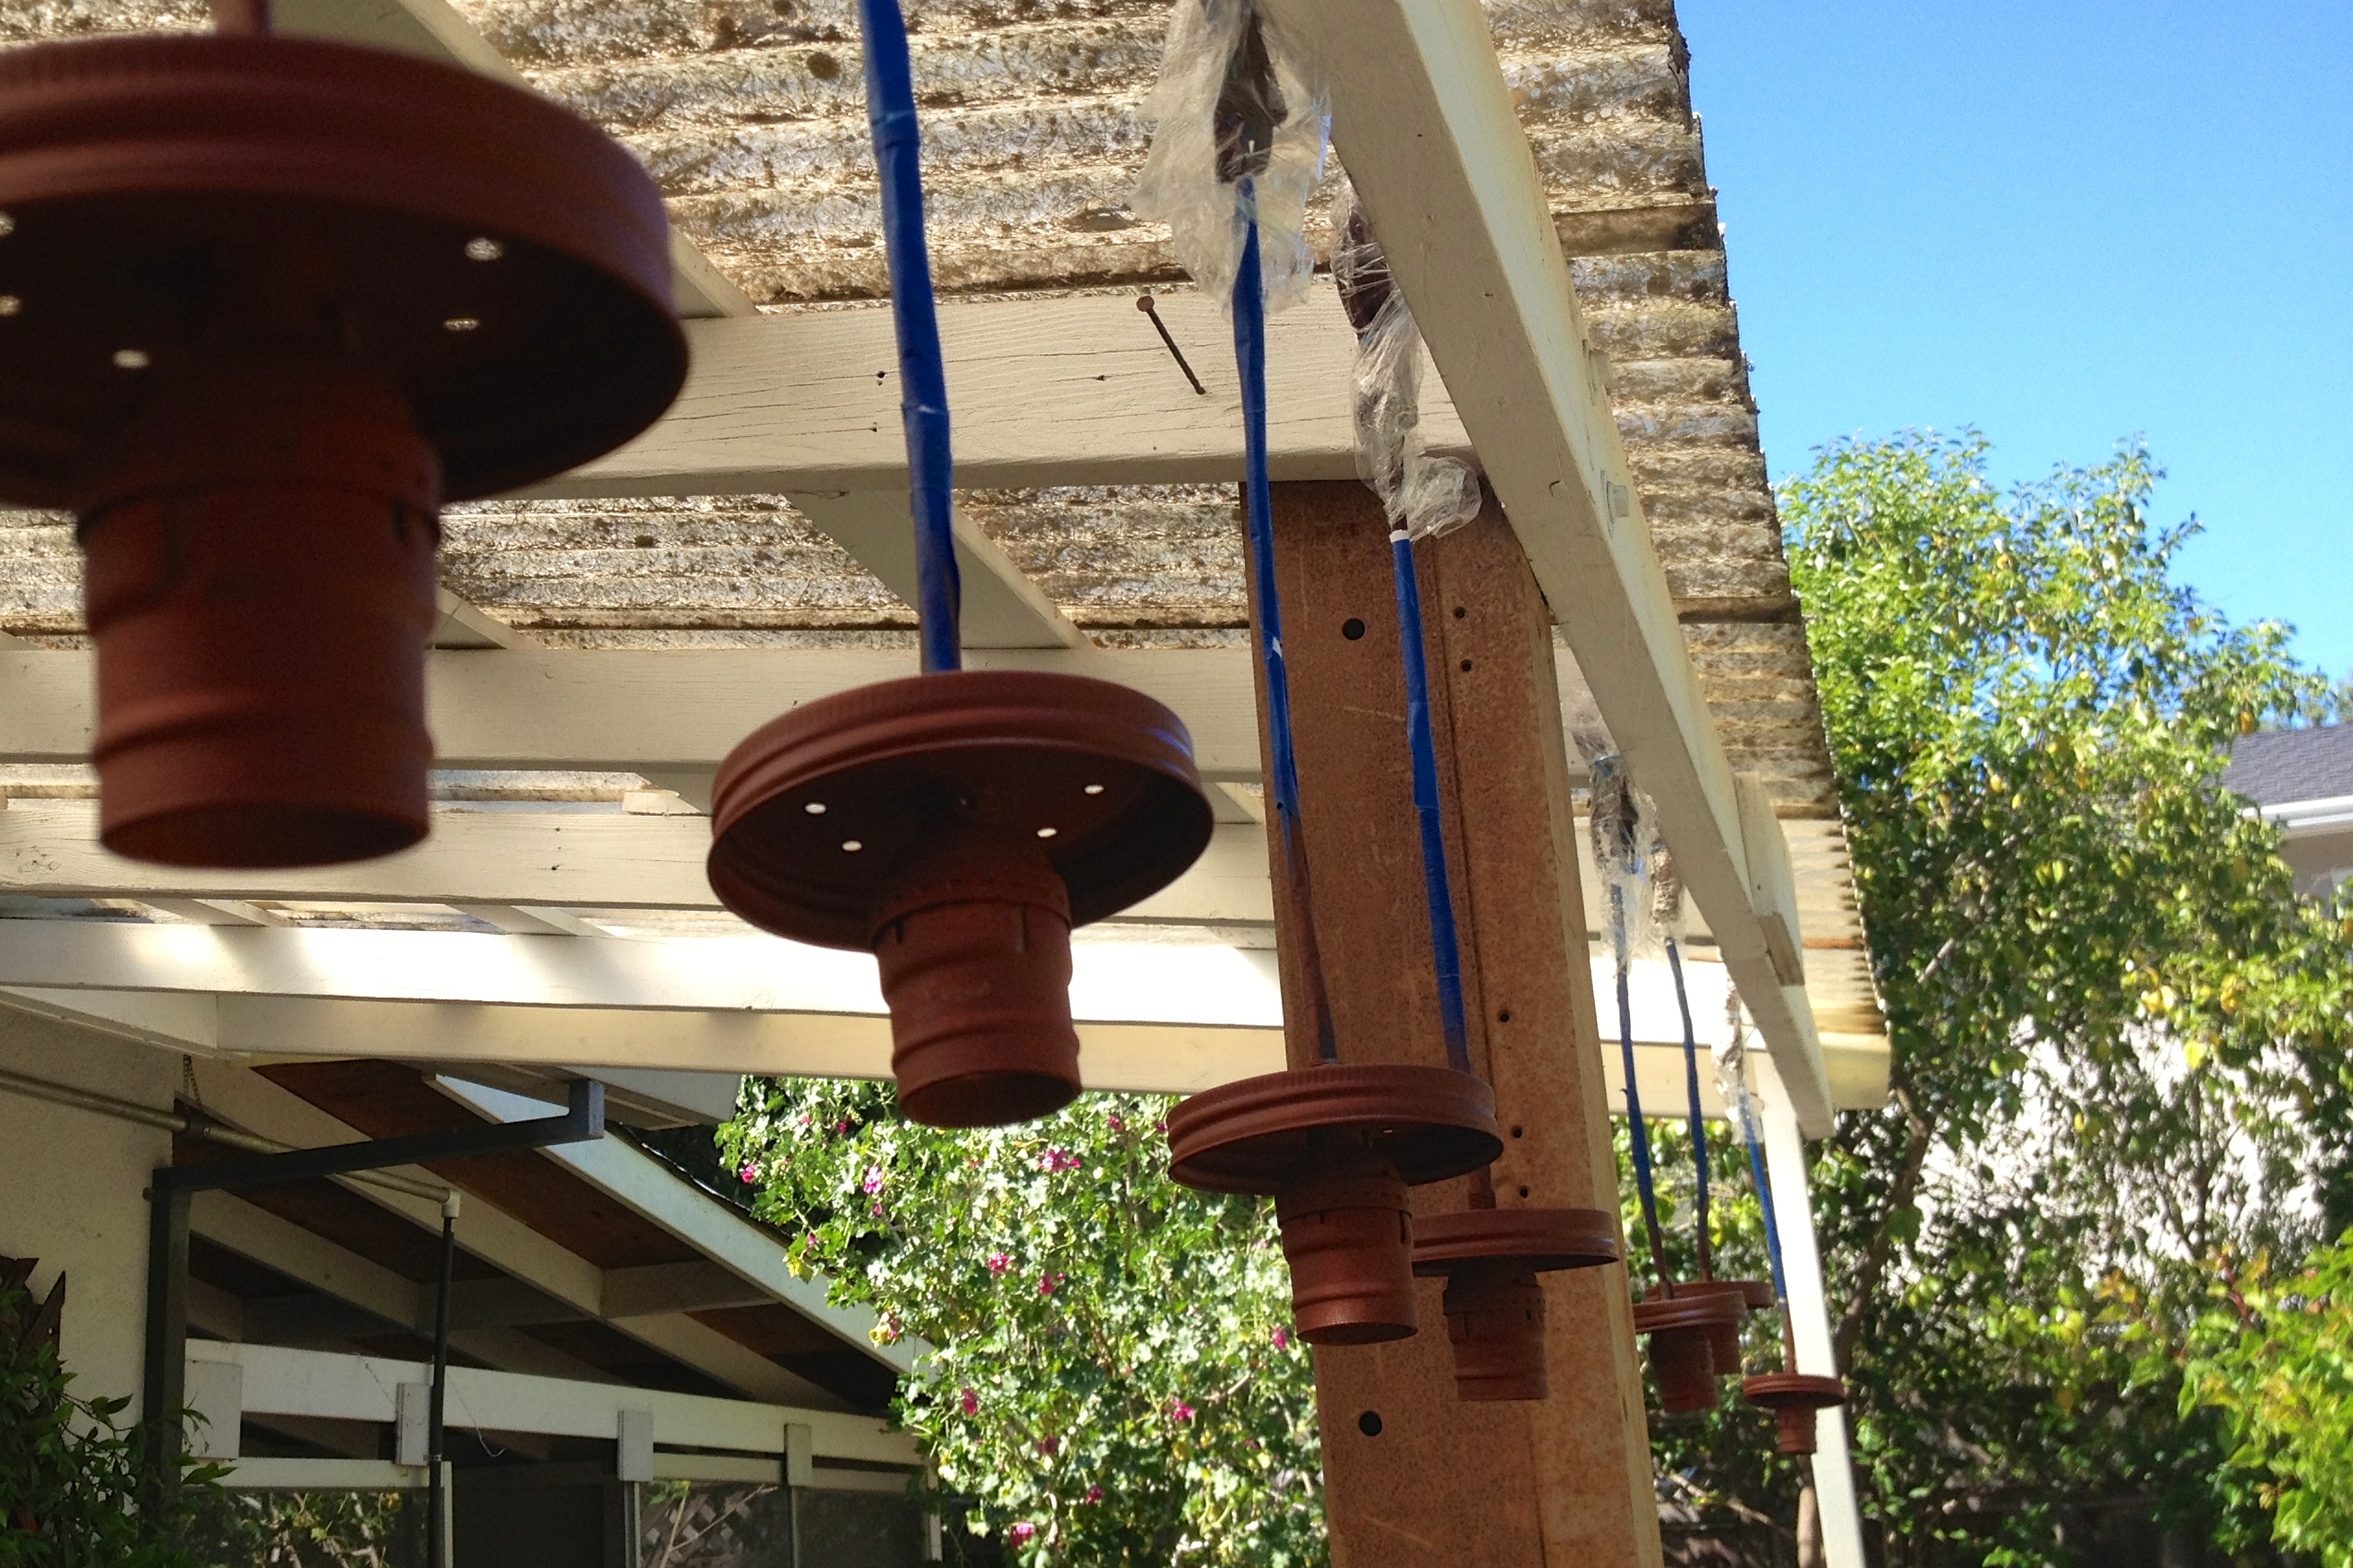
Painted jar lid ensembles
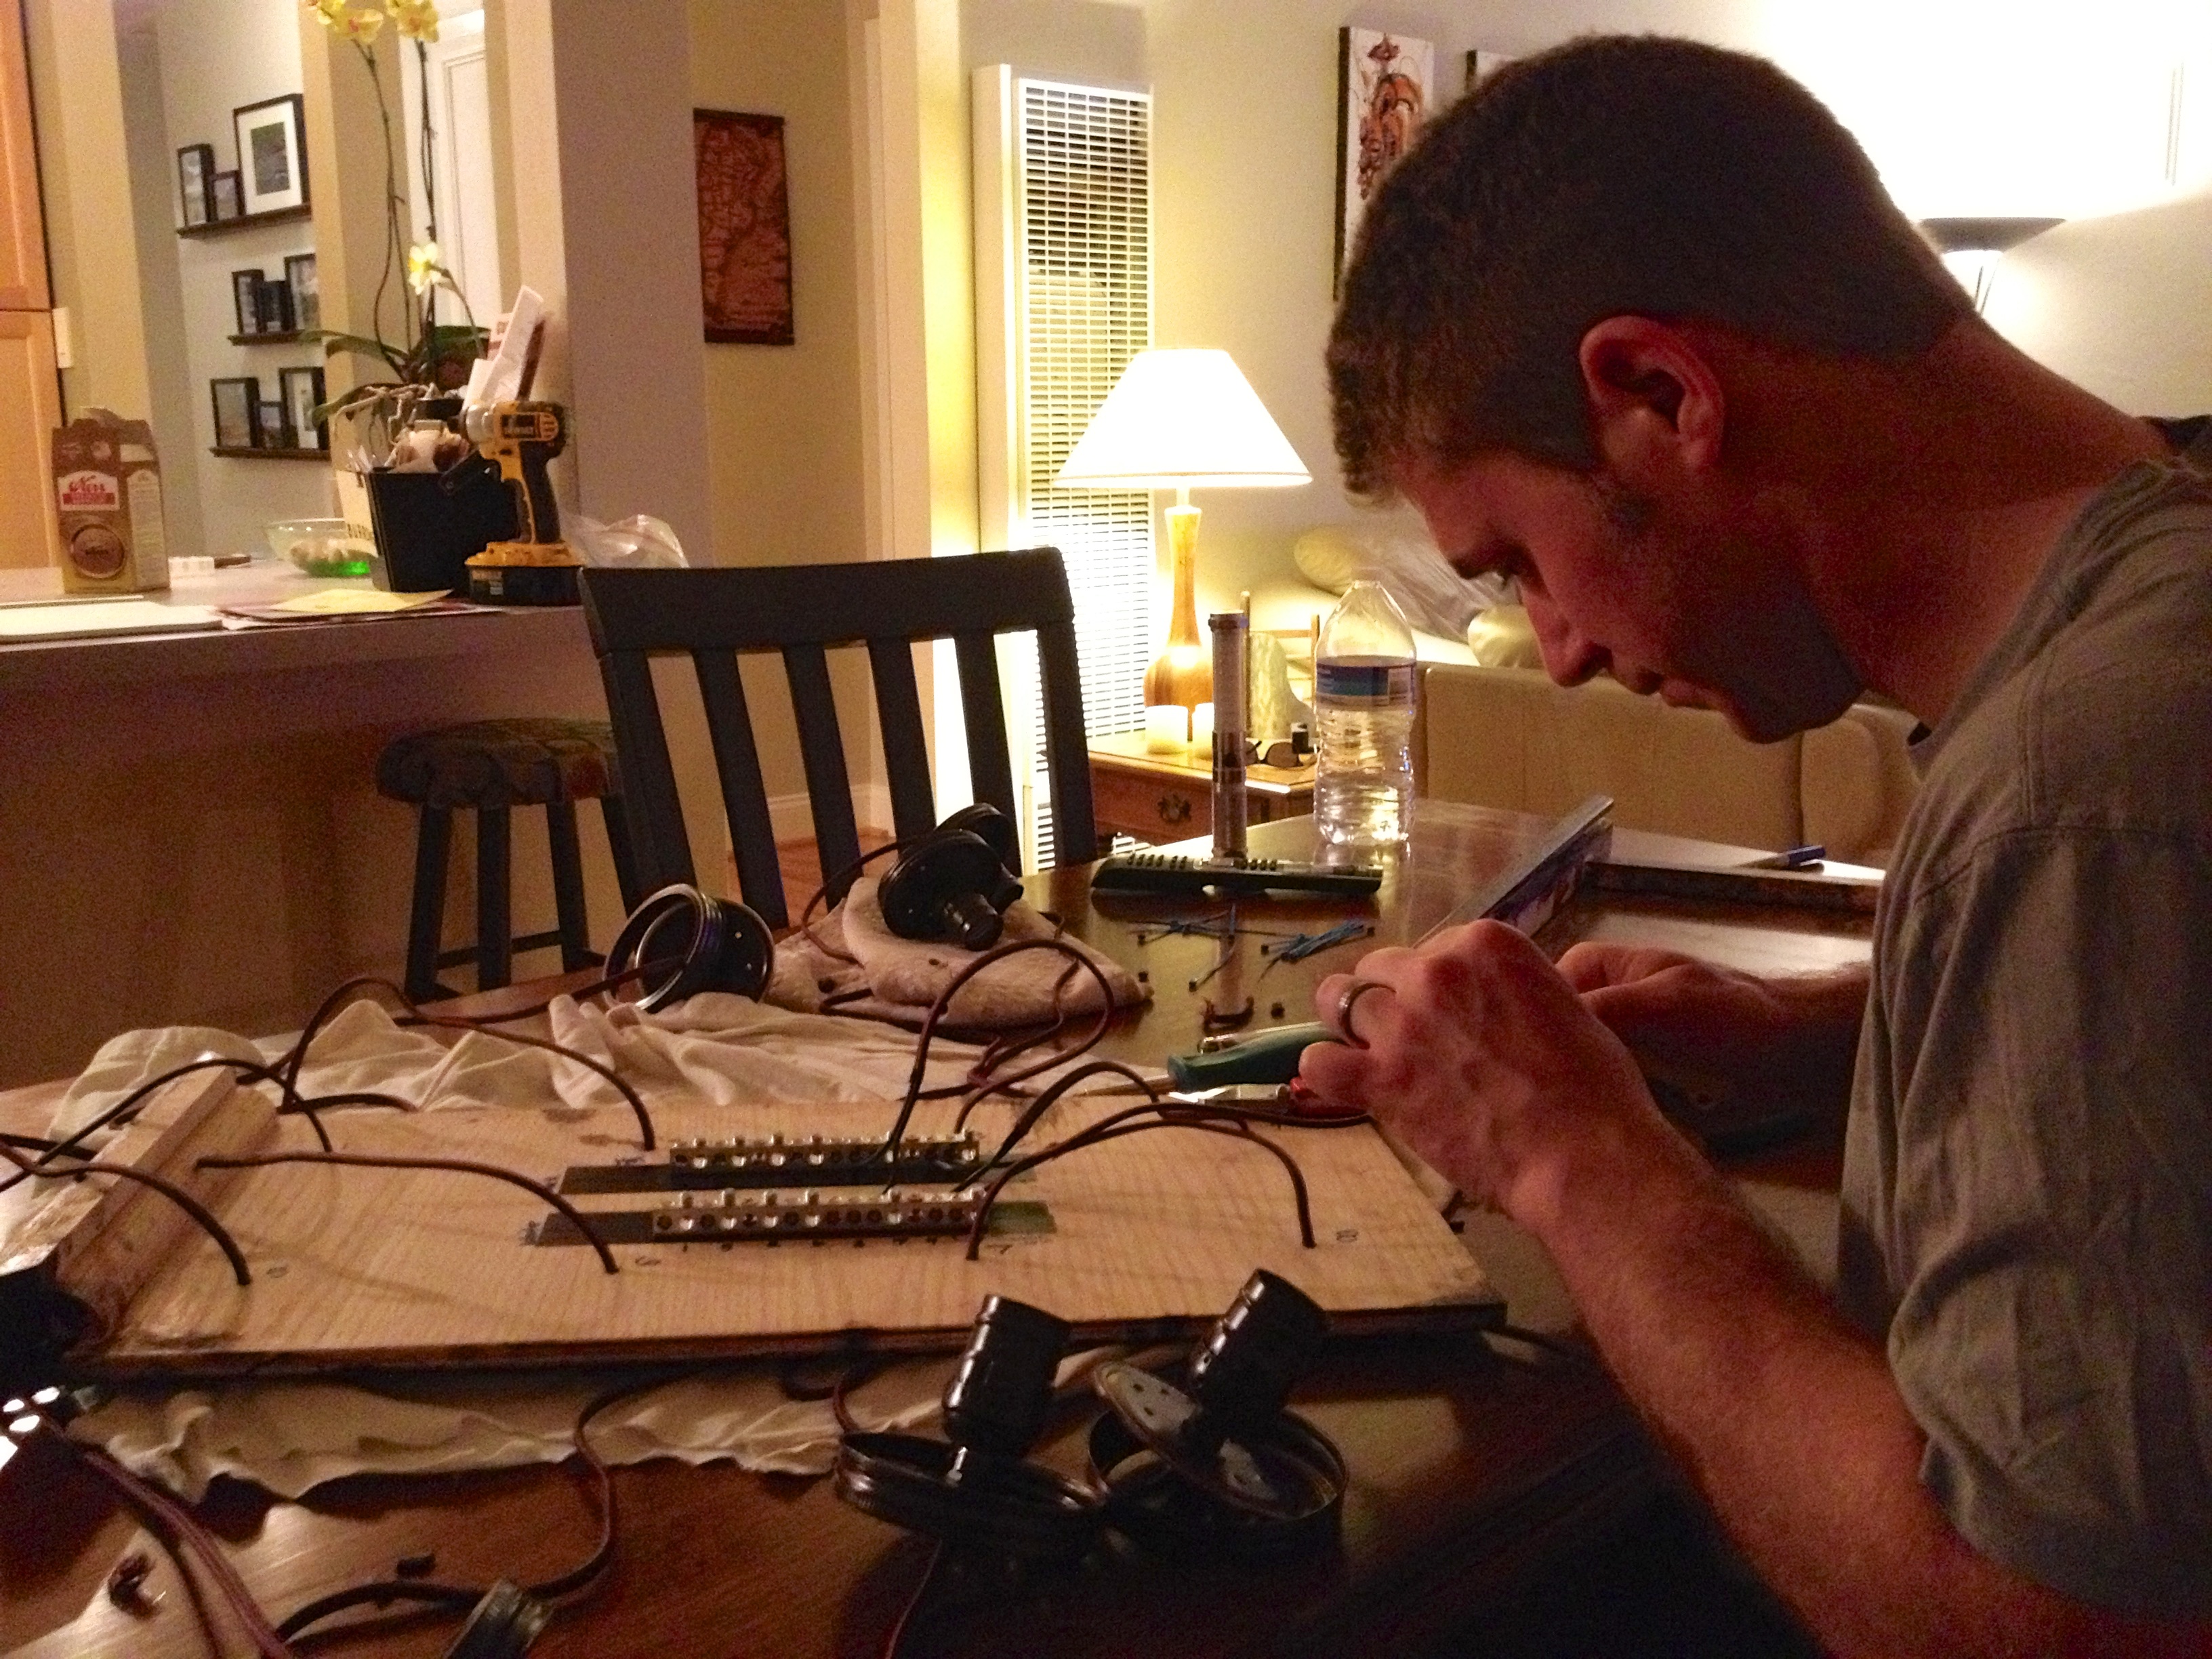
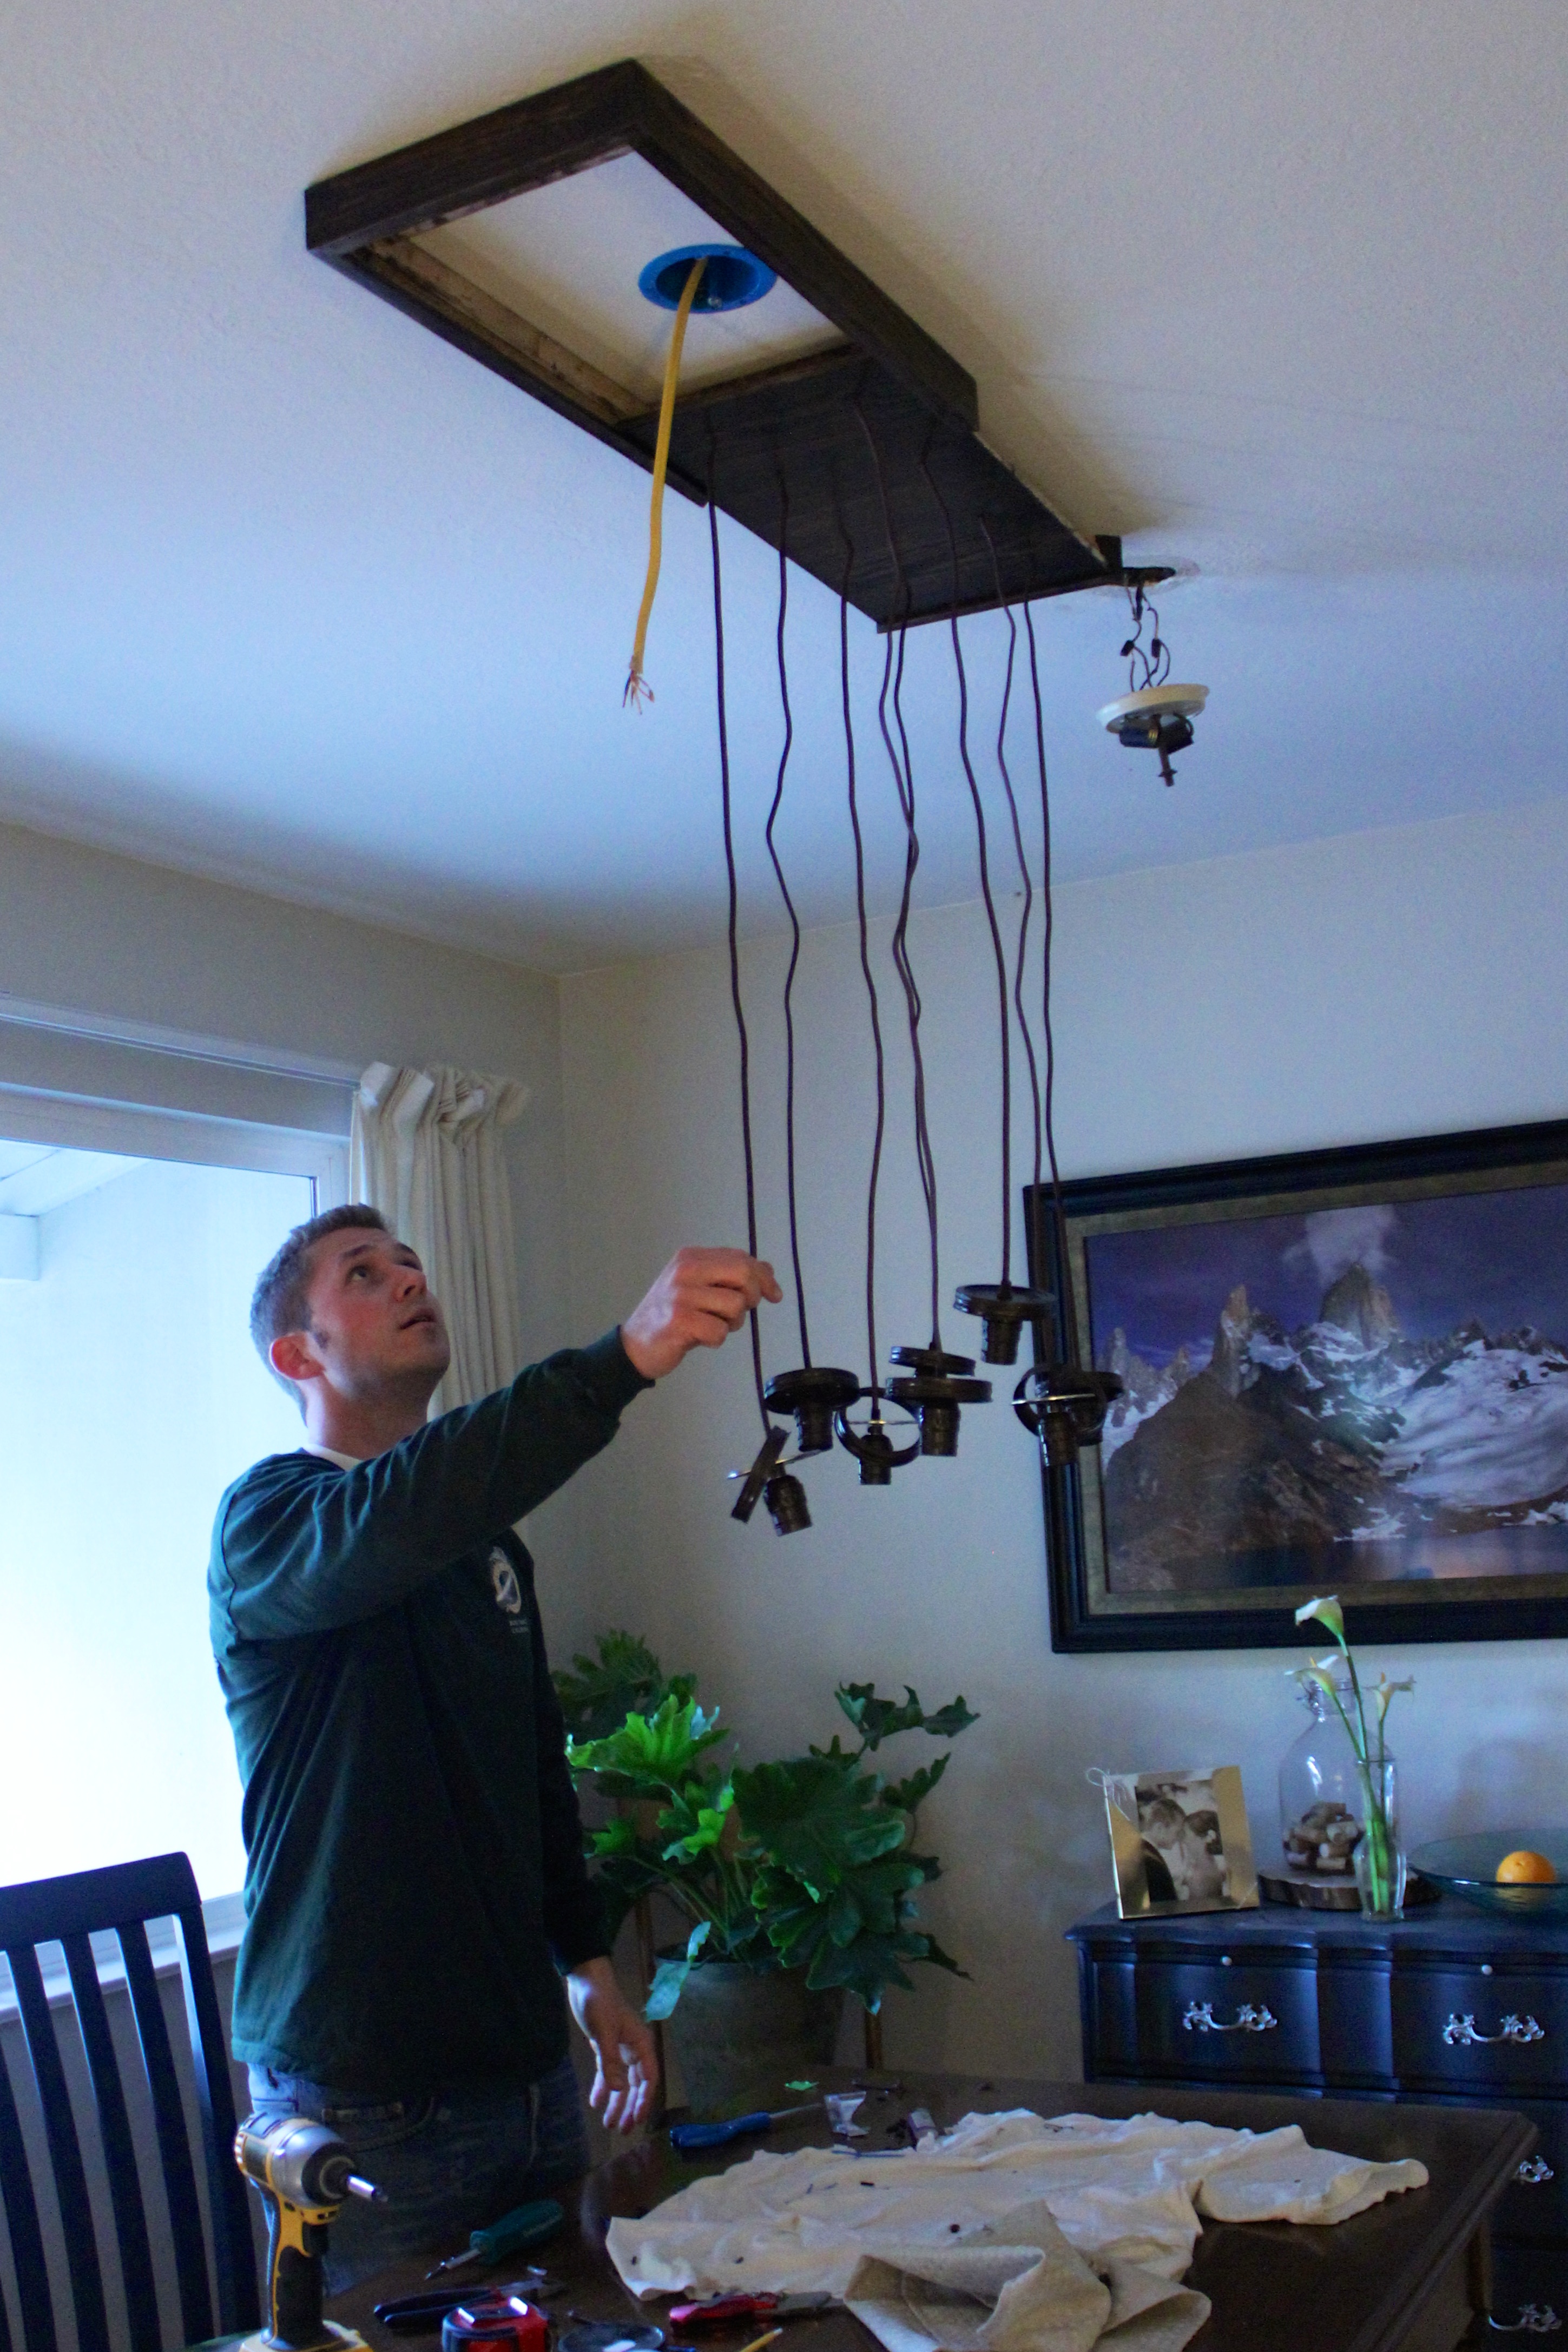
Now that we had all the pieces built/assembled/procured, it was time for the electrical work, that I know not much about. I’ll just show you a few photos and tell you that there was some swearing and lots of time spent in the attic. However, there were no electrocutions and the junction box relocation was successful, so all in all I would say things went rather well.
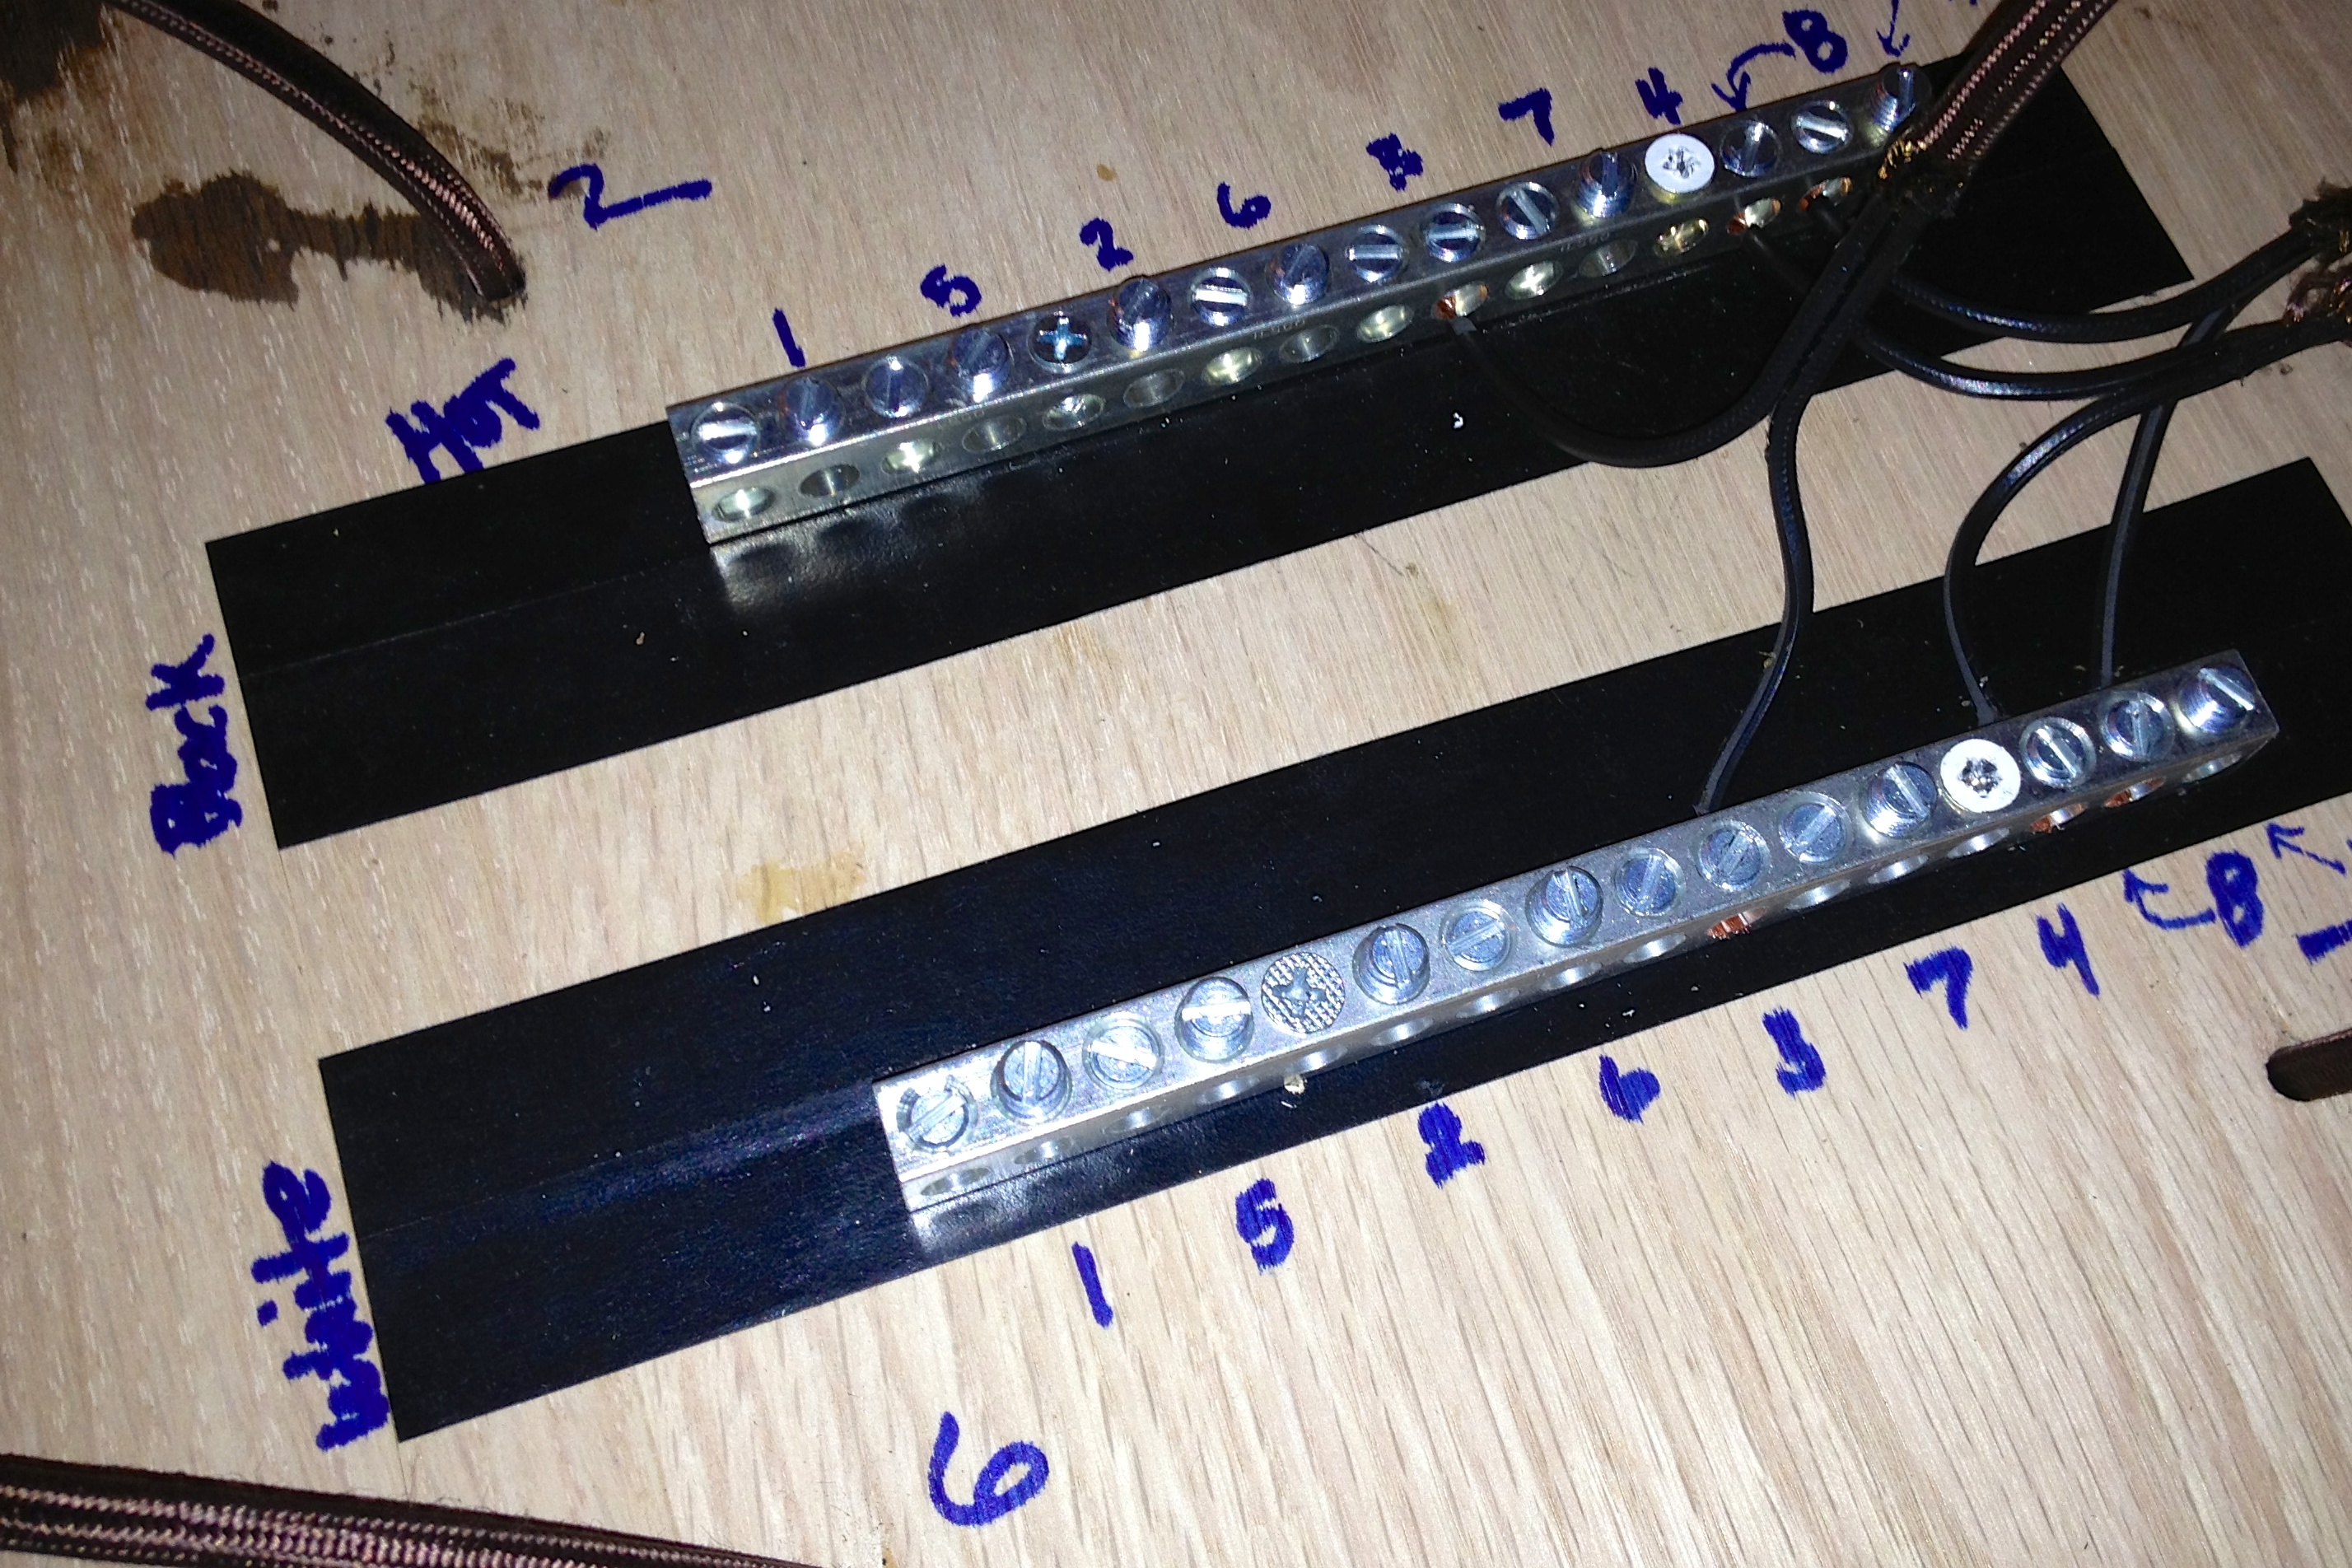
Electrical mumbo-jumbo. That’s all I have to say about that…
Chandelier, assemble!
We had already decided where the chandelier was going to go, and had marked out exactly where the box would go on the ceiling. Now was the time to put it up! This was actually a relatively simple act, because Justin had designed it to be so. I just held up the box while Justin screwed it in, then slide in the second piece of the box to hide the wires, screws, junction box, etc., then we added the light bulbs, and finally the jars!
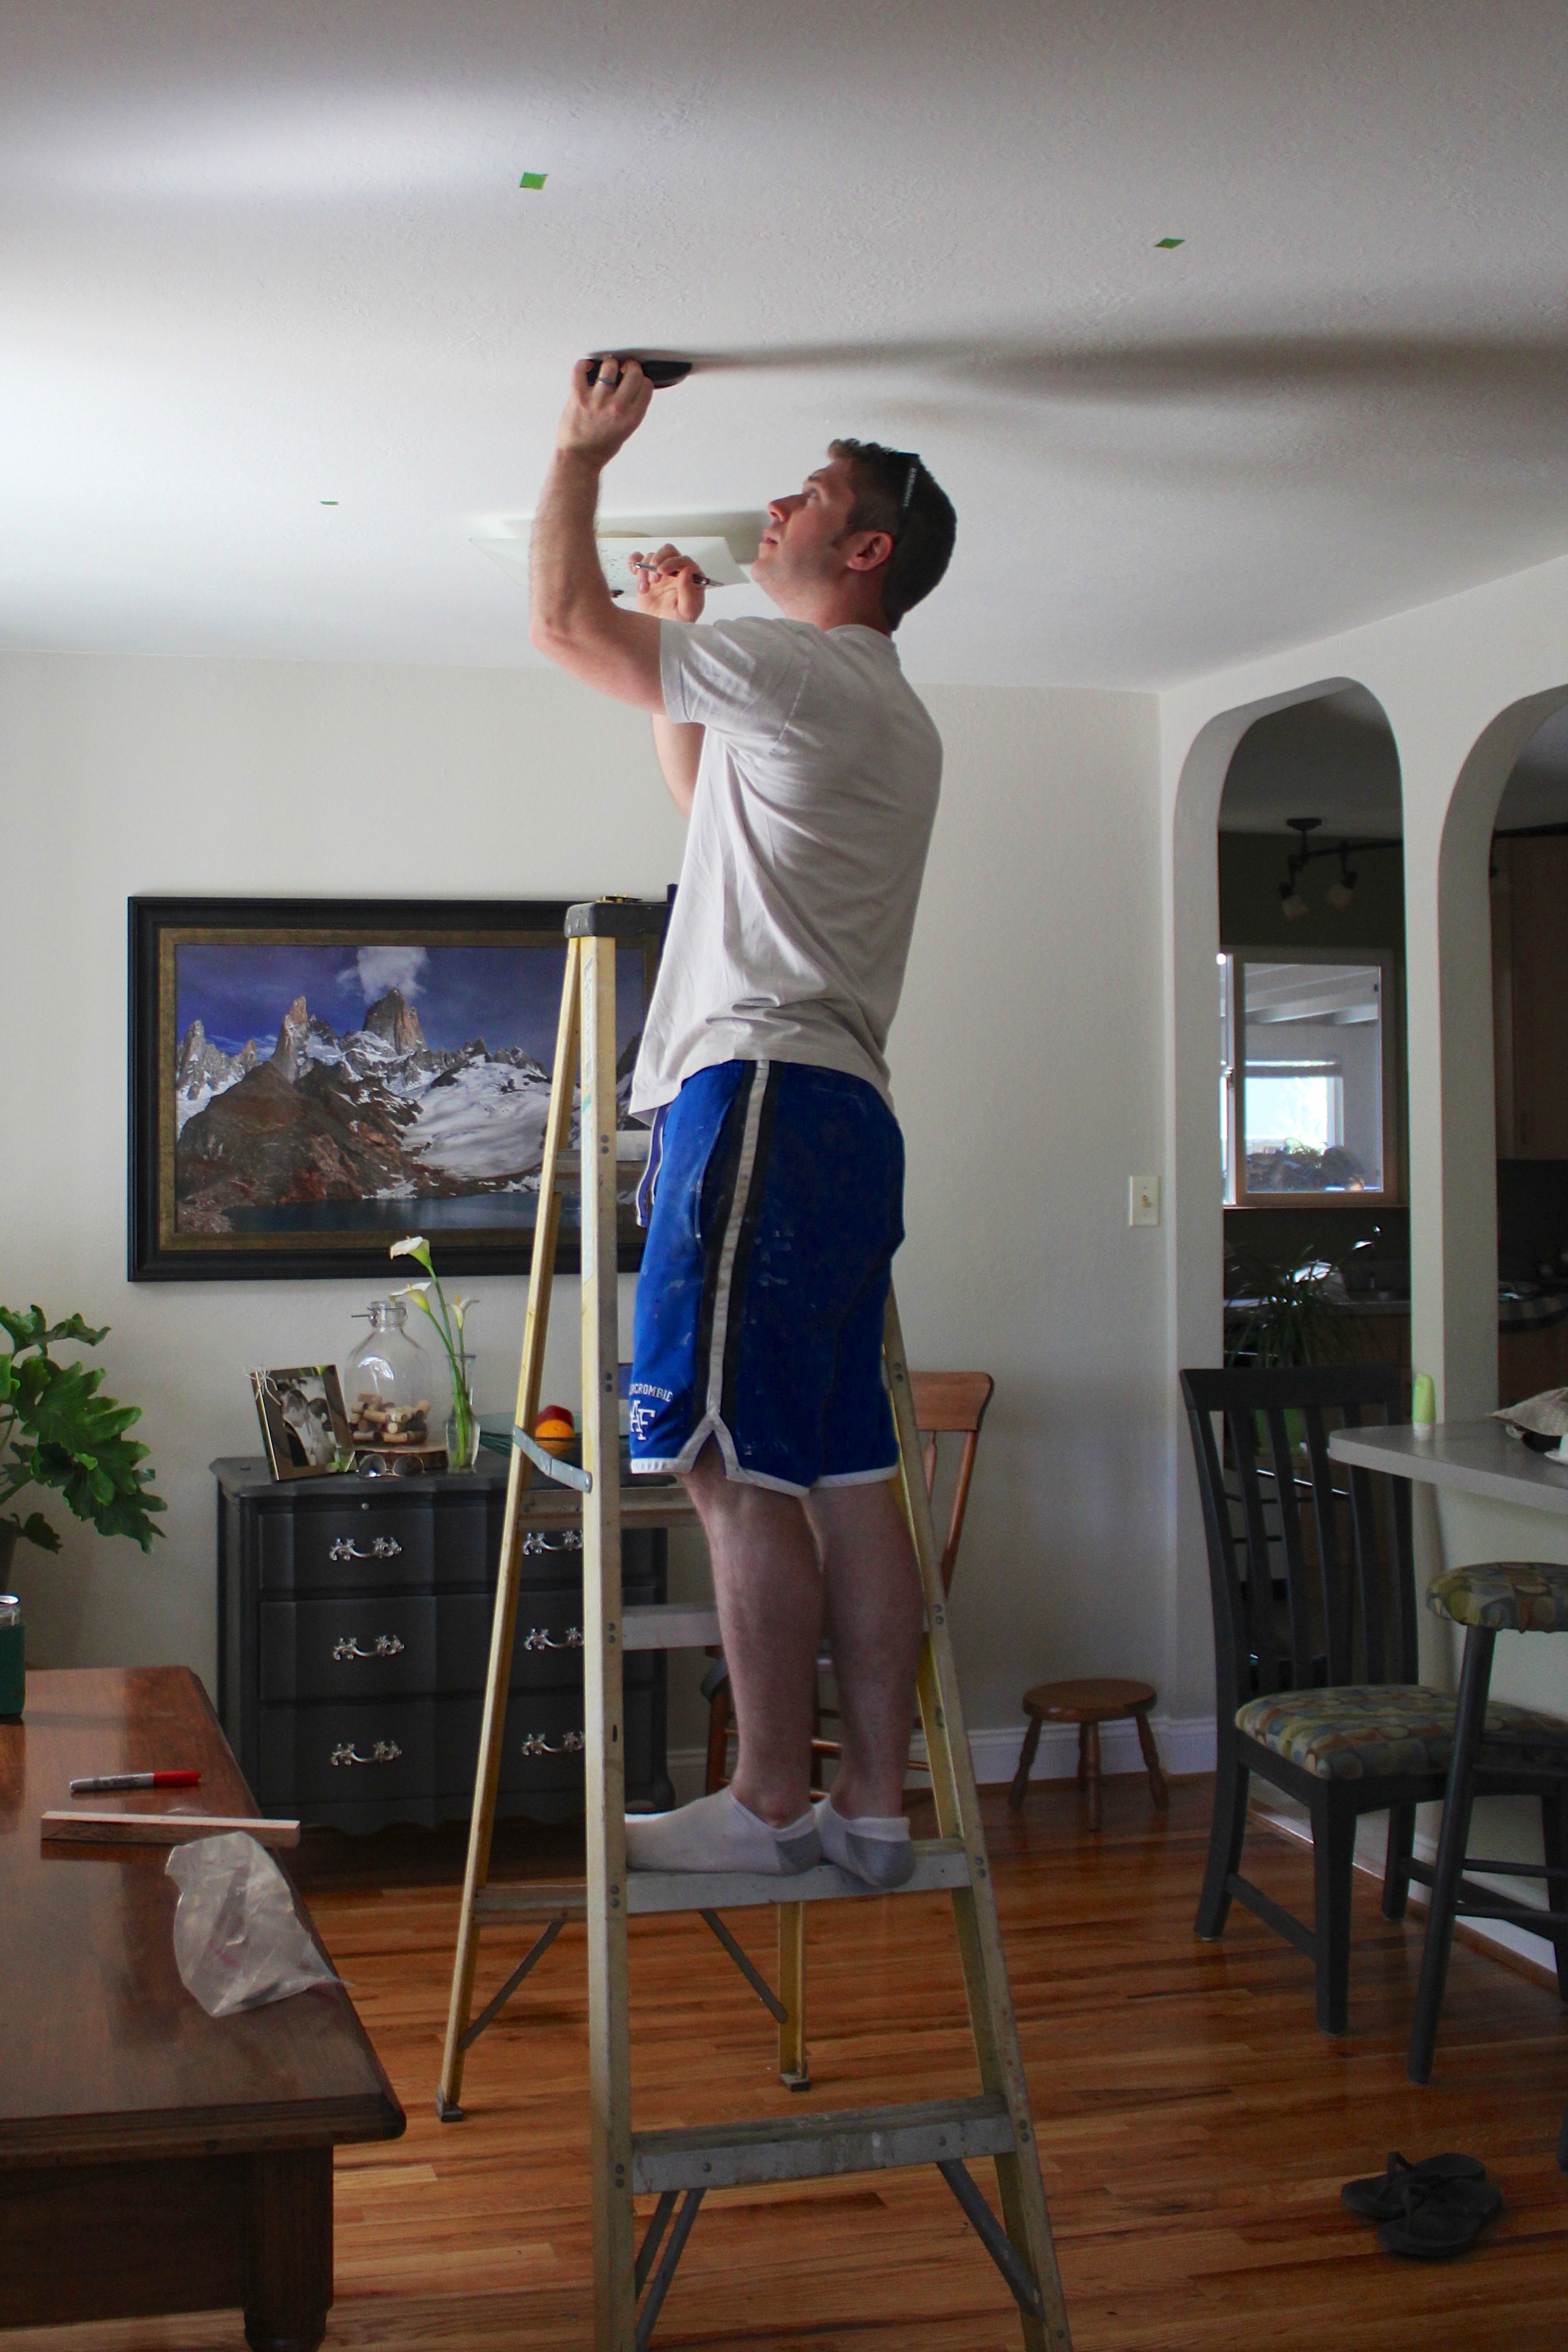
New chandelier location marked on the ceiling. If you look closely, you can see the old light fixture on the other side of Justin
Here you can really see the “box” construction. You know, how one piece slides into the other piece to hide all of the electrical uglies? Yeah, I know… there is probably a better way to describe that, but hopefully the picture helps!
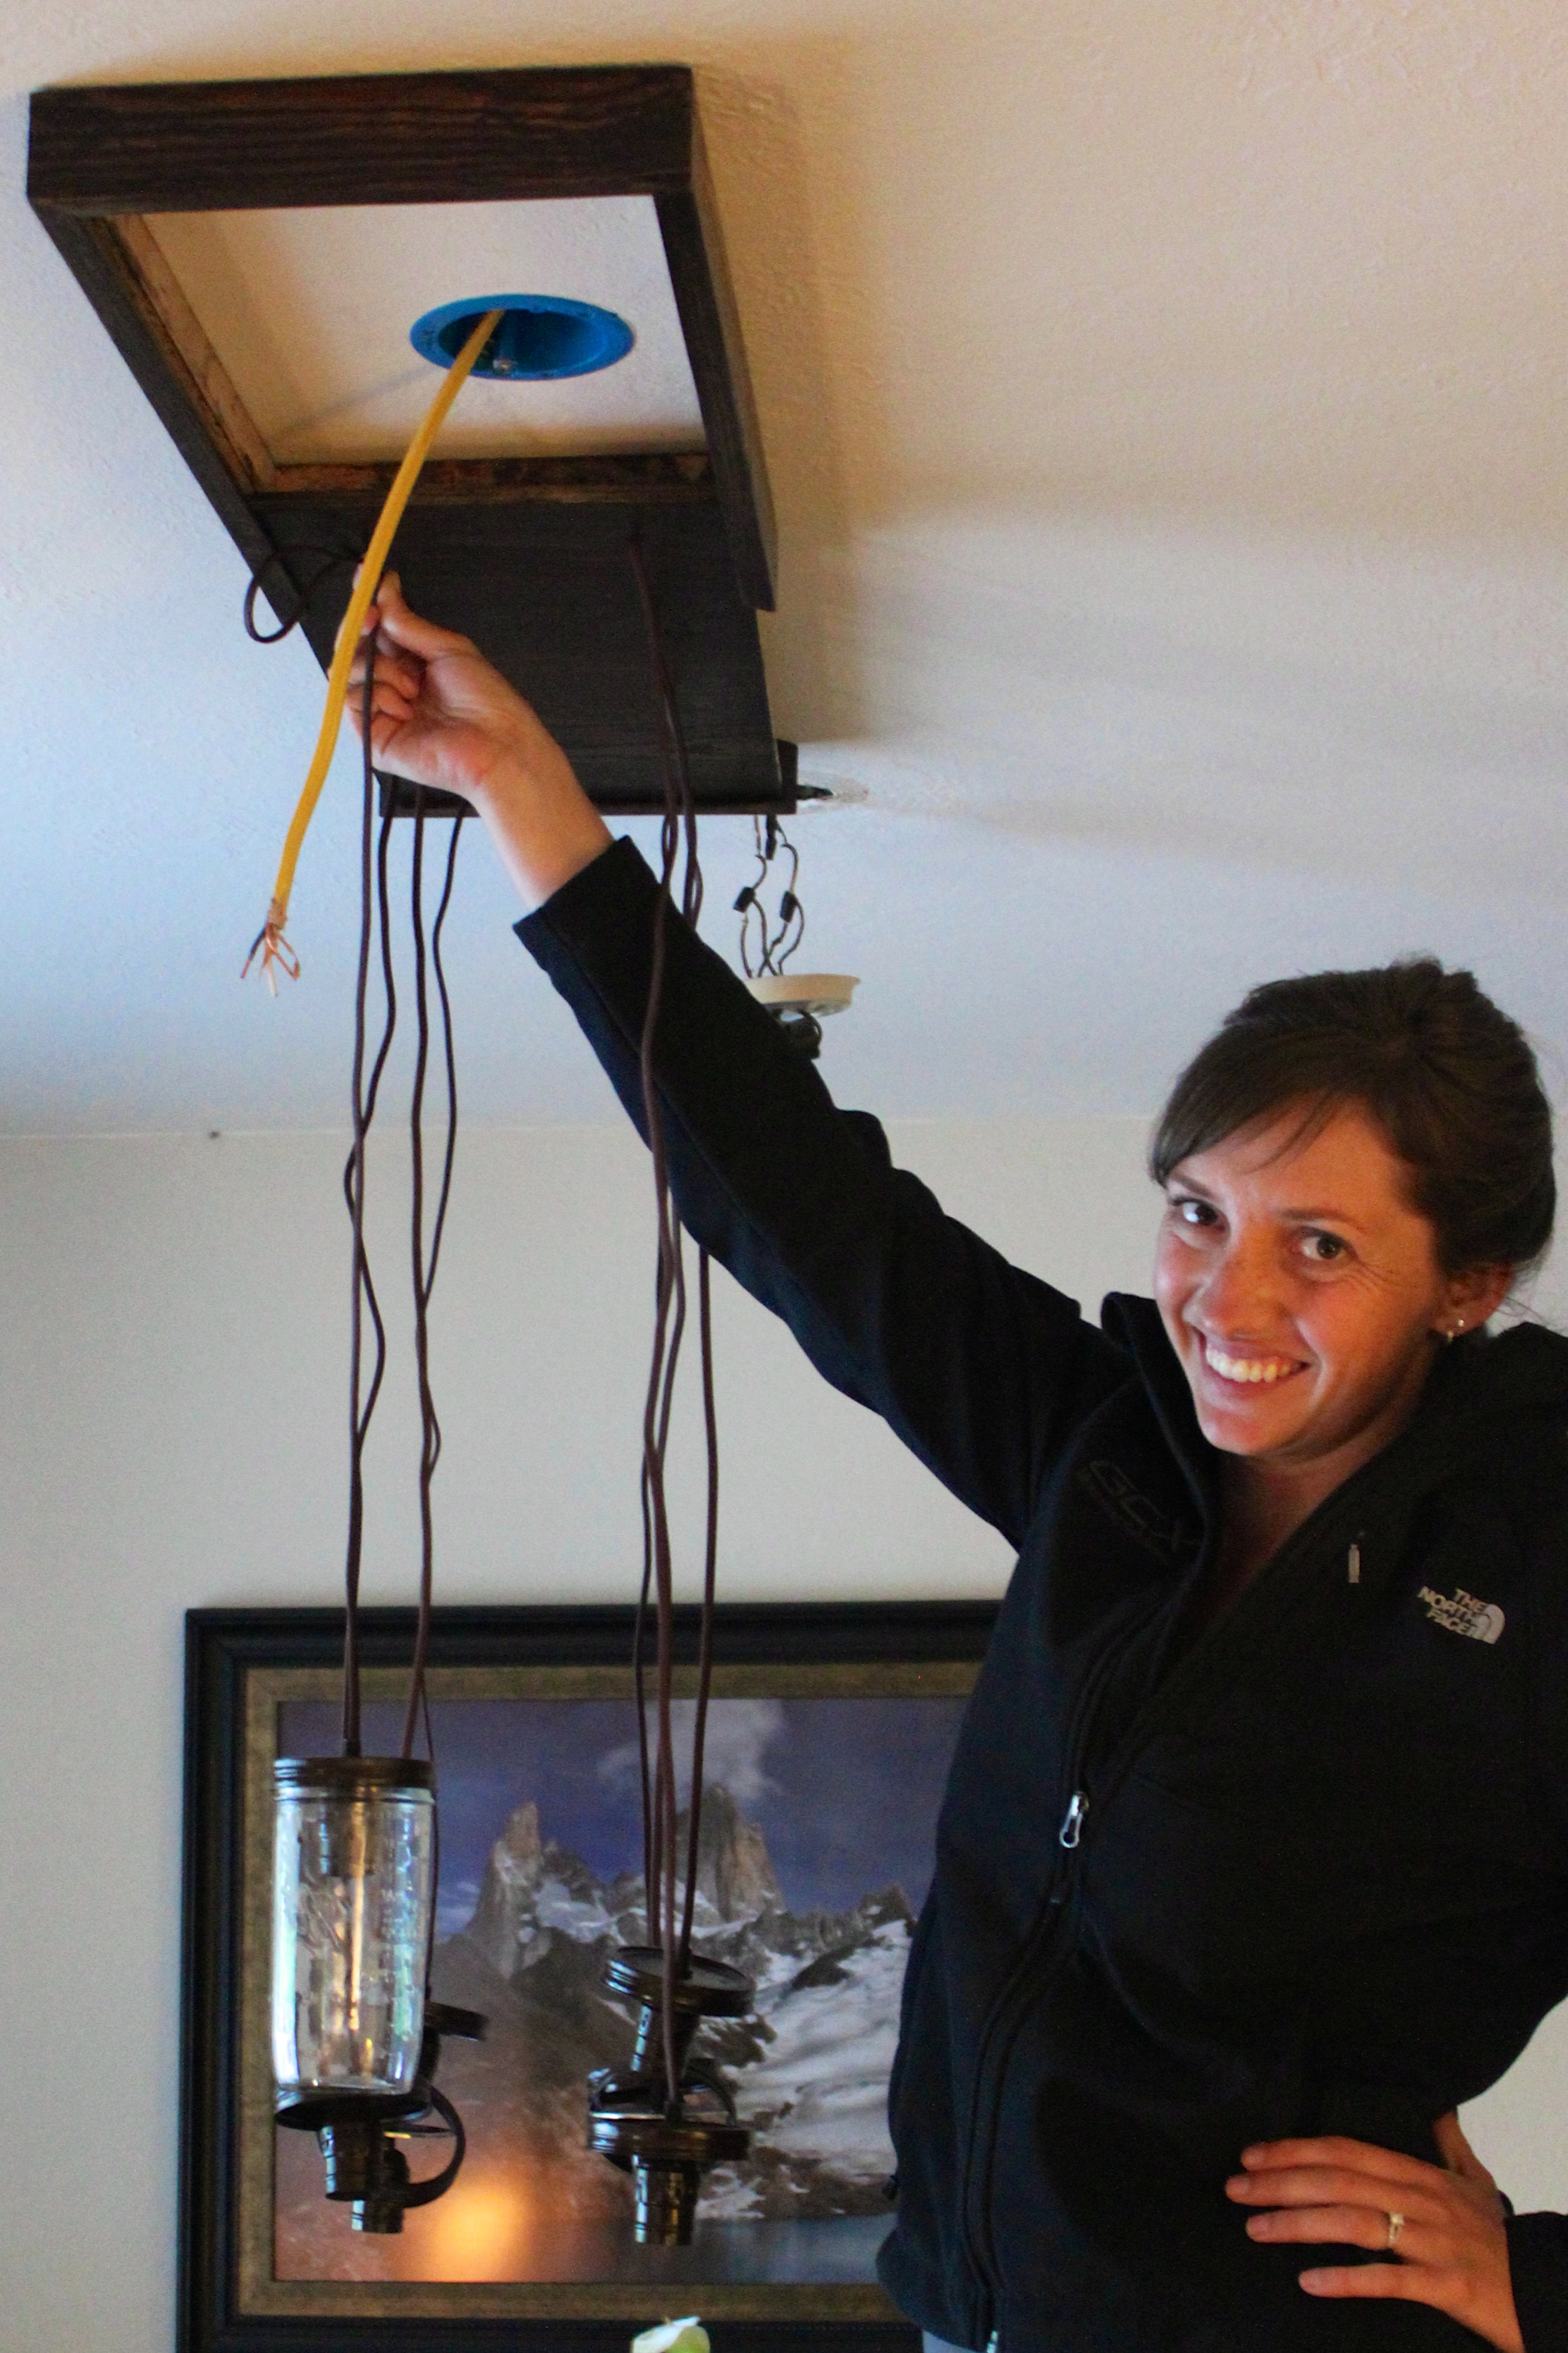
Determining the height of the jars
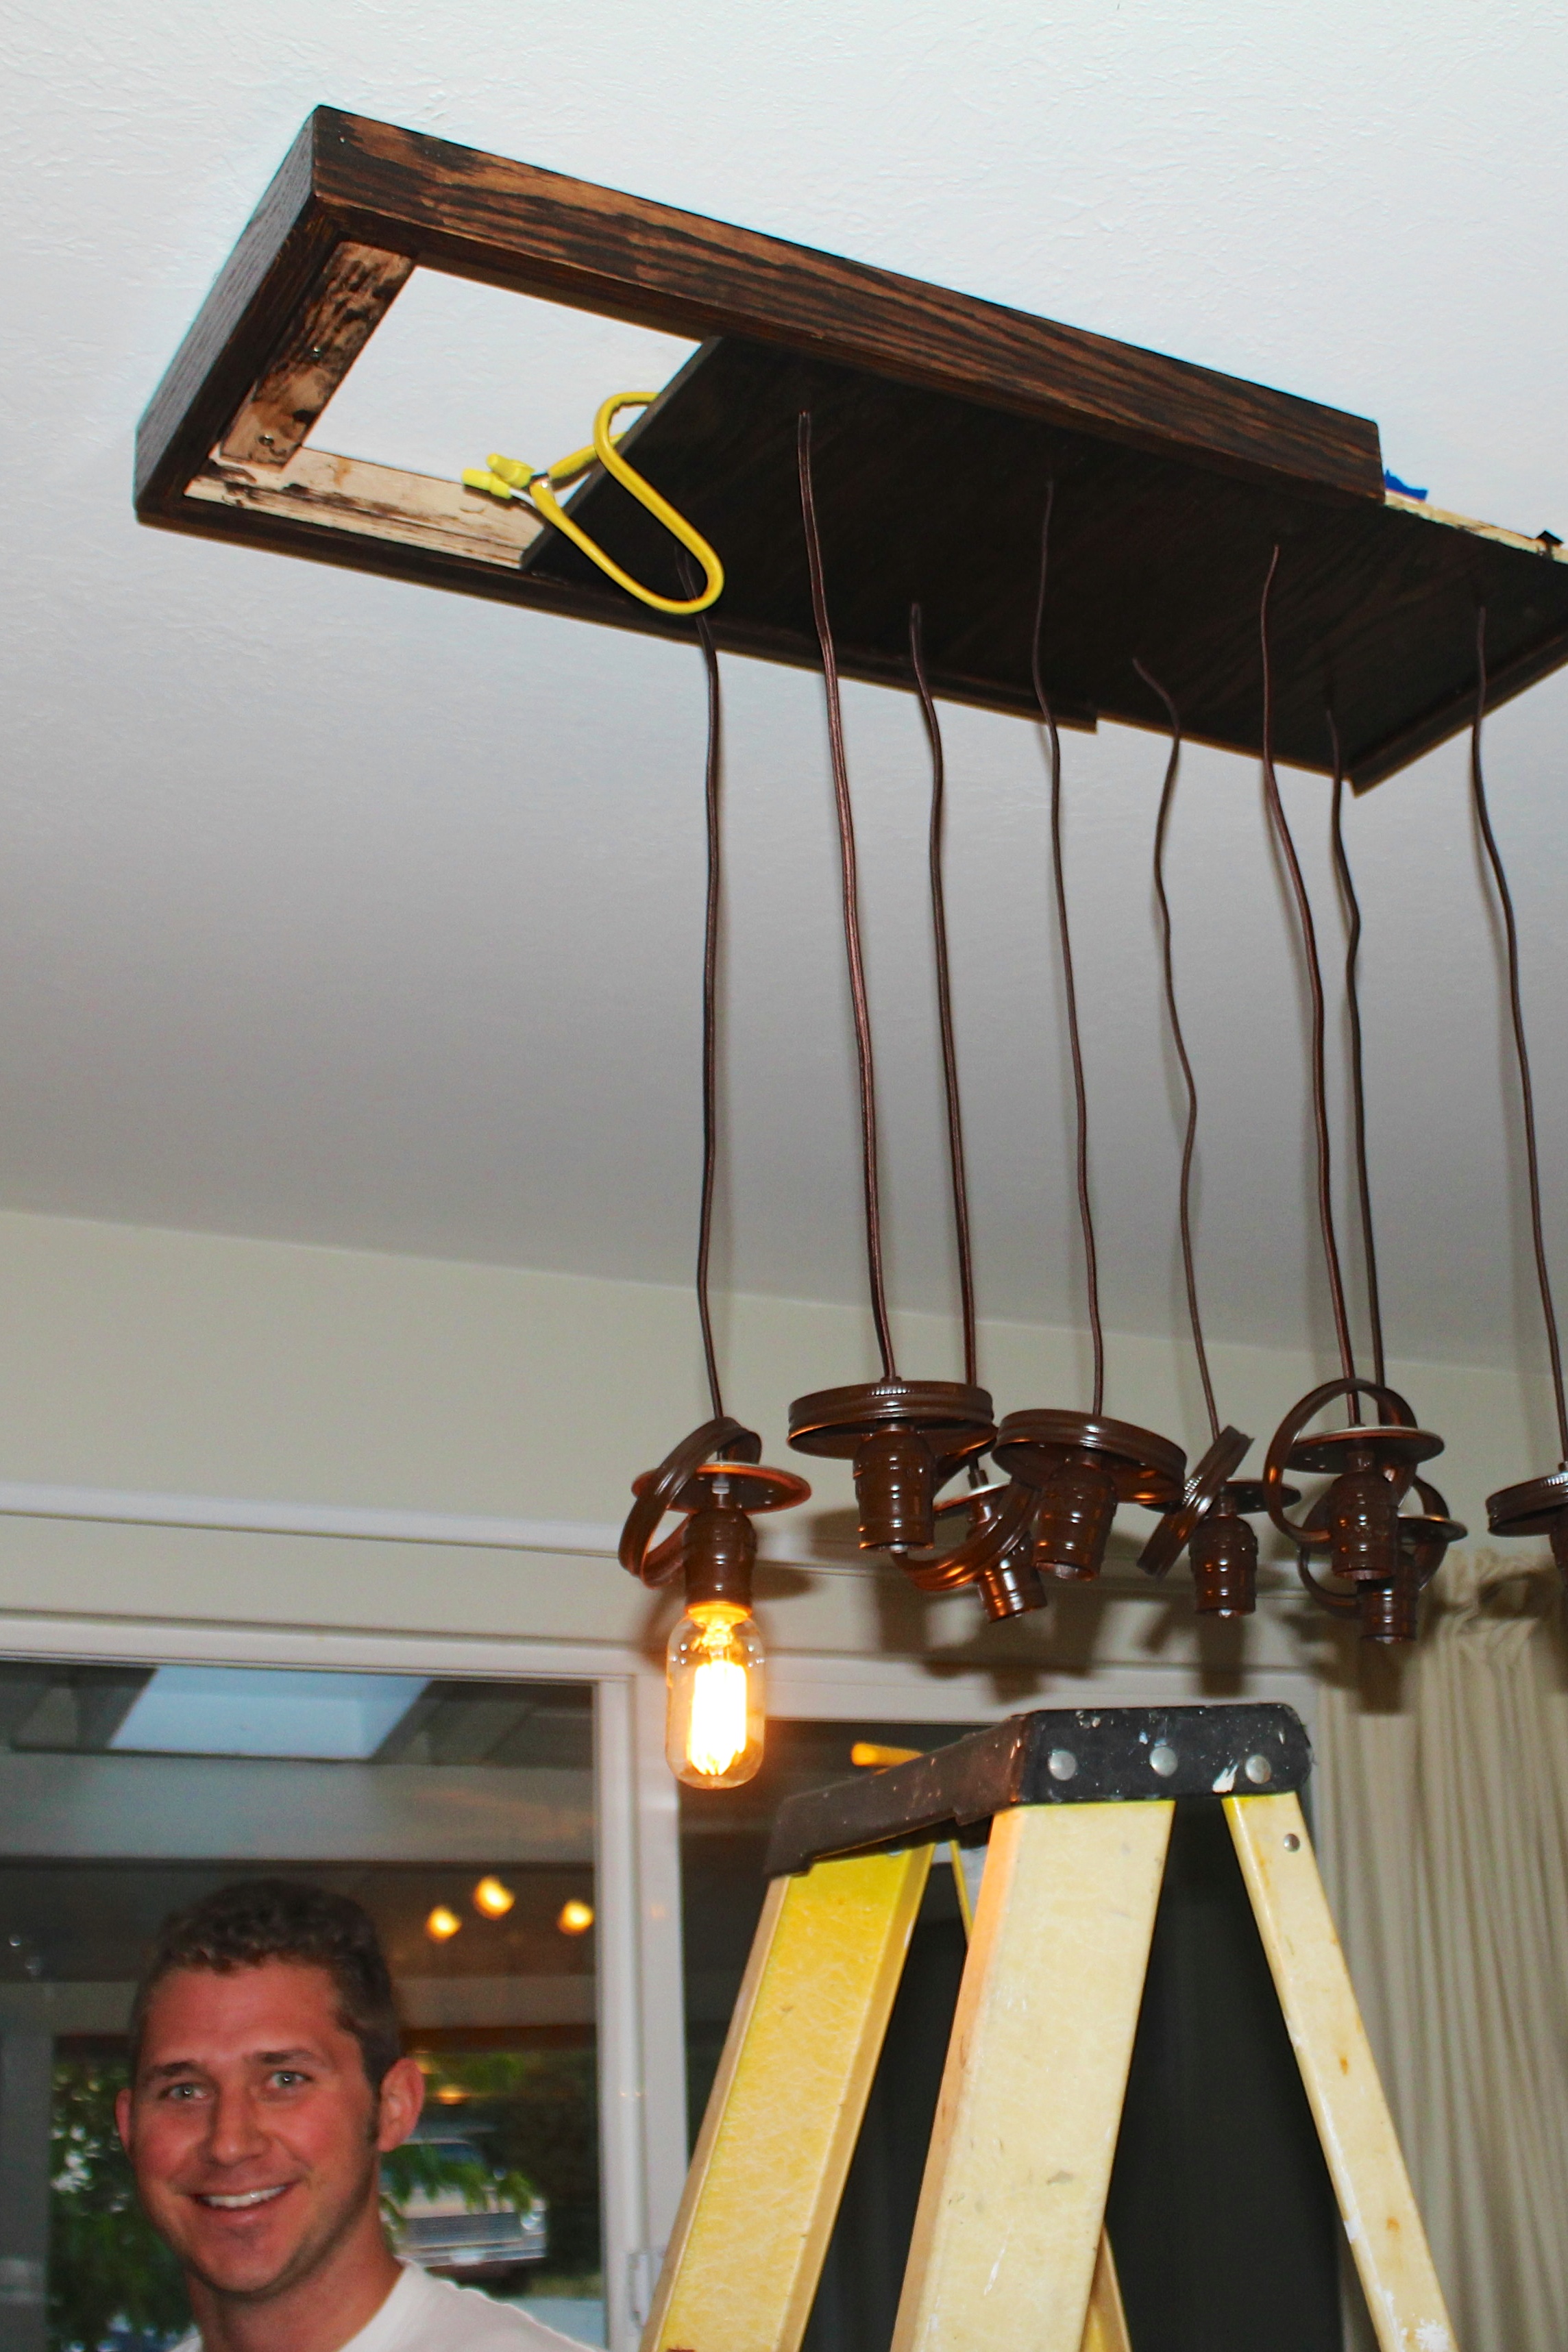
We screwed in the first light bulb and… ta-da! It worked!!! Justin was really excited. Actually, we did a little dance around the house at this point in the project 🙂
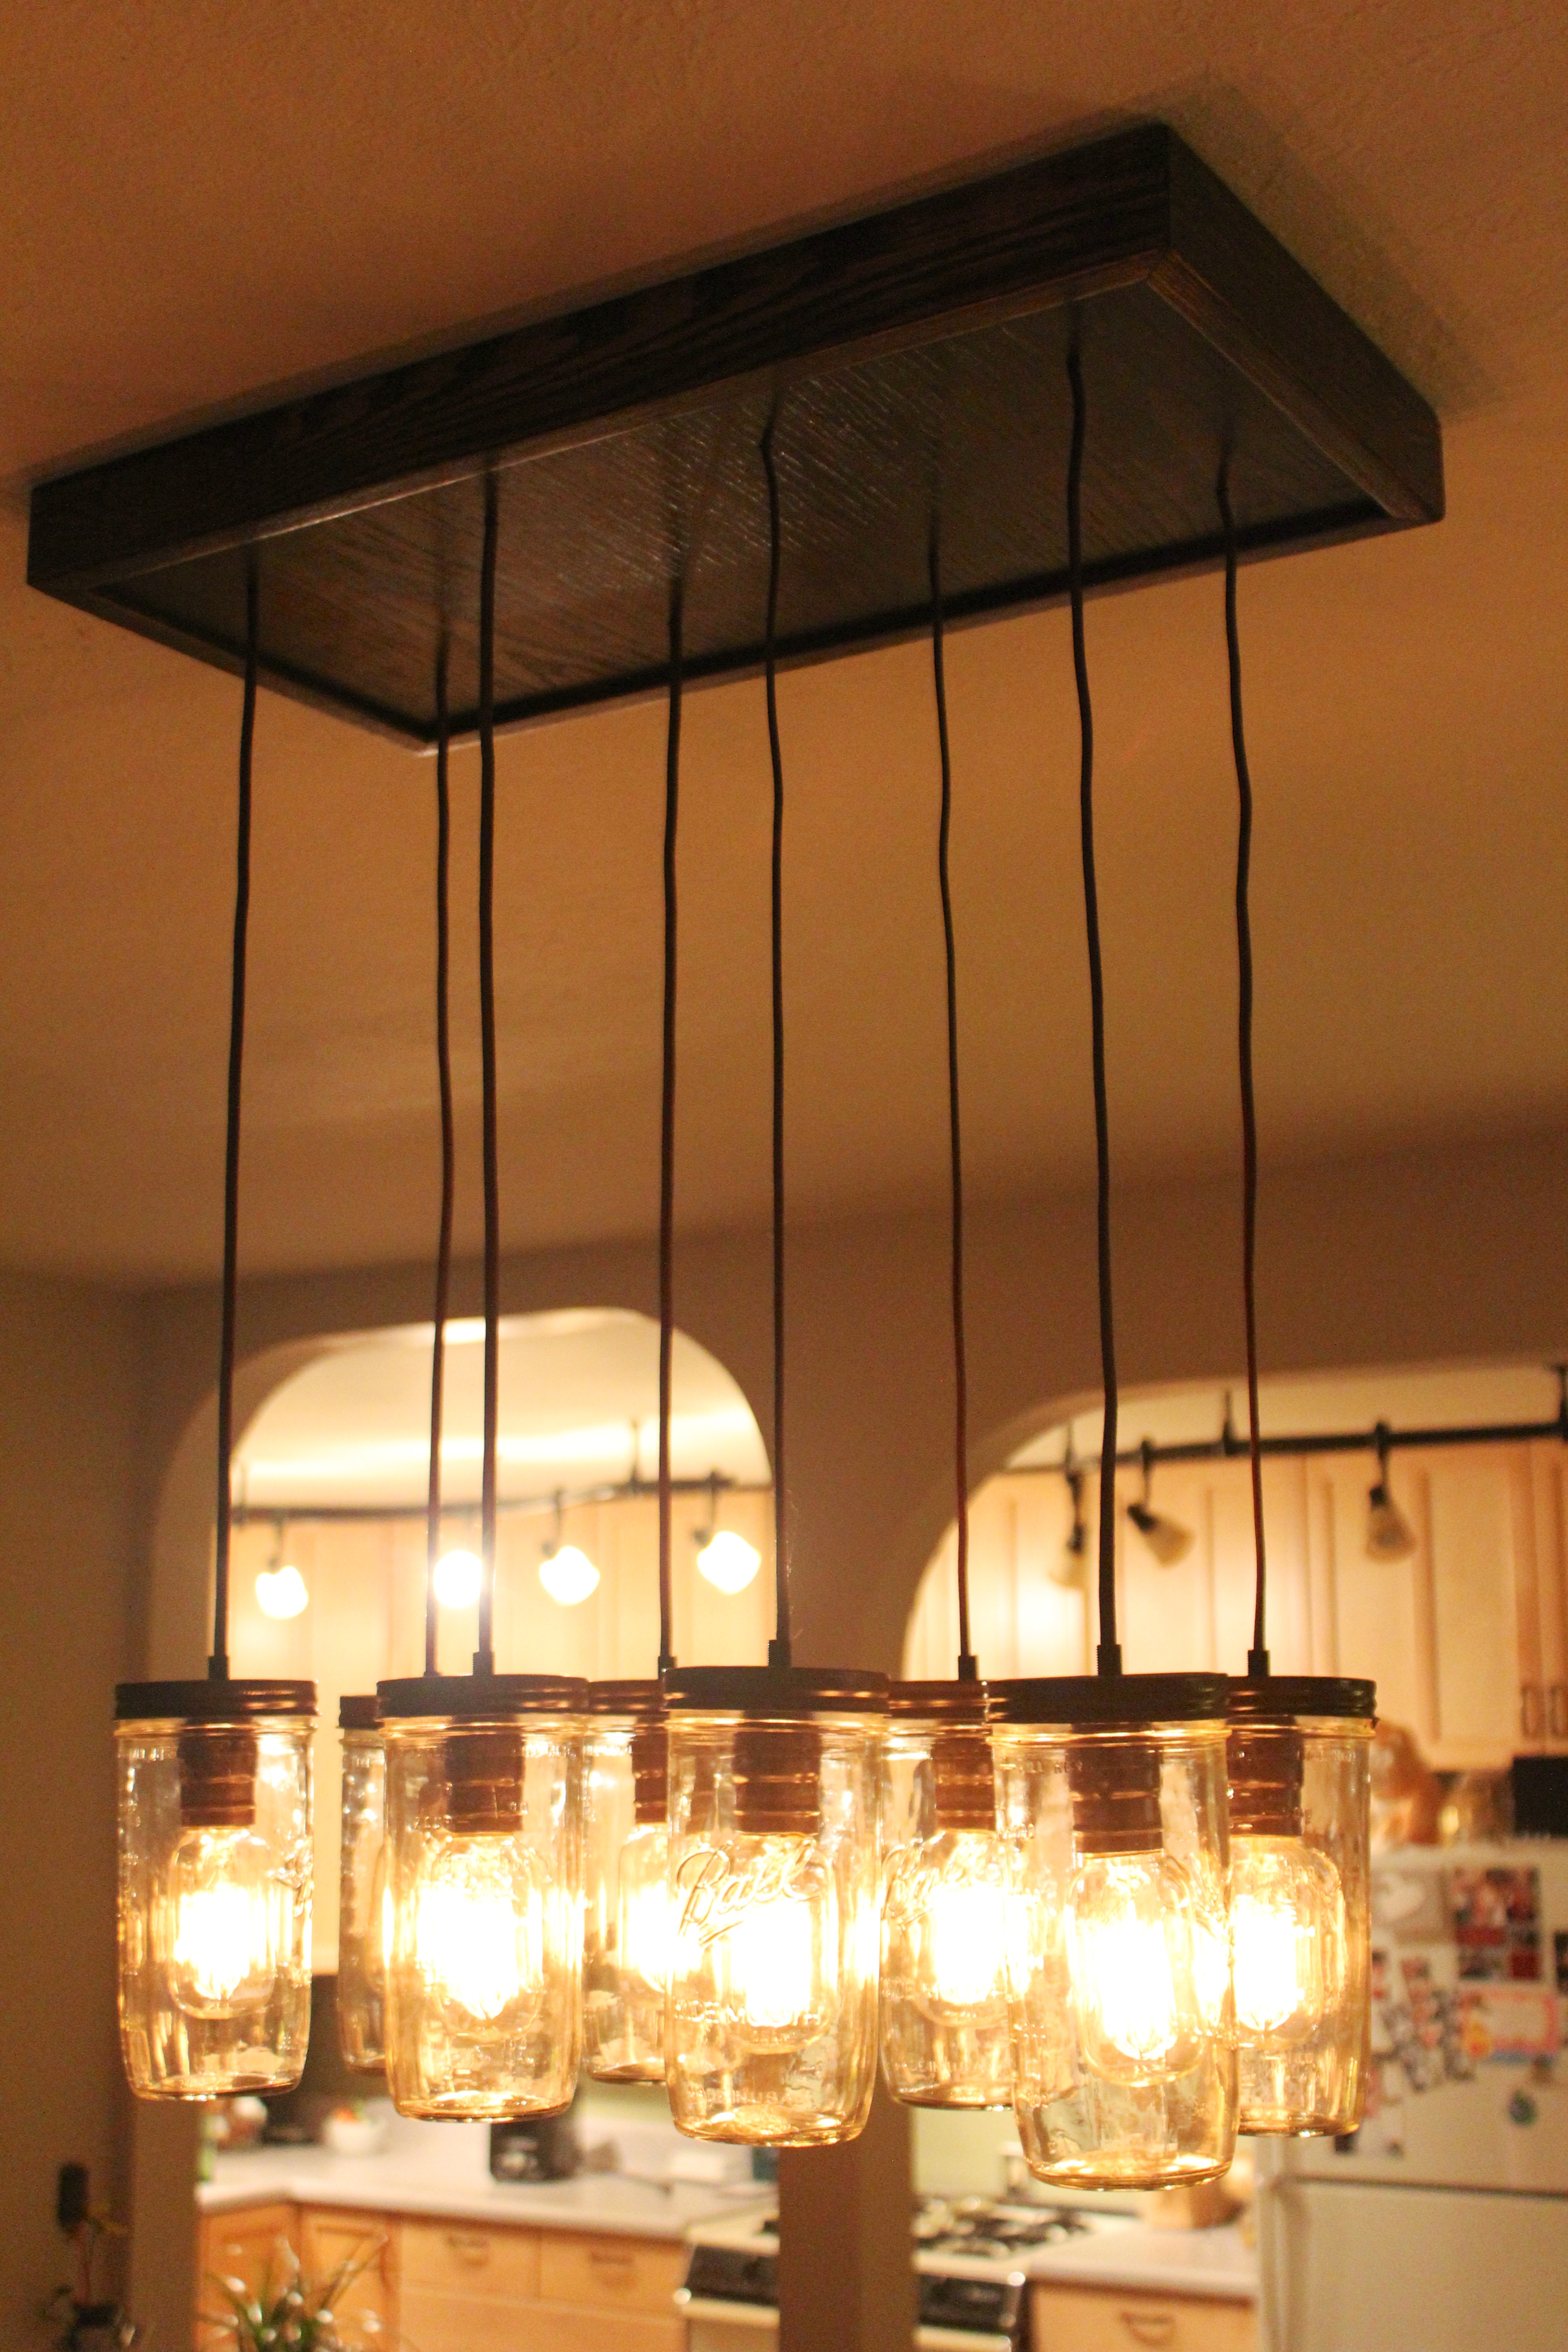
At the end of the weekend, we had this work of art:
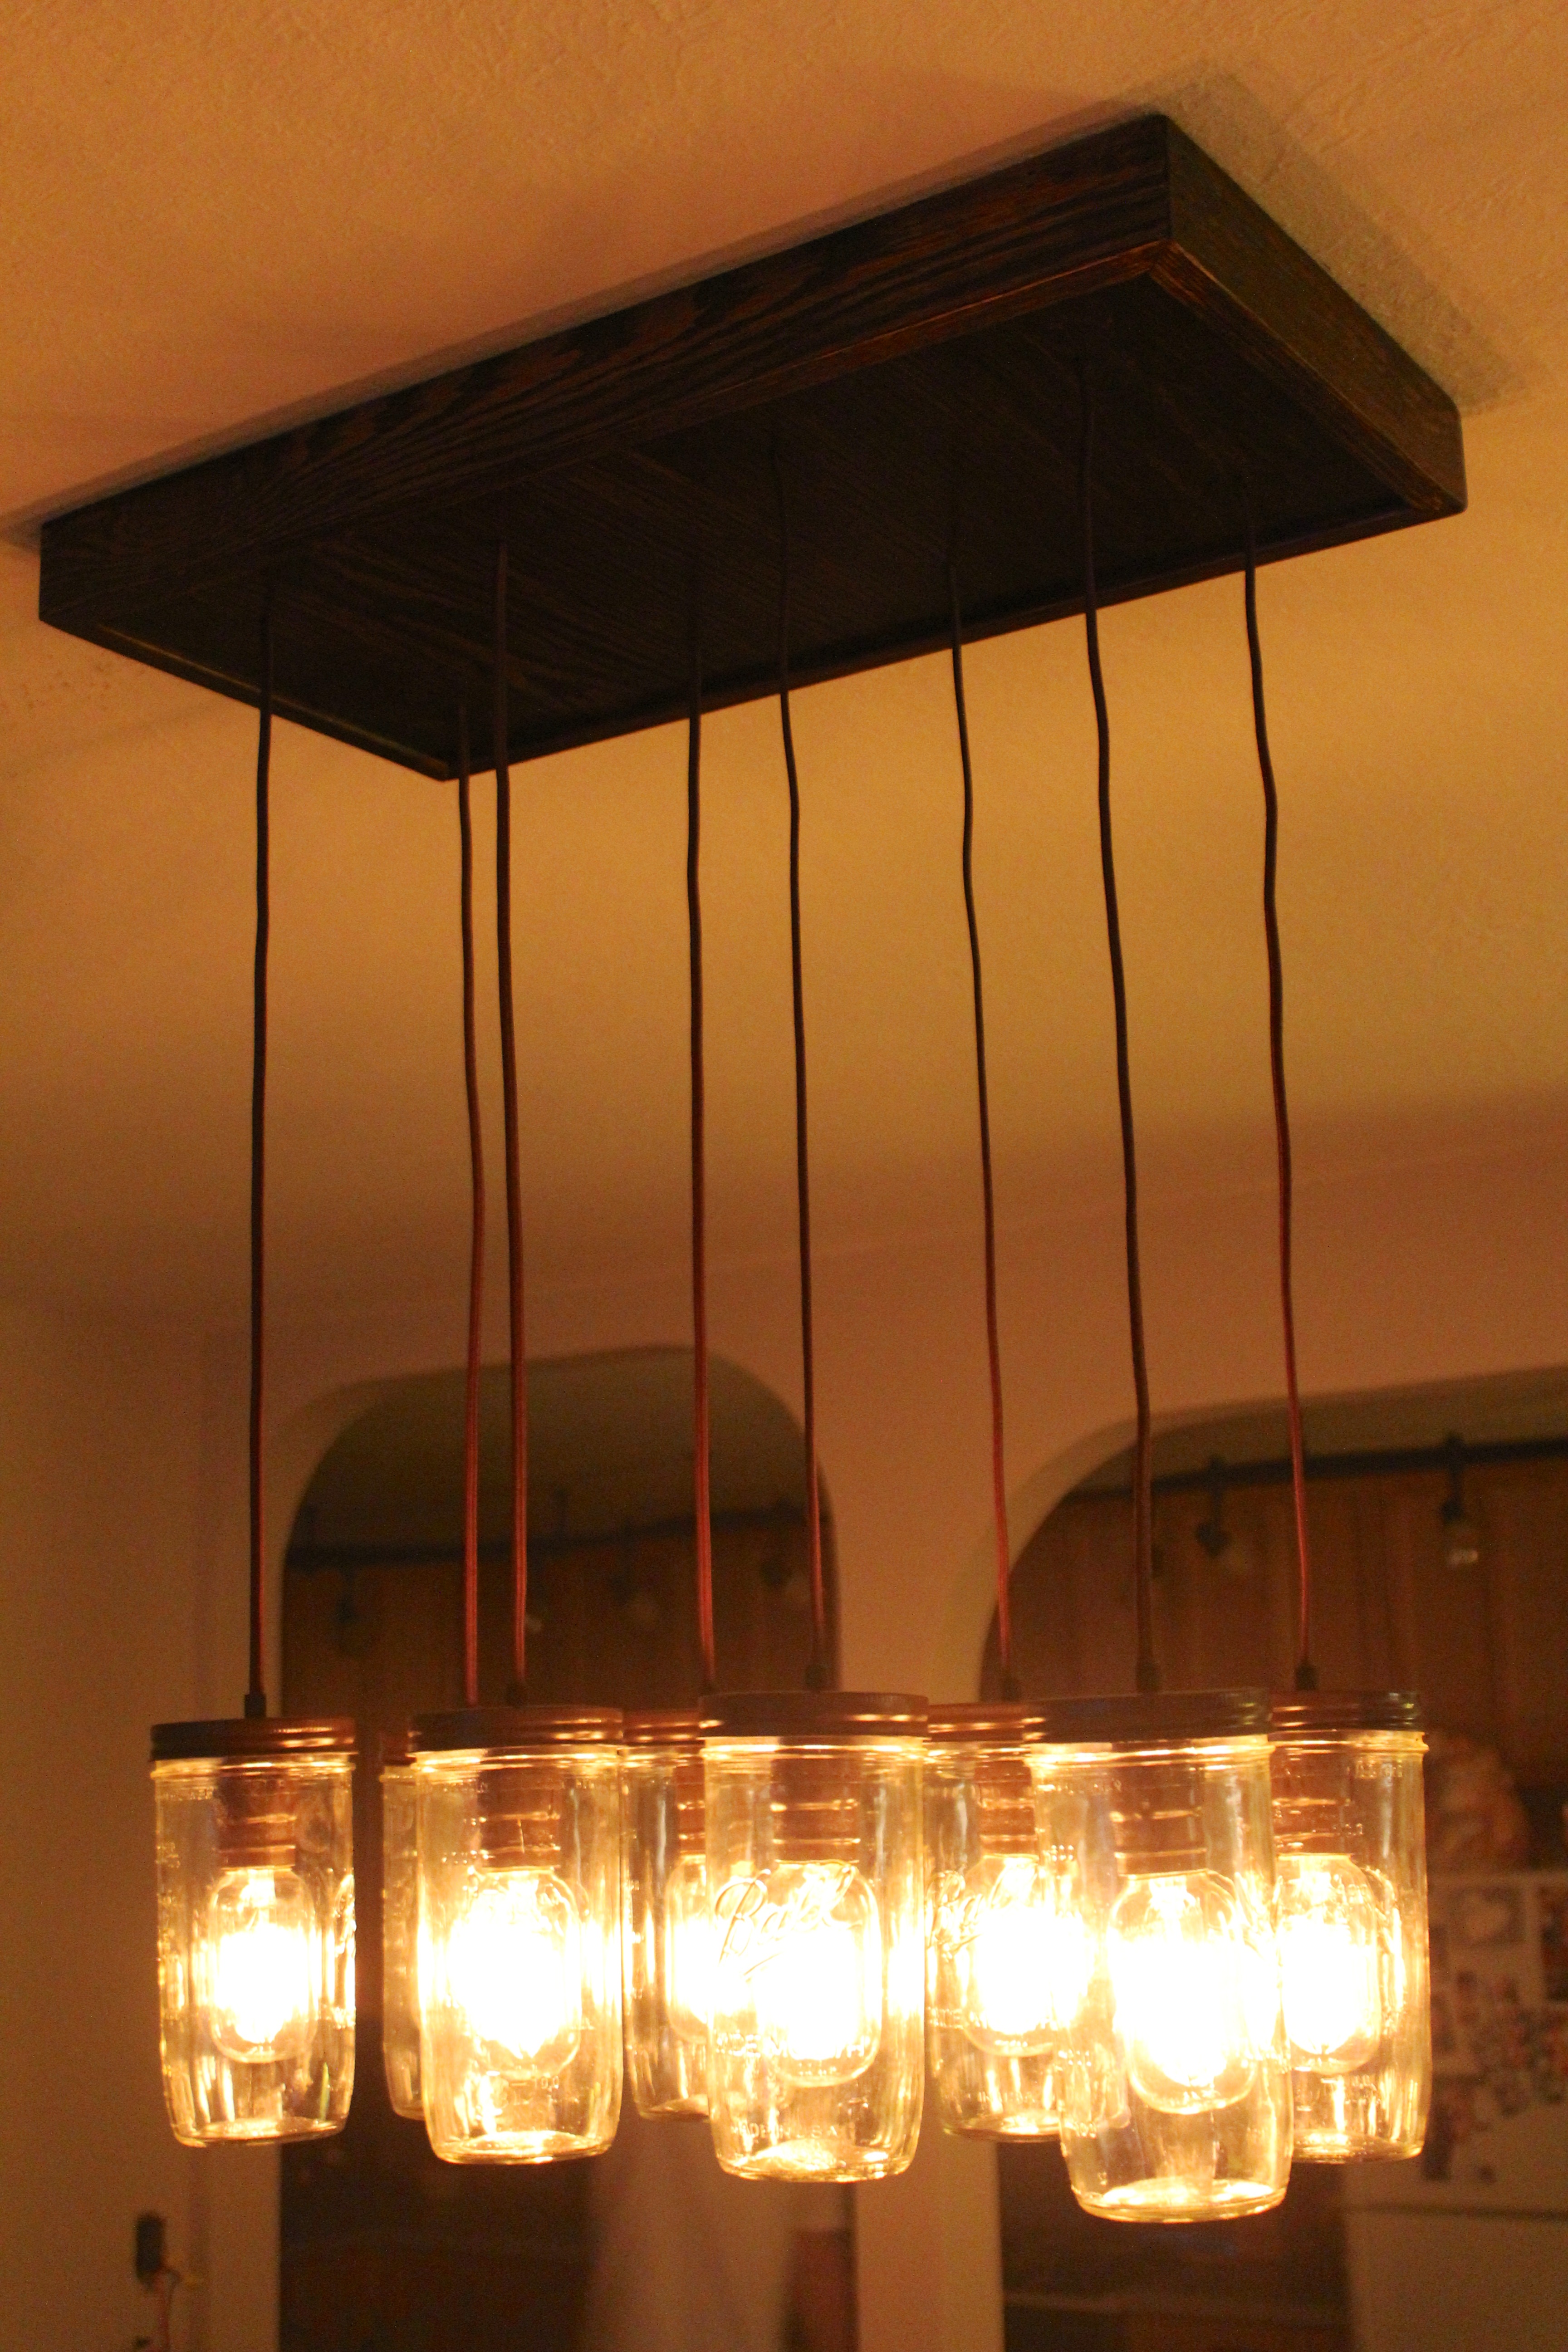
So pretty 🙂
And with the kitchen lights on
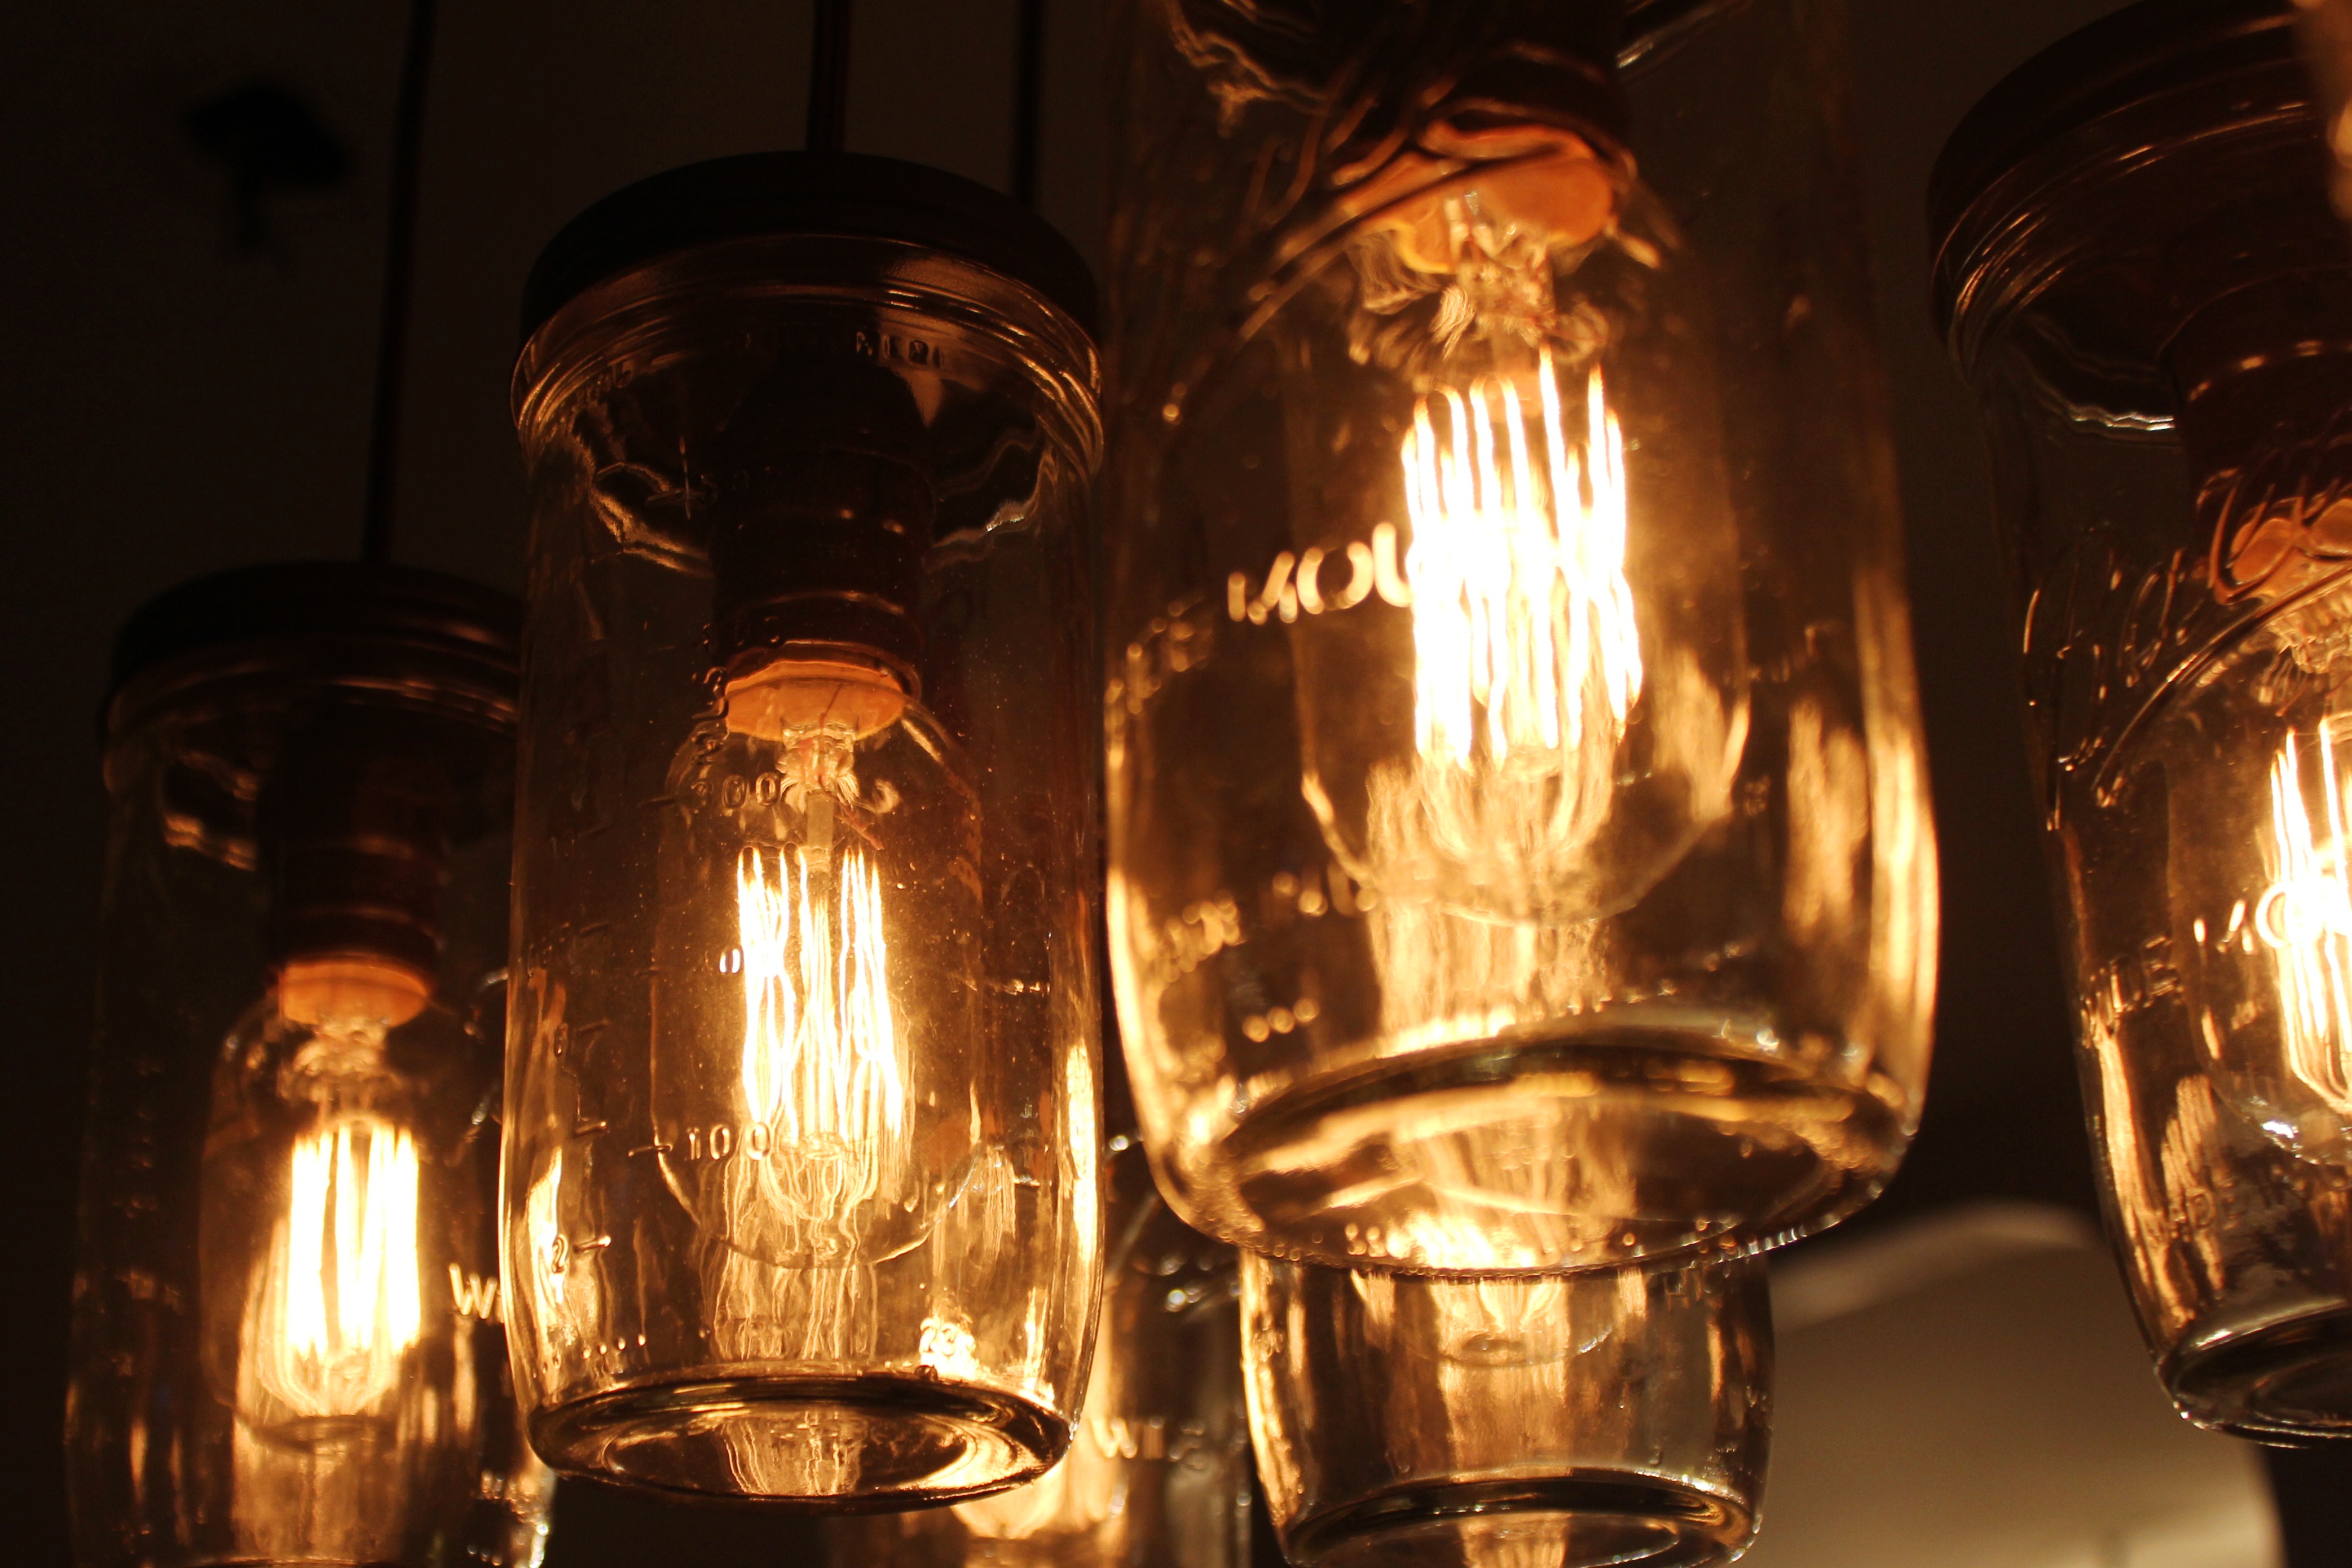
Up close and personal
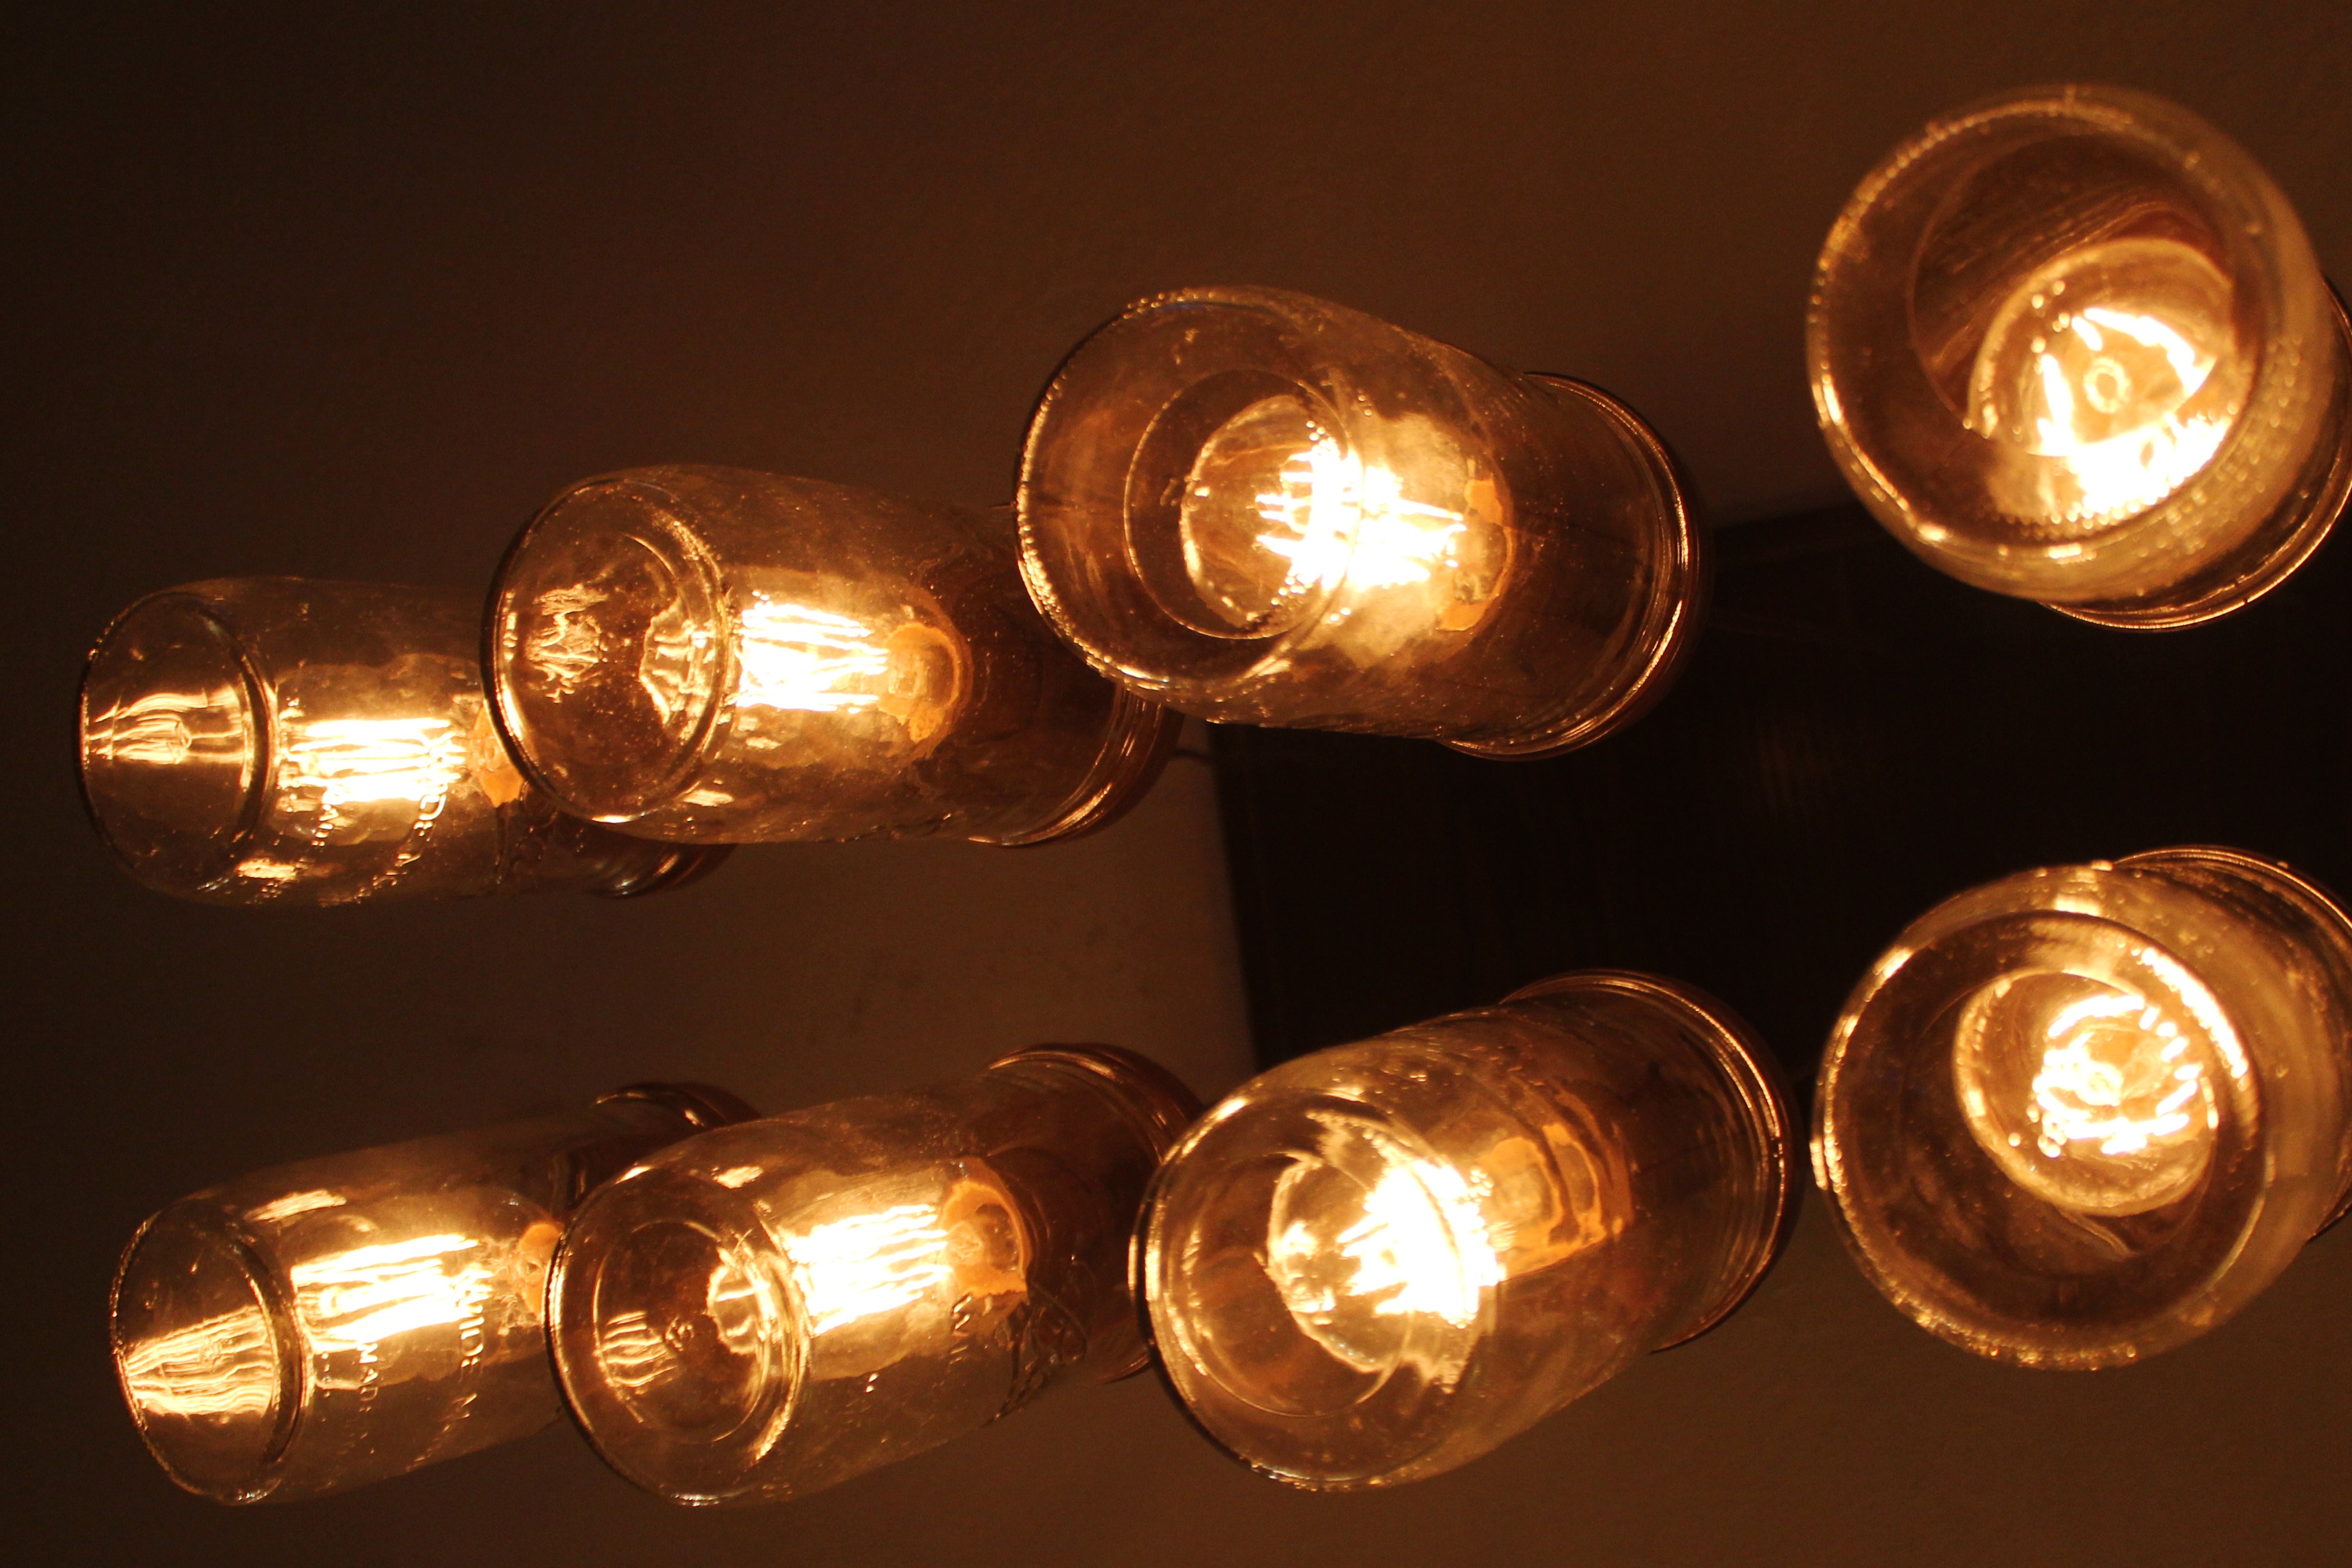
From below
We couldn’t be happier with how things turned out. We definitely learned a few things along the way and got frustrated a few times, but it was worth it. I find it highly amusing that when someone asked me what I did last weekend, I replied: “My husband and I built a chandelier.” I didn’t think much of this response, because it’s not that out of the ordinary for us to make/build/improve on the weekends, but apparently building a chandelier as a weekend project is not all that common for most people!
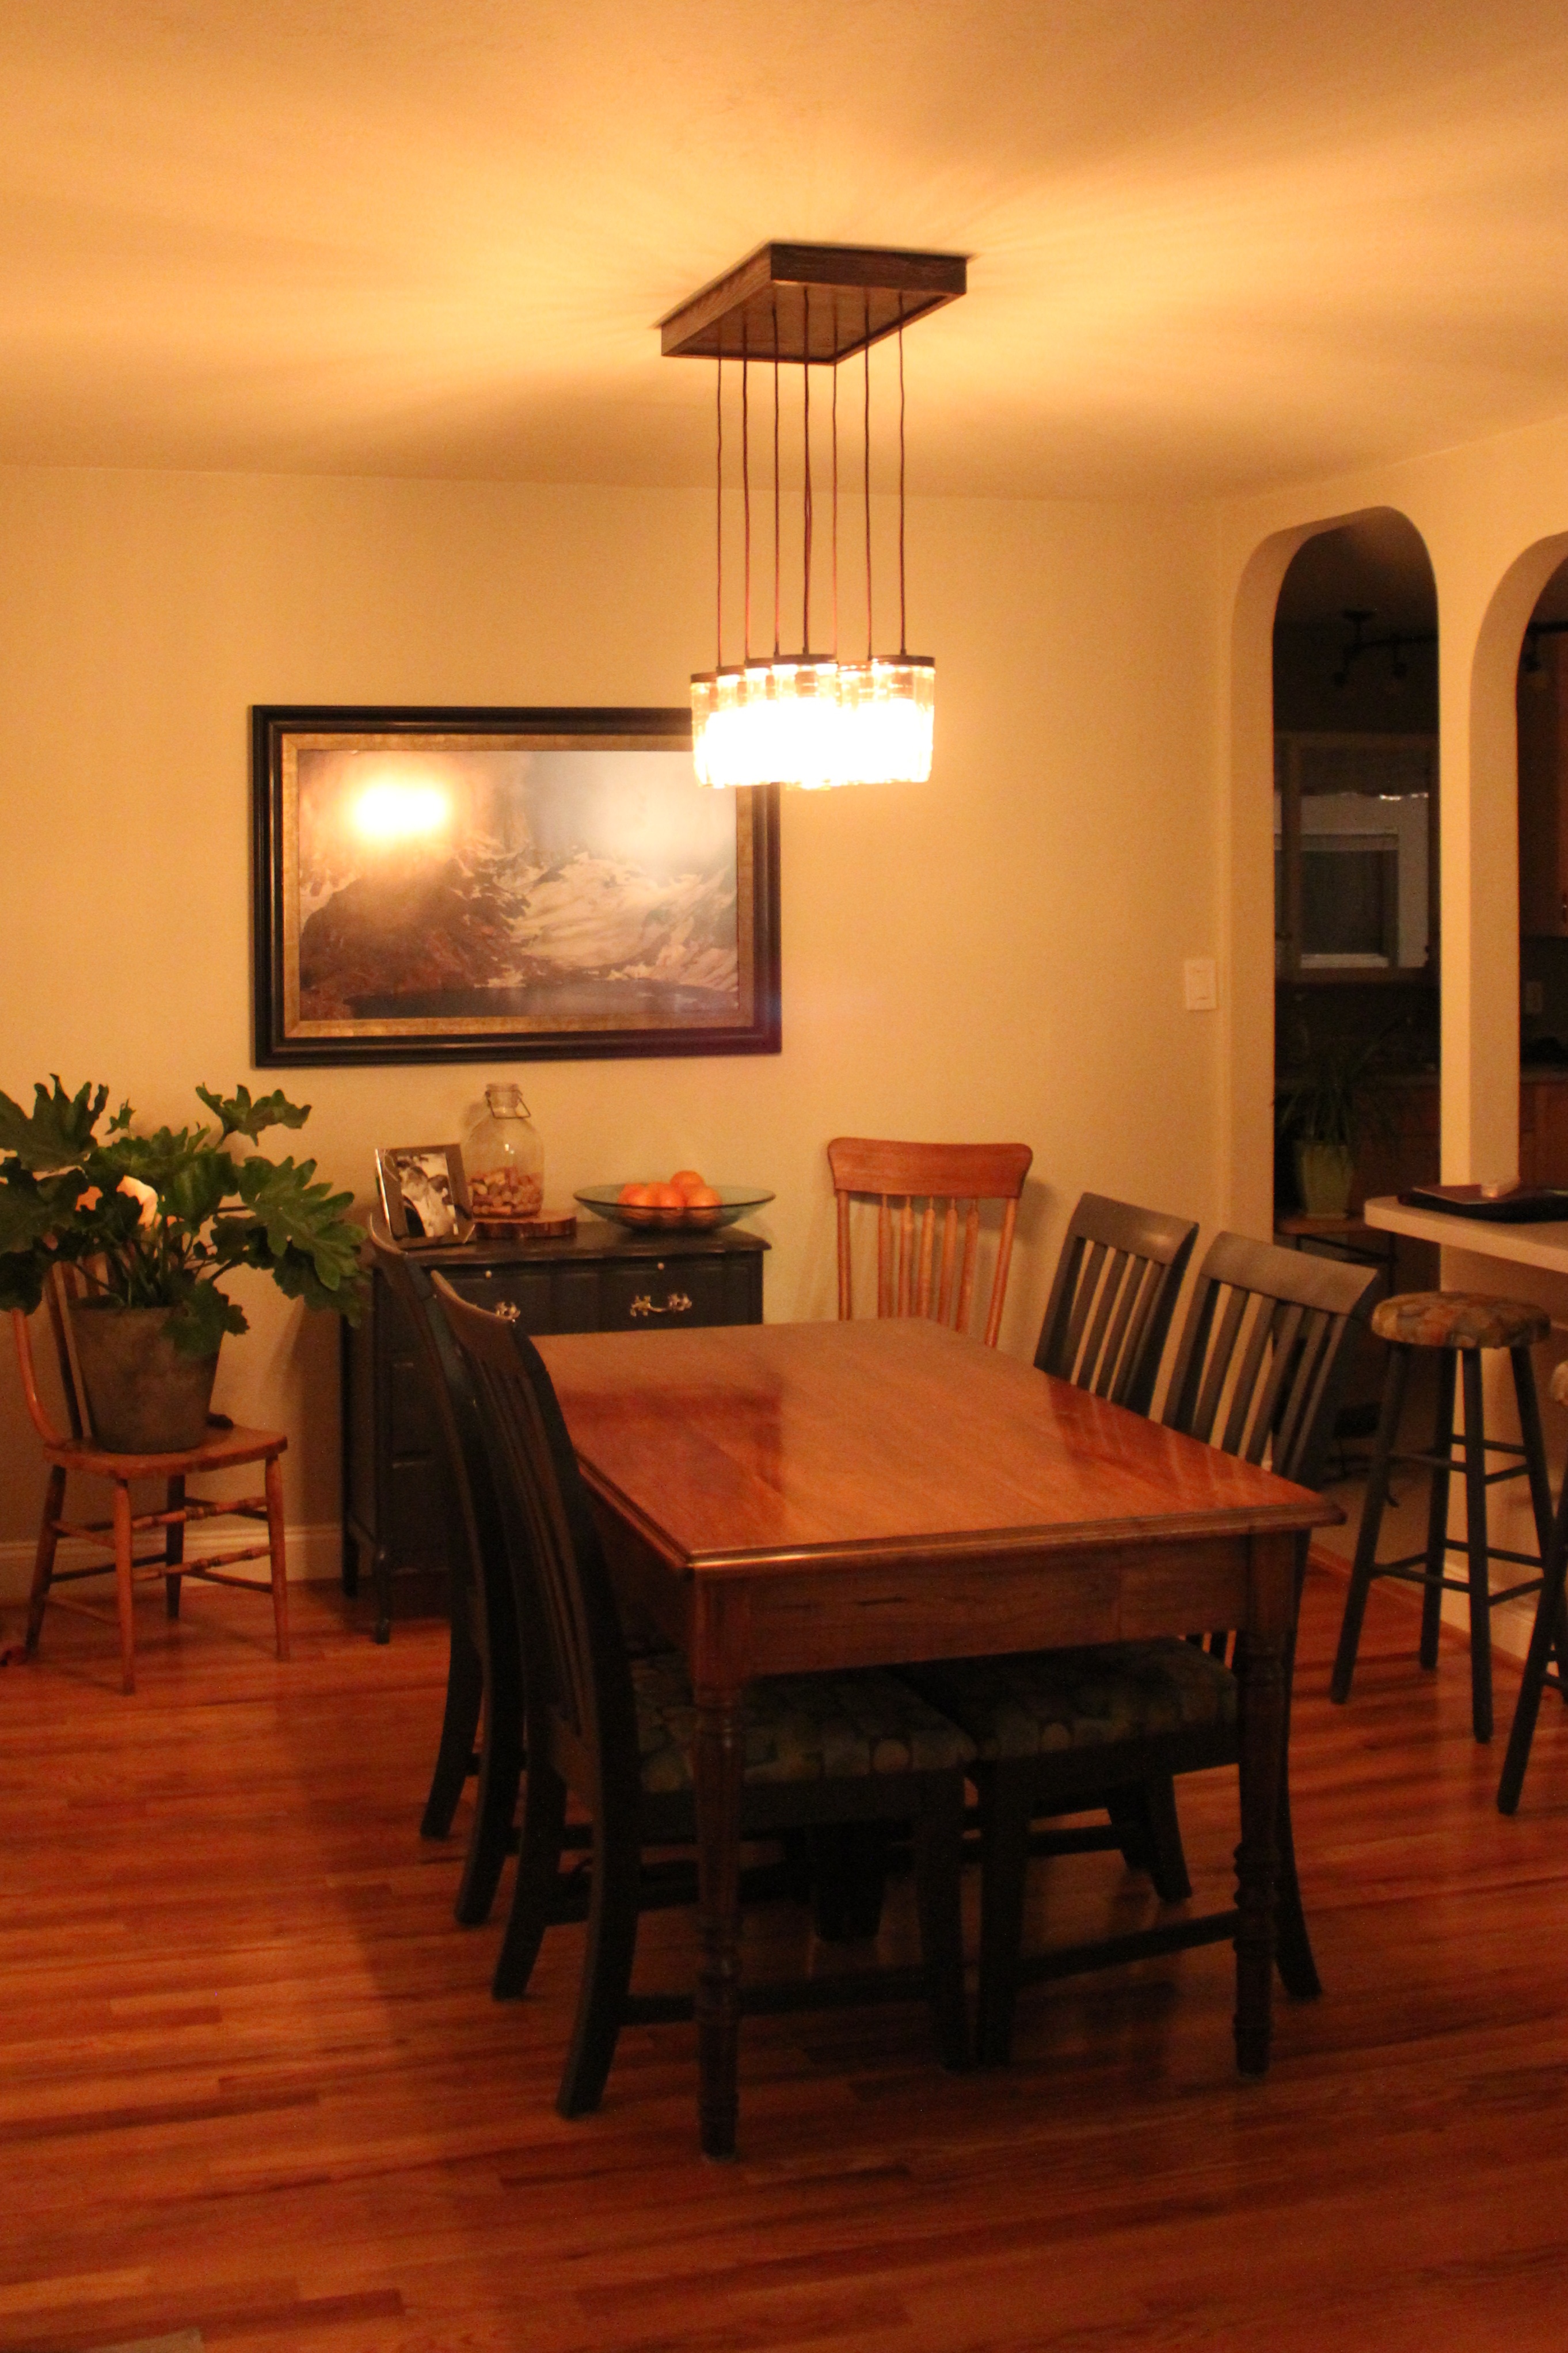
And another one… of the whole room this time
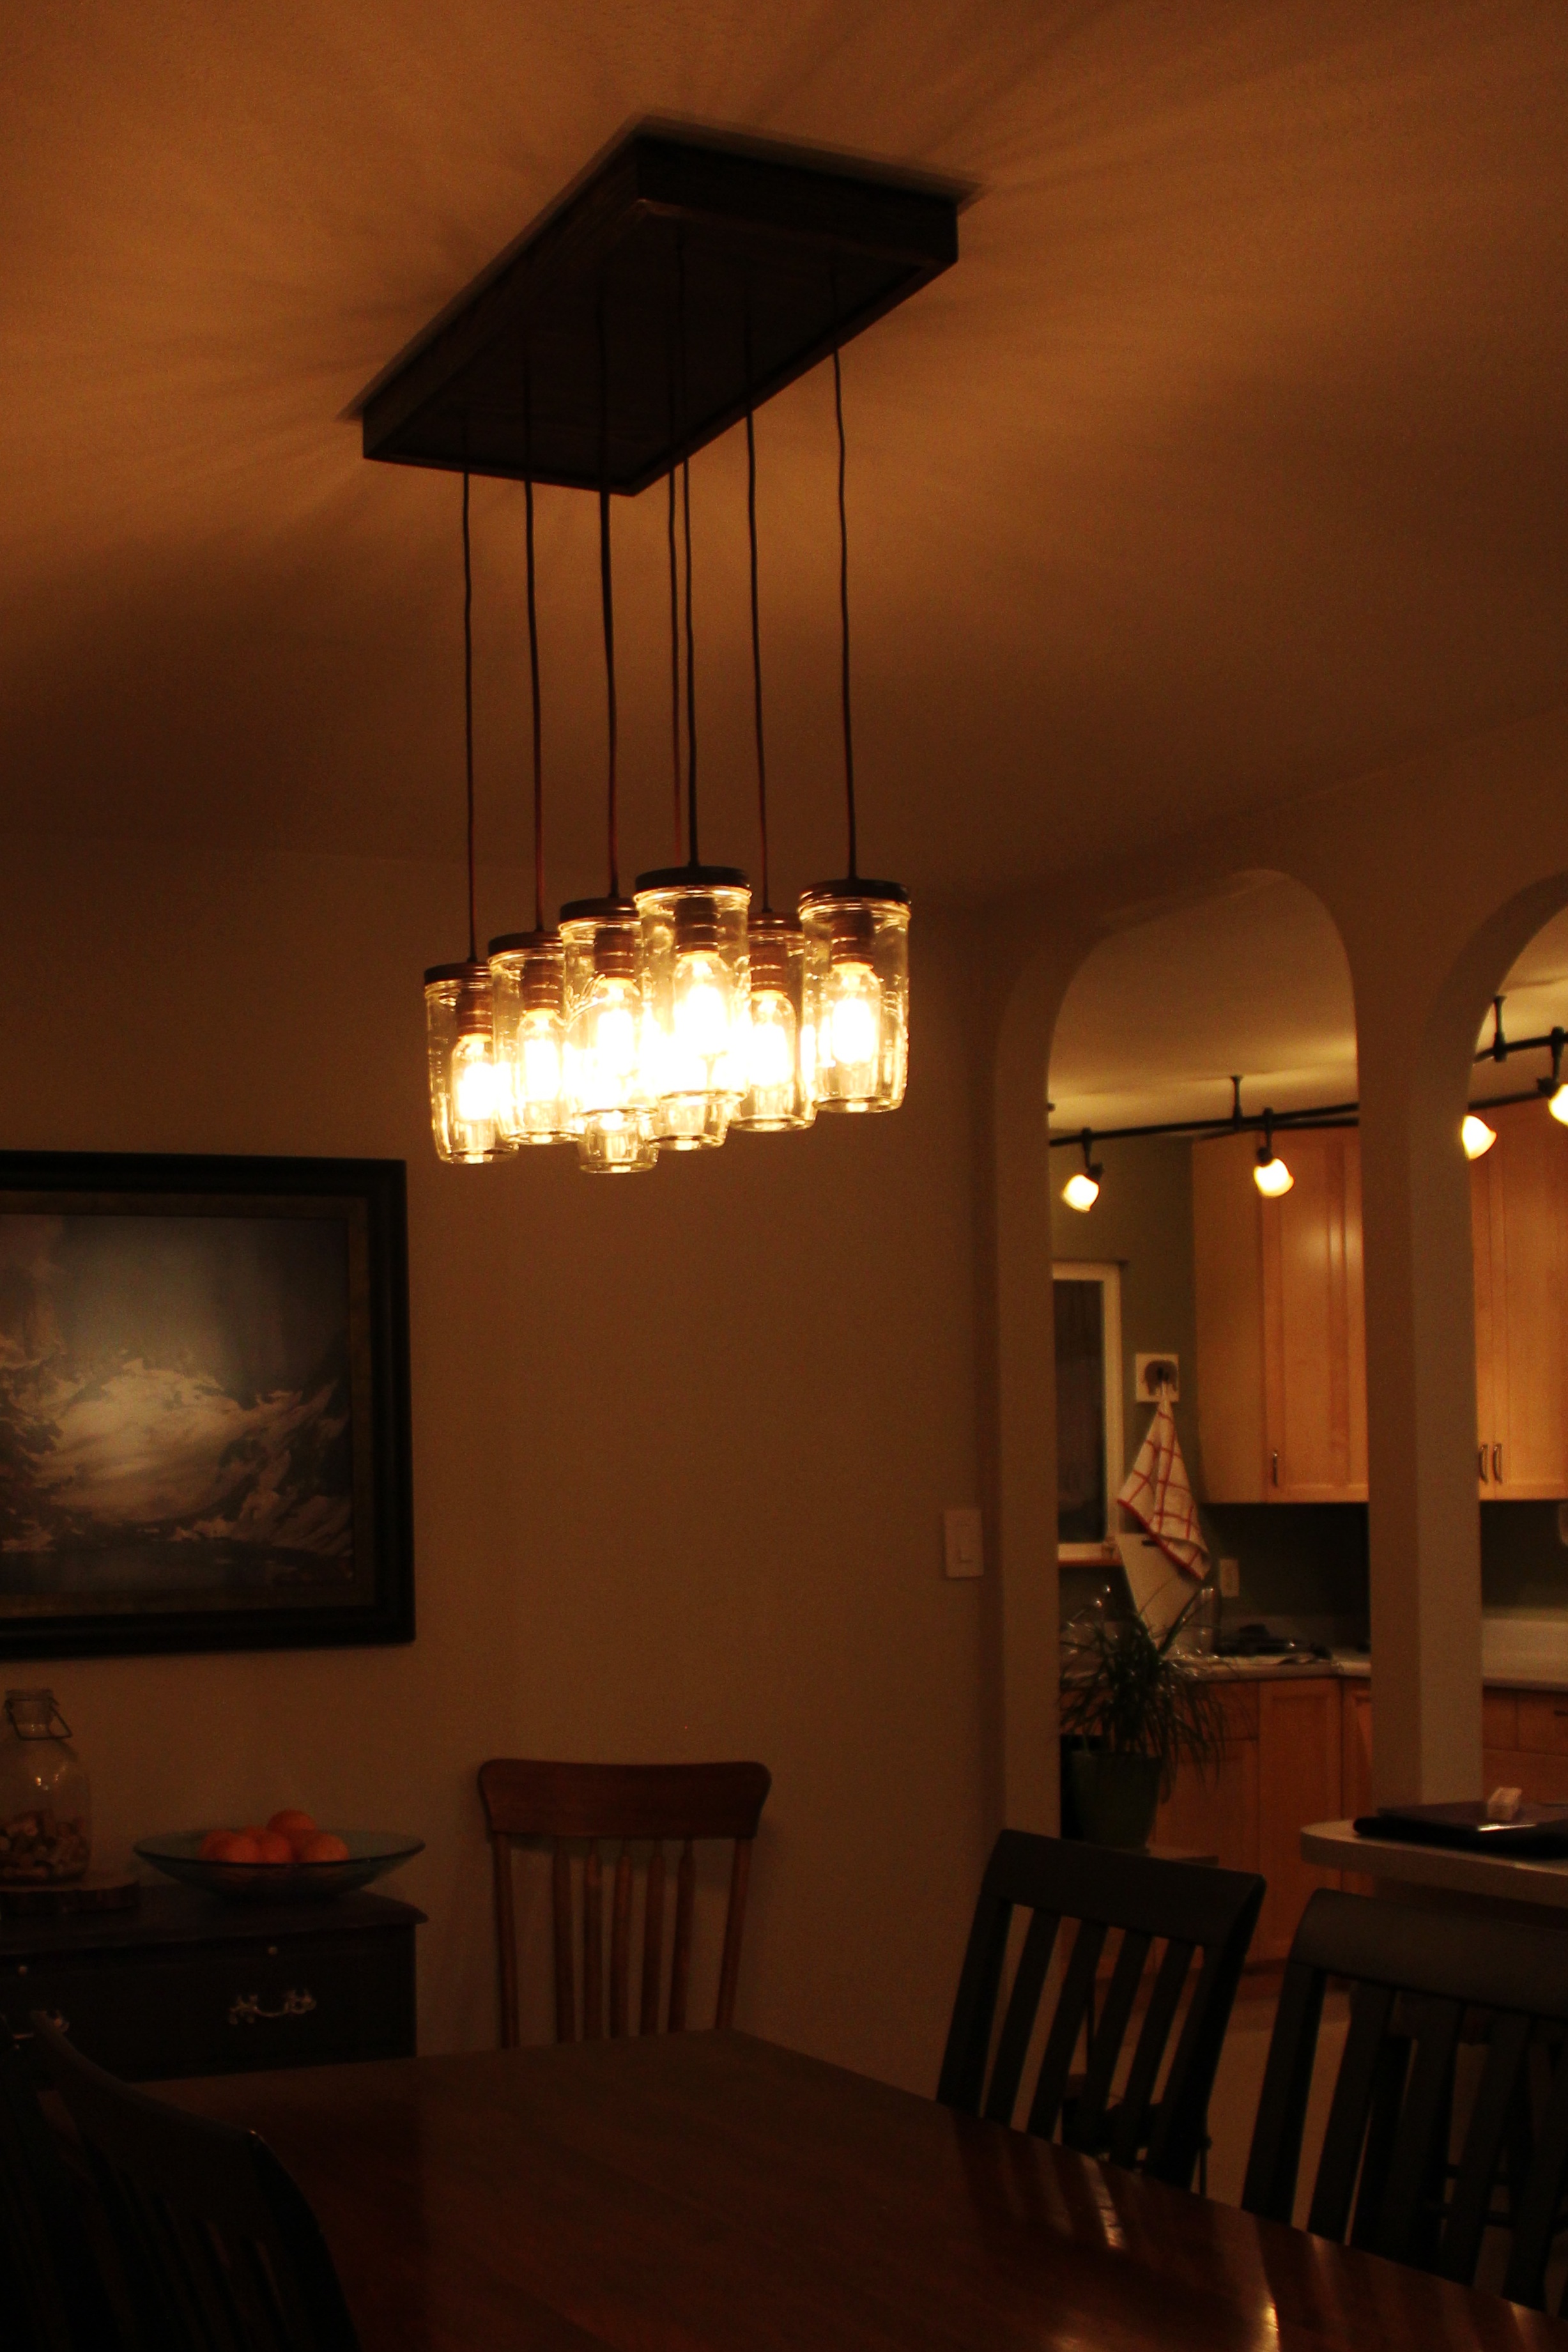
Last one, I promise. Isn’t the light pattern on the ceiling gorgeous??


Really like your design, especially of the canopy box! Two questions:
I see a brace inside the box on one end. Is that how you adhered the fixture to the ceiling, and is there another brace on the other end?
Also, what material is the broad face of the box made from (i.e., solid pine board, veneered plywood, etc?)?
Thanks so much!
Hi Stephanie! Sorry for the late response on your questions… I’ve been on a blogging hiatus for a bit 🙂 To answer your questions:
1. There are two braces inside the box, one at each end. We placed the braces so that the screws adhering the fixture to the ceiling would go directly into studs in the ceiling. That way, we don’t have to worry about mason jars falling on our heads during dinner.
2. The broad face (or the “underside”) is oak plywood and the edges are oak hardwood, all stained espresso.
Hope that helps! Feel free to ask more questions. If you try your own, I would love to see photos!
Oh my gosh… This is gorgeous!! (from every angle). Thanks so much for sharing the joy and satisfaction these projects bring. I continue to be truly amazed and in awe. The chandelier, and all illuminated here, looks sooo inviting! Someday hope to also see in person, but for now, very much enjoying being guests of your Blog. 🙂
That’s quite the project you undertook. Turned out great though!
Thank you!
I’ve been waiting for this post! Your chandelier is sooo cool! Perfect jewelry for your dining/living area. It’s fun watching the two of you explore and learn how to do these projects.
It looks like you did a good job covering up the hole from the old fixture.
Nancy Sent from my iPad
My favorite!!!! Love it, keep the posts coming, it’s so much fun for me to see each step of this transformation journey!
You two are amazing! Love the light fixture! And the wonderful stories about all your projects!