
Disclaimer: This is a very word-heavy post. Pardon me while I wax poetic about lists and projects… The last post was and the next post will be heavy on photos to make up for it!
I am a list person. There are to-do lists, grocery lists, amazon order lists, Home Depot lists, etc. written on all types of paper scattered all over my life (I would say house, but the lists have wandered into my car, my backpack, the bathroom, the shop…). Justin has tried to convert me to one of the multitude of list-making apps available, but it’s just not the same. Checking a box and watching an item disappear from a list on my phone is in no way as satisfying as drawing a nice clean line through a completed item, and having it stay there. It’s like saying, “Take that, task! You’re DONE!” And watching the neatly crossed off tasks and items grow is, at least for me, somewhat of a guilty pleasure. Time for a confession: I add things to lists just so I can cross them off. That’s right, I said it. I will write down a task I’ve already completed just so I can cross it off and feel more accomplished. Hopefully I’m not the only one guilty of this, or you may all start to think I’ve lost my marbles…
Anyway, now that you all can add another dimension to my perceived craziness (and sympathize with Justin over my list-making tendencies), let’s get to the point of this post. We started a huge project in January: converting the shop at the back of our lot to half shop, half lounge. Let’s be honest: Justin does not need 1,000 square-feet of tools. Can you imagine what would happen if we ever moved?? And we really had our hearts set on converting part of the building to an entertainment space.

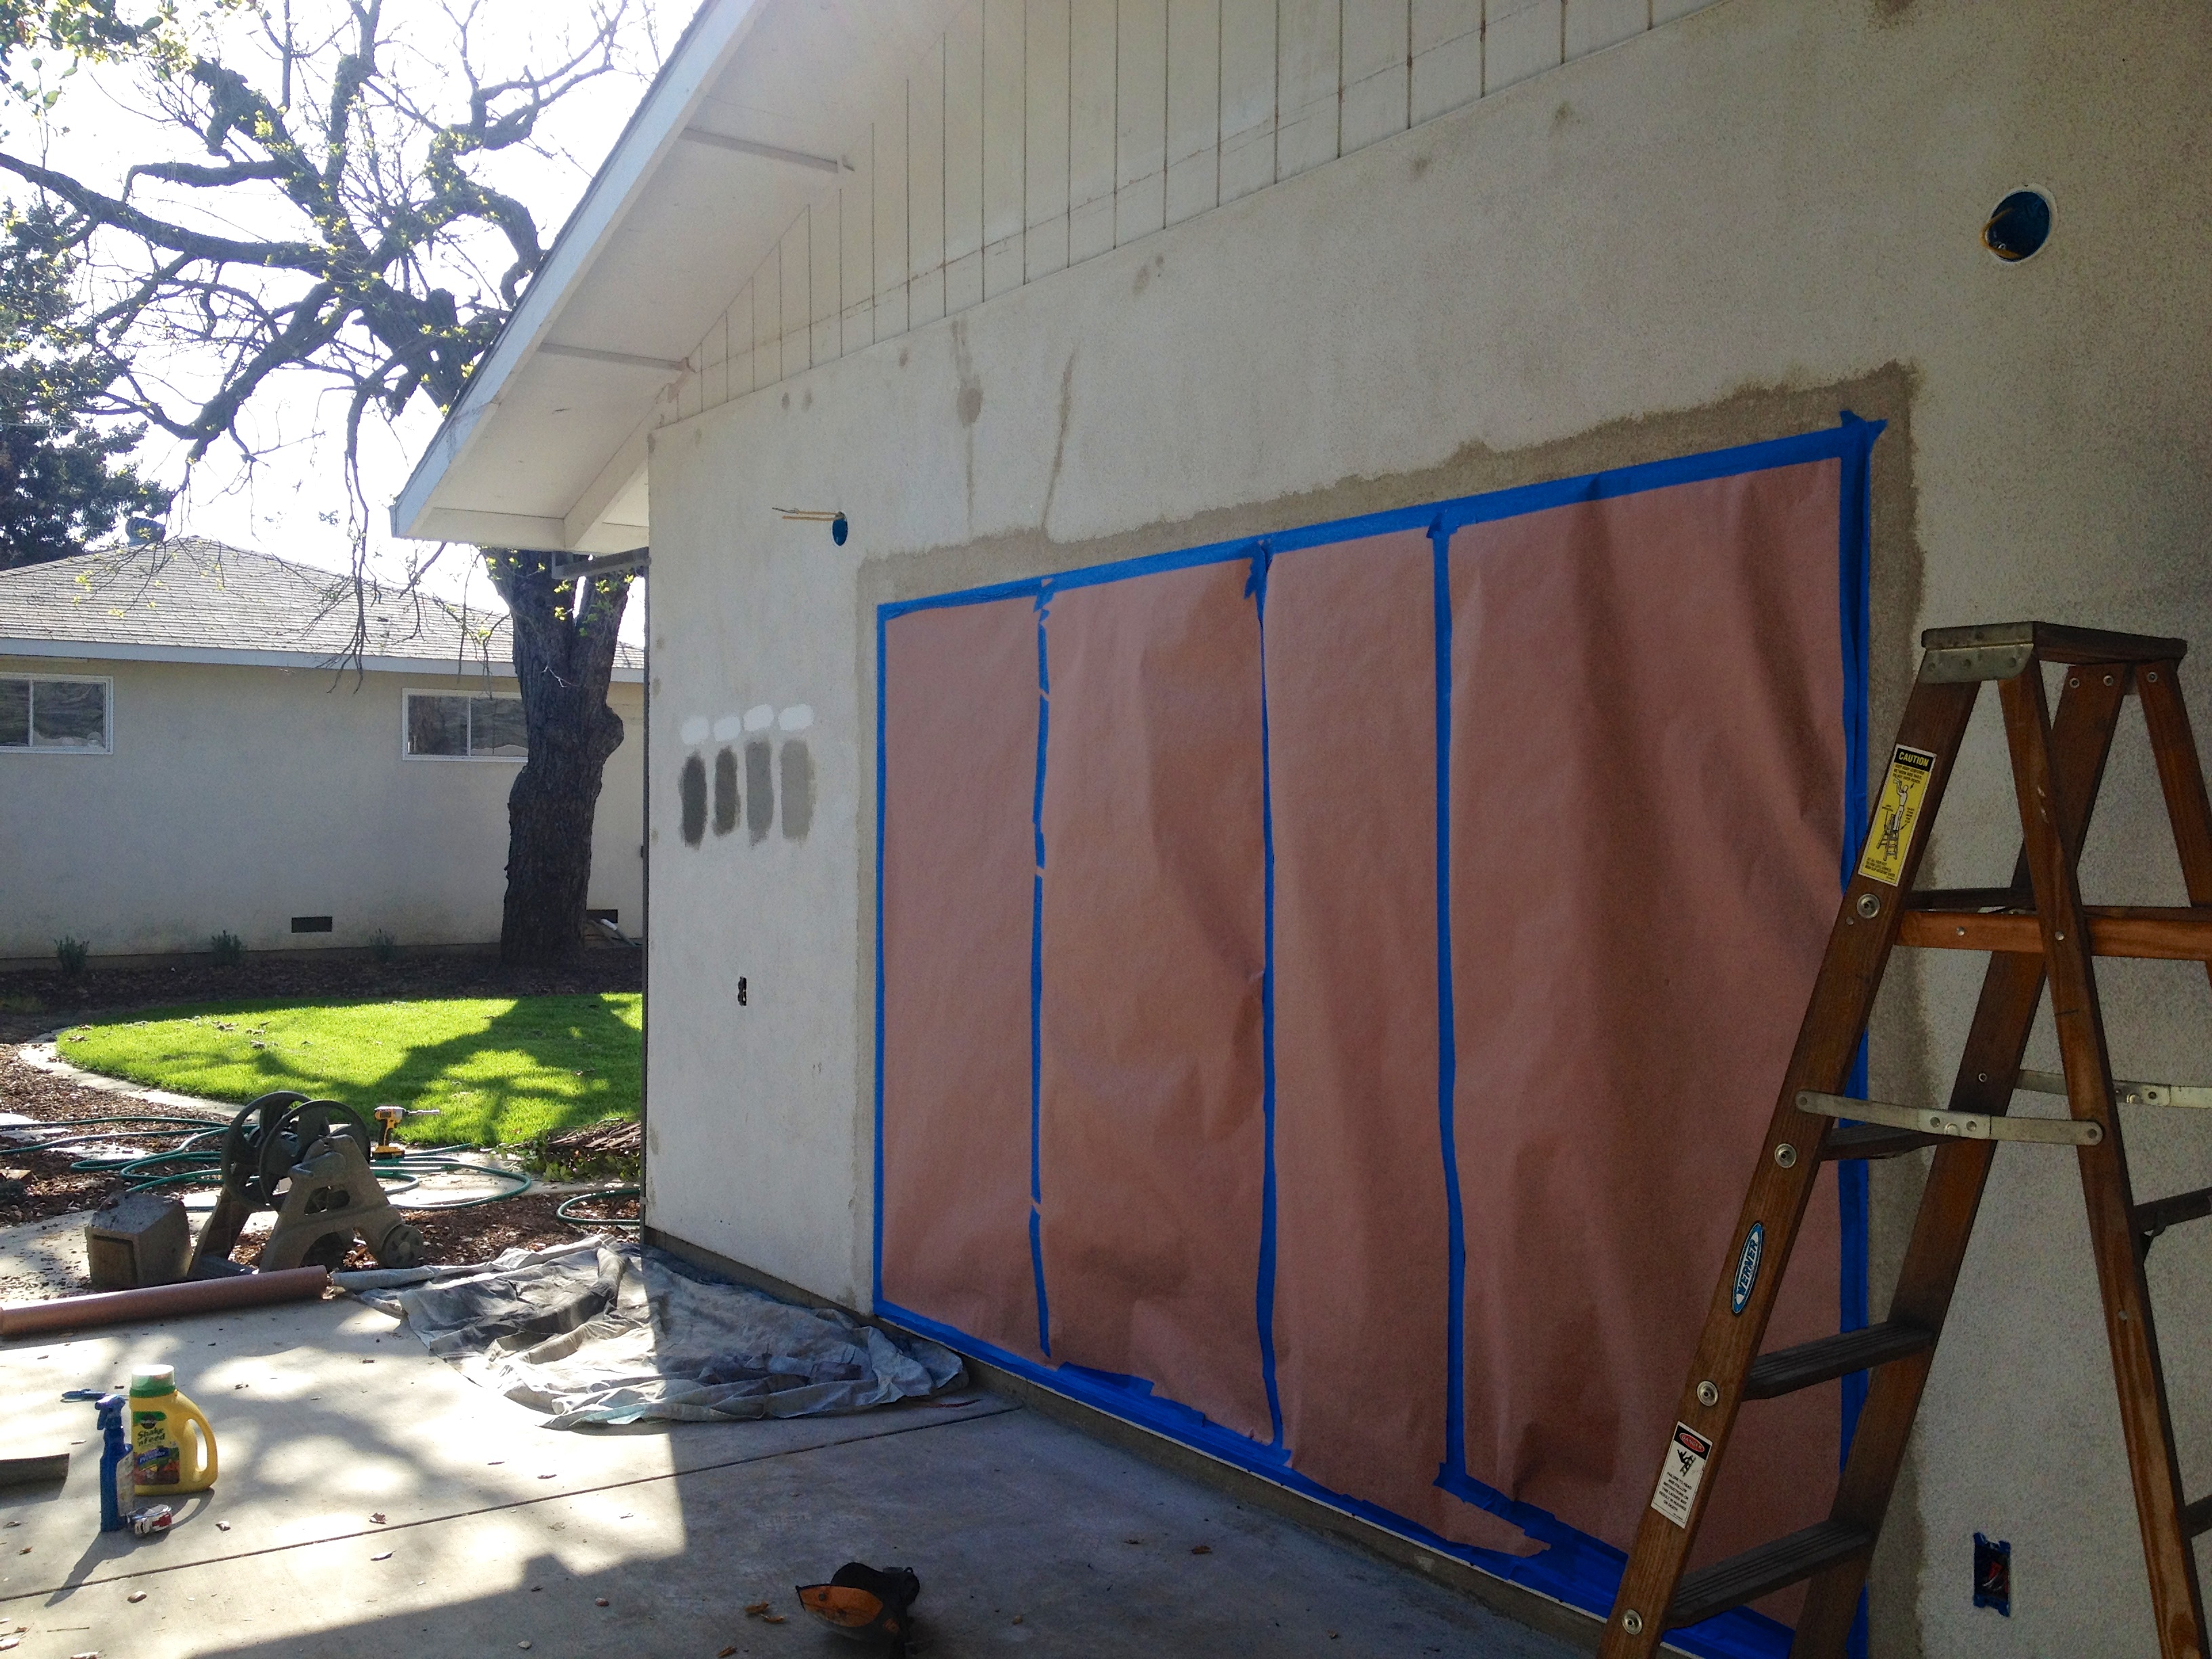
The wall that started it all
As part of the blog revival effort, to get you all caught up without giving everything away, I thought it would be fun to share a list of what we’ve done, what we’re working on, and what’s left to do (please, no comments on my definition of “fun”). In order not to bore you to tears, I’ve condensed the list into general topics. Future posts may cover more of the dirty details, but for now, we want to give you an idea of what we’ve been up to. The bullet items in italics have been completed.
The Hub (thanks to Kimmi for the GREAT name suggestion… it stuck!)
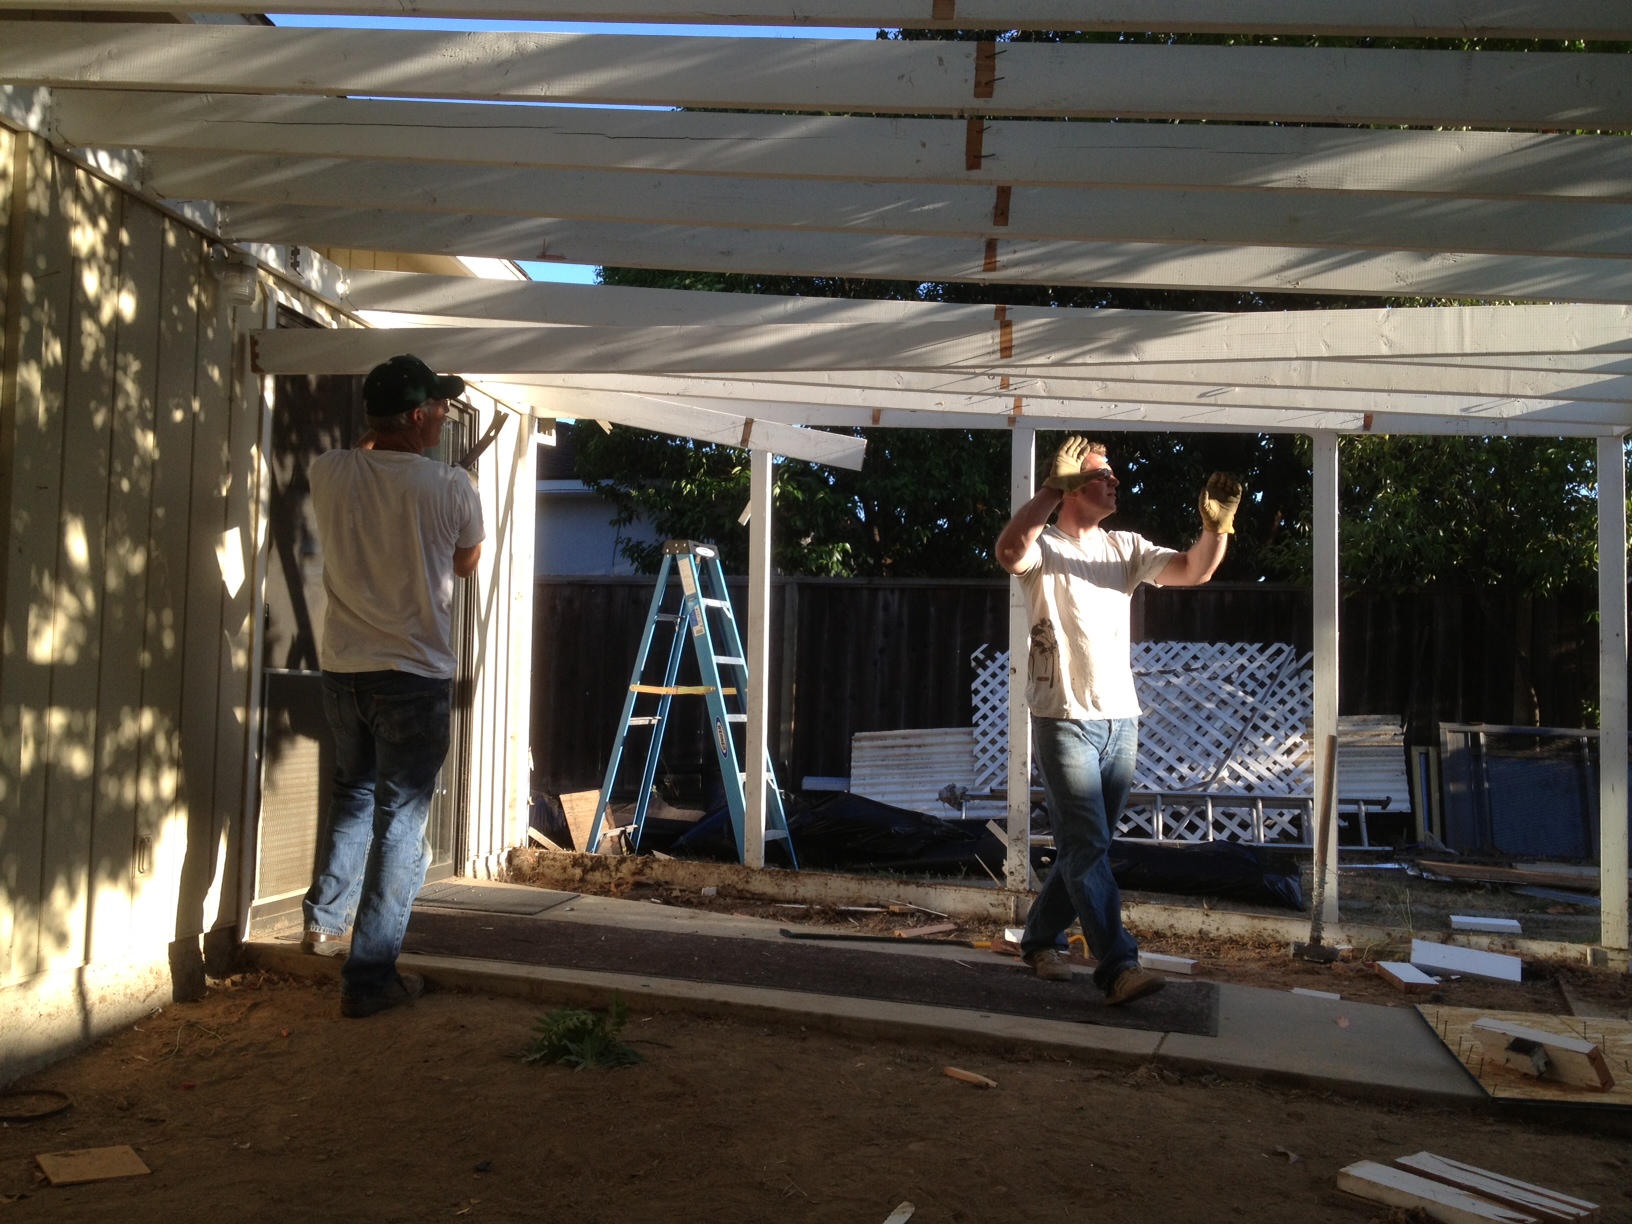
- Build a wall, right down the middle of the building: this is what started the project way back in January! Thanks to Nancy and Dirk for coming to visit and kicking us into gear.
- Tape, texture, and paint the interior walls and ceiling (including the pre-existing walls, that previously had no texture)
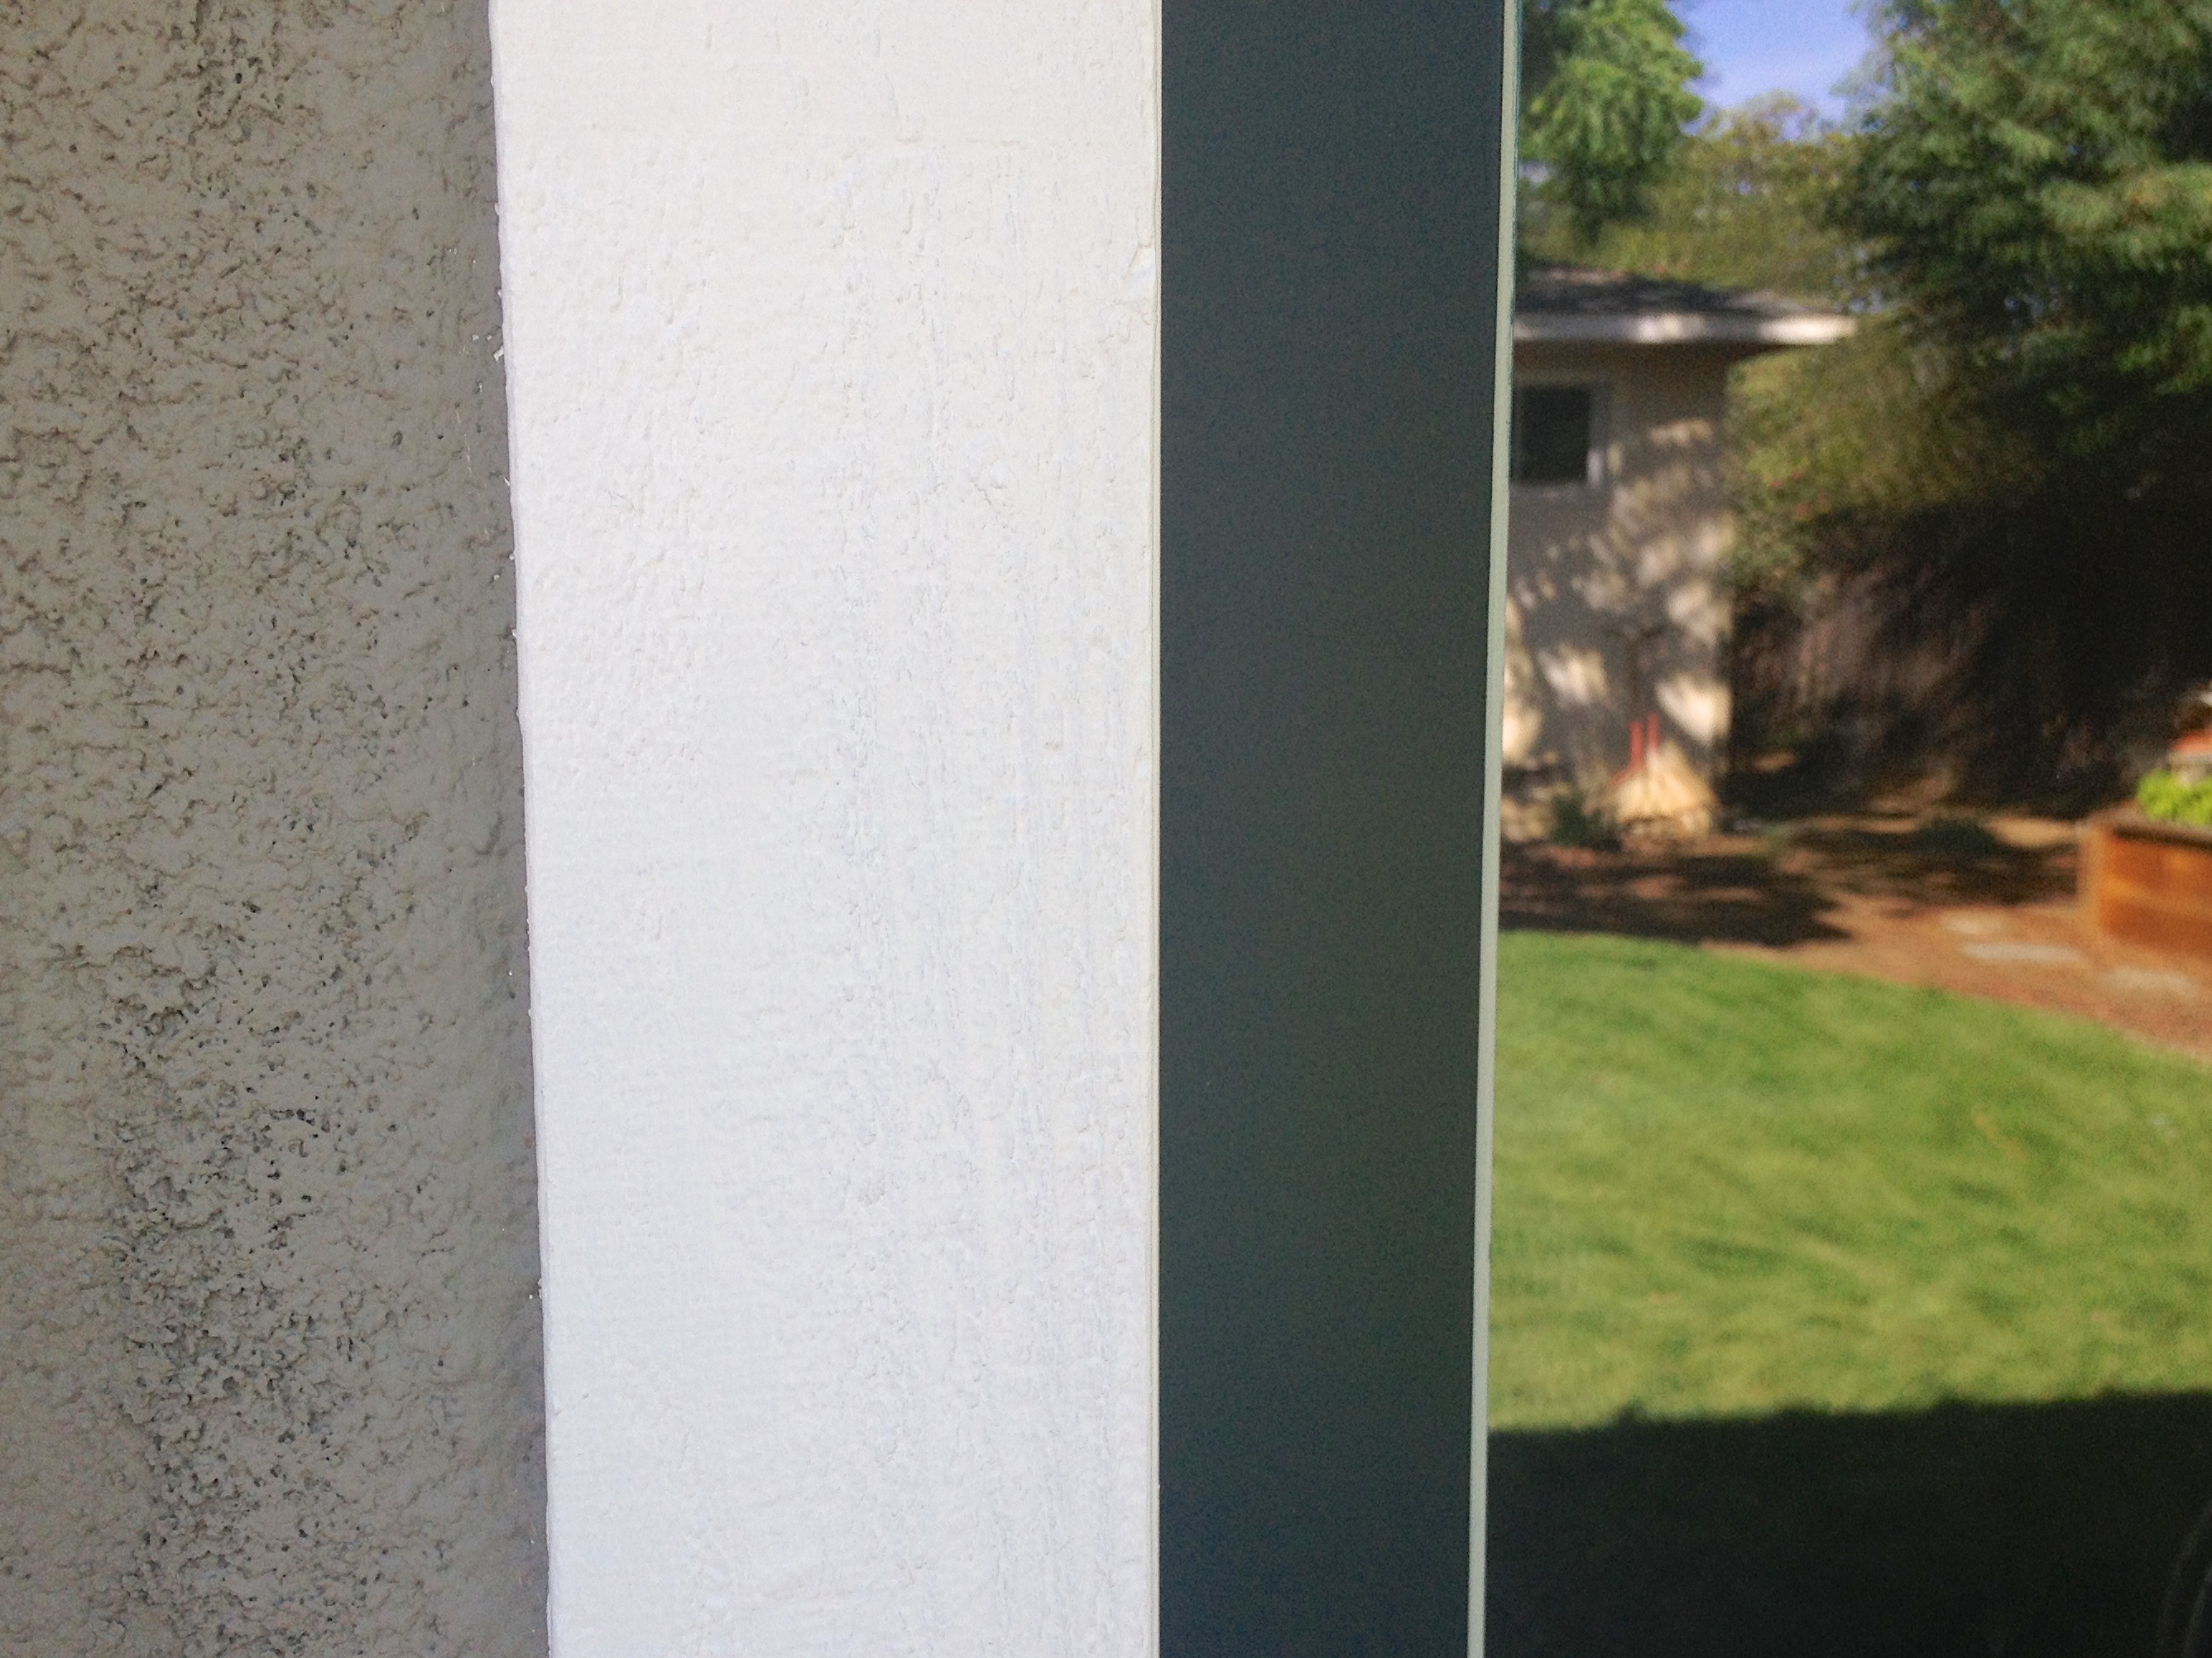
- Give the hub a facelift: add exterior trim around the doors and windows, paint everything on the exterior (walls, trim, gutters, doors, etc.), add new hardware to exterior doors, remove massive antennae, put up some art/other visual interest
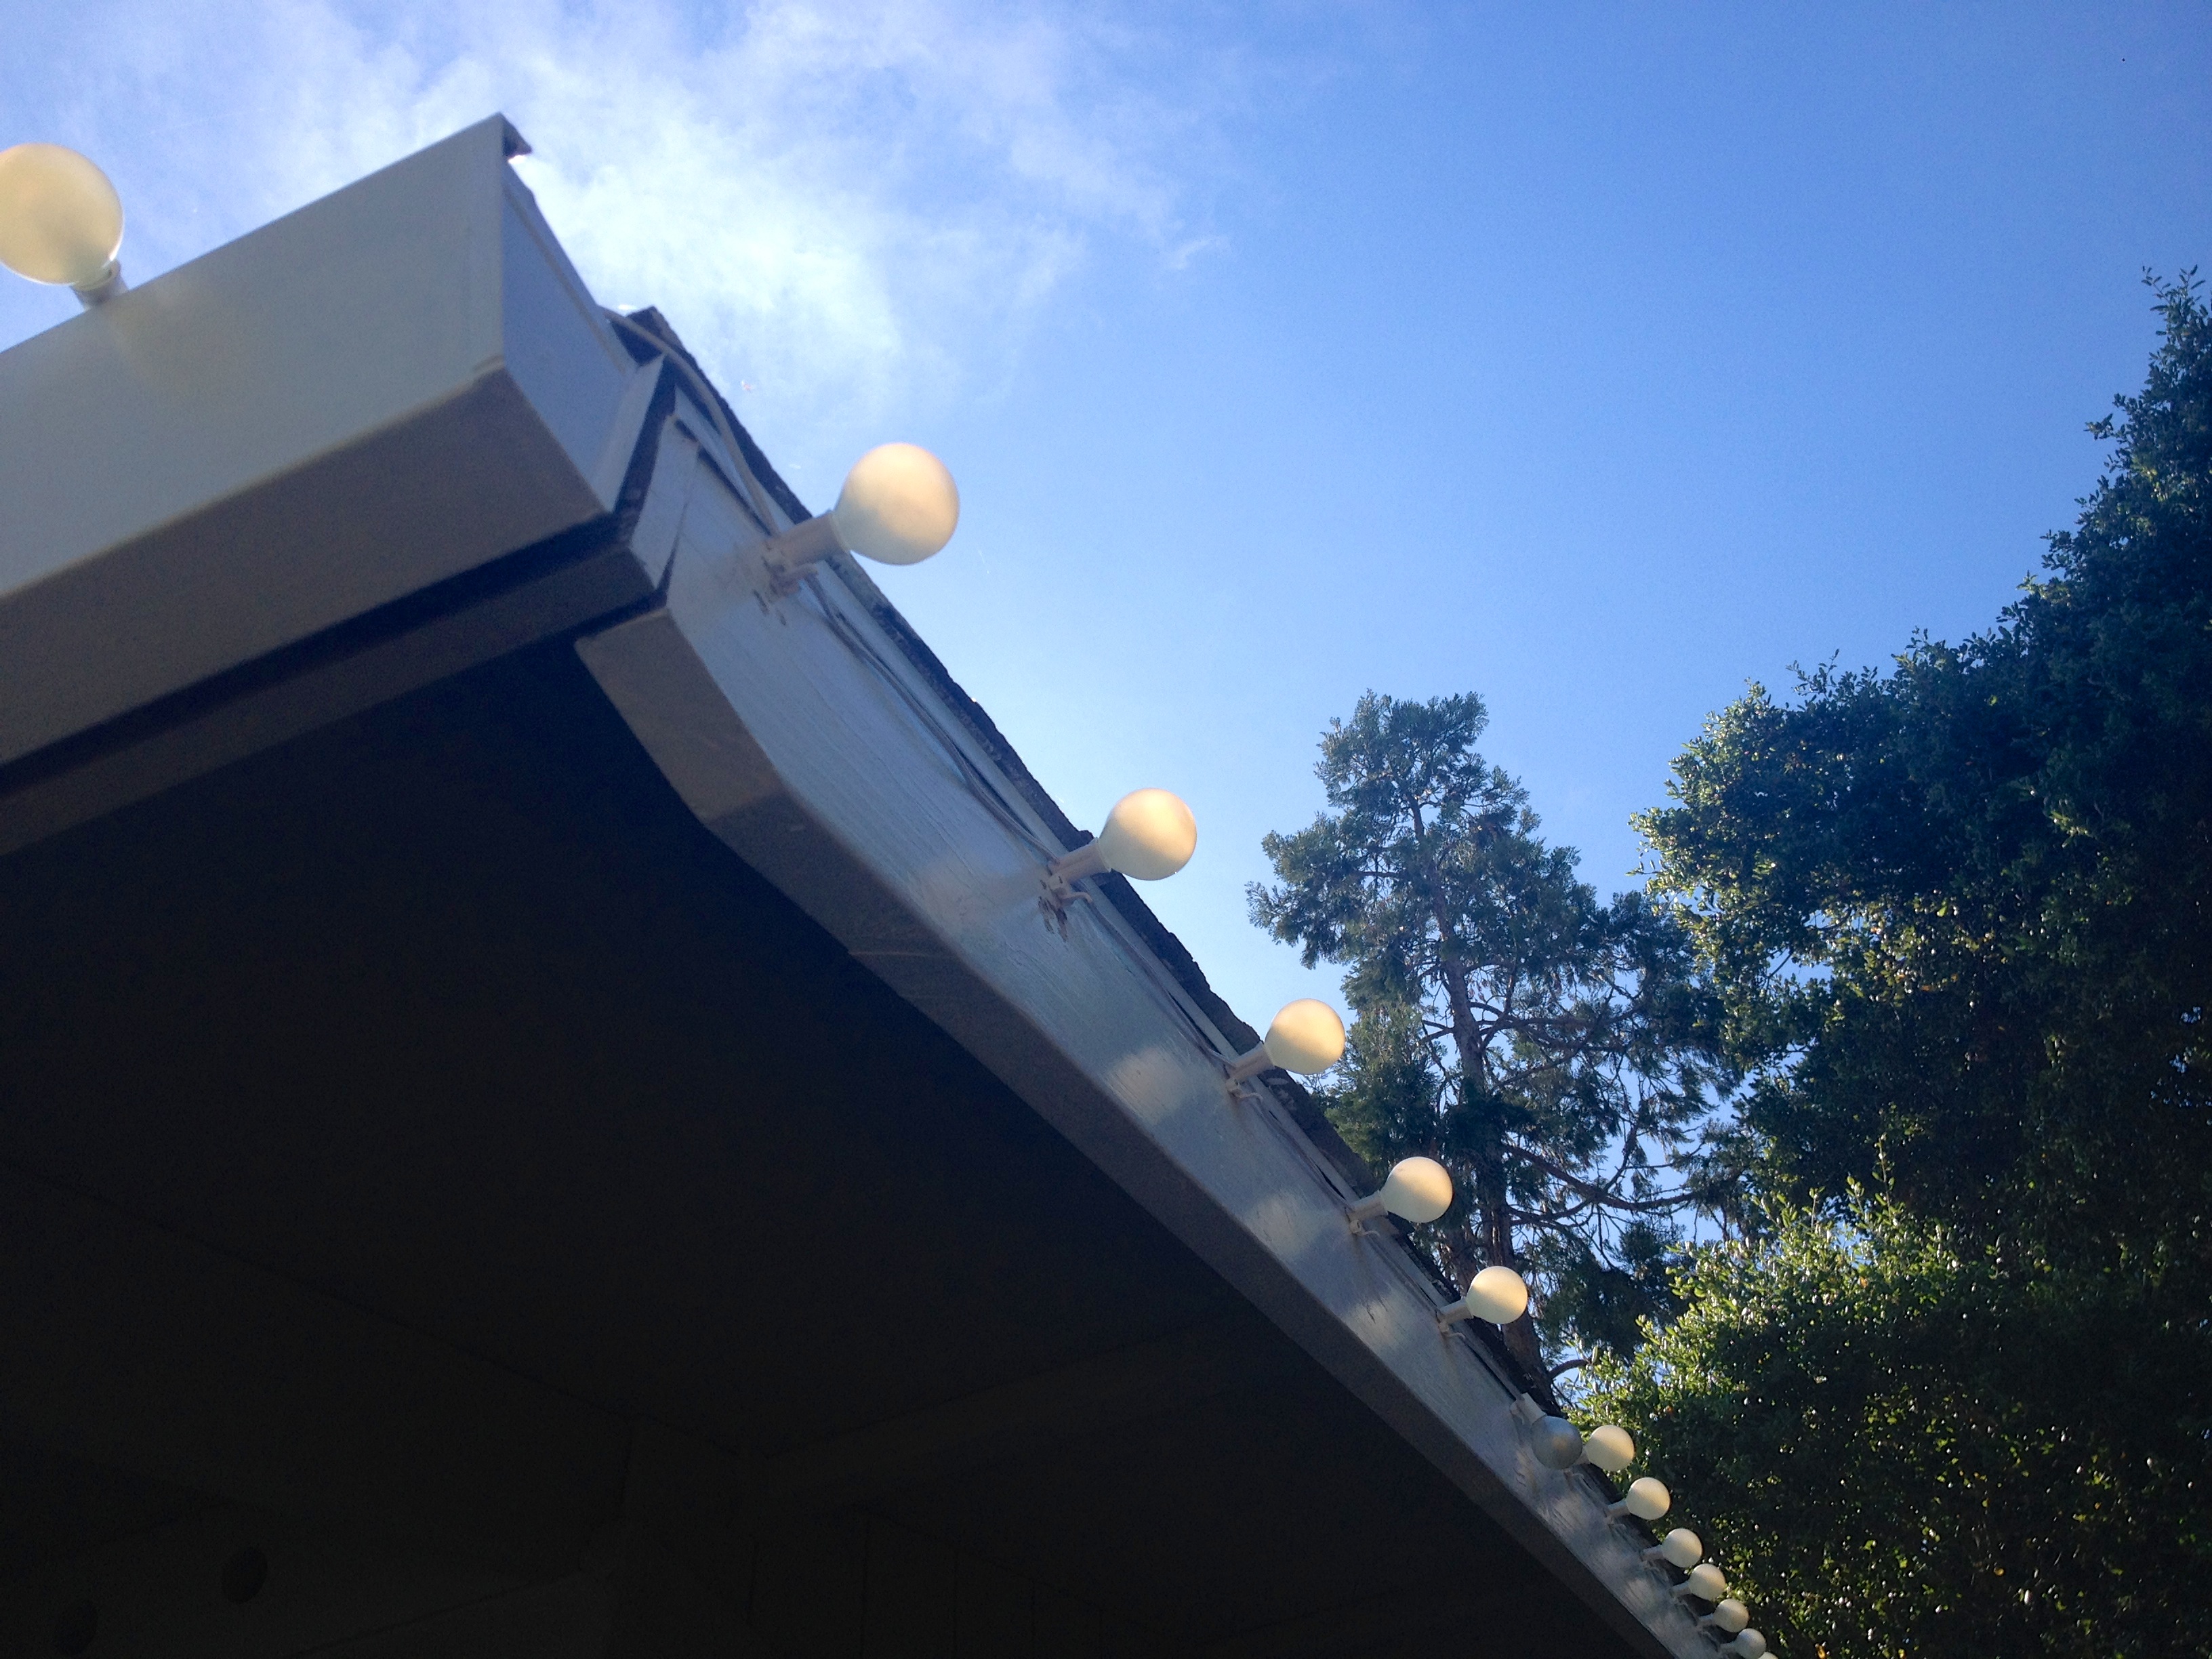
- Install exterior lighting, including both task lighting for projects and ambient lighting for parties
- Plant, plant, plant!
- Add a fence near the patio on the north side of the hub, to block off storage space from view (much like this fence that Dan and Justin built last summer)
- Clean up/paint/refinish patio furniture; maybe add a fire pit? A water feature?
- Stain concrete patios, sidewalk, and mow strip (this is a big someday item; it helps that we have to wait on this to make sure the new and old concrete stain evenly)
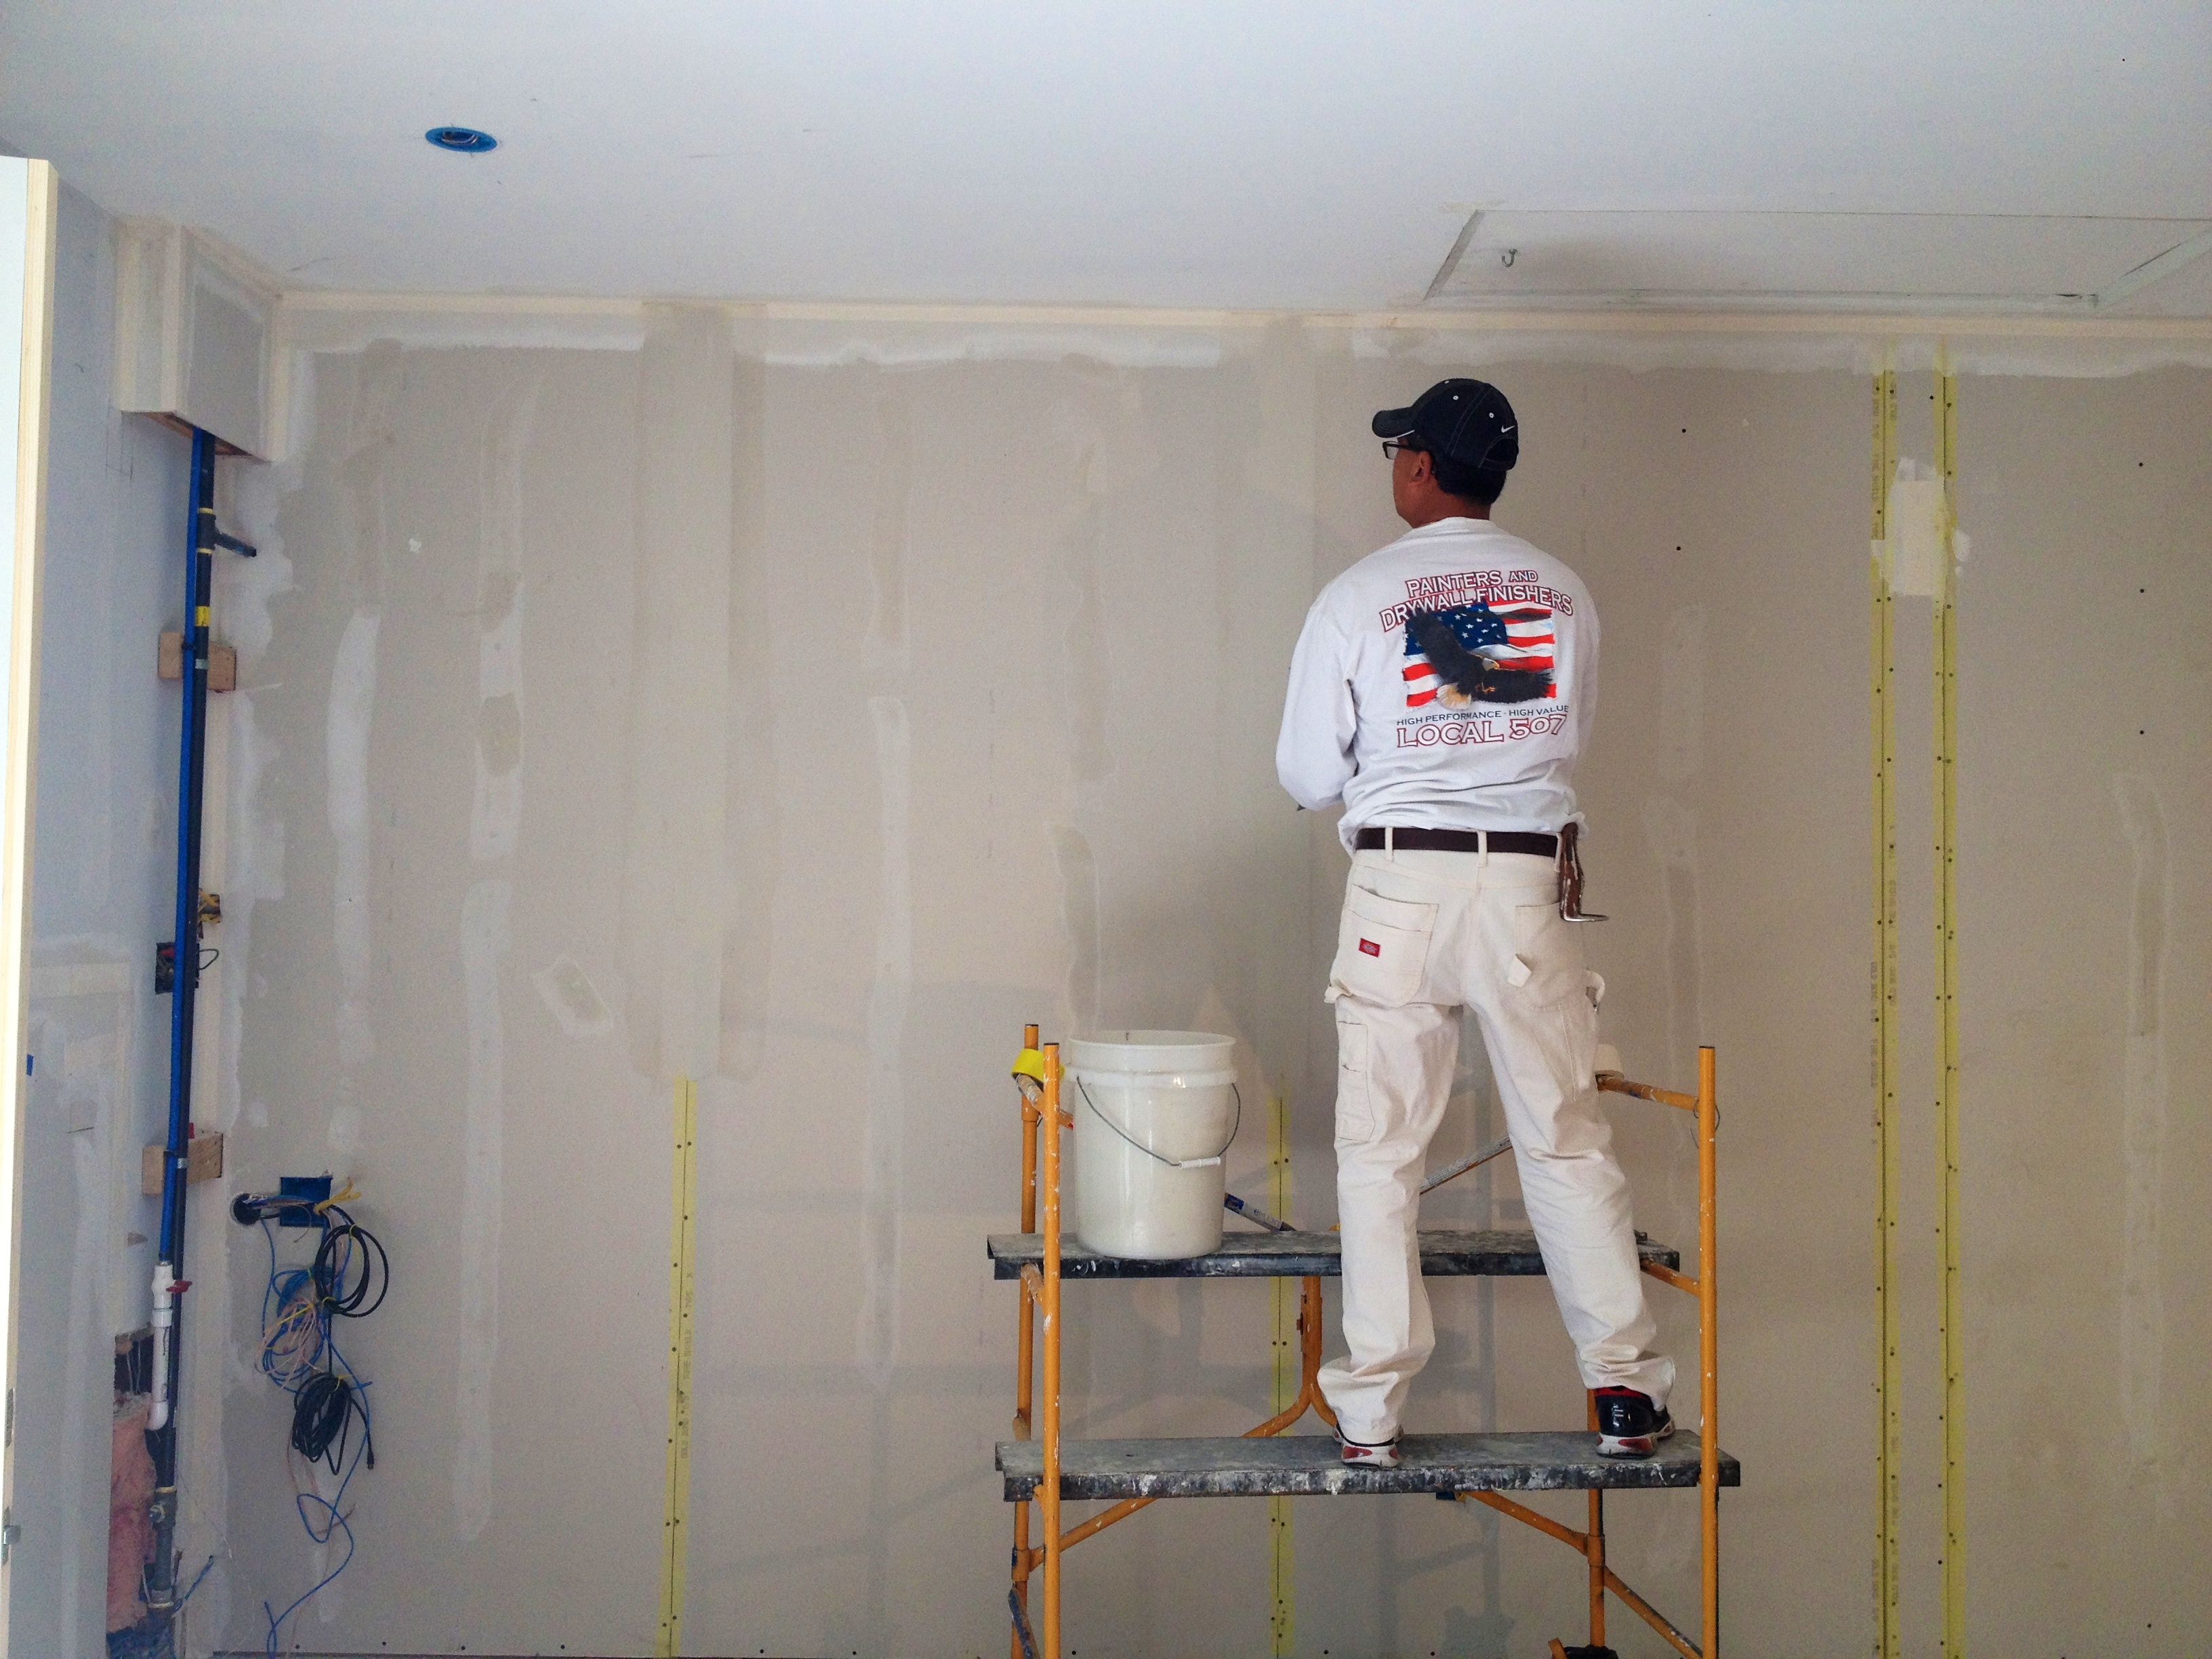
We paid someone to tape and texture… and it was worth every penny!
Yaaaa exterior painting! Can you tell what color we chose?
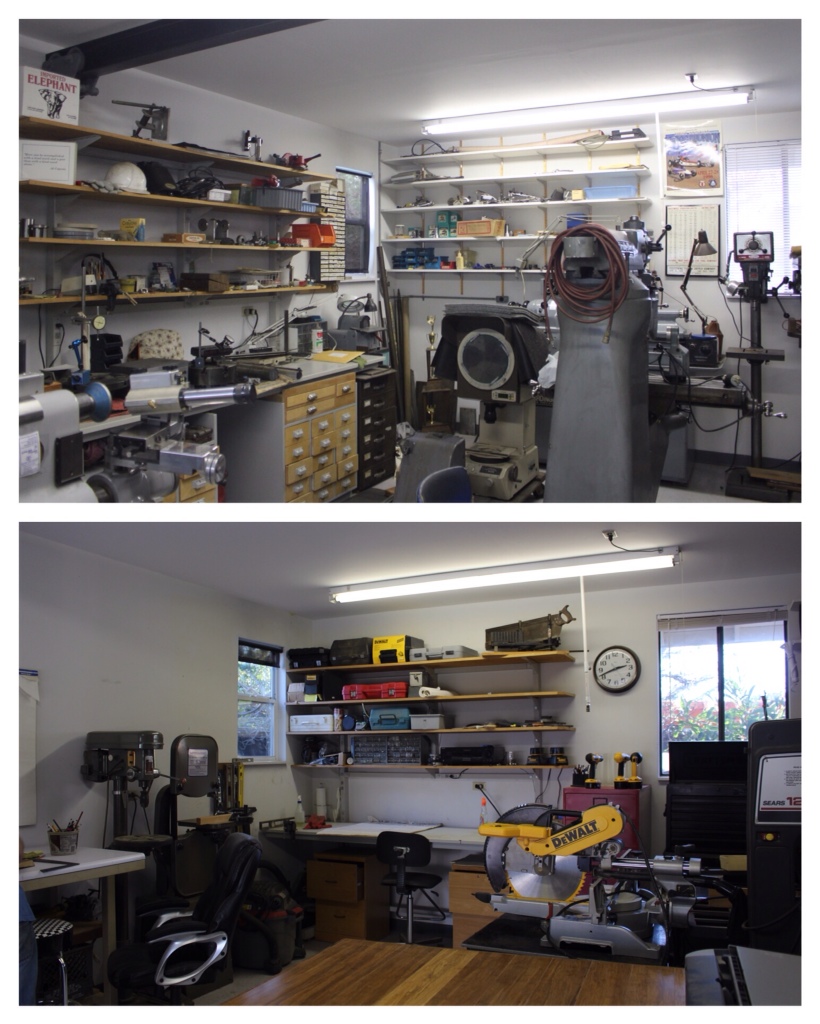
The Shop
- Clean, paint, and install various storage features (cabinets, shelves, desks, a repurposed kitchen island, etc.)
- Facelift for the floors: strip, clean, and reseal the existing VCT flooring
- Add/move overhead shop lights for better function
- Add art: I know, the shop isn’t a place to hang pretty pictures. Not that kind of art. We would really like to have a “Paul wall” with fun and interesting things that we inherited from Paul when we bought the house. Because Paul spent so much time in his shop, we think this is the perfect place.
The Lounge
- Install new glass doors that open the room to the lawn to the east and to the patio to the north
- New face for the floors: remove VCT and associated adhesive, add new tile floor
- Add window and door trim, crown molding, and baseboard (and paint and caulk around said trim)
- Install lounge-worthy lighting that is NOT fluorescent
- Create a bar area: install cabinets, make and install concrete countertops, transform old grimy refrigerator into a chalkboard fridge equipped with a keg-erator
- Move in furniture, including moving a pool table (?)
- Add a sound system
- Decorate: We have lots of ideas for this bullet and we want all of the choices to be very “us”. We have dreams of incorporating a gallery wall somewhere, hanging Justin’s hand-shaped surfboard, making furniture out of wine barrels, handmade quilts in baskets, a dartboard backstop made out of corks… we’ll see where we end up!
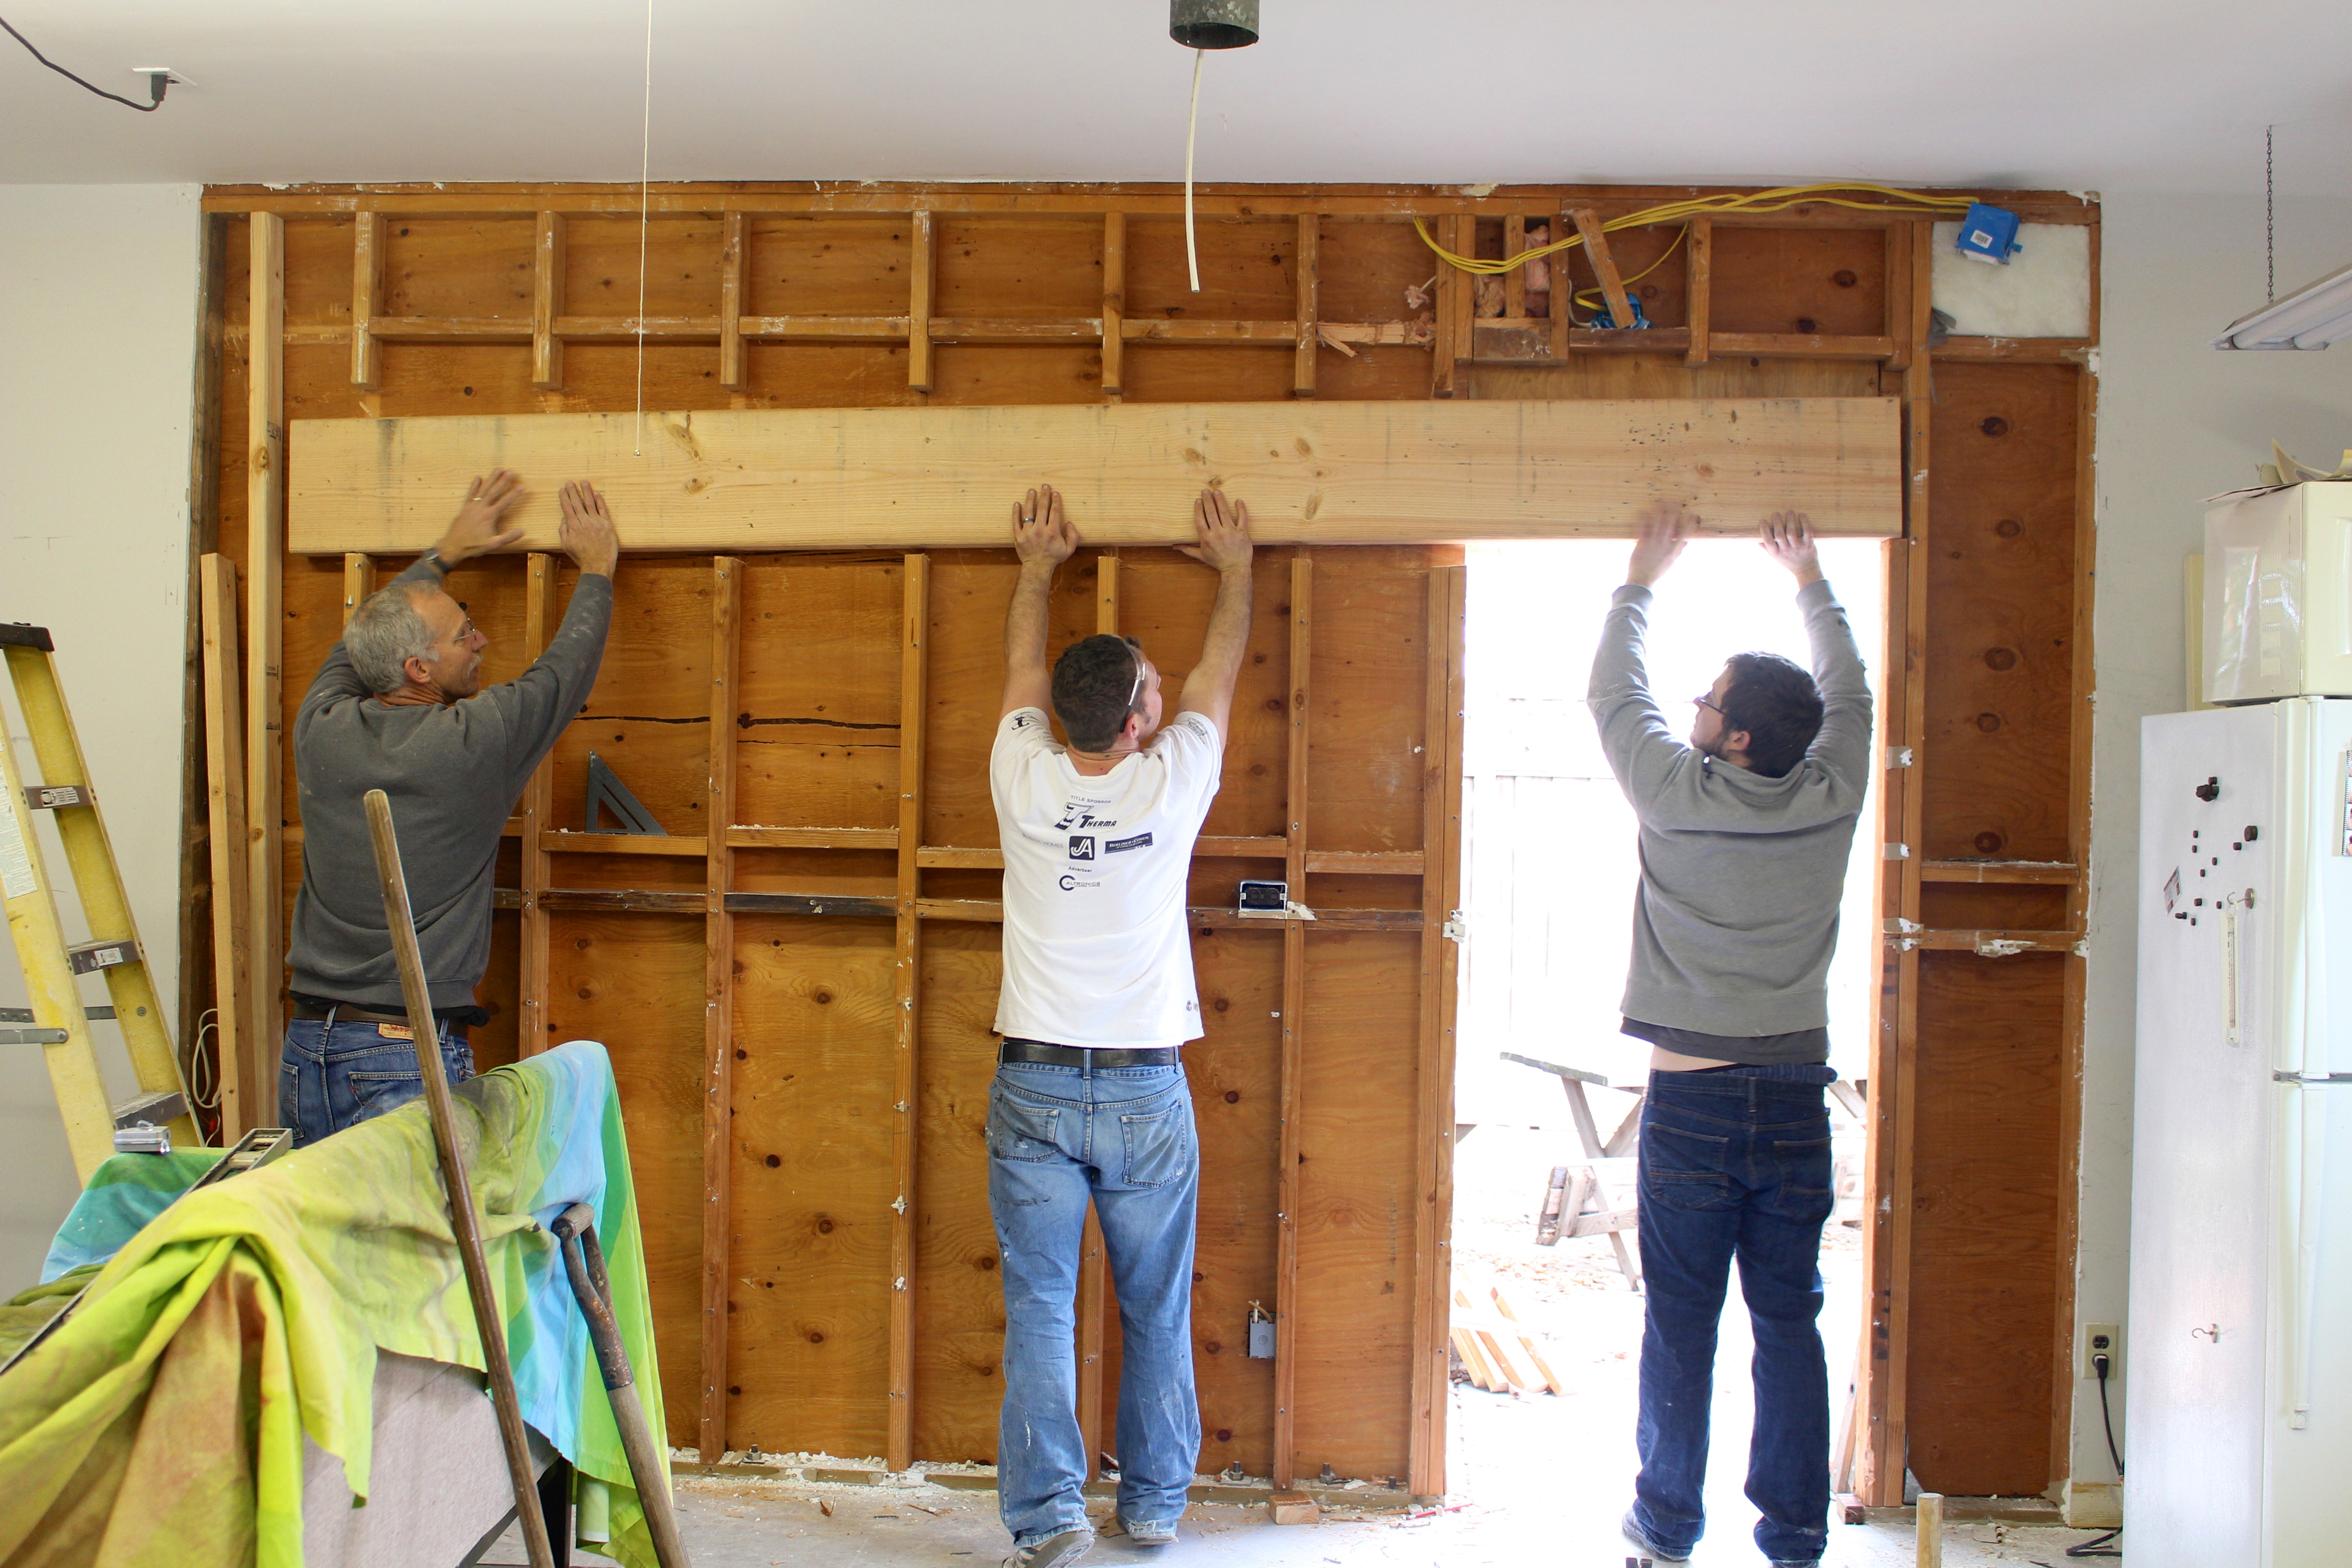
Preparing for a new door
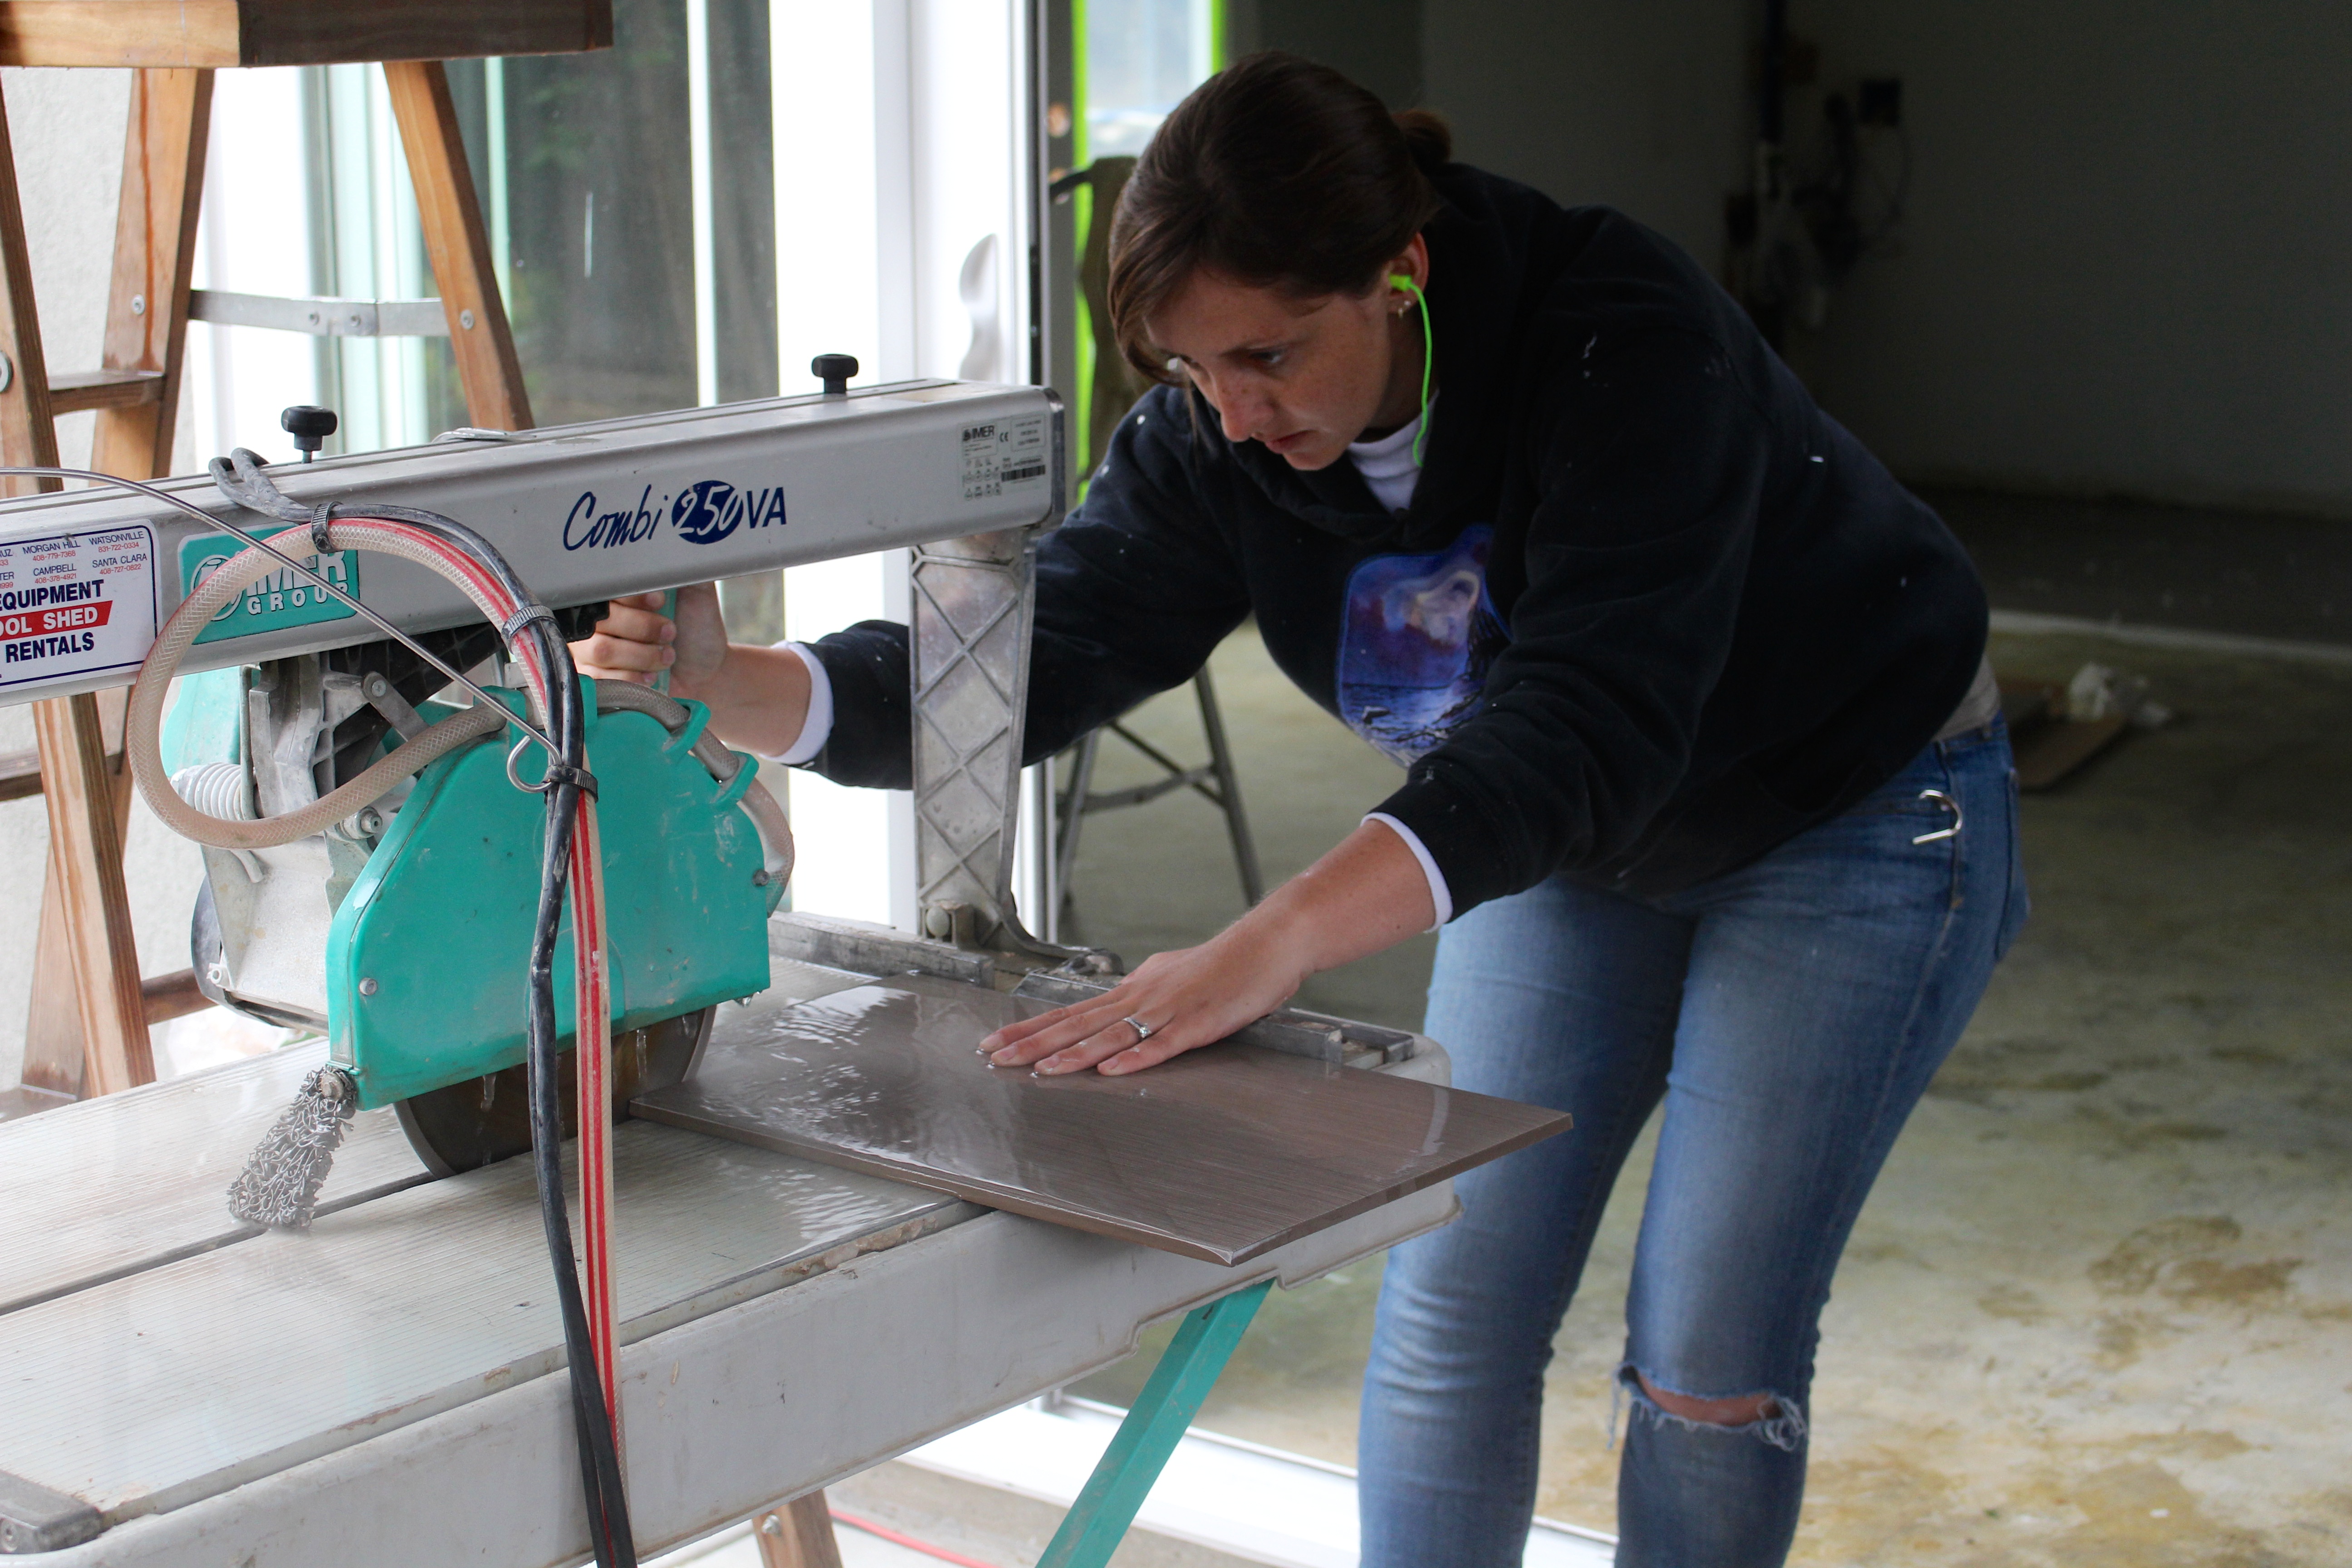
Cutting tile is a very serious business… just like list making!
As you can see by the amount of italics, we have been quite busy. And there are a lot of things (line half in italics) that are works in progress. It will probably be that way for awhile… but that’s what you have to look forward to as I work to catch the blog up on our progress. Ever heard of the term “weekend warrior”? Well, Justin and I are weeknight warriors as well. I apologize in advance for the lack of pictures and/or terrible quality of photos that you’ll see for some parts of this project!
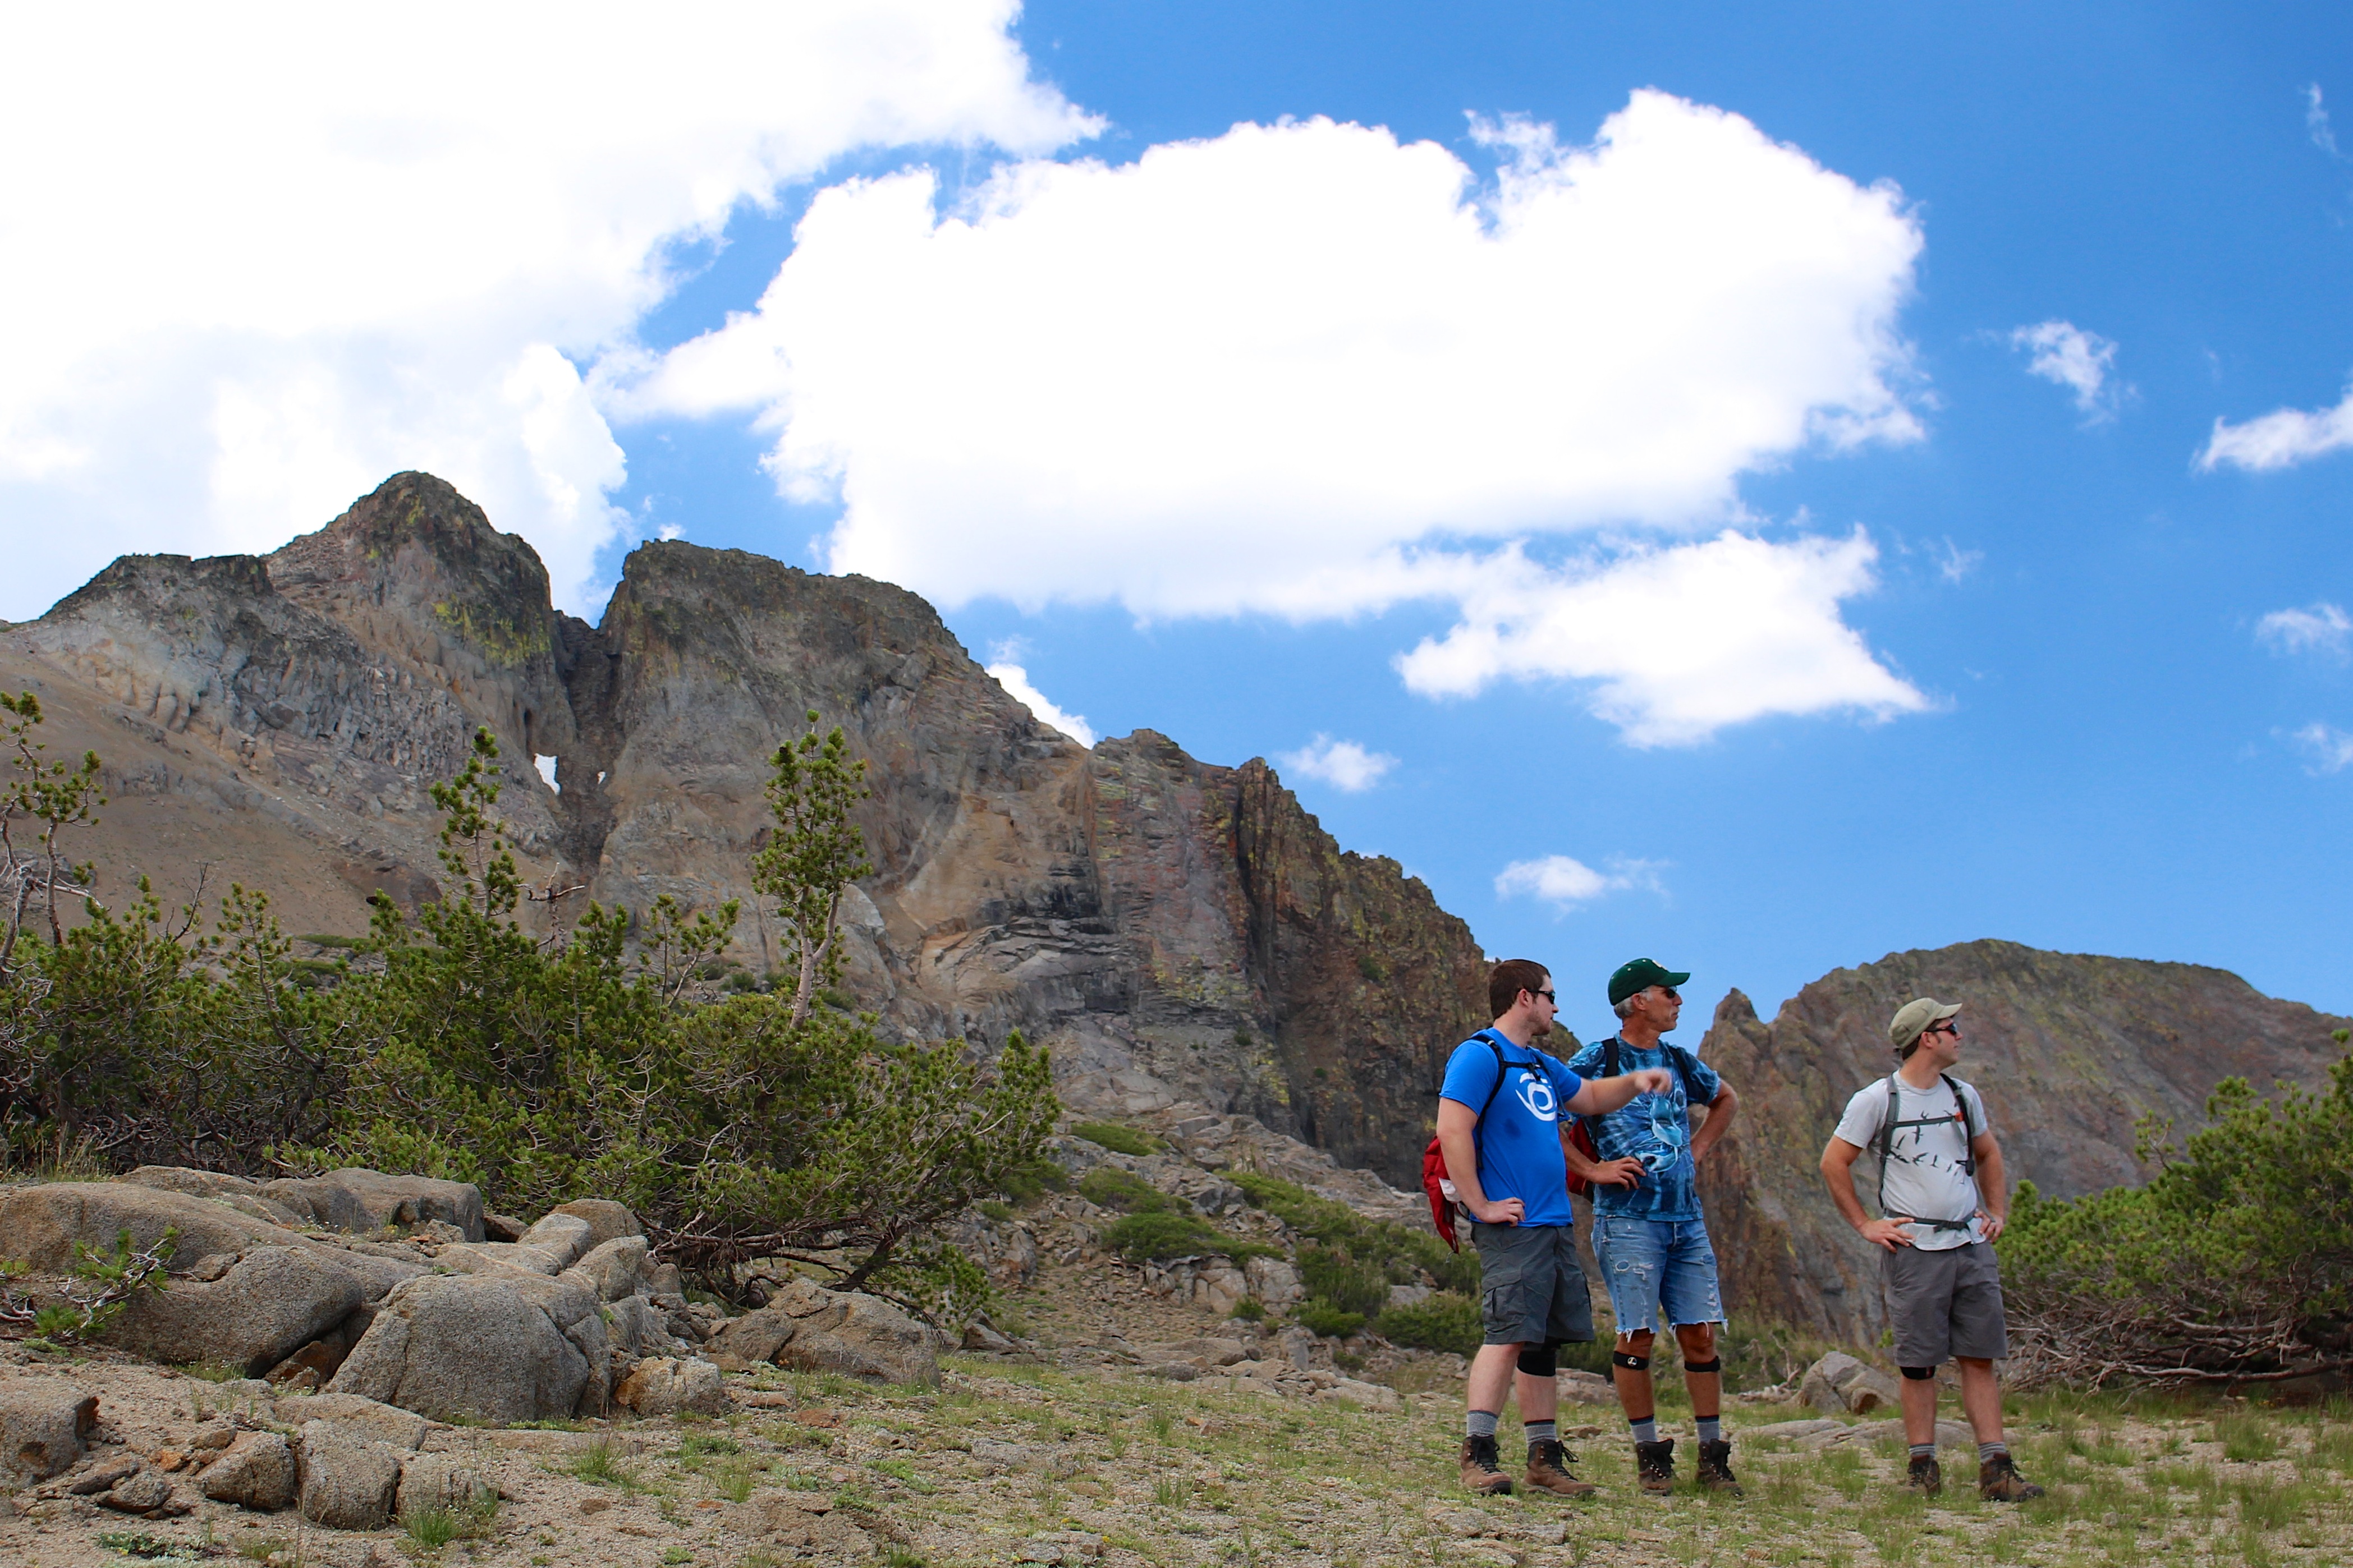
We hike. Justin and I both come from families of hikers: leisurely hikes, steep hikes, hikes to destinations, hikes for views, hikes, hikes, hikes. Prior to wedding planning and homeownership, we used to hike in the bay area on weekends at home or on trips to Truckee, Tahoe, Yosemite, or wherever else our wanderings took us. Now, we mostly stay home and work our tails off. I’m not complaining, don’t get me wrong, but the fact that we don’t get out to hike as much as we used to makes it even more special when we find the time.

Round Top: we’re coming for you!
Last summer, we took a few days off work and spent a long weekend in the Sierras with my fam (more on other adventures in coming posts). After arriving at Papa’s house in Tahoe on a Friday night, we hauled ourselves out of bed early on Saturday to make the drive from south lake up to Carson Pass on Hwy 88, about 45 minutes away. After finding a parking spot, we gazed across the highway at our mountain of choice: Round Top.

View of our designation from the parking lot
For a little personal background story, my Grandma Joan used to take us up to this pass when we would come visit Tahoe in the summer. She loved the area, and would take my sisters and I in the little red jeep with our mandatory matching red bandanas, blaring the Oak Ridge Boys, for our version of a girls’ day out. The hike from Hwy 88 back to Winnemucca Lake is relatively flat (i.e., perfect for grandmas and grandkids if you bring plenty of water and candy with which to bribe said grandkids) and has the most beautiful array of Sierra wildflowers I’ve ever seen. It’s the best kind of special place. This year we were a little late for the show, but we still got some beautiful colors and another great Winnemucca wildflower memory to add to my growing collection.

Aster daisy, Indian paintbrush, lupine
This particular trip we were on a mission. We had tried to get to the summit of Round Top a few years ago, and by some freak incident happened to try this on the windiest day of the year. A big group of us (maybe 20? You know who you are…) had left south lake in our shorts and t-shirts. By the time we got halfway up the mountain from Winnemucca, it was about 40 degrees with gale force winds. And I’m not being overly dramatic: at least half of us didn’t make it to the top, and those that did were up there for about 3 minutes and came down for fear of being blown off! But I digress. We had come back to conquer Round Top.

Getting closer! The trail to Round Top
As I said earlier, the hike into Winnemucca Lake is flat, past Frog Lake with the mass of Elephant’s Back keeping you company on your left. Once you get to the lake, it’s a steep, roughly one-mile hike to the top. And you can tell from the contours: both sides of Round Top are pretty steep, but the other side is crazy steep!

This is the best map I found of this hike. We didn’t do the full loop here… we started at #7 (Carson Pass), headed to Winnemucca Lake (#5), then on to the summit (#4). We did some cross country to get from #5 to #4, but mostly stayed on the trail. Source: http://www.everytrail.com/guide/round-top-amp-winnemucca-lake-carson-pass
On the way up. Boys like to stare off in to the distance and point at unknown objects. They like to all point at different things and pretend they are in agreement with what they are pointing at…

Hiking, hiking, Kimmi is starting to get silly!

Big smiles from Chels

Scrambling up the lichen-crusted rocks
But the views from the top are so gorgeous. It’s hard to describe what it’s like to get to the top of a mountain. These are my favorite types of hikes: the hard work paid off and you feel like you can see the whole world from these vantages. And it makes you feel so powerful, but so tiny and insignificant at the same time. Need a new perspective on life? Go climb a mountain.

Caples Lake, the view from Round Top
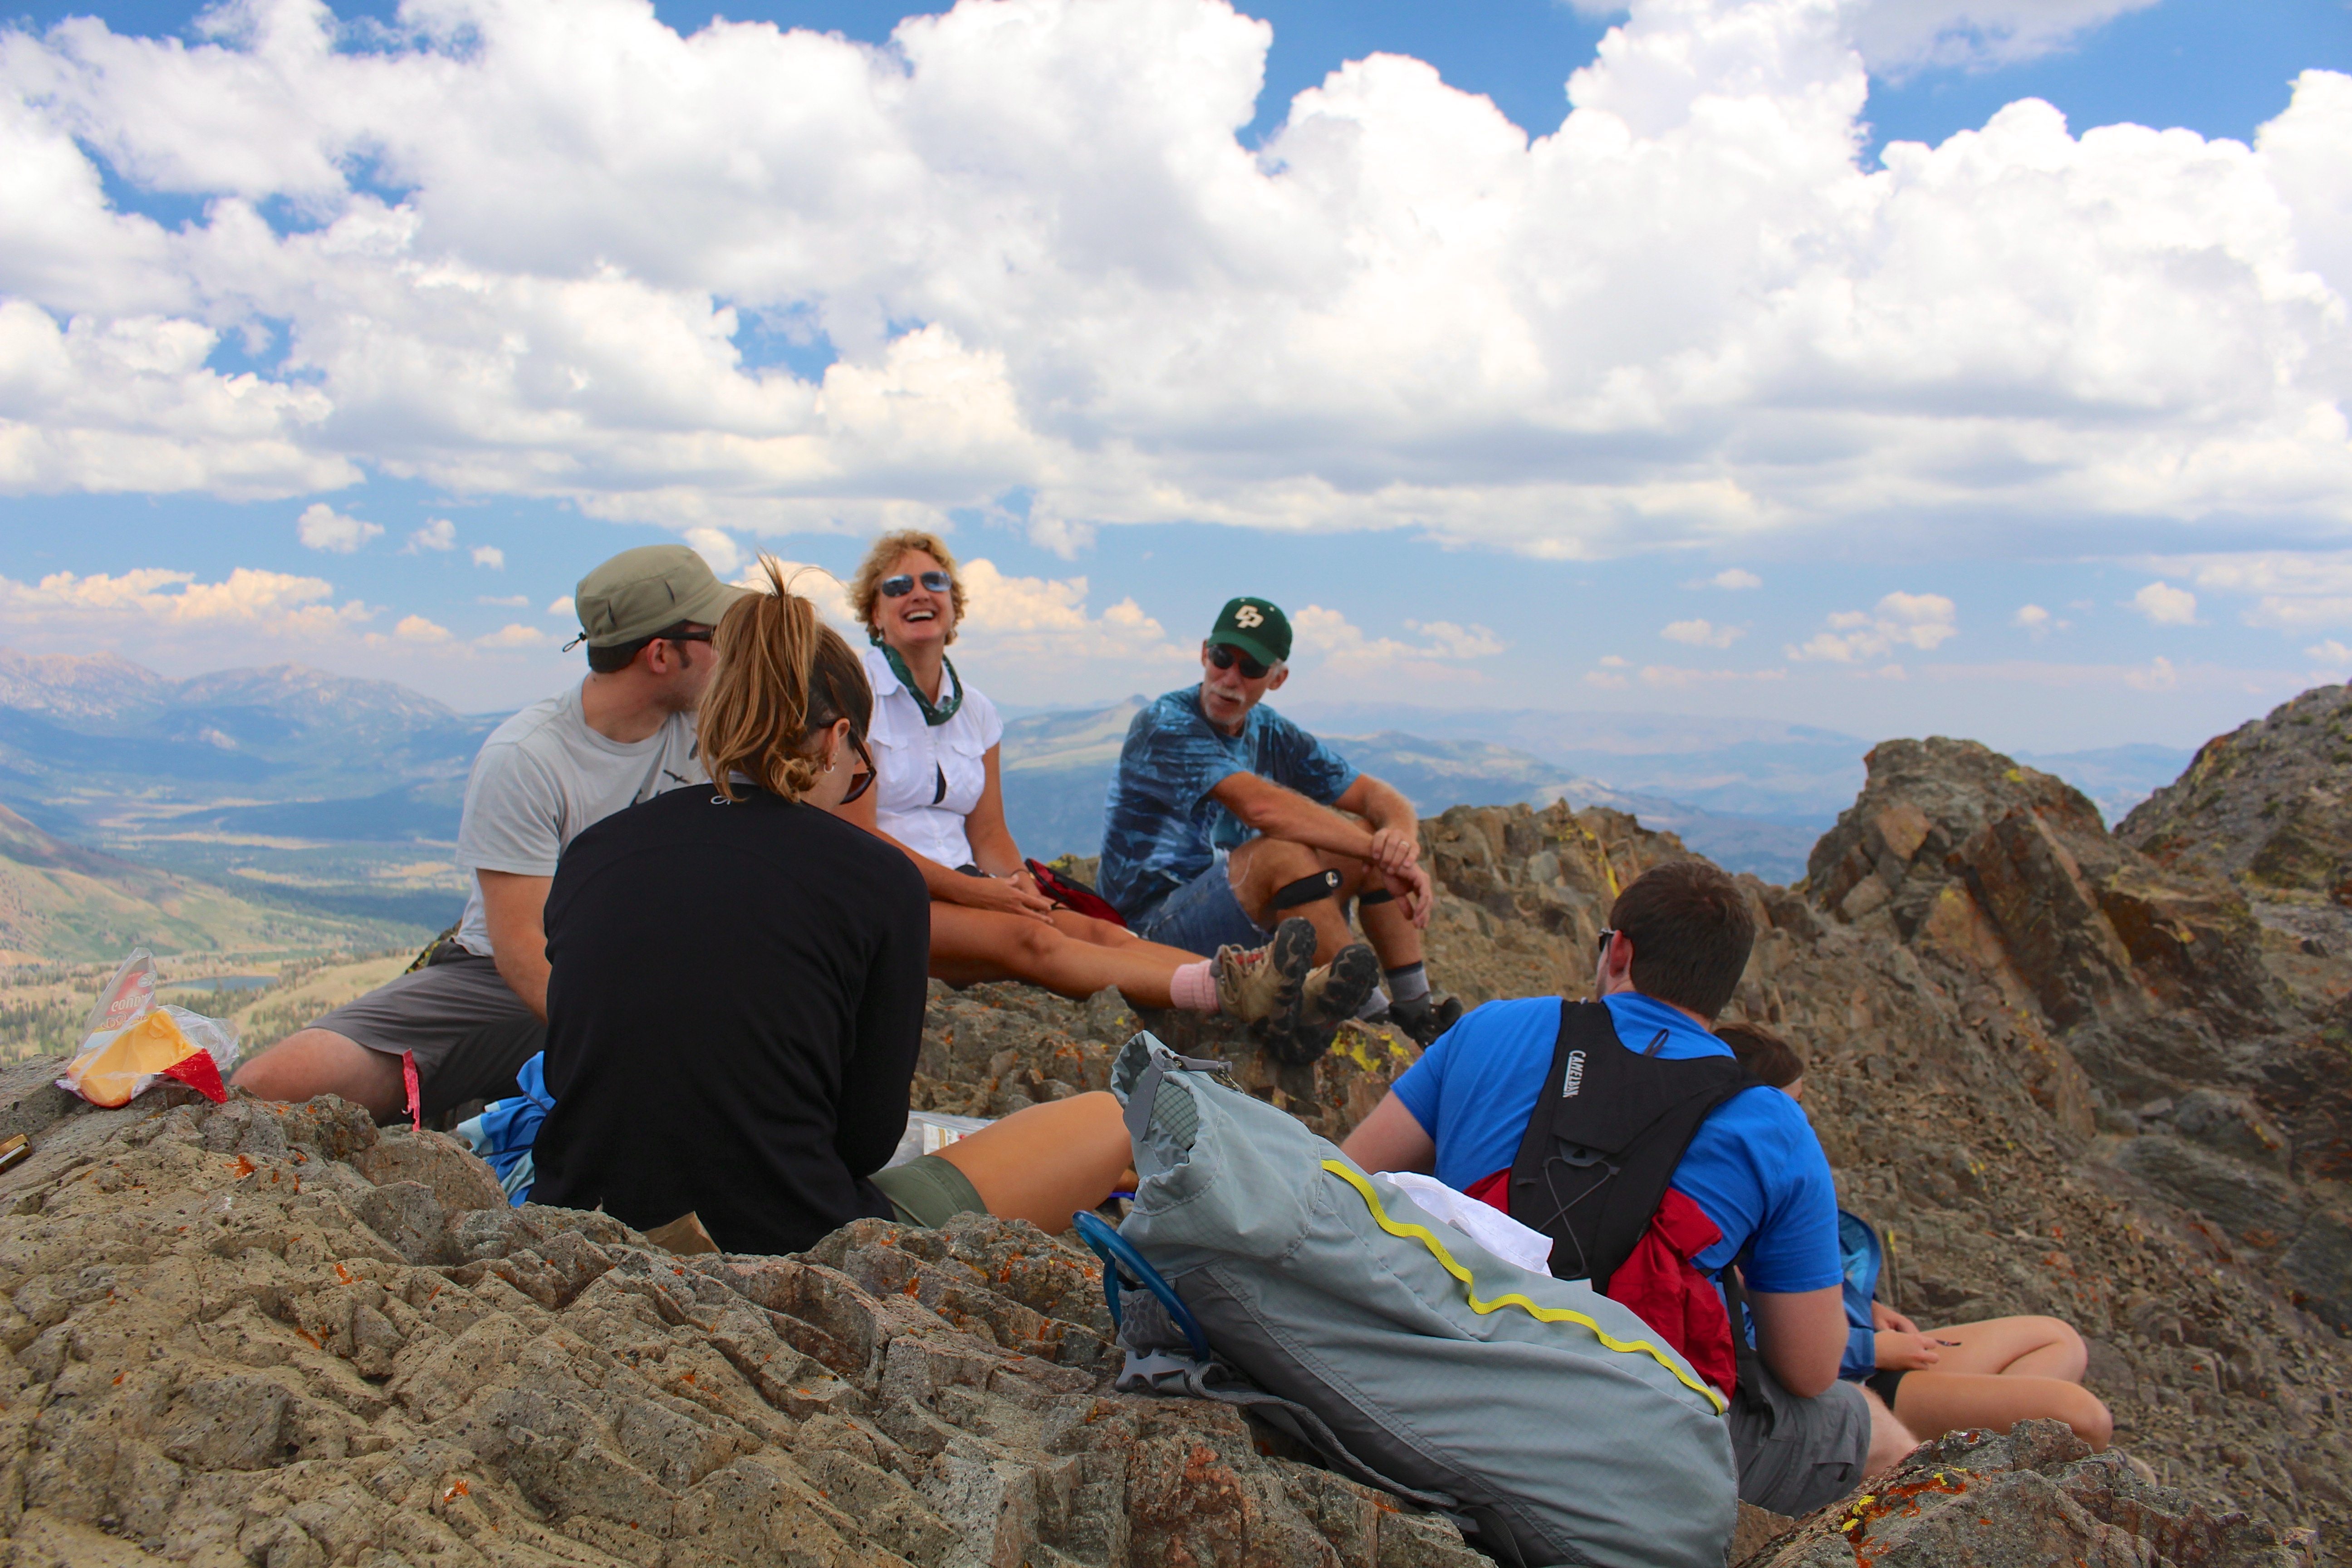
Lunch on top of the world

Peaking over the edge, down to Winnemucca Lake

Happiness is climbing mountains 🙂

More spectacular views
And I also have to note: the endorphins. Yes, we tend to get a little silly up there…

There are no words…

One of the many faces of Matty B

There was one other family up there with us for a bit. They brought this dog. Those tiny little legs brought him up the mountain. And he went a little crazy too!
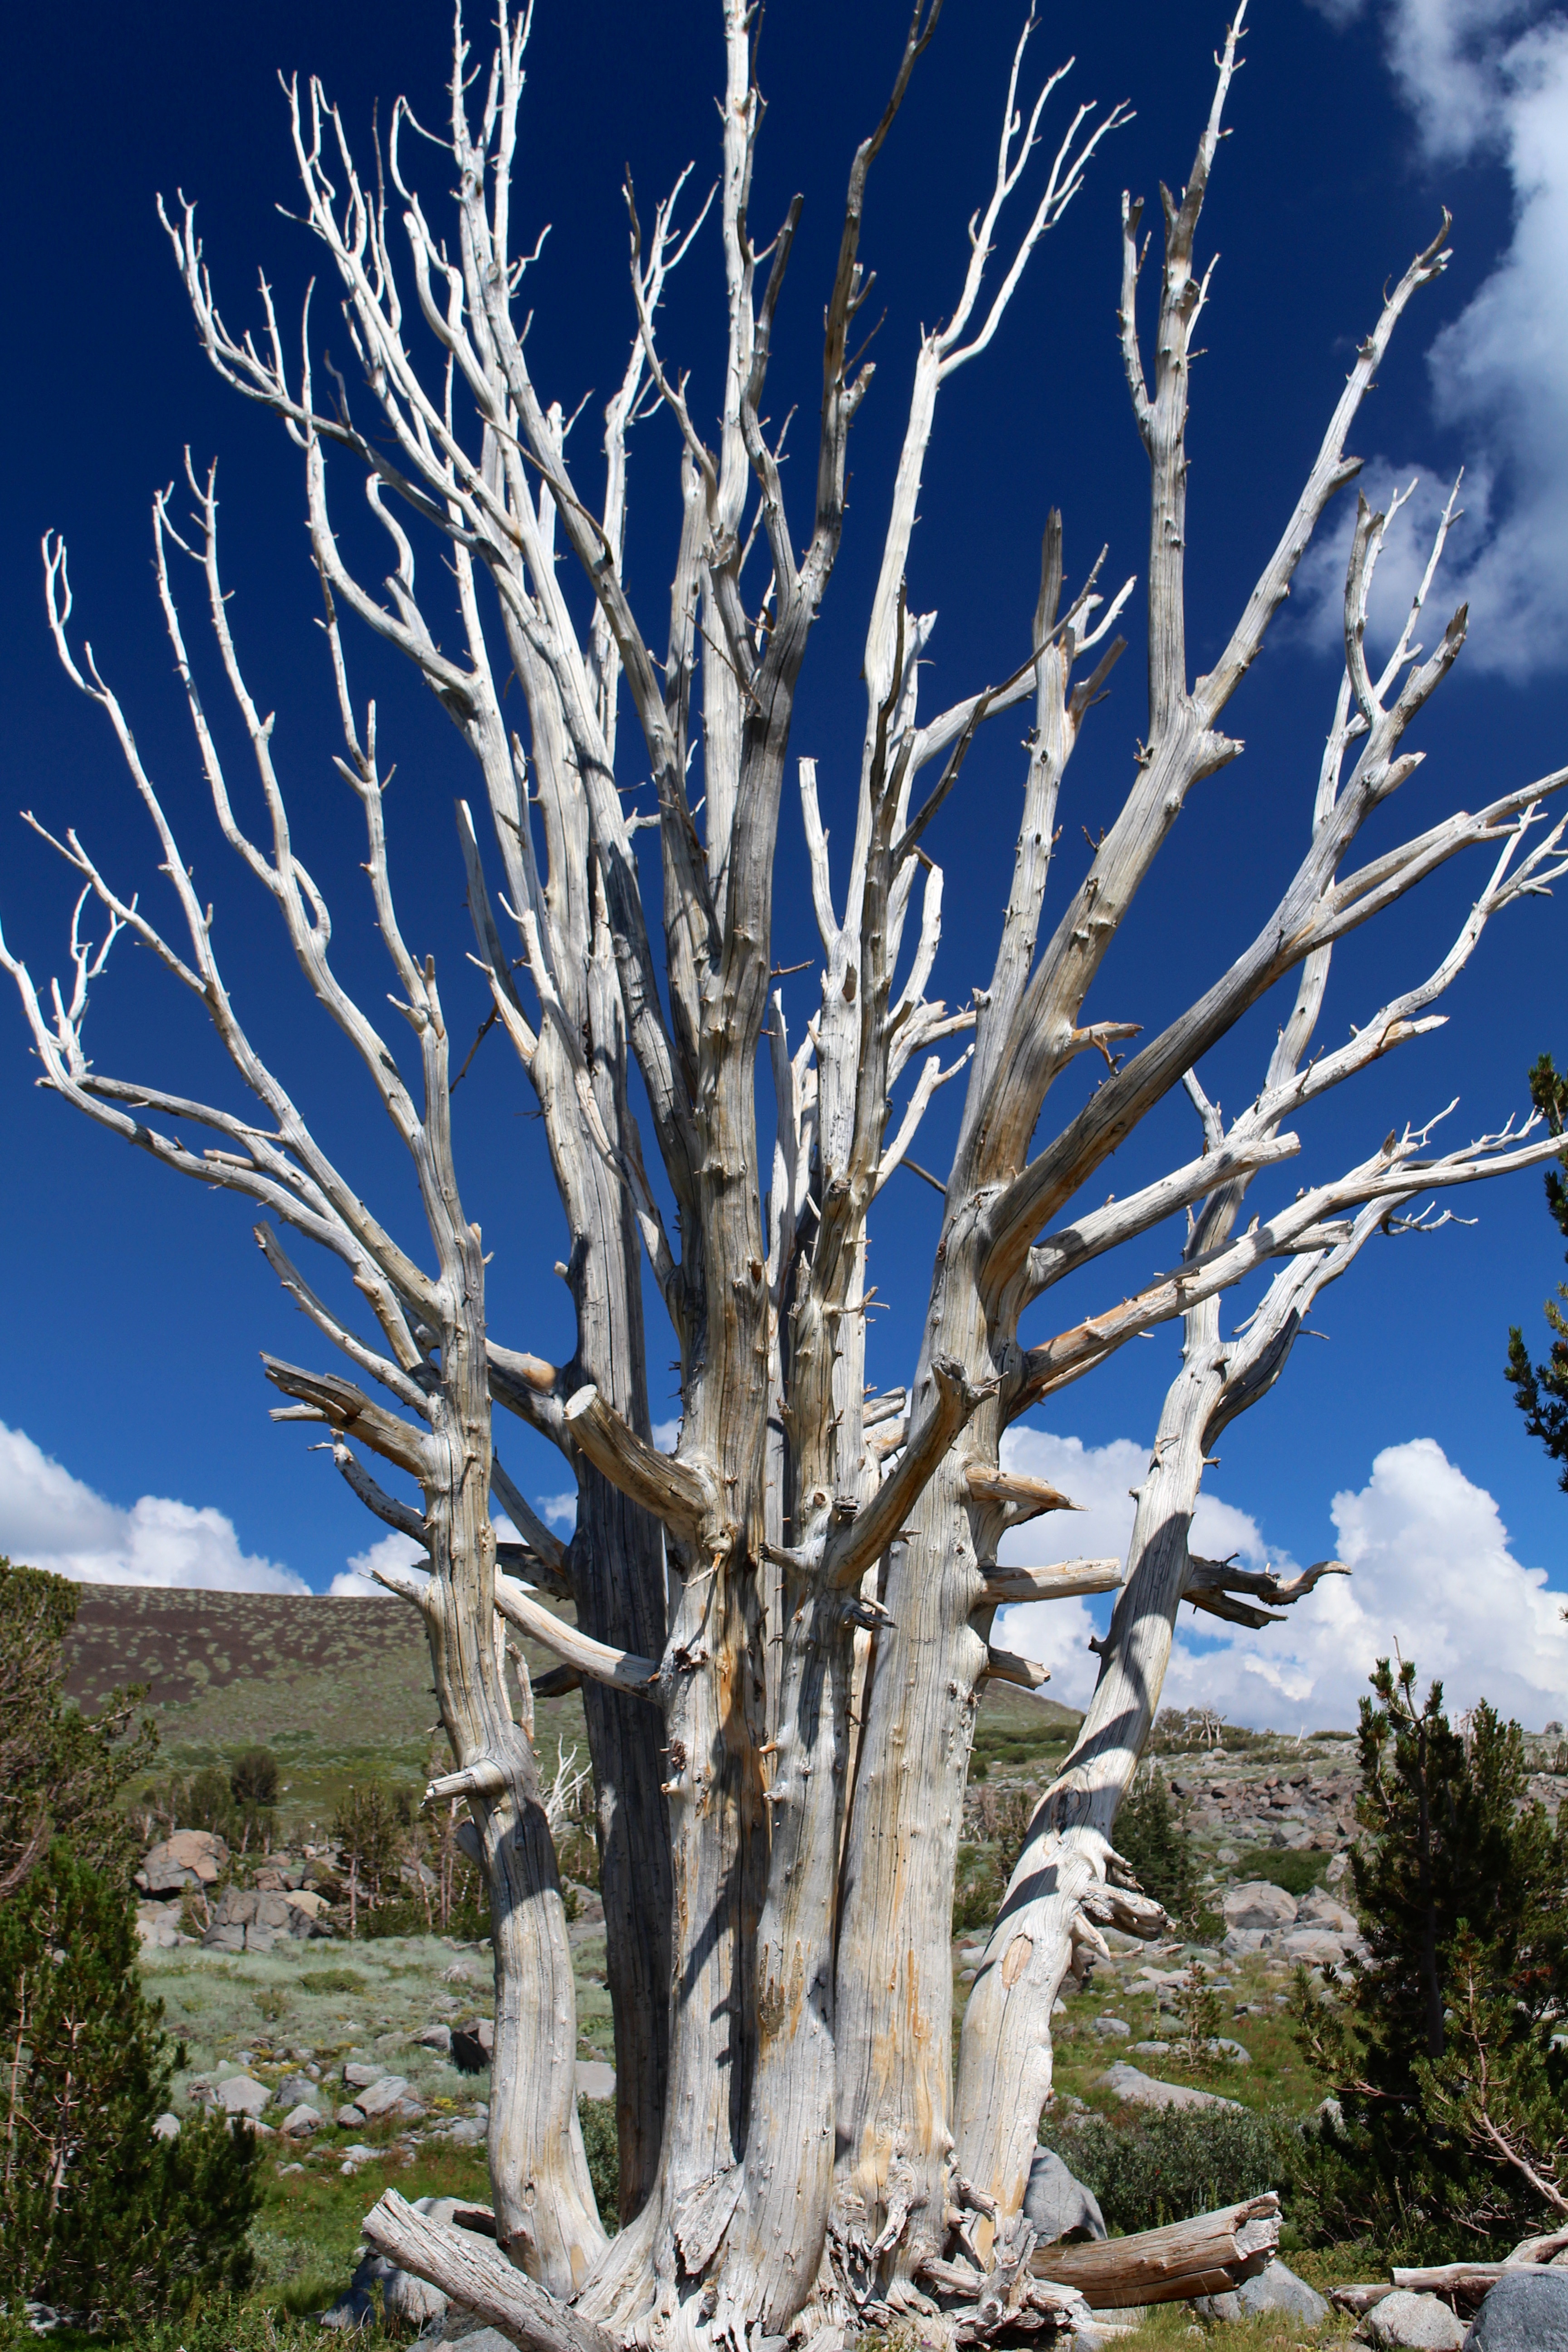
I also feel obliged to mention that these photos have not been edited. I shot them with a polarized lens on my camera, but these colors are real. The beautiful blue sky, white and grey puffy clouds, vibrant wildflowers and lichens, every shade of green you can imagine in the trees, grasses, shrubs, flowers… so much life, and so many colors.

Frog Lake

Winnemucca Lake
We’ll go back someday, of course. How could we not? Traditions of grandmas and grandkids, family hikes, and wildflowers must be upheld! I don’t think we need to uphold the Oak Ridge Boys tradition though; that was only for Grandma Joan 🙂

He’s my favorite
And, of course, the celebratory beer in the parking lot. We did it!

Woo hoo!
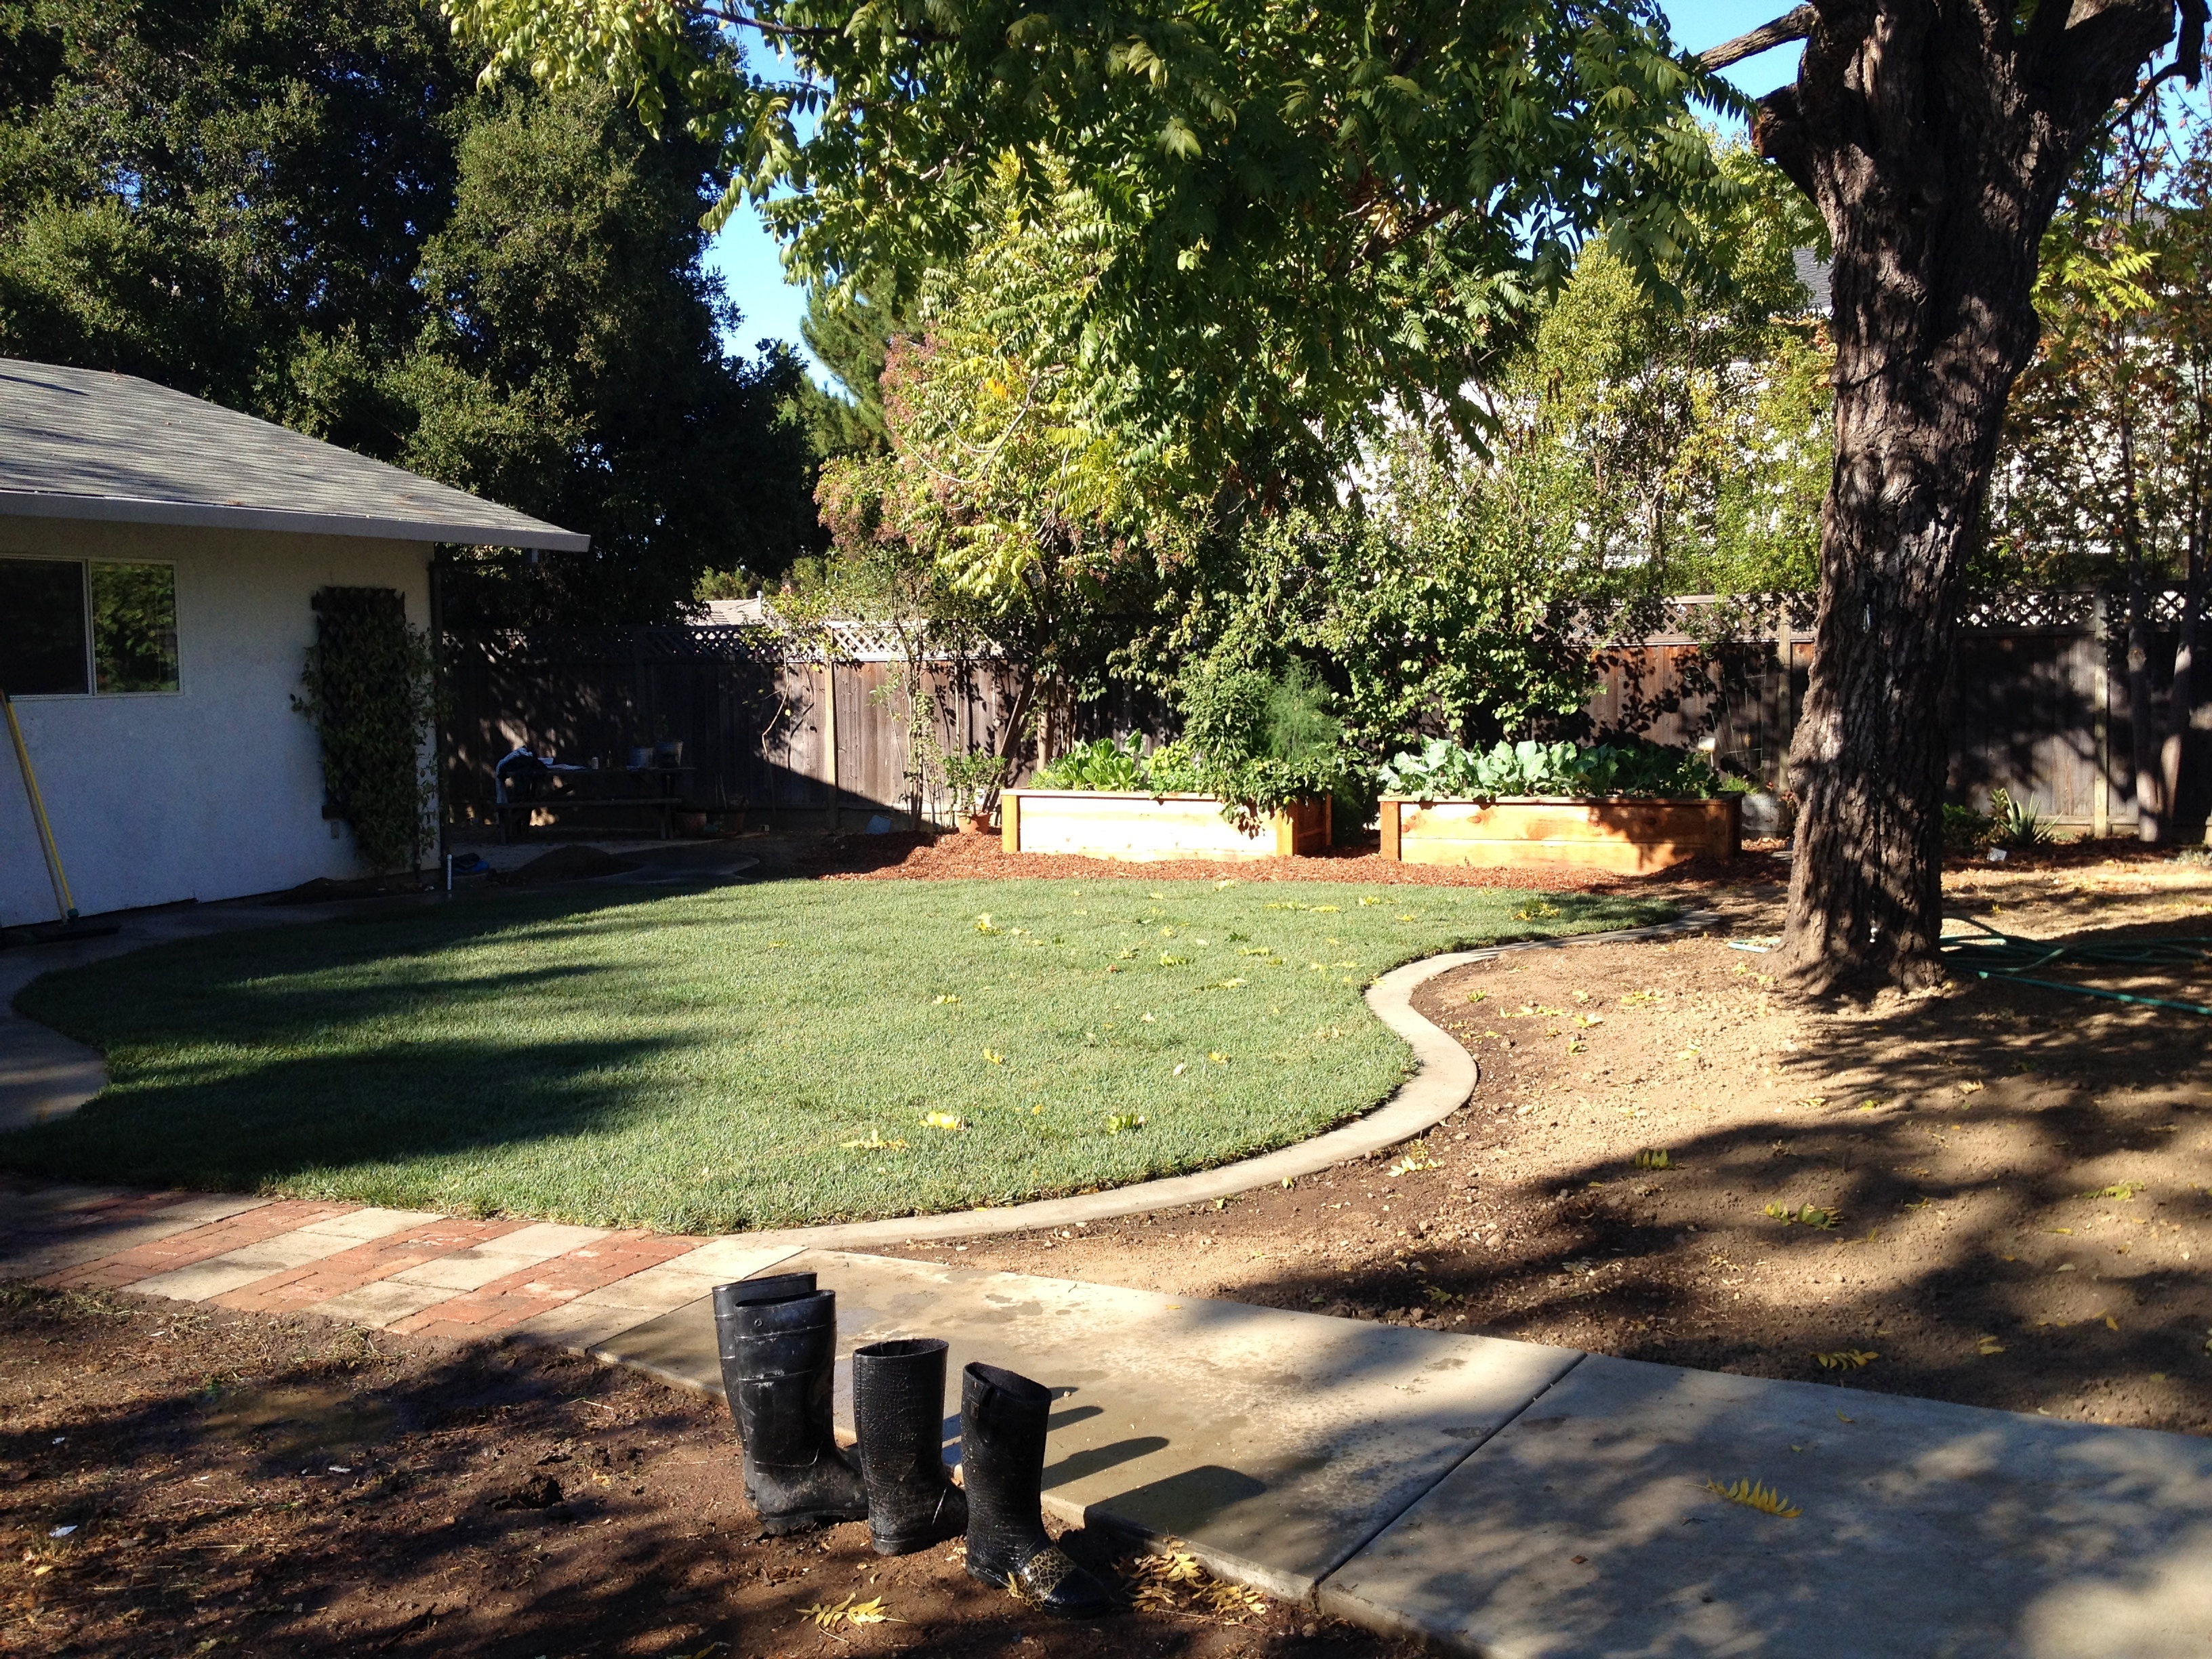
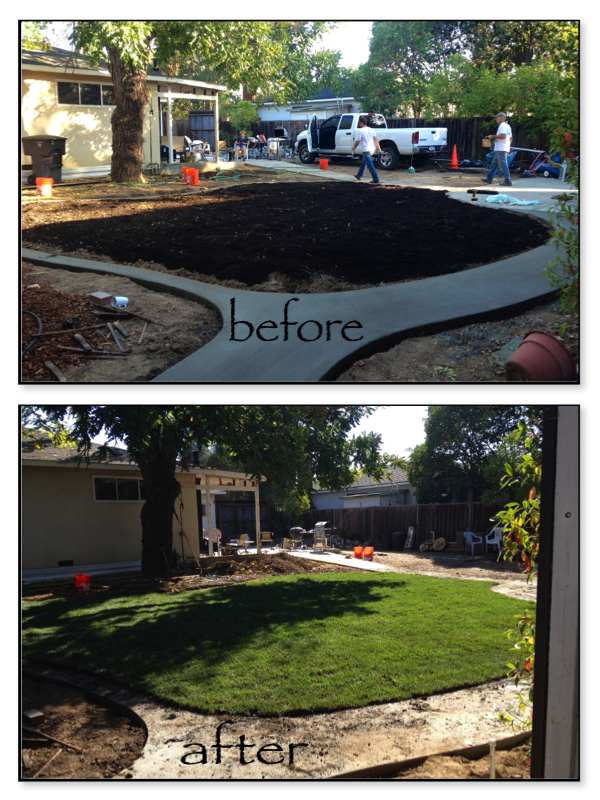
Have you ever finished a house project, stepped back, and thought, “That looks like it’s always been that way?” Immediately after placing sod, this is how I felt. It’s hard to explain. Obviously, the lawn hadn’t always been there. I had more around for most of the prep work that went into this project (more on that here). But at the end of sod day, I felt like “Oh hey, lawn. You look the same as yesterday. And the same as last week. And the same as last year.” Wait, no! You’re brand new! Anyway, either I’ve lost my train of thought and at some point you understood what I was attempting to tell you, or now you think I’ve lost my train of thought and my mind. The point is this: the lawn is everything I ever wanted!

We did quite a bit of research on the types of grass available and the companies able to deliver them. Did we entertain the idea of seed? Sure, for half a second. By the time we were ready to put the lawn in (last October… I know, I know), we had already suffered through a summer with the dirt patch. It wasn’t that bad because we were so busy tearing things down that we didn’t really notice it for a while. But now, we were ready. And we were surprised at how relatively inexpensive sod was! So we selected our grass type (Bolero) and selected our company (Delta Bluegrass) and ordered. Two days later, this truck arrived at our house at 6 am.

It was a Saturday, and we were ready to roll. Or should I say unroll?
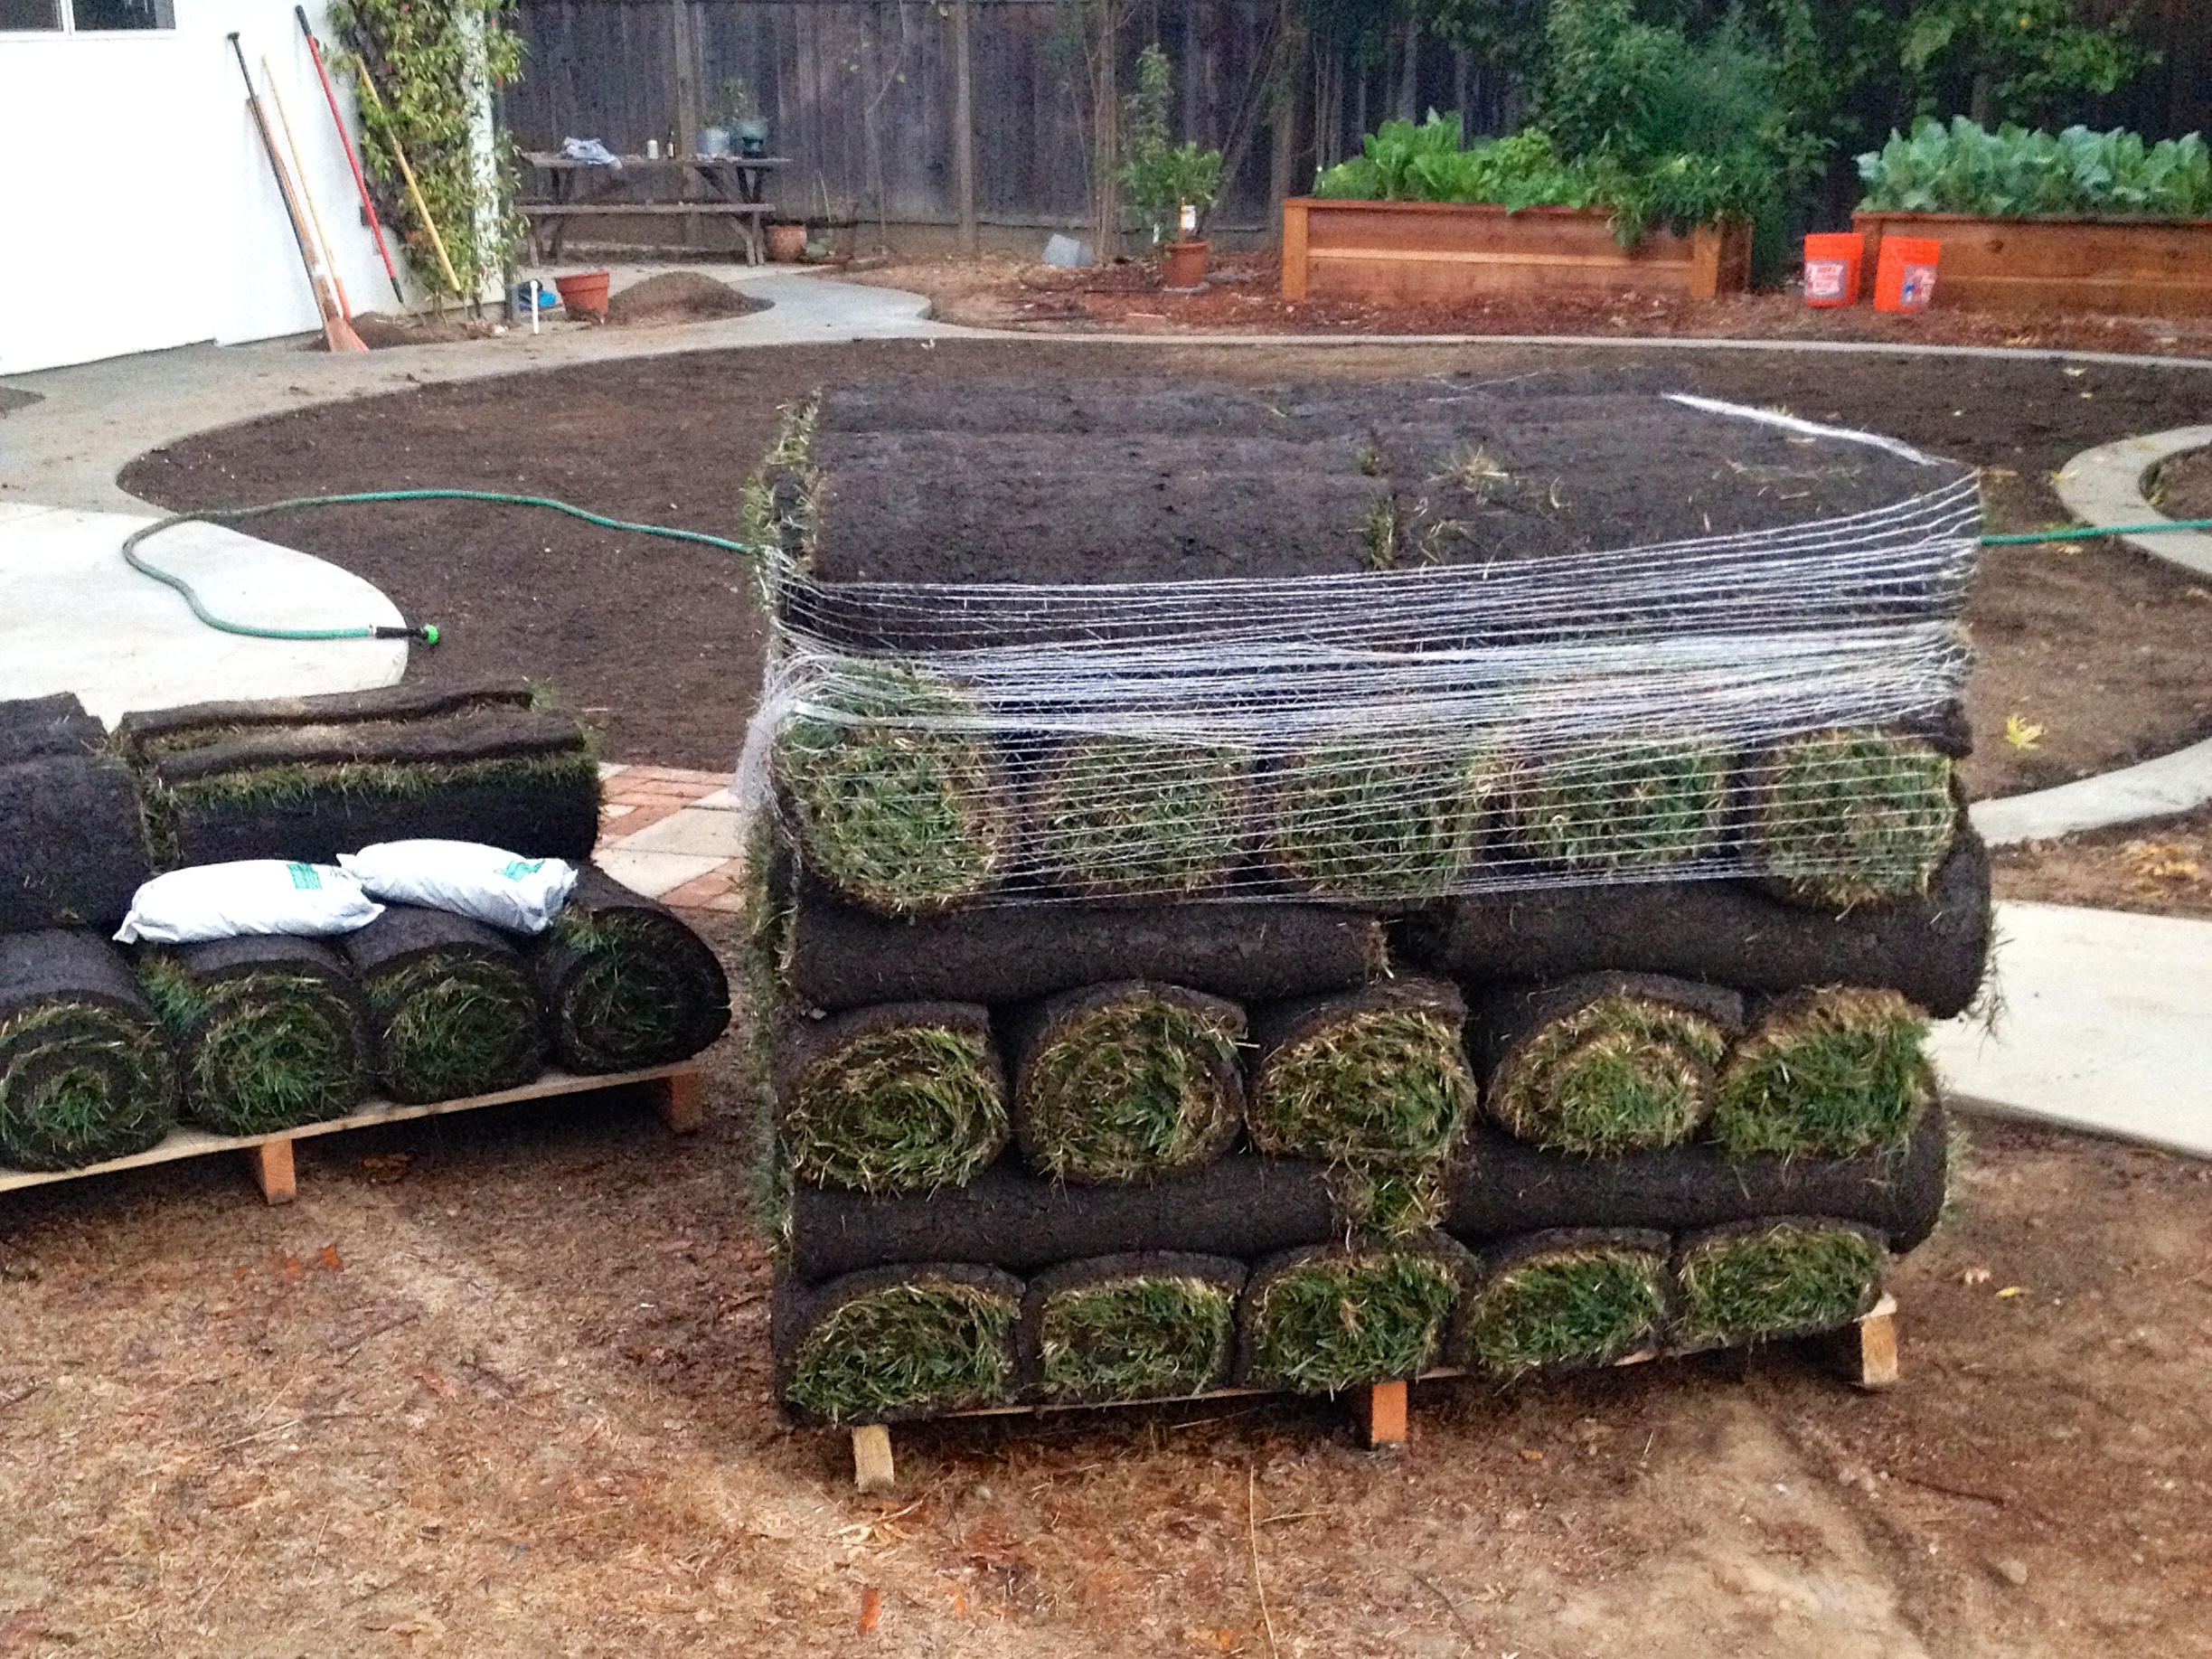
Laying sod is a very rewarding project. In a matter of hours, we had gone from dirt patch to lawn! Check out our time lapse of the project here.

As for the details, it’s pretty simple. The delivery guy handed us a packet of fertilizer, which we sprinkled all around over the compost we had already put down. Then, you start unrolling. You develop a technique for meshing the pieces of sod together so the seams are less visible, but after a few weeks it’s impossible to tell where the piecing happened. And when you get to the end of a “row”, you sit yourself down, and saw off the remaining chunk of sod with a steak knife. No, really, you do… You can see me do this in the video a lot!
And there you have it: the lawn of my dreams. The backyard is really starting to take shape. I can’t wait for lazy summer days lounging on the lawn, sunbathing in the backyard, games of ladder ball and lawn bocce… the possibilities are endless.
And now for some before-and-after throwbacks. These photos were taken when we bought the house (the upper photo) and in November (the lower photo). Pretty crazy, right?


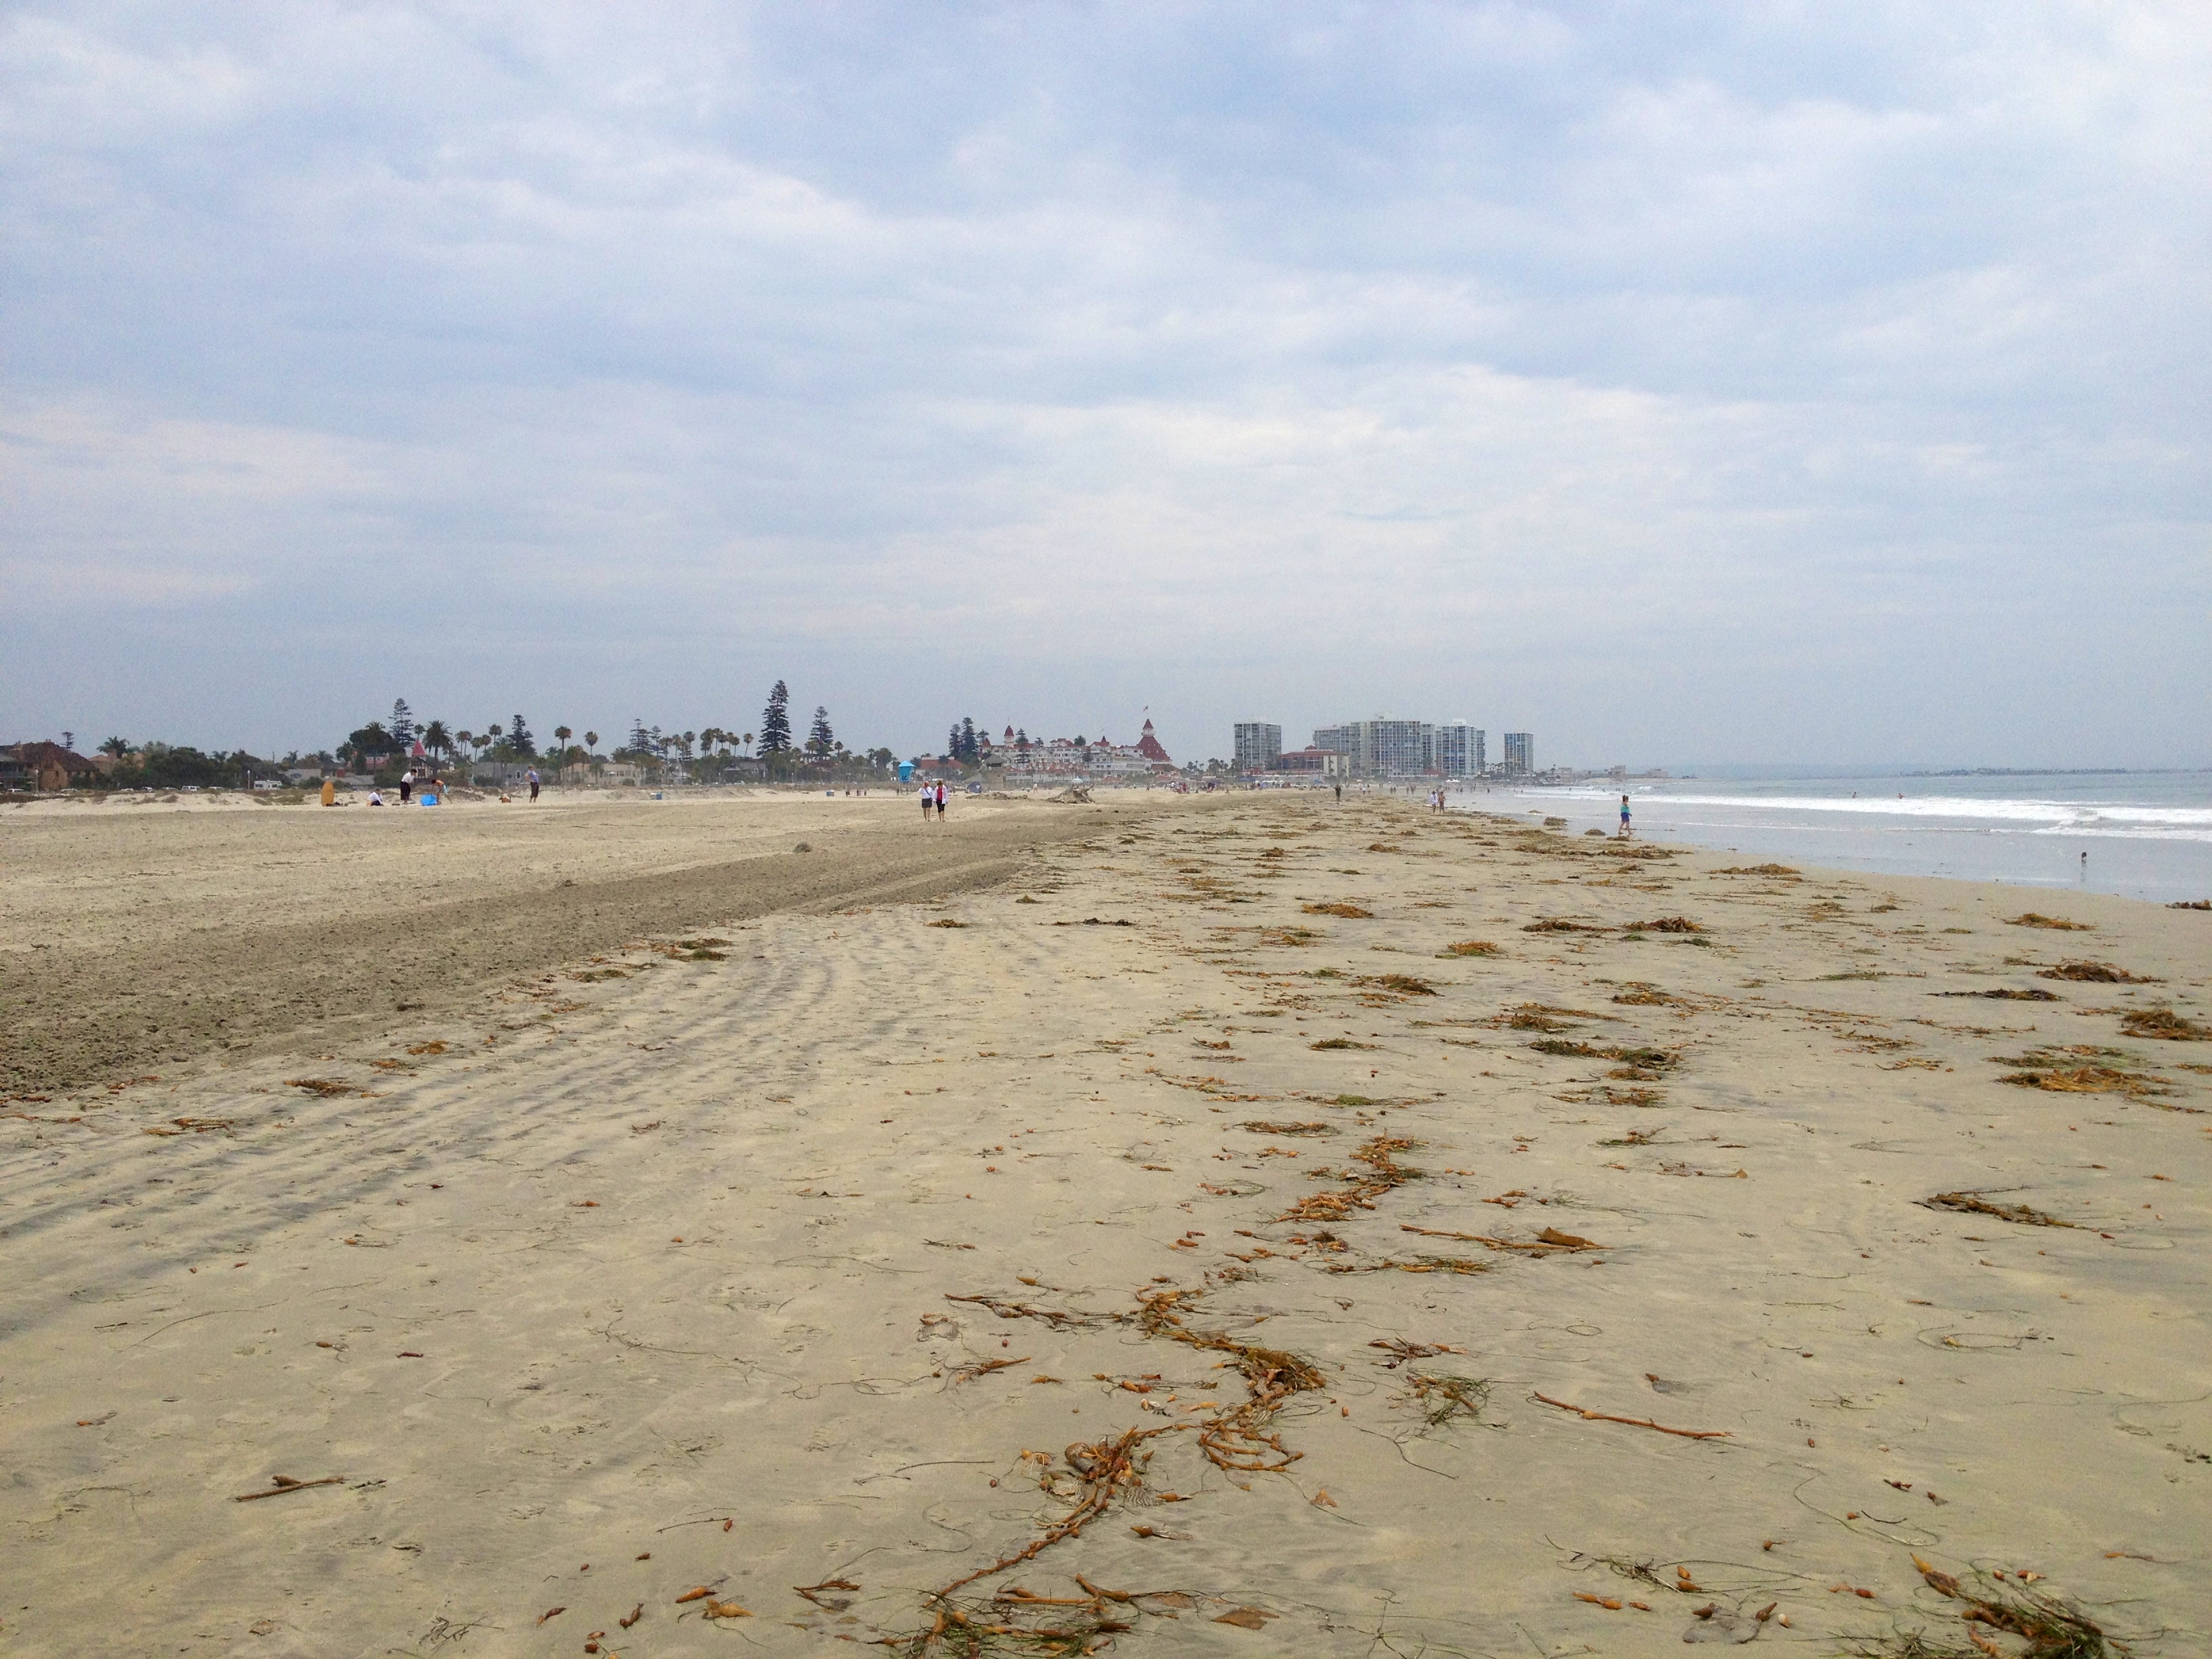
We were invited to spend a weekend at a friend’s family beach house in Coronado. I KNOW. Who could possibly say no to that? No one. No one could ever say no. And this wasn’t just any house in Coronado. Walking distance to the beach (although most things are walking distance in Coronado), pool, hot tub, beautiful summer weekend, beach cruisers for days, and some locals to show us around; this house had all the trappings for a great weekend, and did not disappoint.
Wandering aimlessly is the best way to start your morning on Coronado
It probably won’t surprise you that we spent the weekend days walking the beach and cruising the island. Do you know how fun it is to form an impromptu bike gang and ride all over the place on beach cruisers? During ComicCon weekend? Let’s just say best people watching EVER.

Beach cruisin’
To be honest, the people watching was so amazing and I was so preoccupied with riding a bicycle and staring that I did not take a single photo of the ComicCon madness (For those blissfully unaware of this event, it’s an annual conference in downtown San Diego relating to all things comics. And everyone dresses up. And I mean really dresses up!). Oh well, maybe I’ll remember photos next year? Hint, hint, Kyle…
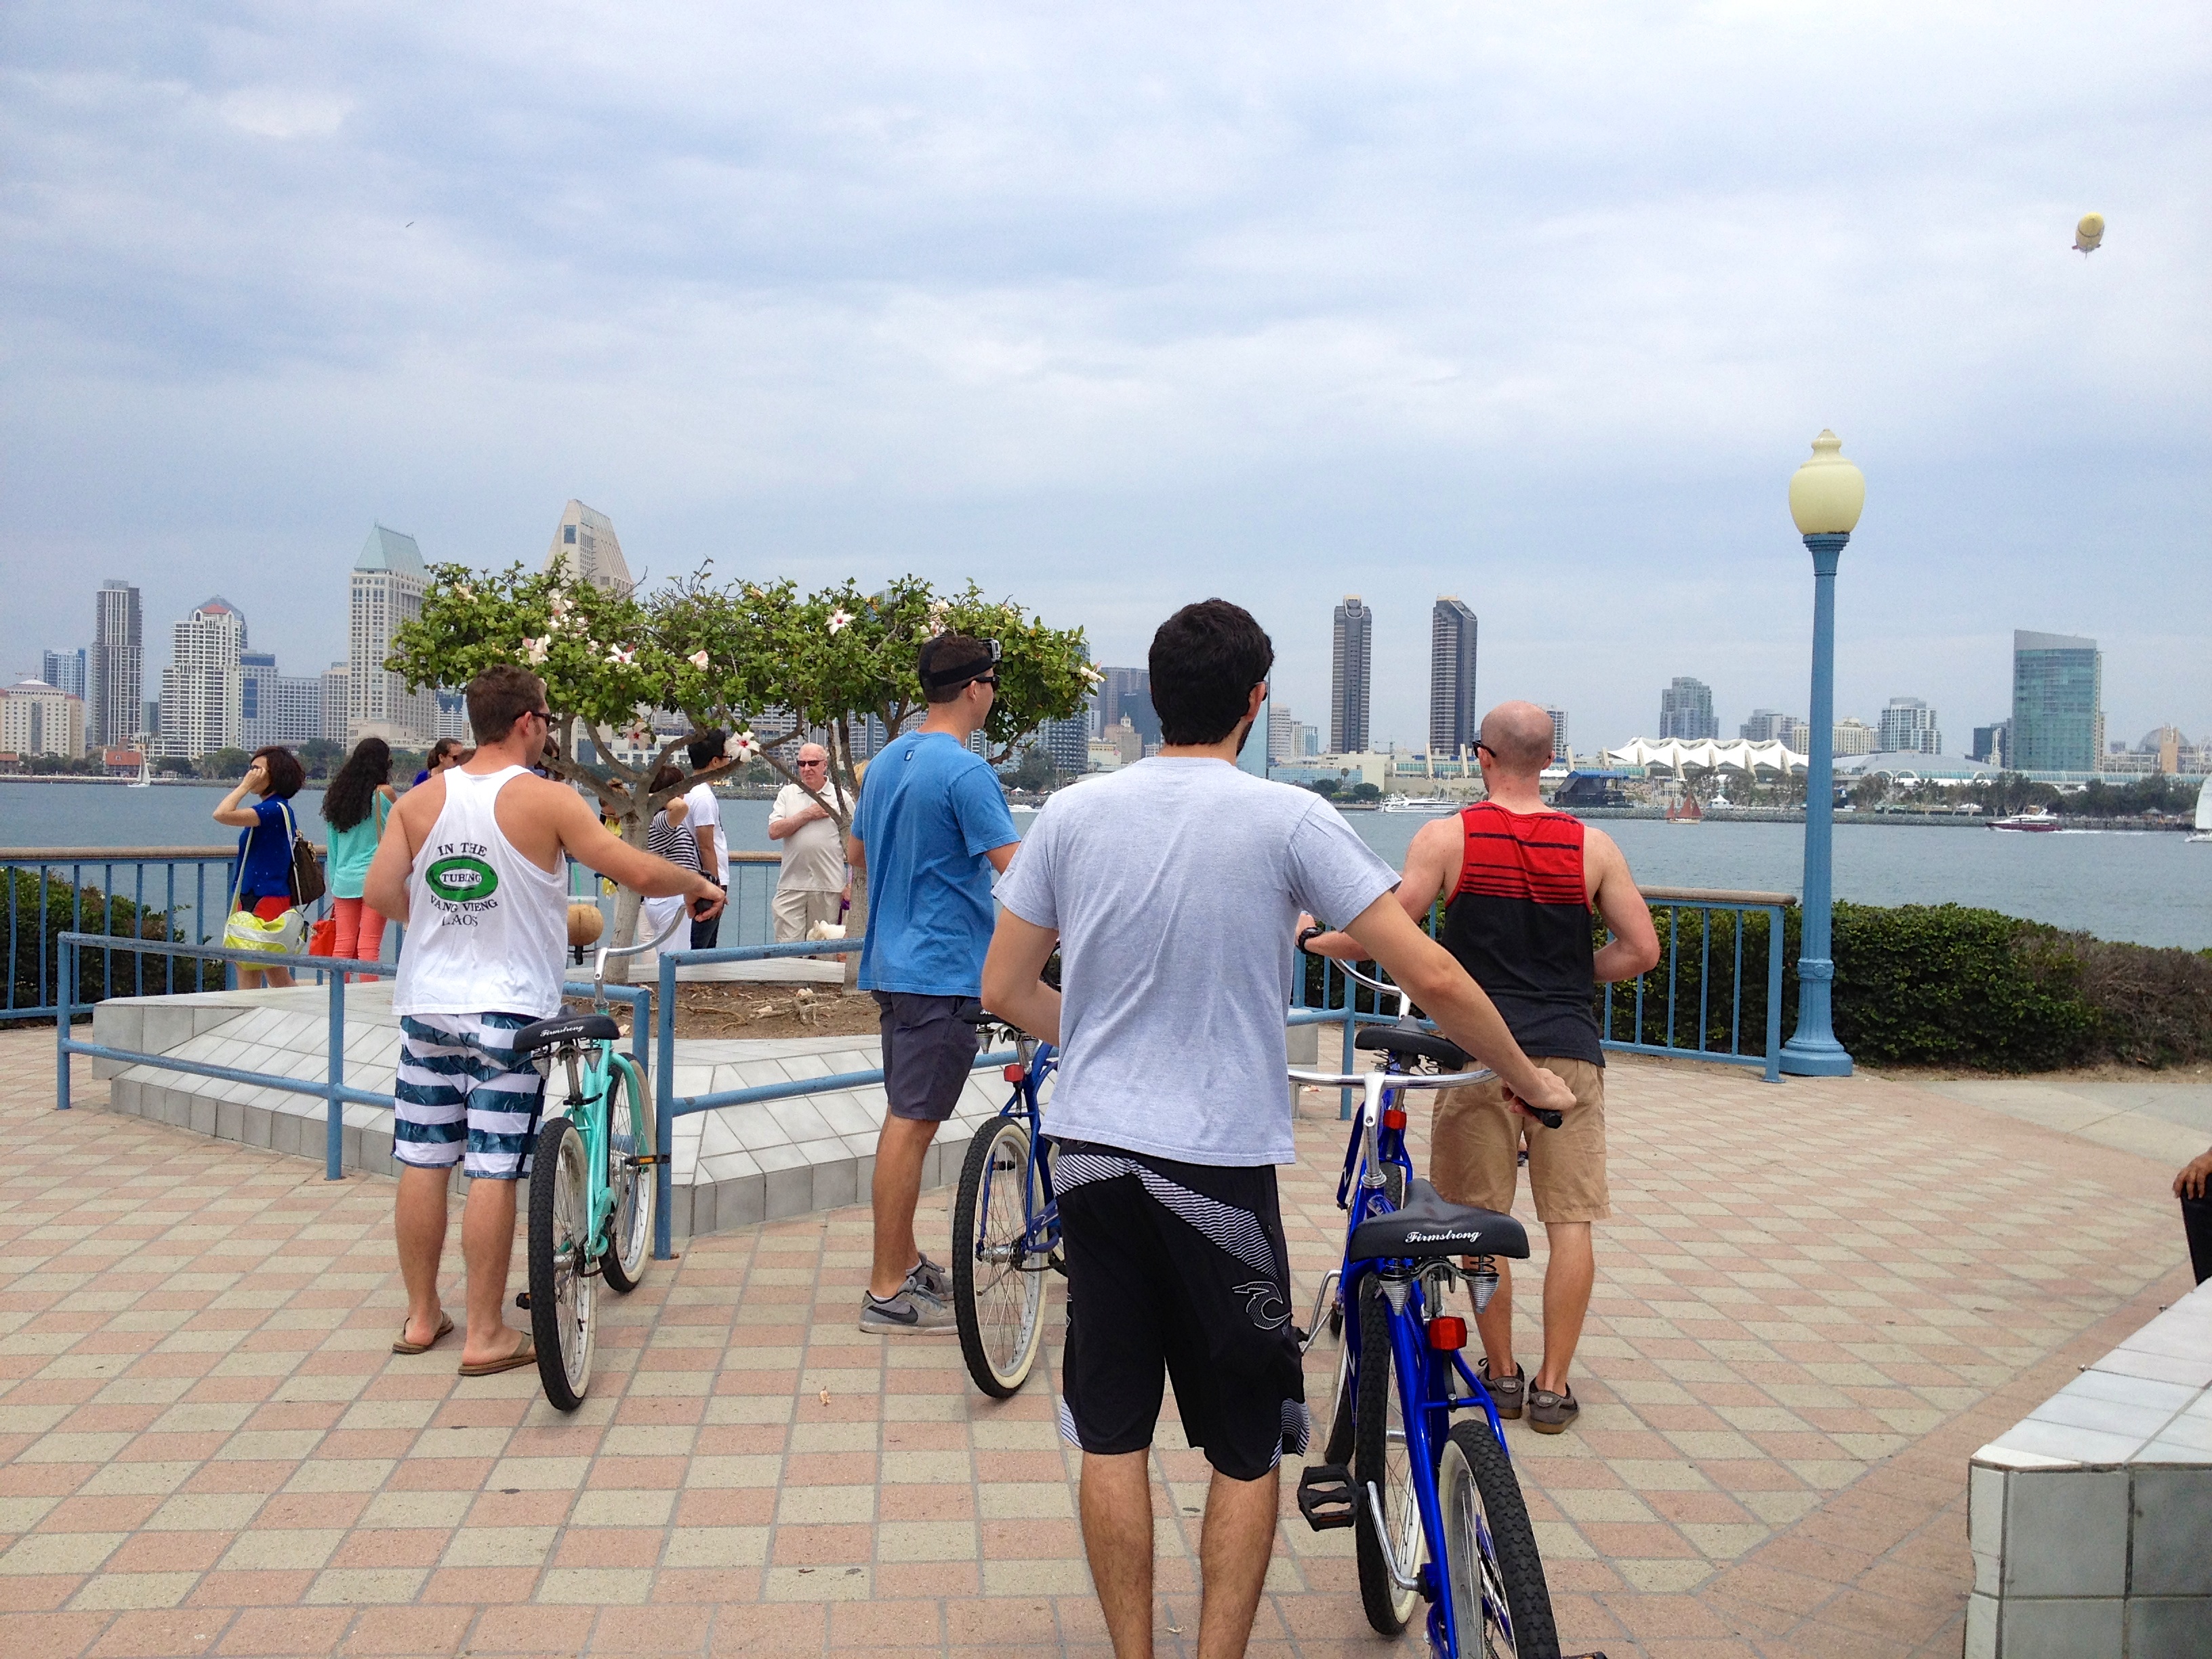
View of downtown San Diego from Coronado

If this picture doesn’t make you happy, I’m not sure what to tell you.

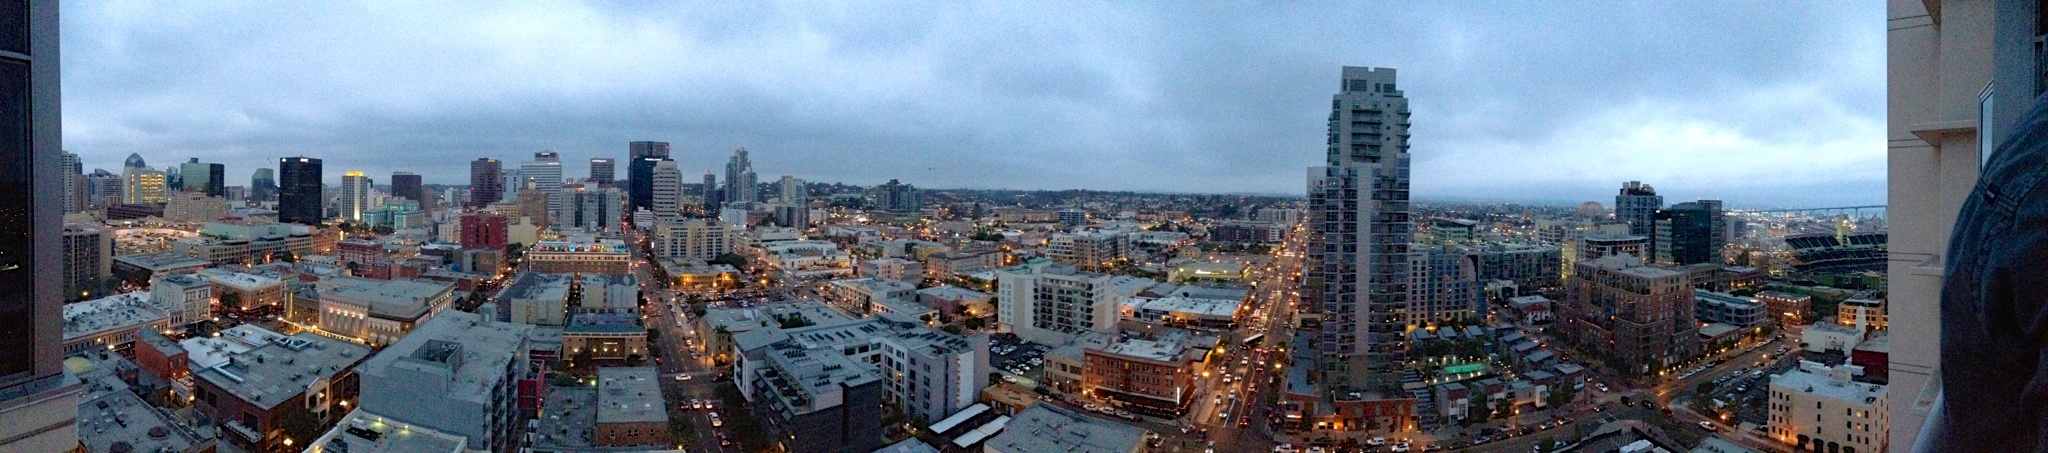
San Diego skyline

Bridge from San Diego to Coronado

I think Justin could get used to this…
After an exhausting day of cruising, we headed into San Diego to see what kind of trouble we could get into. Remember how I mentioned hanging out with the locals? Well, we got invited to a rooftop party, overlooking the entire city. And managed to get there before the sun set. And they were BBQing, and the food was fabulous. To whomever those people were, your life rocks. Thank you for including us for the night!
So, to our hosts, thanks for the best weekend in the history of Coronado. And to those of you traveling to Coronado, here’s my advice: stay at a friends beach house, form a beach cruiser bike gang, take in all the ComicCon hilarity, and get invited to a rooftop party overlooking the city. Come on, it’s not that hard…
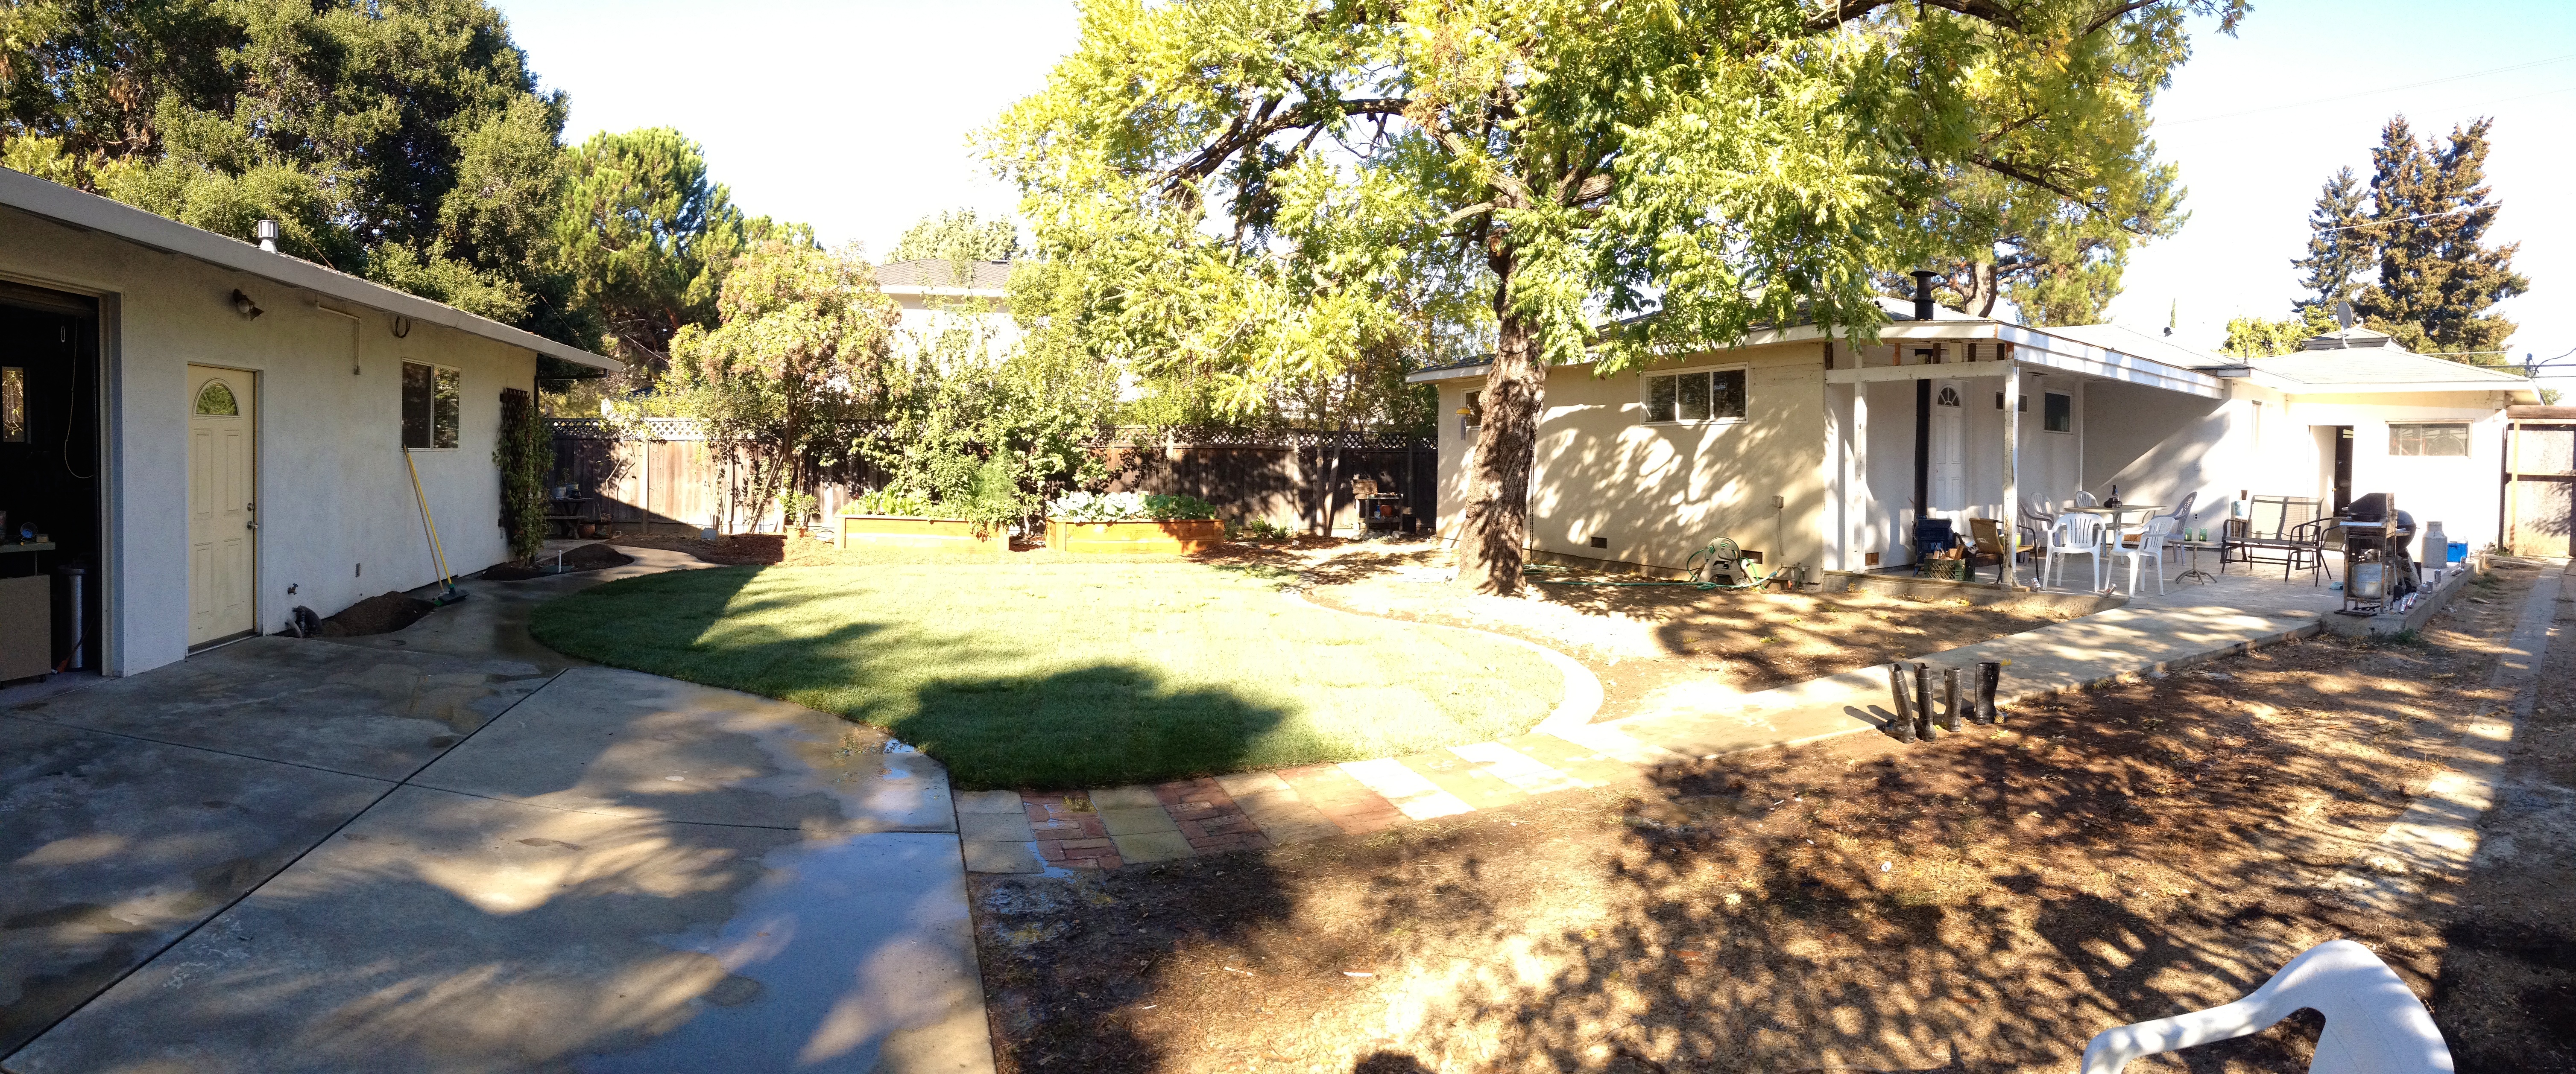
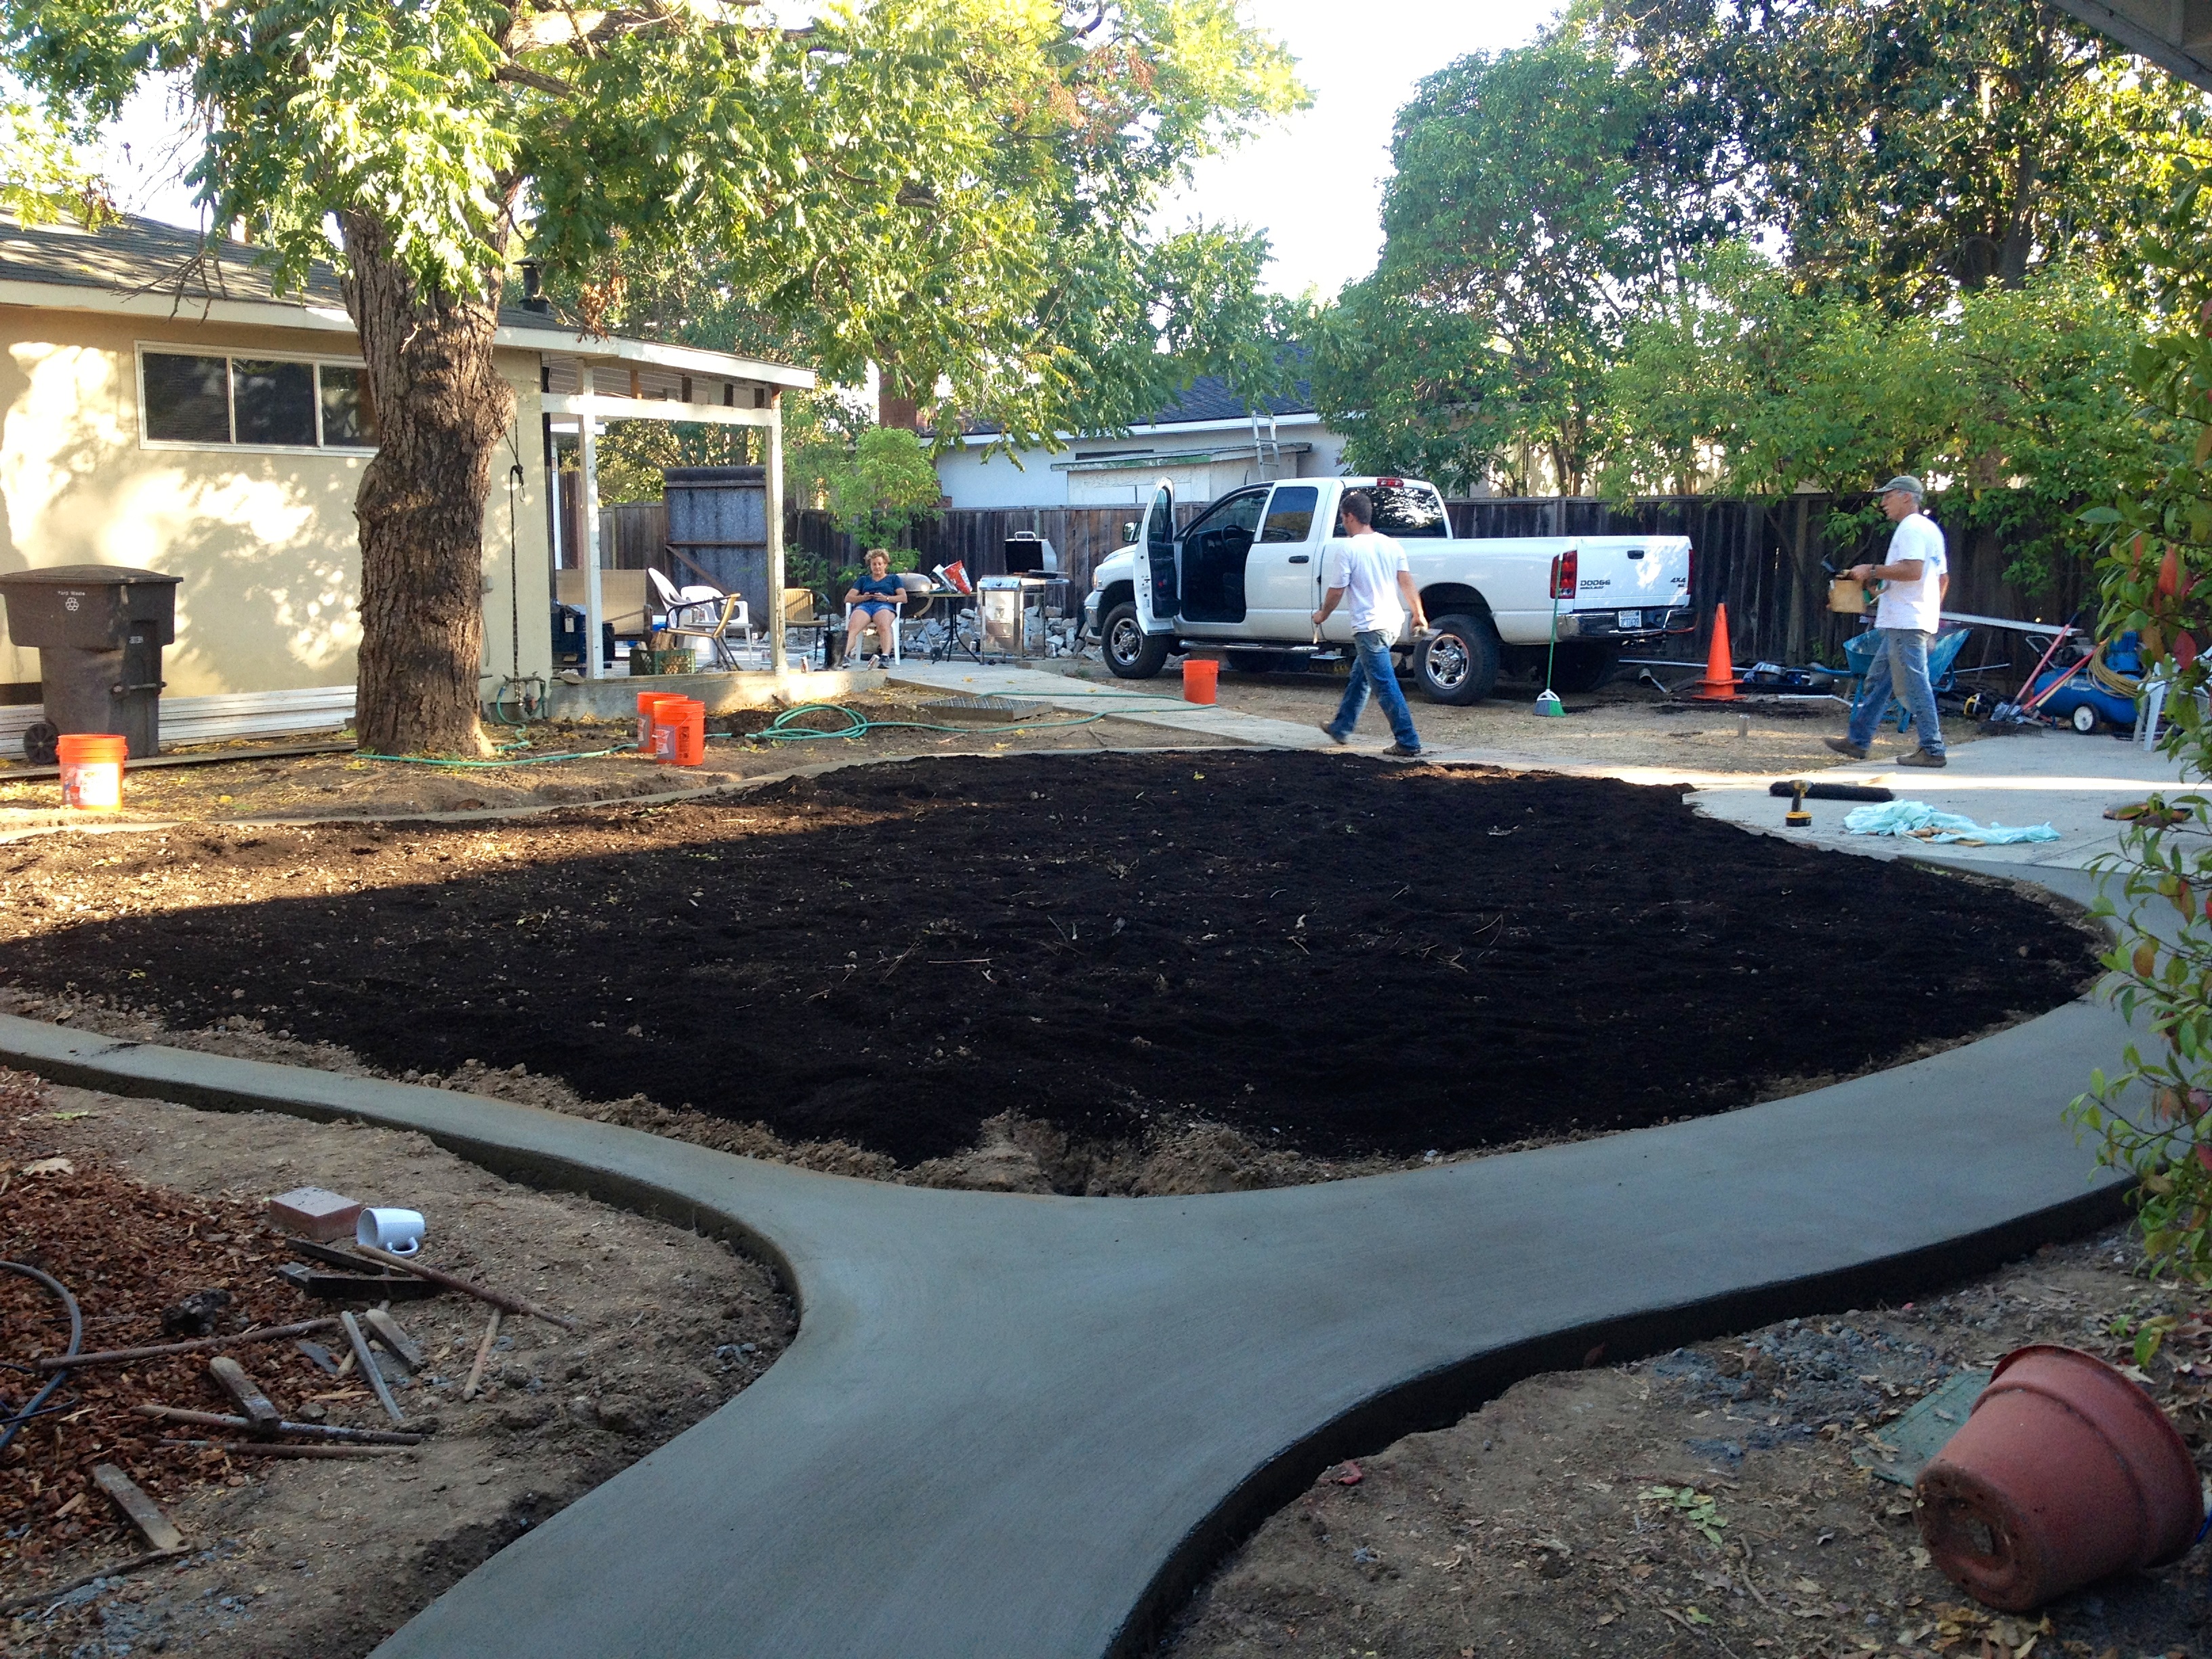
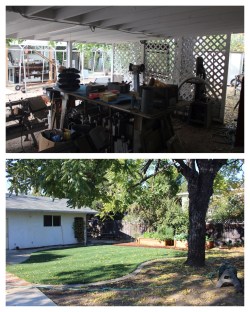
What do you do when you’ve finished demo and can actually see what your backyard looks like? Start beautifying your newly exposed backyard! As soon as the miscellaneous structures attached to the house and the shop were gone, we immediately started planning our backyard. Other than demo and the planters, we hadn’t really done a whole lot back here after we bought the house. But seeing the backyard sans the West Wing really inspired us to get a move on!
See the large dirt patch in the back? So much more obvious now…
The main goal for the backyard was to get a lawn in. I know, I know… we live in California, a state of perpetual drought. But the lawn isn’t very big, and we are definitely NOT putting one in the front yard. Can you tell I had to justify this a little bit? But how do you create a backyard oasis without a little bit of lawn? Okay, fine. There are lots of ways. I just wanted some lawn!
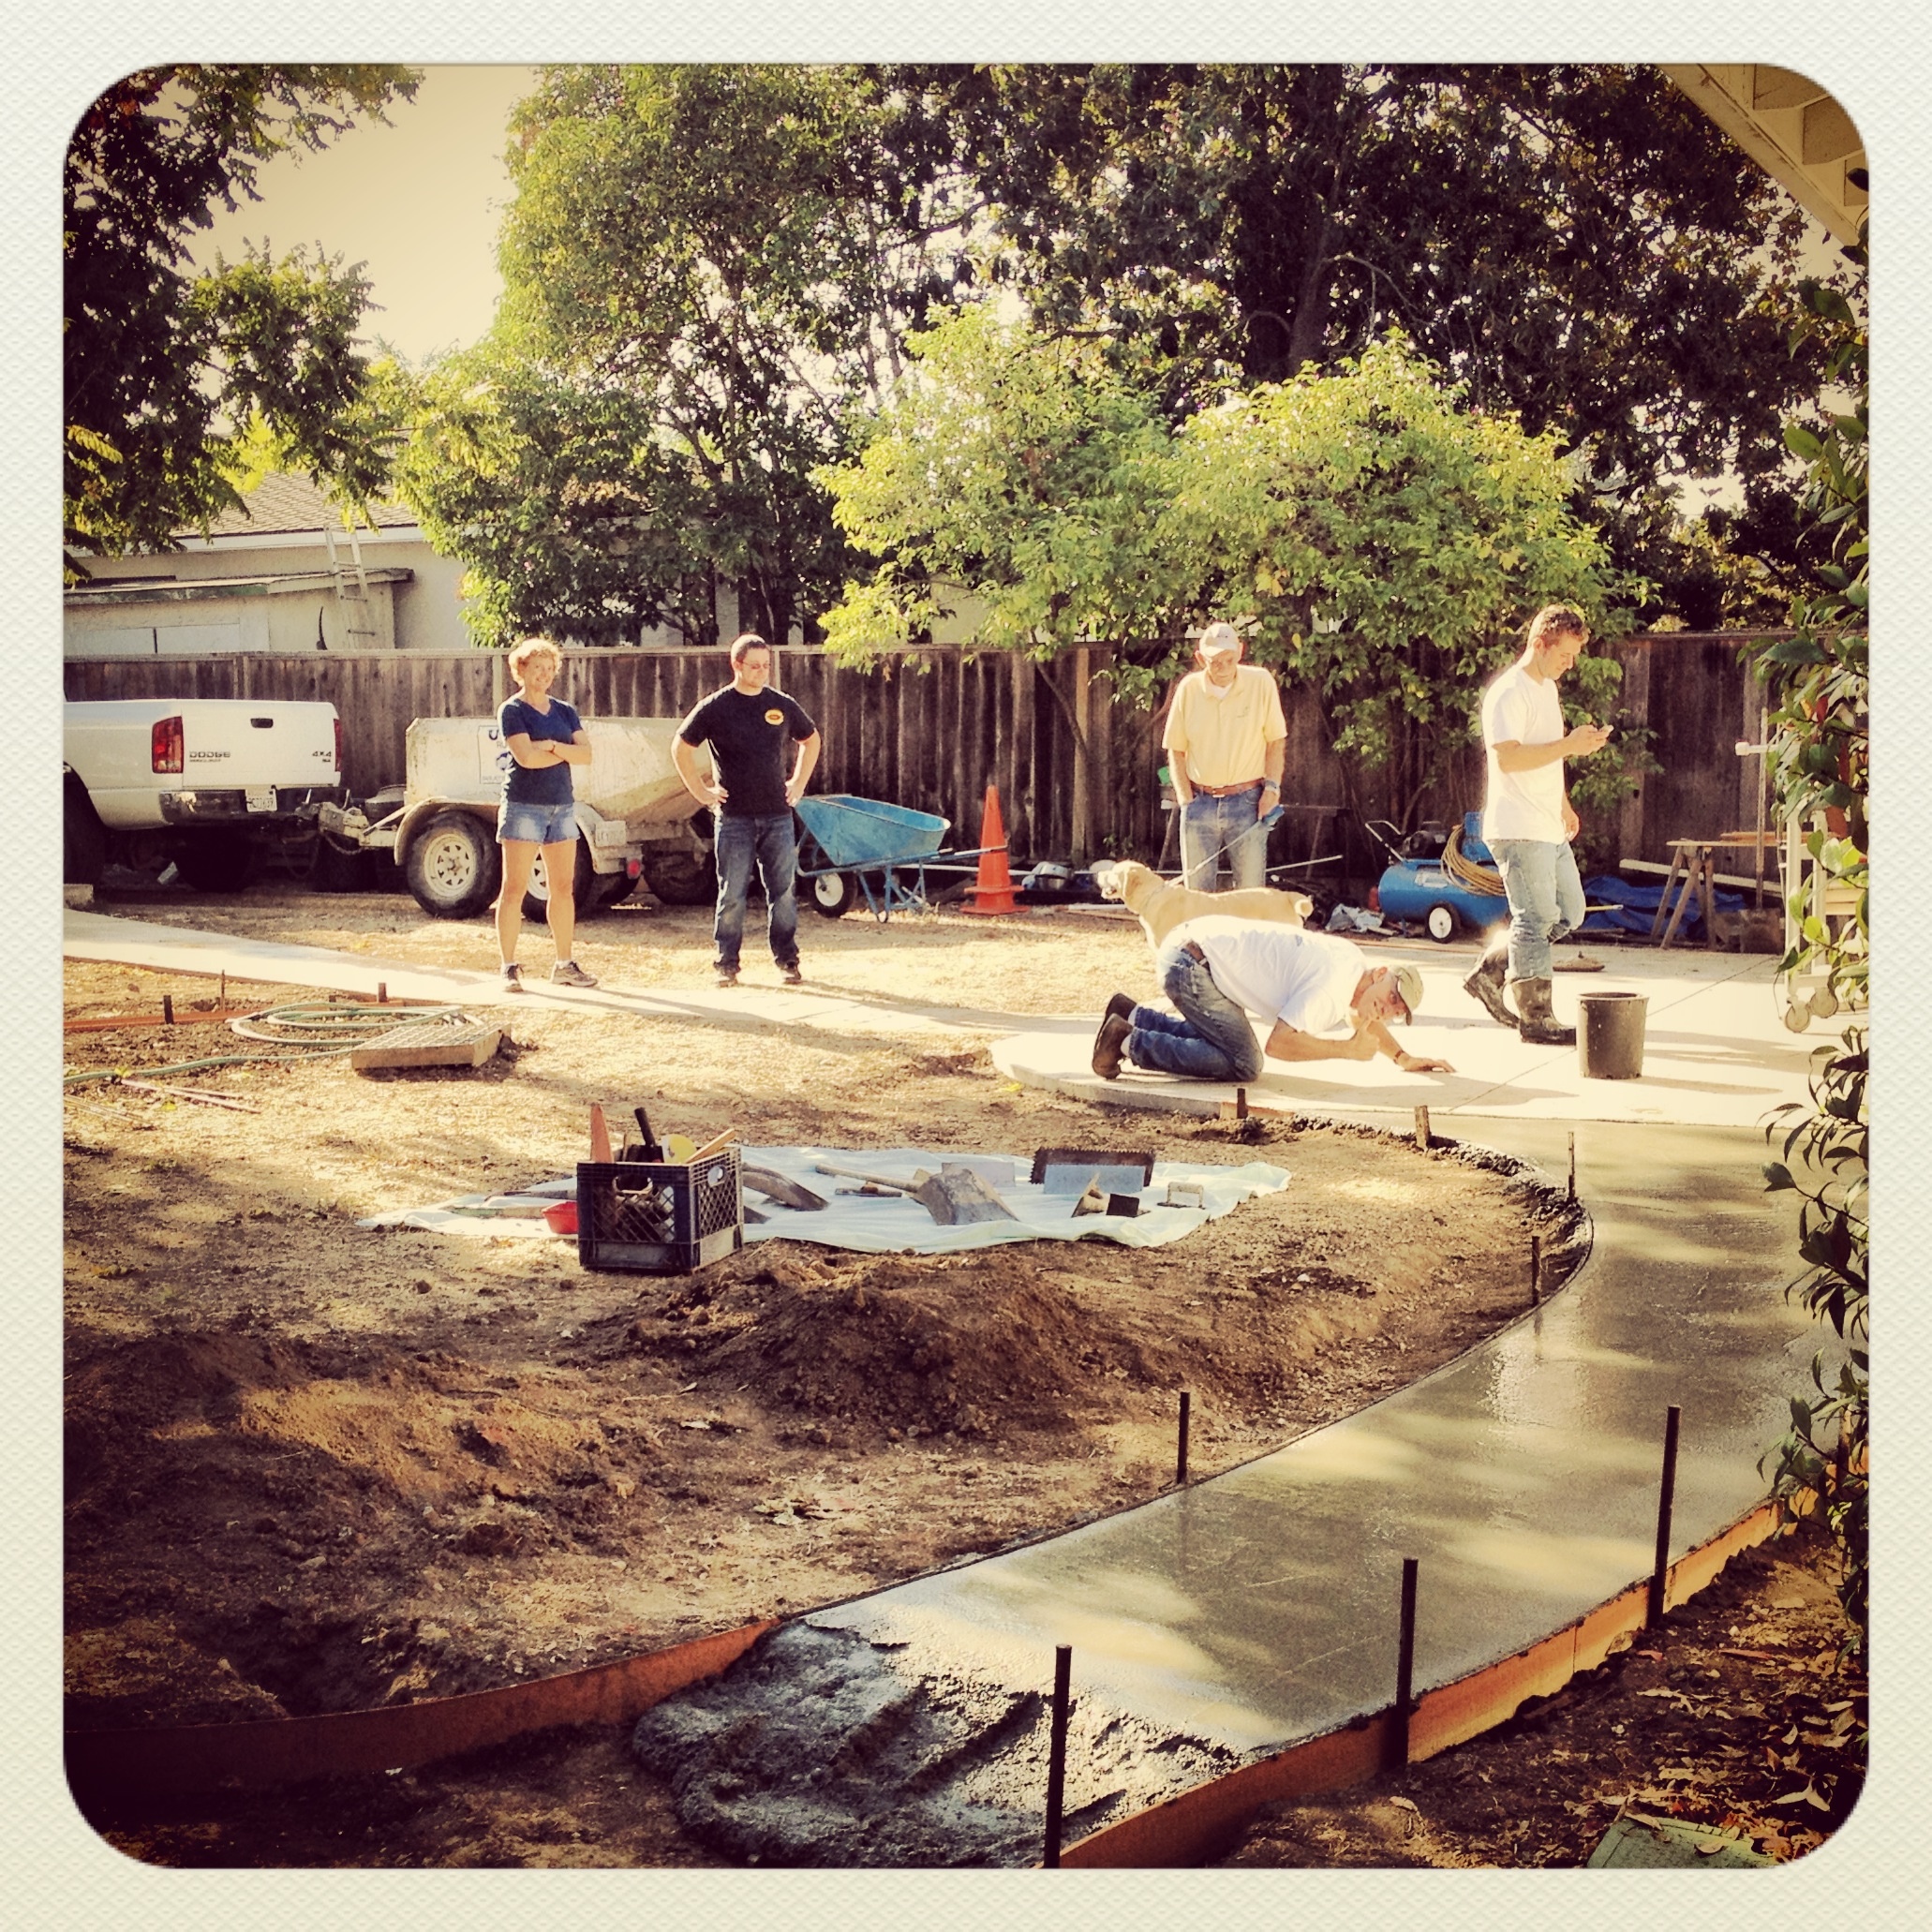
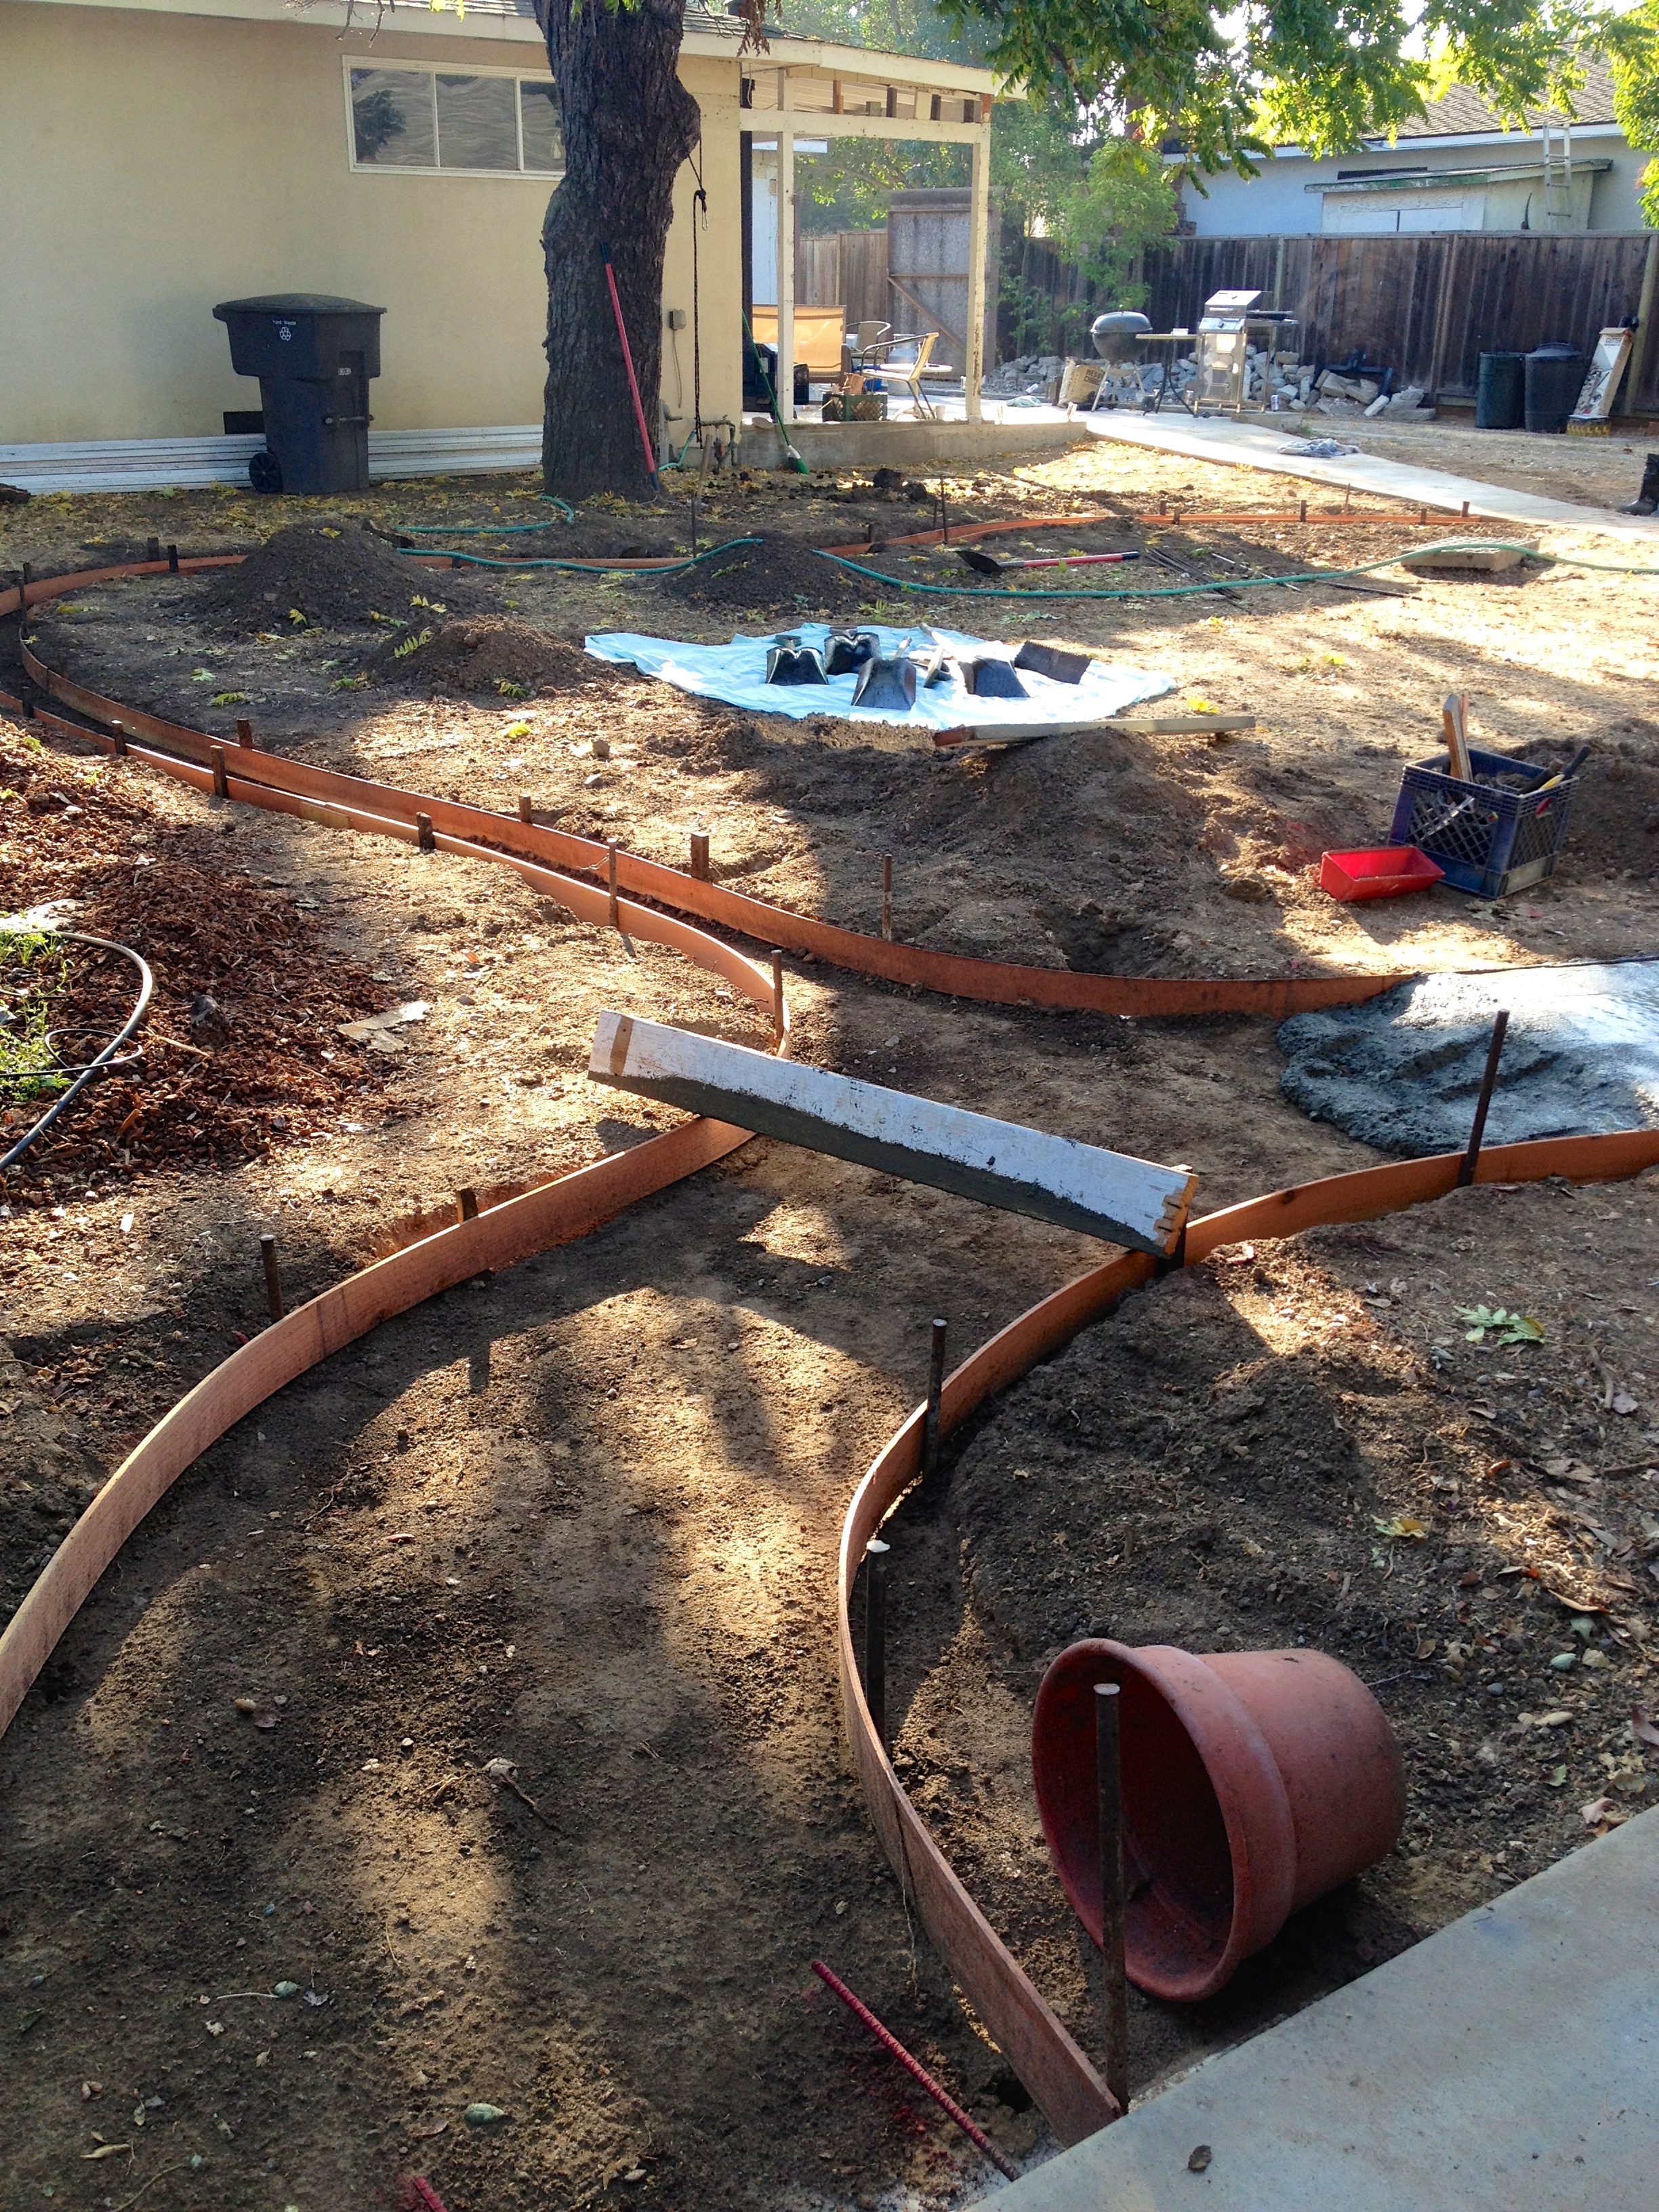
But before I get ahead of myself, there were a few steps to take before our lawn could come into being. First step: concrete. There are two big concrete patios in the back that come off the shop: one in the front at the shop garage door (that you see in most pictures) and another off the north side of the building, under a giant oak tree that lives in our neighbor’s yard. We wanted to create a sidewalk of sorts to connect the patios, as well as a concrete mow strip to encircle the rest of the future lawn. And this post is all about that!
My dad, the lifesaver, spent a bunch of time the week before we poured concrete setting up the bender board forms while Justin and I were at work. I swear, we would have accomplished so much less on our house at this point if my dad wasn’t retired! He’s the best!
Forms in!
The first thing we had to do for concrete weekend (because our forms were already up), was head to the rockery and pick up the concrete.

The beer came later…
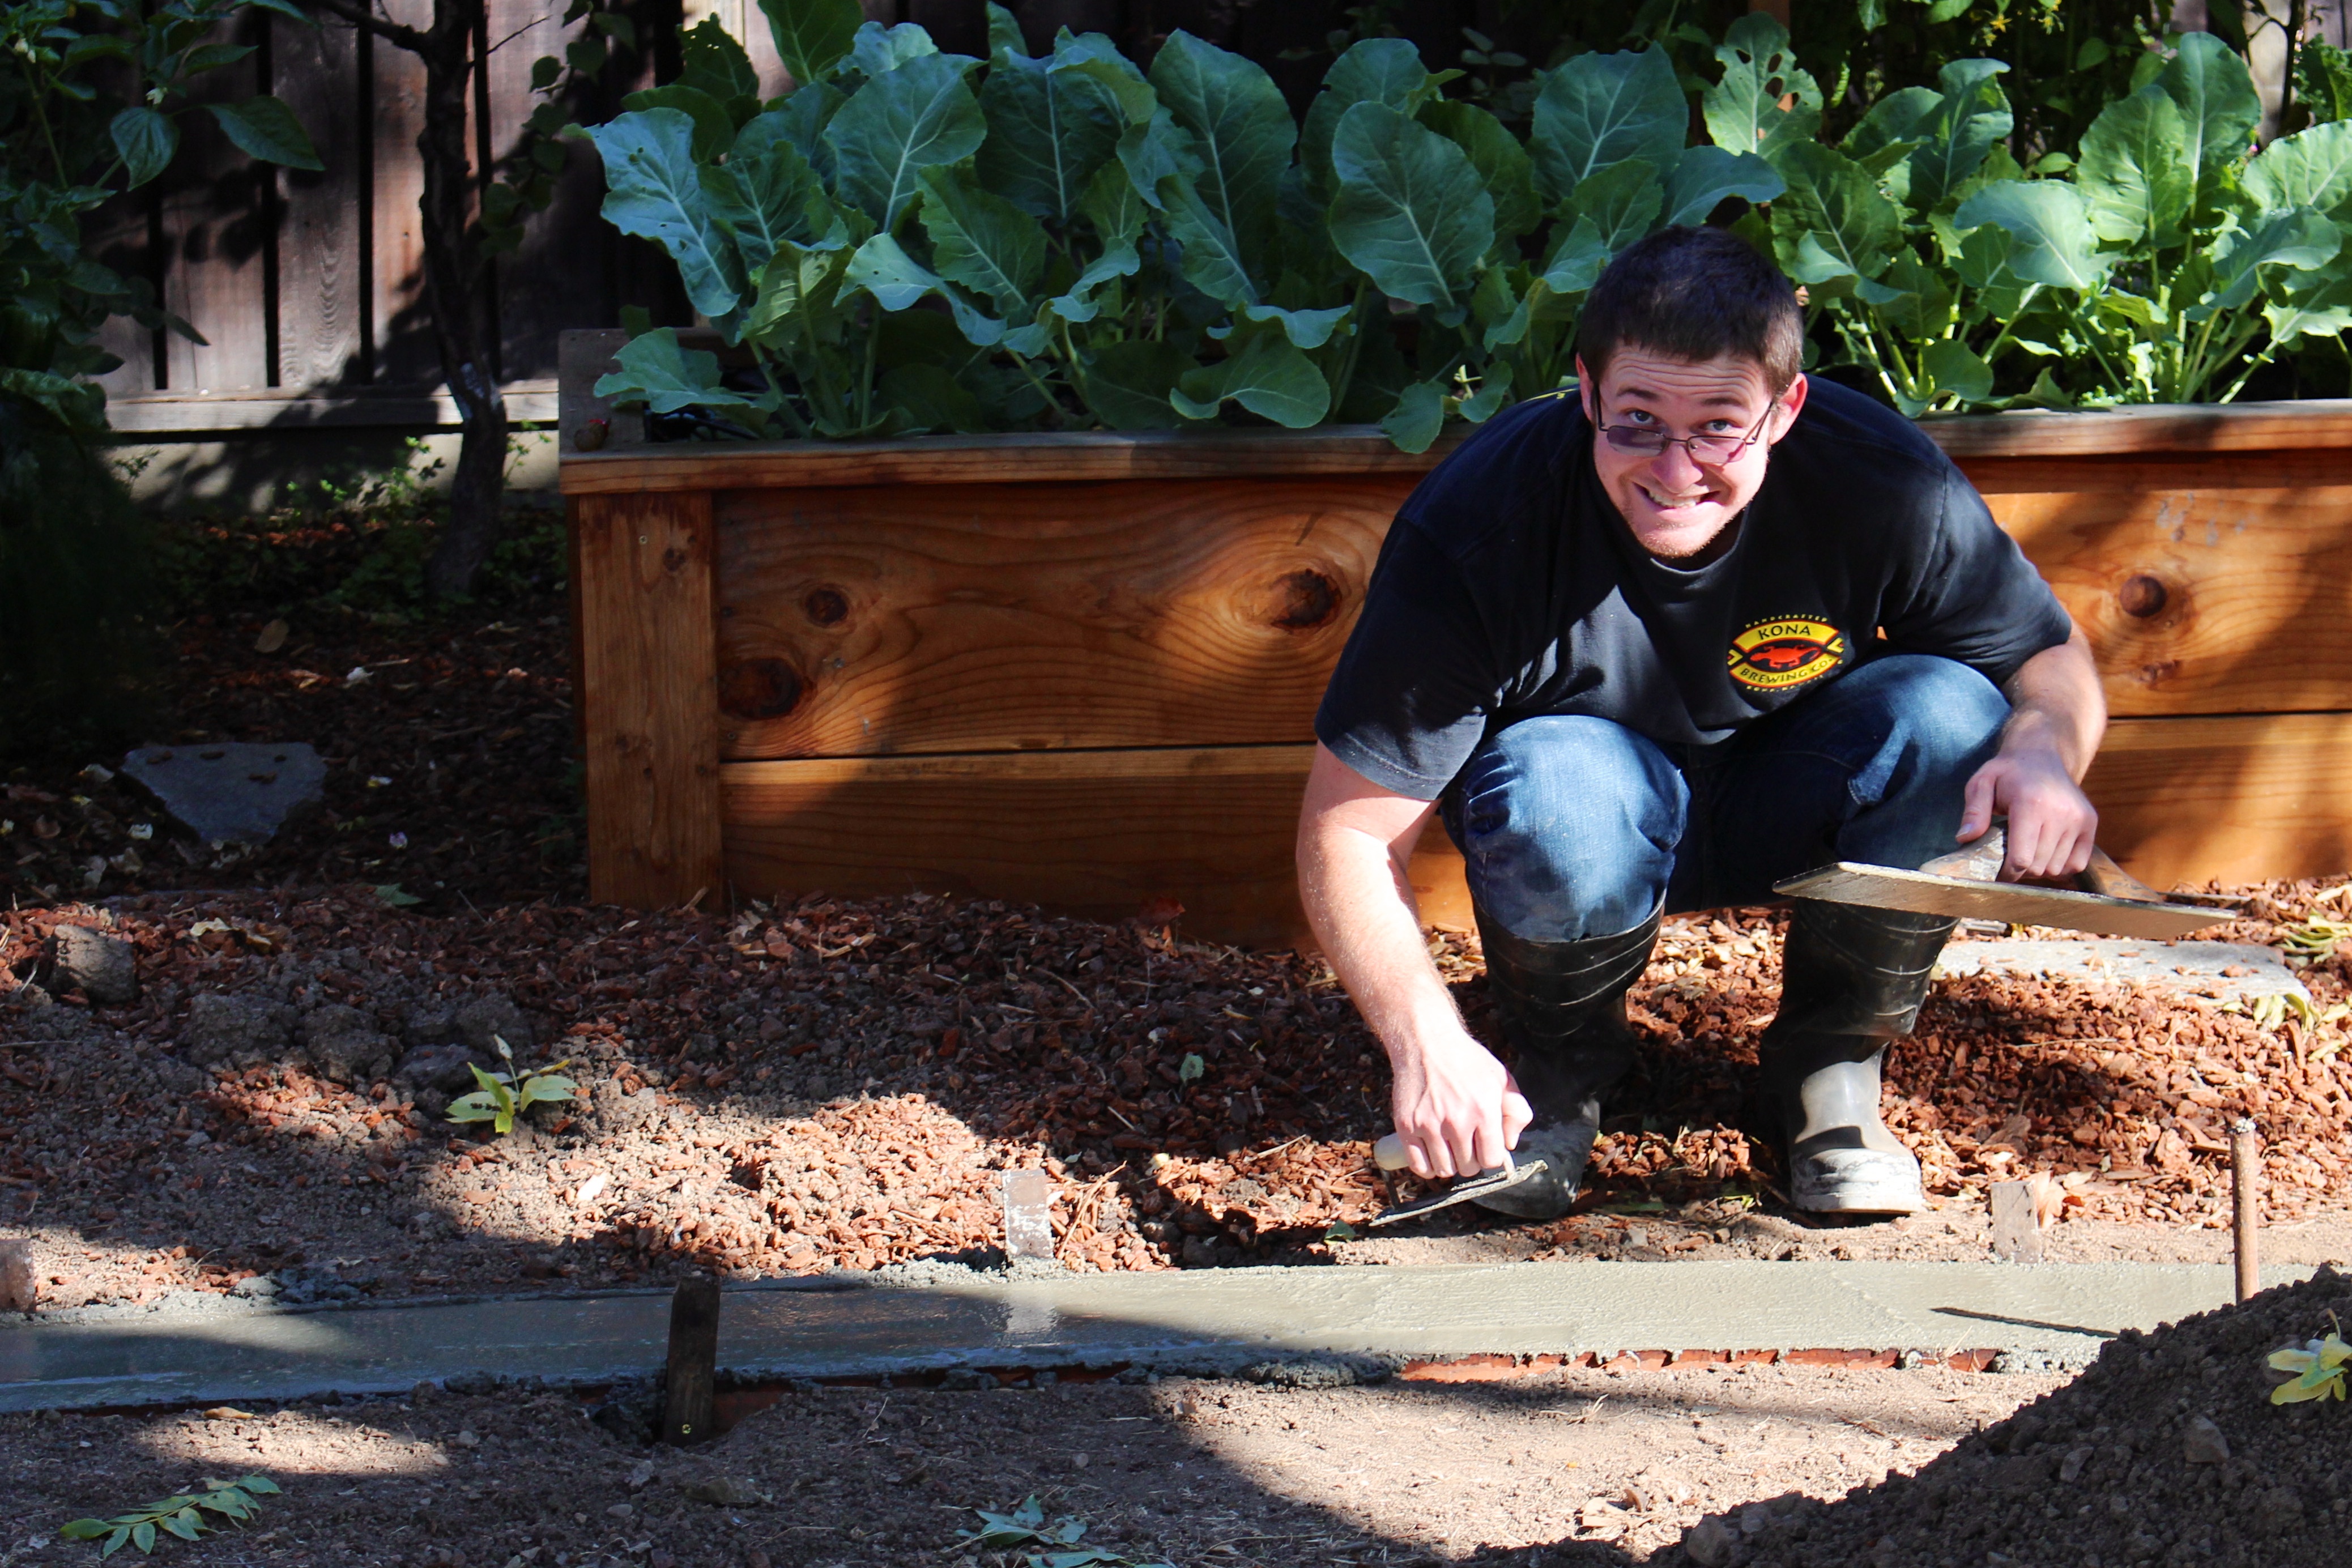
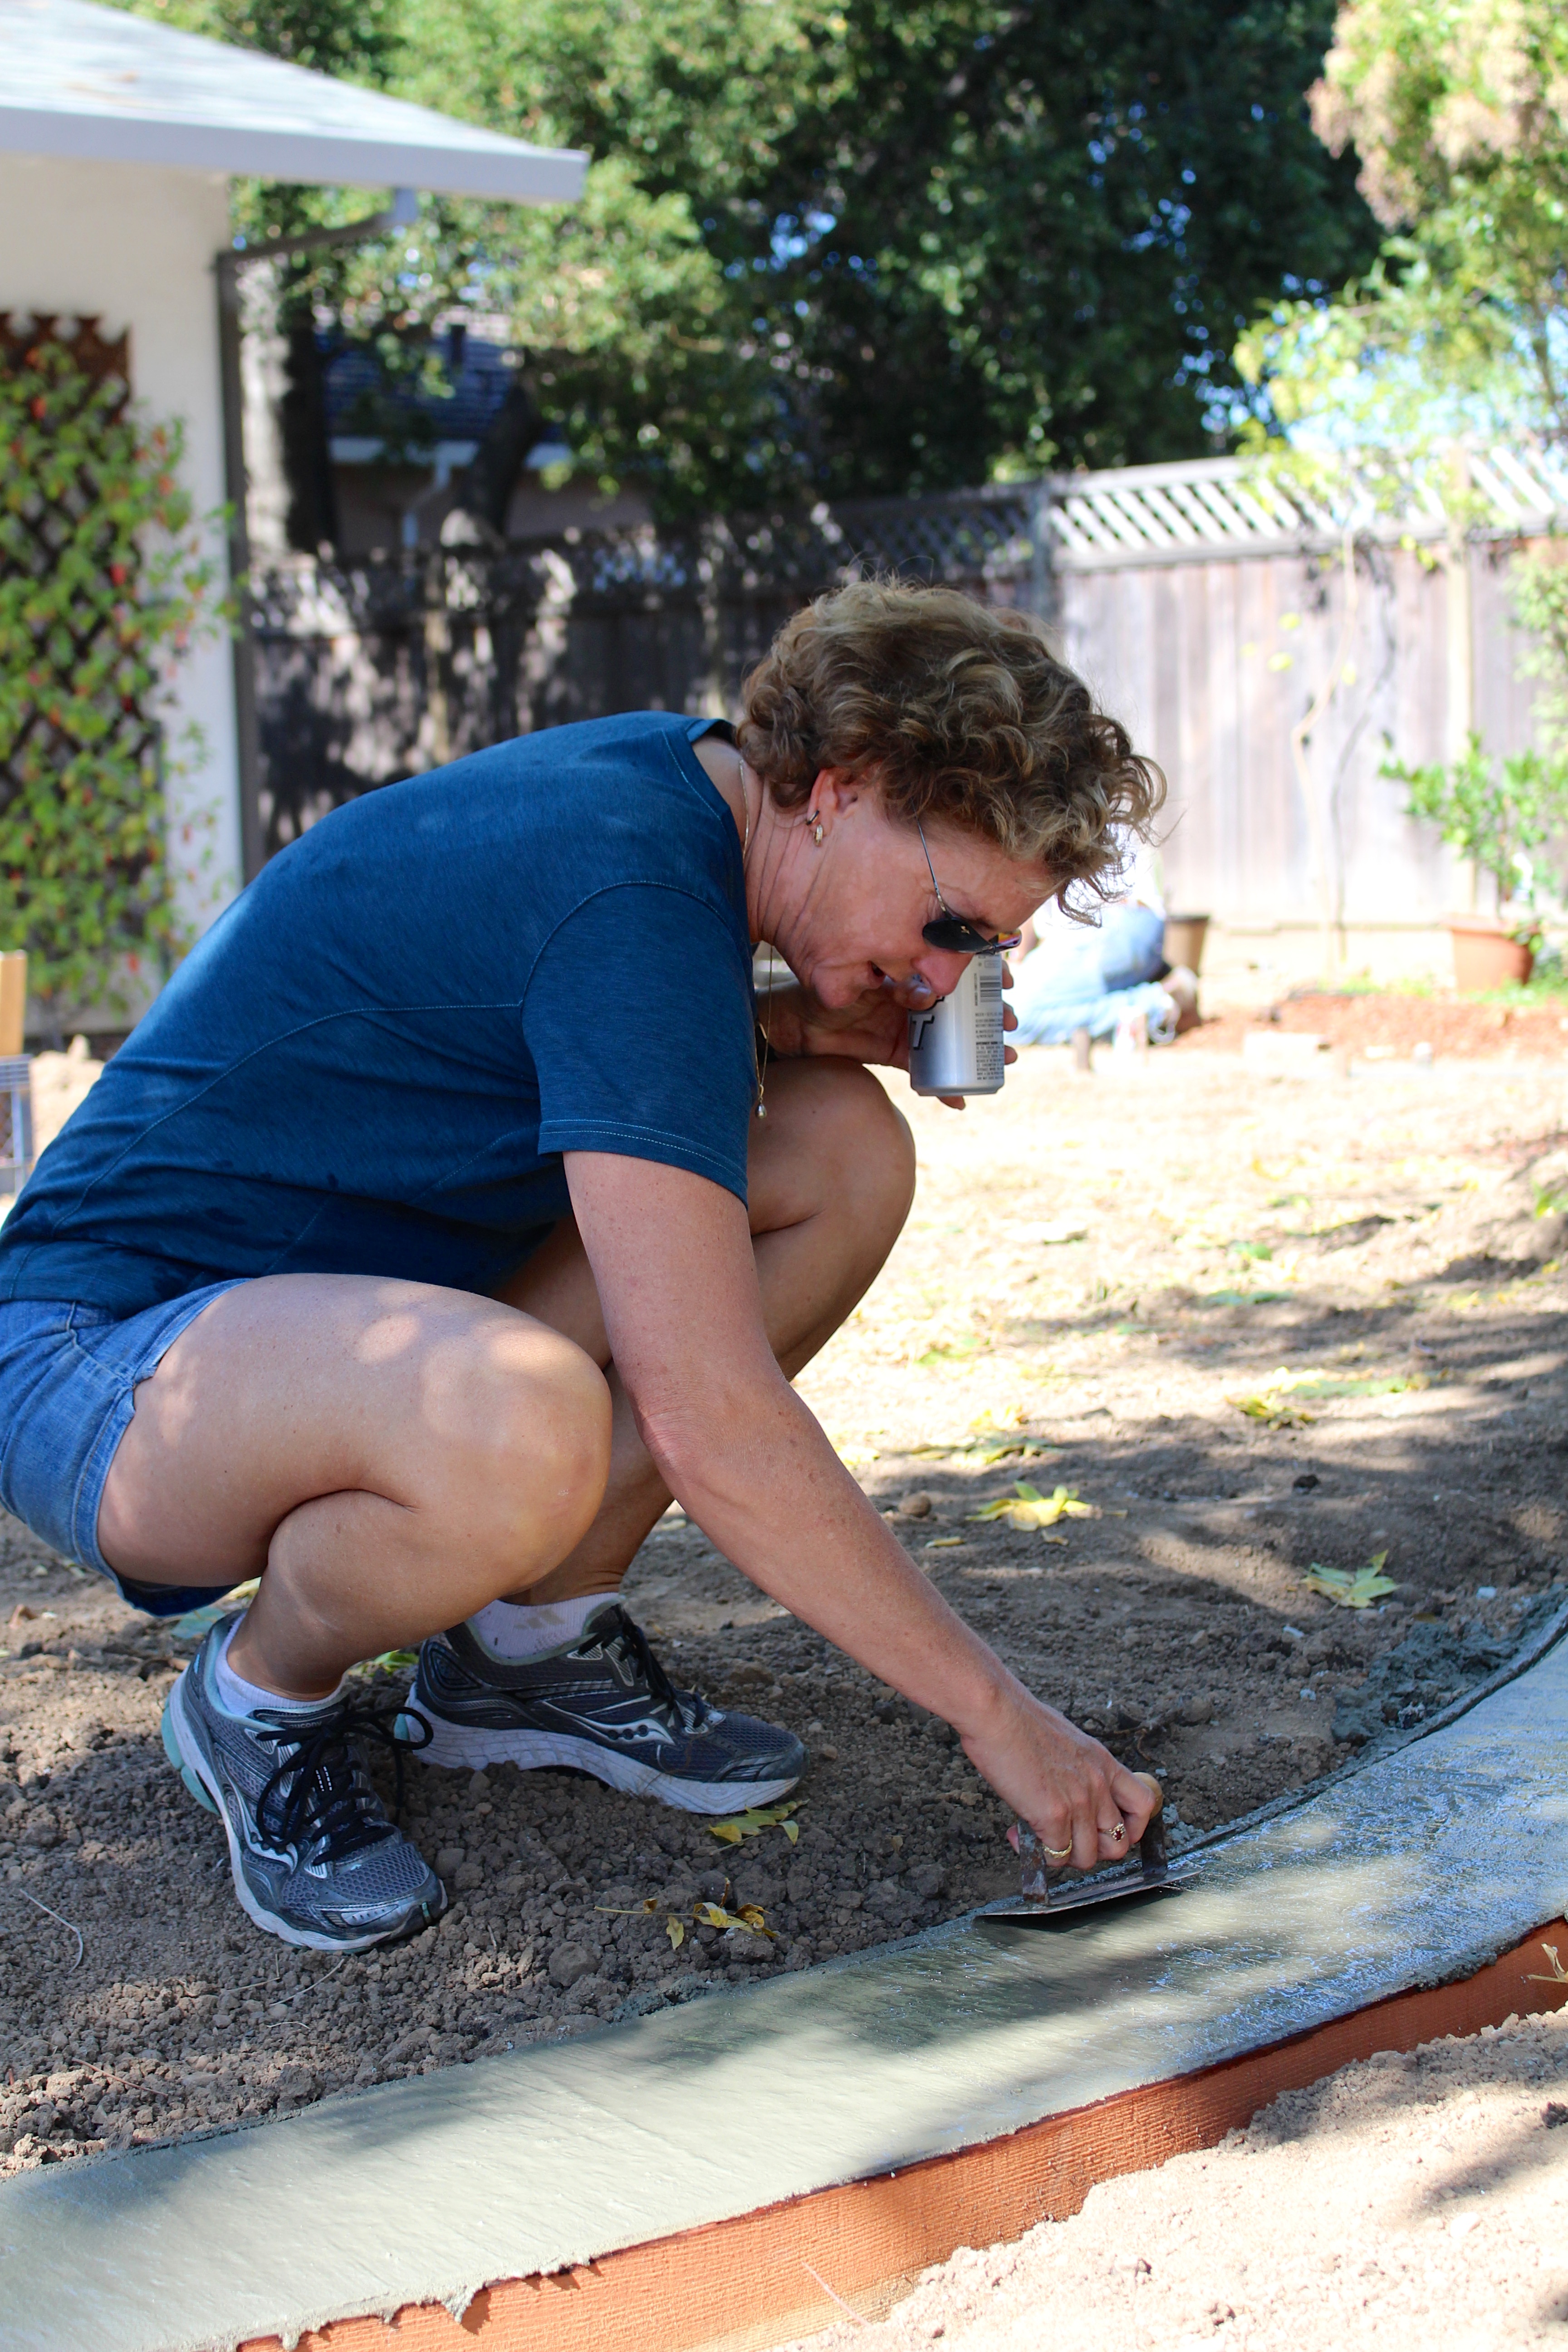
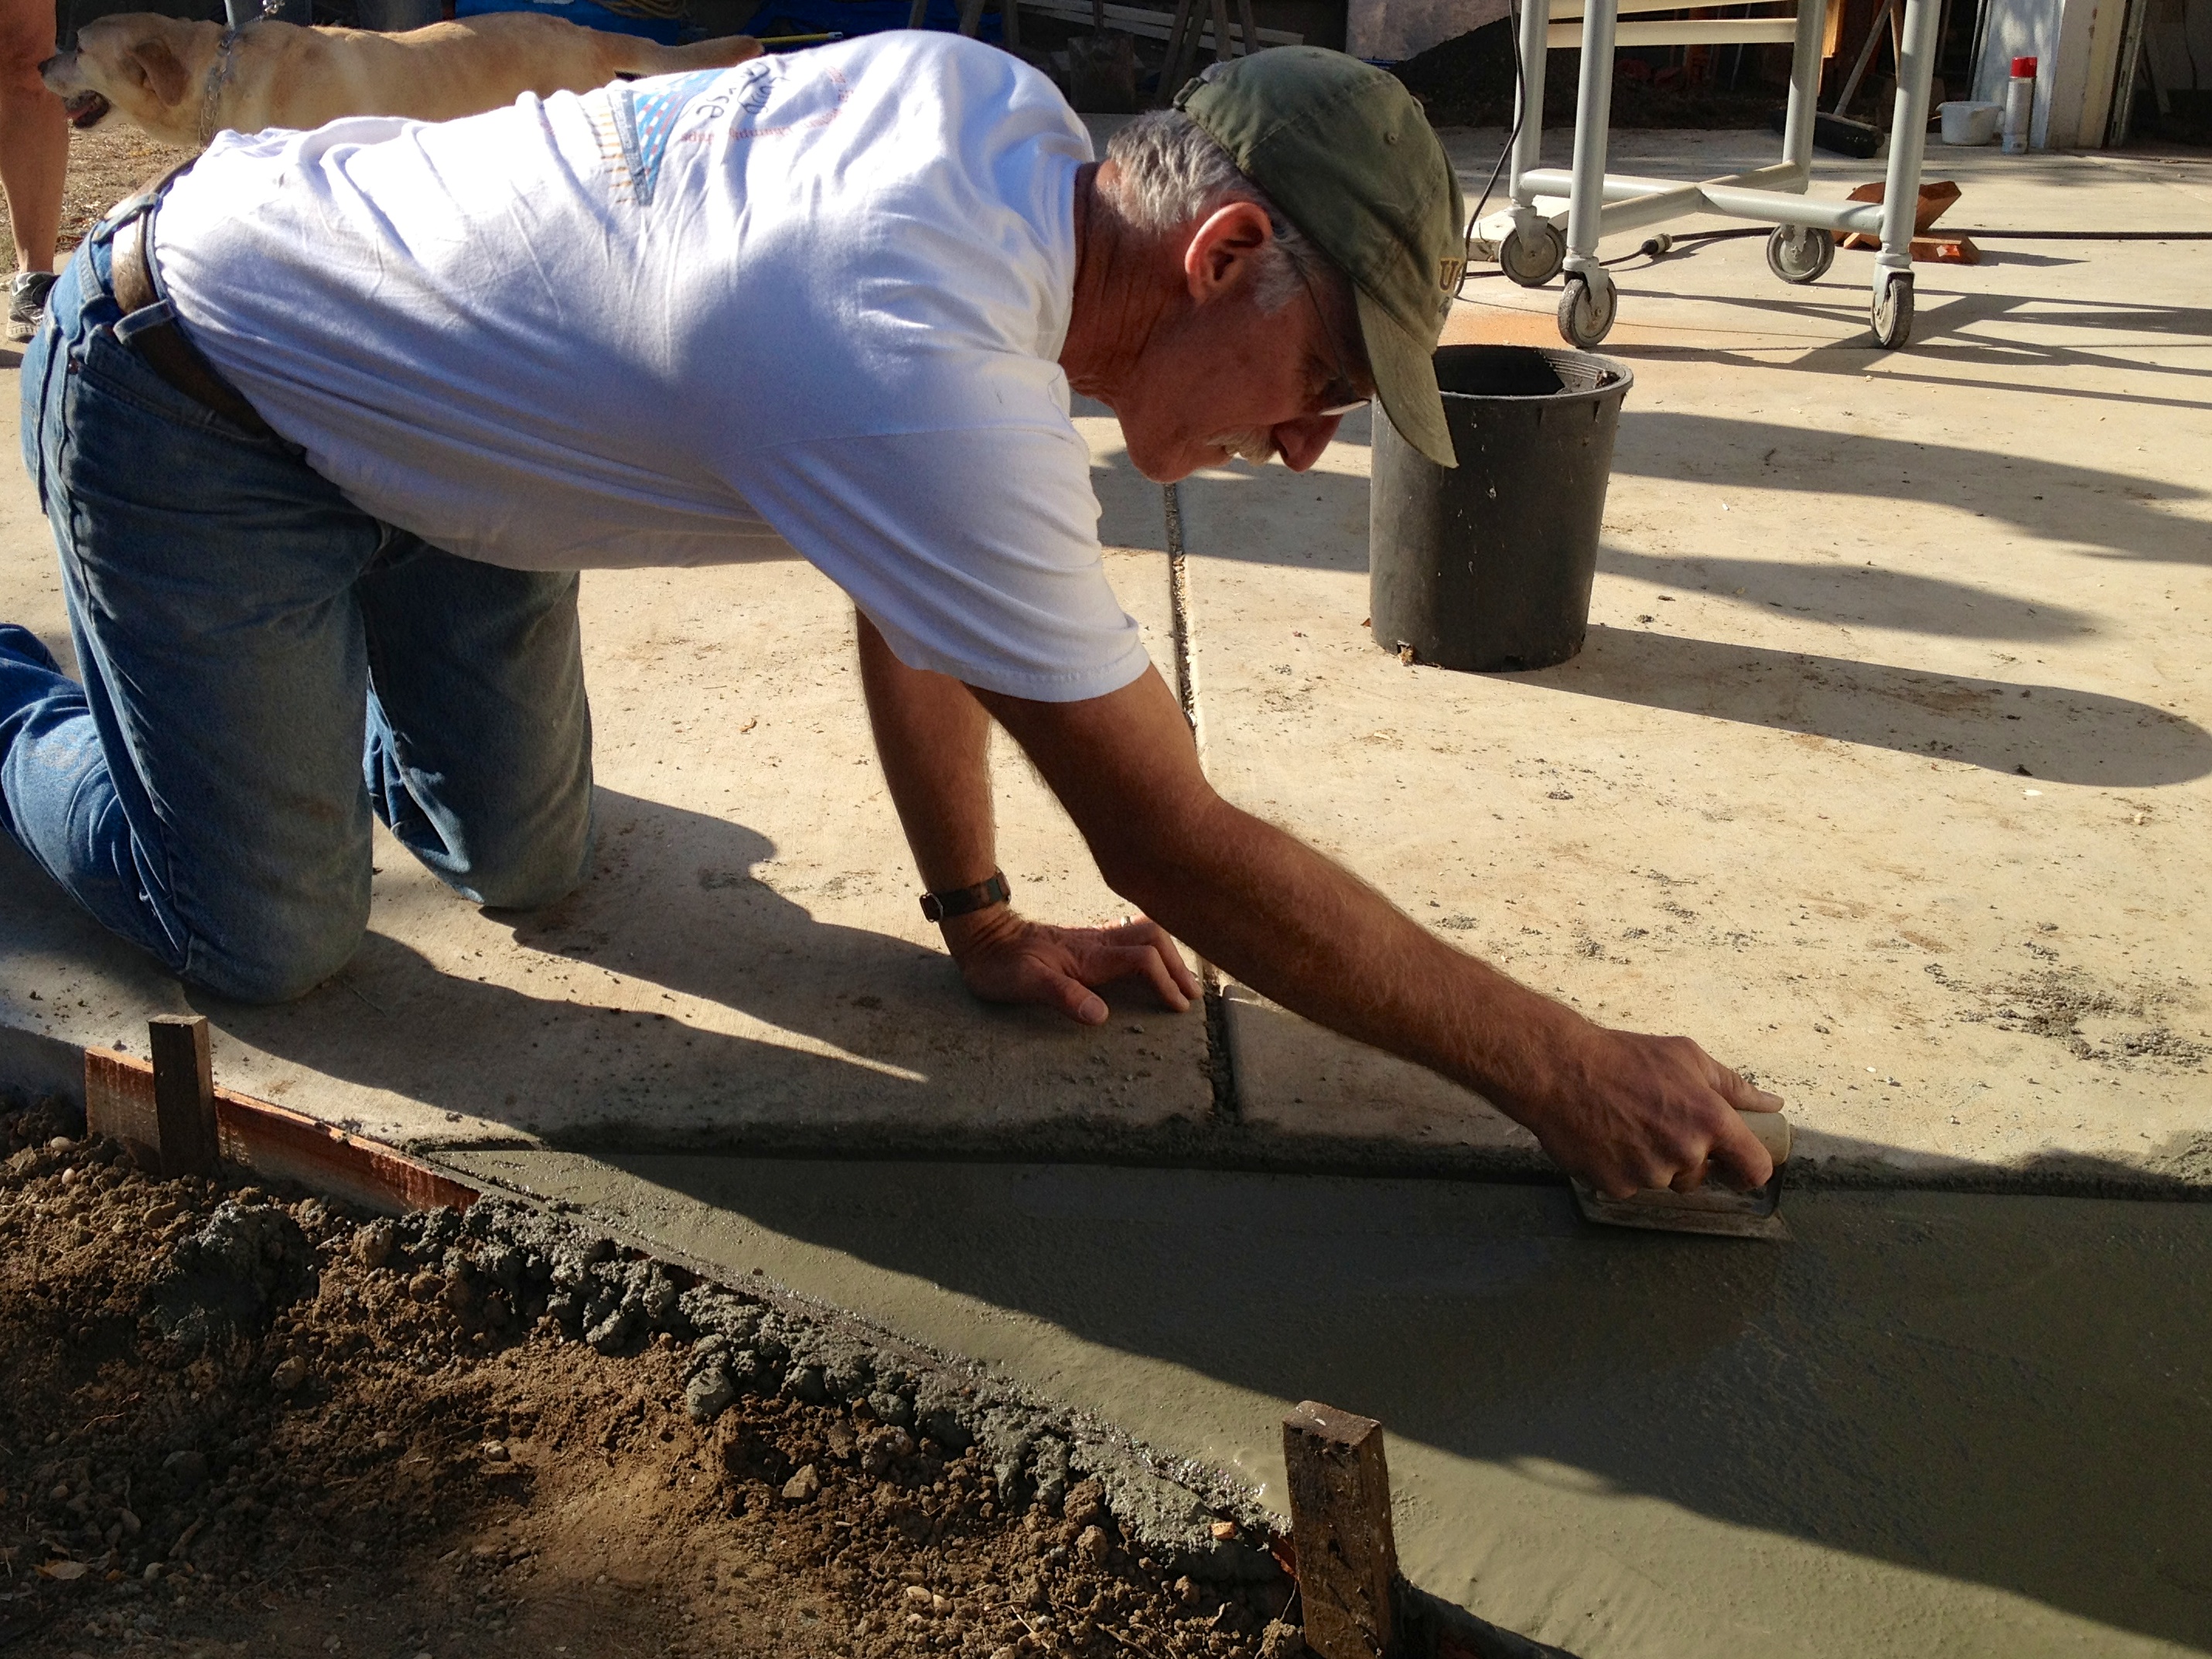
Once the concrete arrived, we had to work like mad to get the concrete into the forms and start troweling the surface before it started to dry. Troweling is a continuous process, but you haven’t to make sure you start early or the concrete sets without you. Knowing we had a lot of concrete to pour, we had all hands on deck that we could recruit.
Matty B

Troweling, troweling, troweling

My grandpa even got in on the action!
Maja
Faja
After the troweling was accomplished (hours and hours later) and the concrete was almost dry, we went back and brushed the concrete with an old broom to give it a little extra texture. And some handprints, because what concrete project is complete without handprints?
Brushing for texture

Handprints for personality
We kept watering down the concrete after all this was done, just to make sure it didn’t dry too fast and crack all over the place. We also went back to the rockery and got a giant pile of steaming, stinky compost so that our future grass would really take off and grow like crazy! And let me tell you, this stuff was rank. I apologize to our neighbors for that smell.

Watering down the concrete. And see the stinky stinky compost?
Pretty concrete and more stinky compost
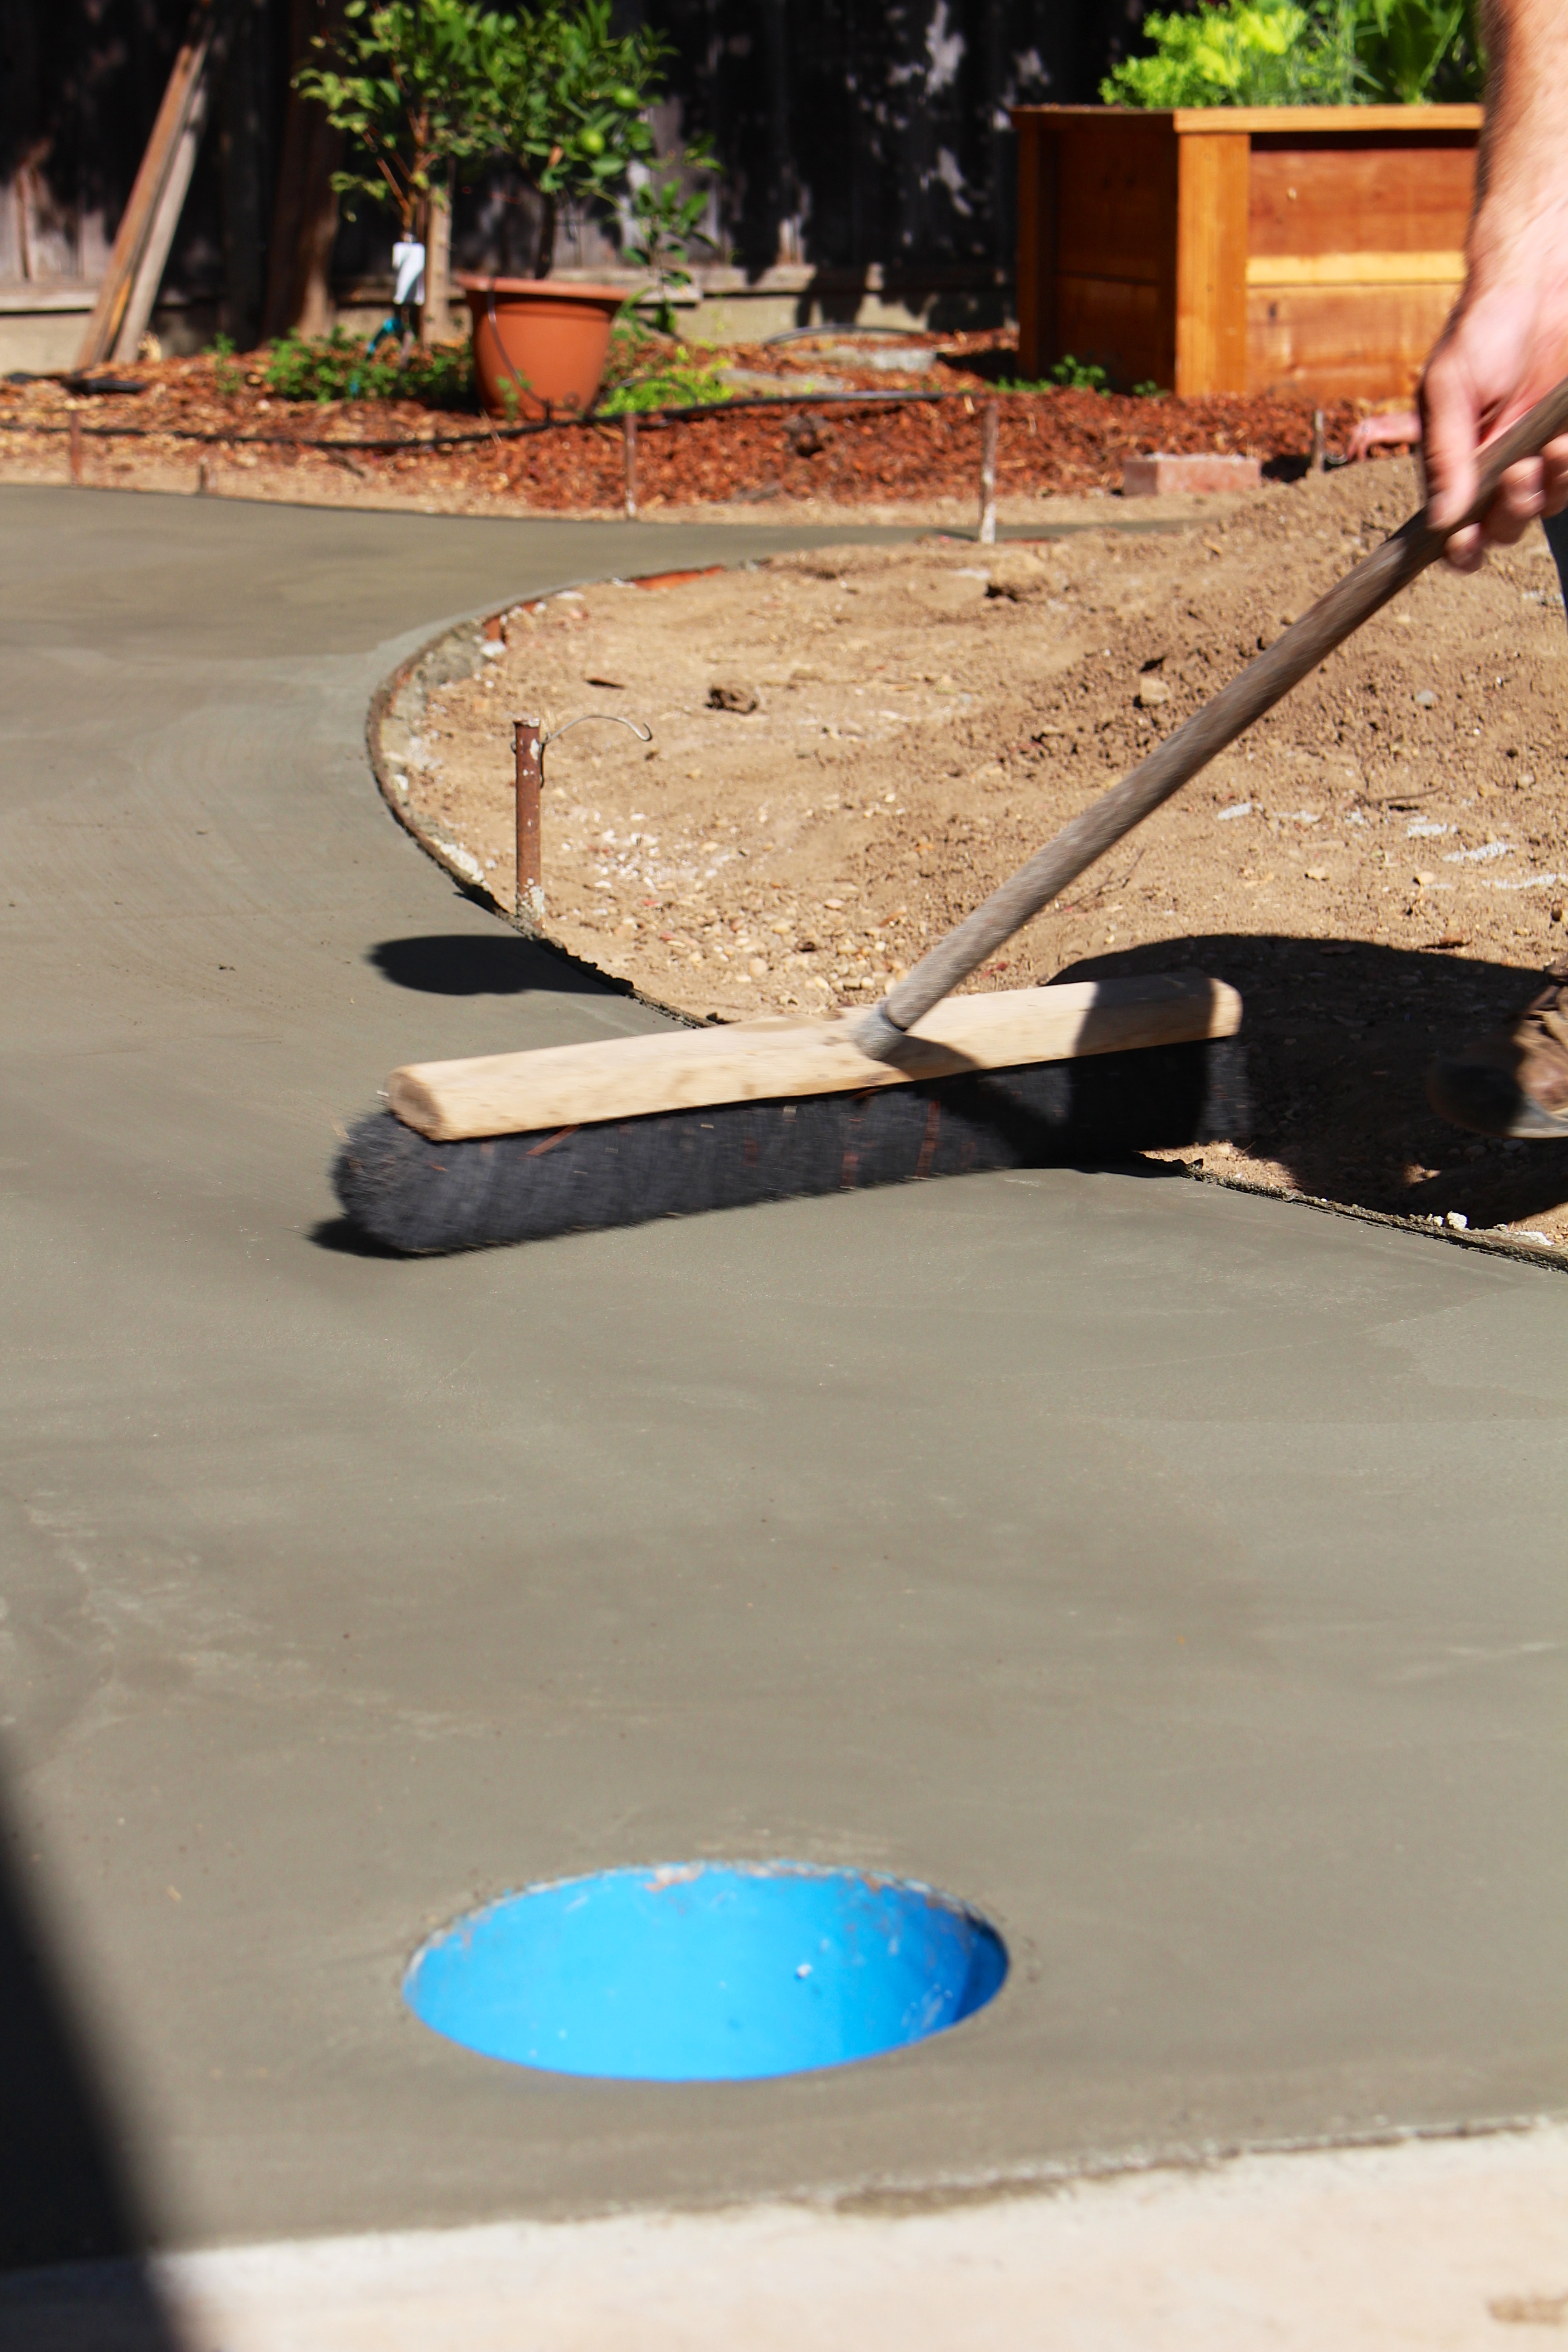
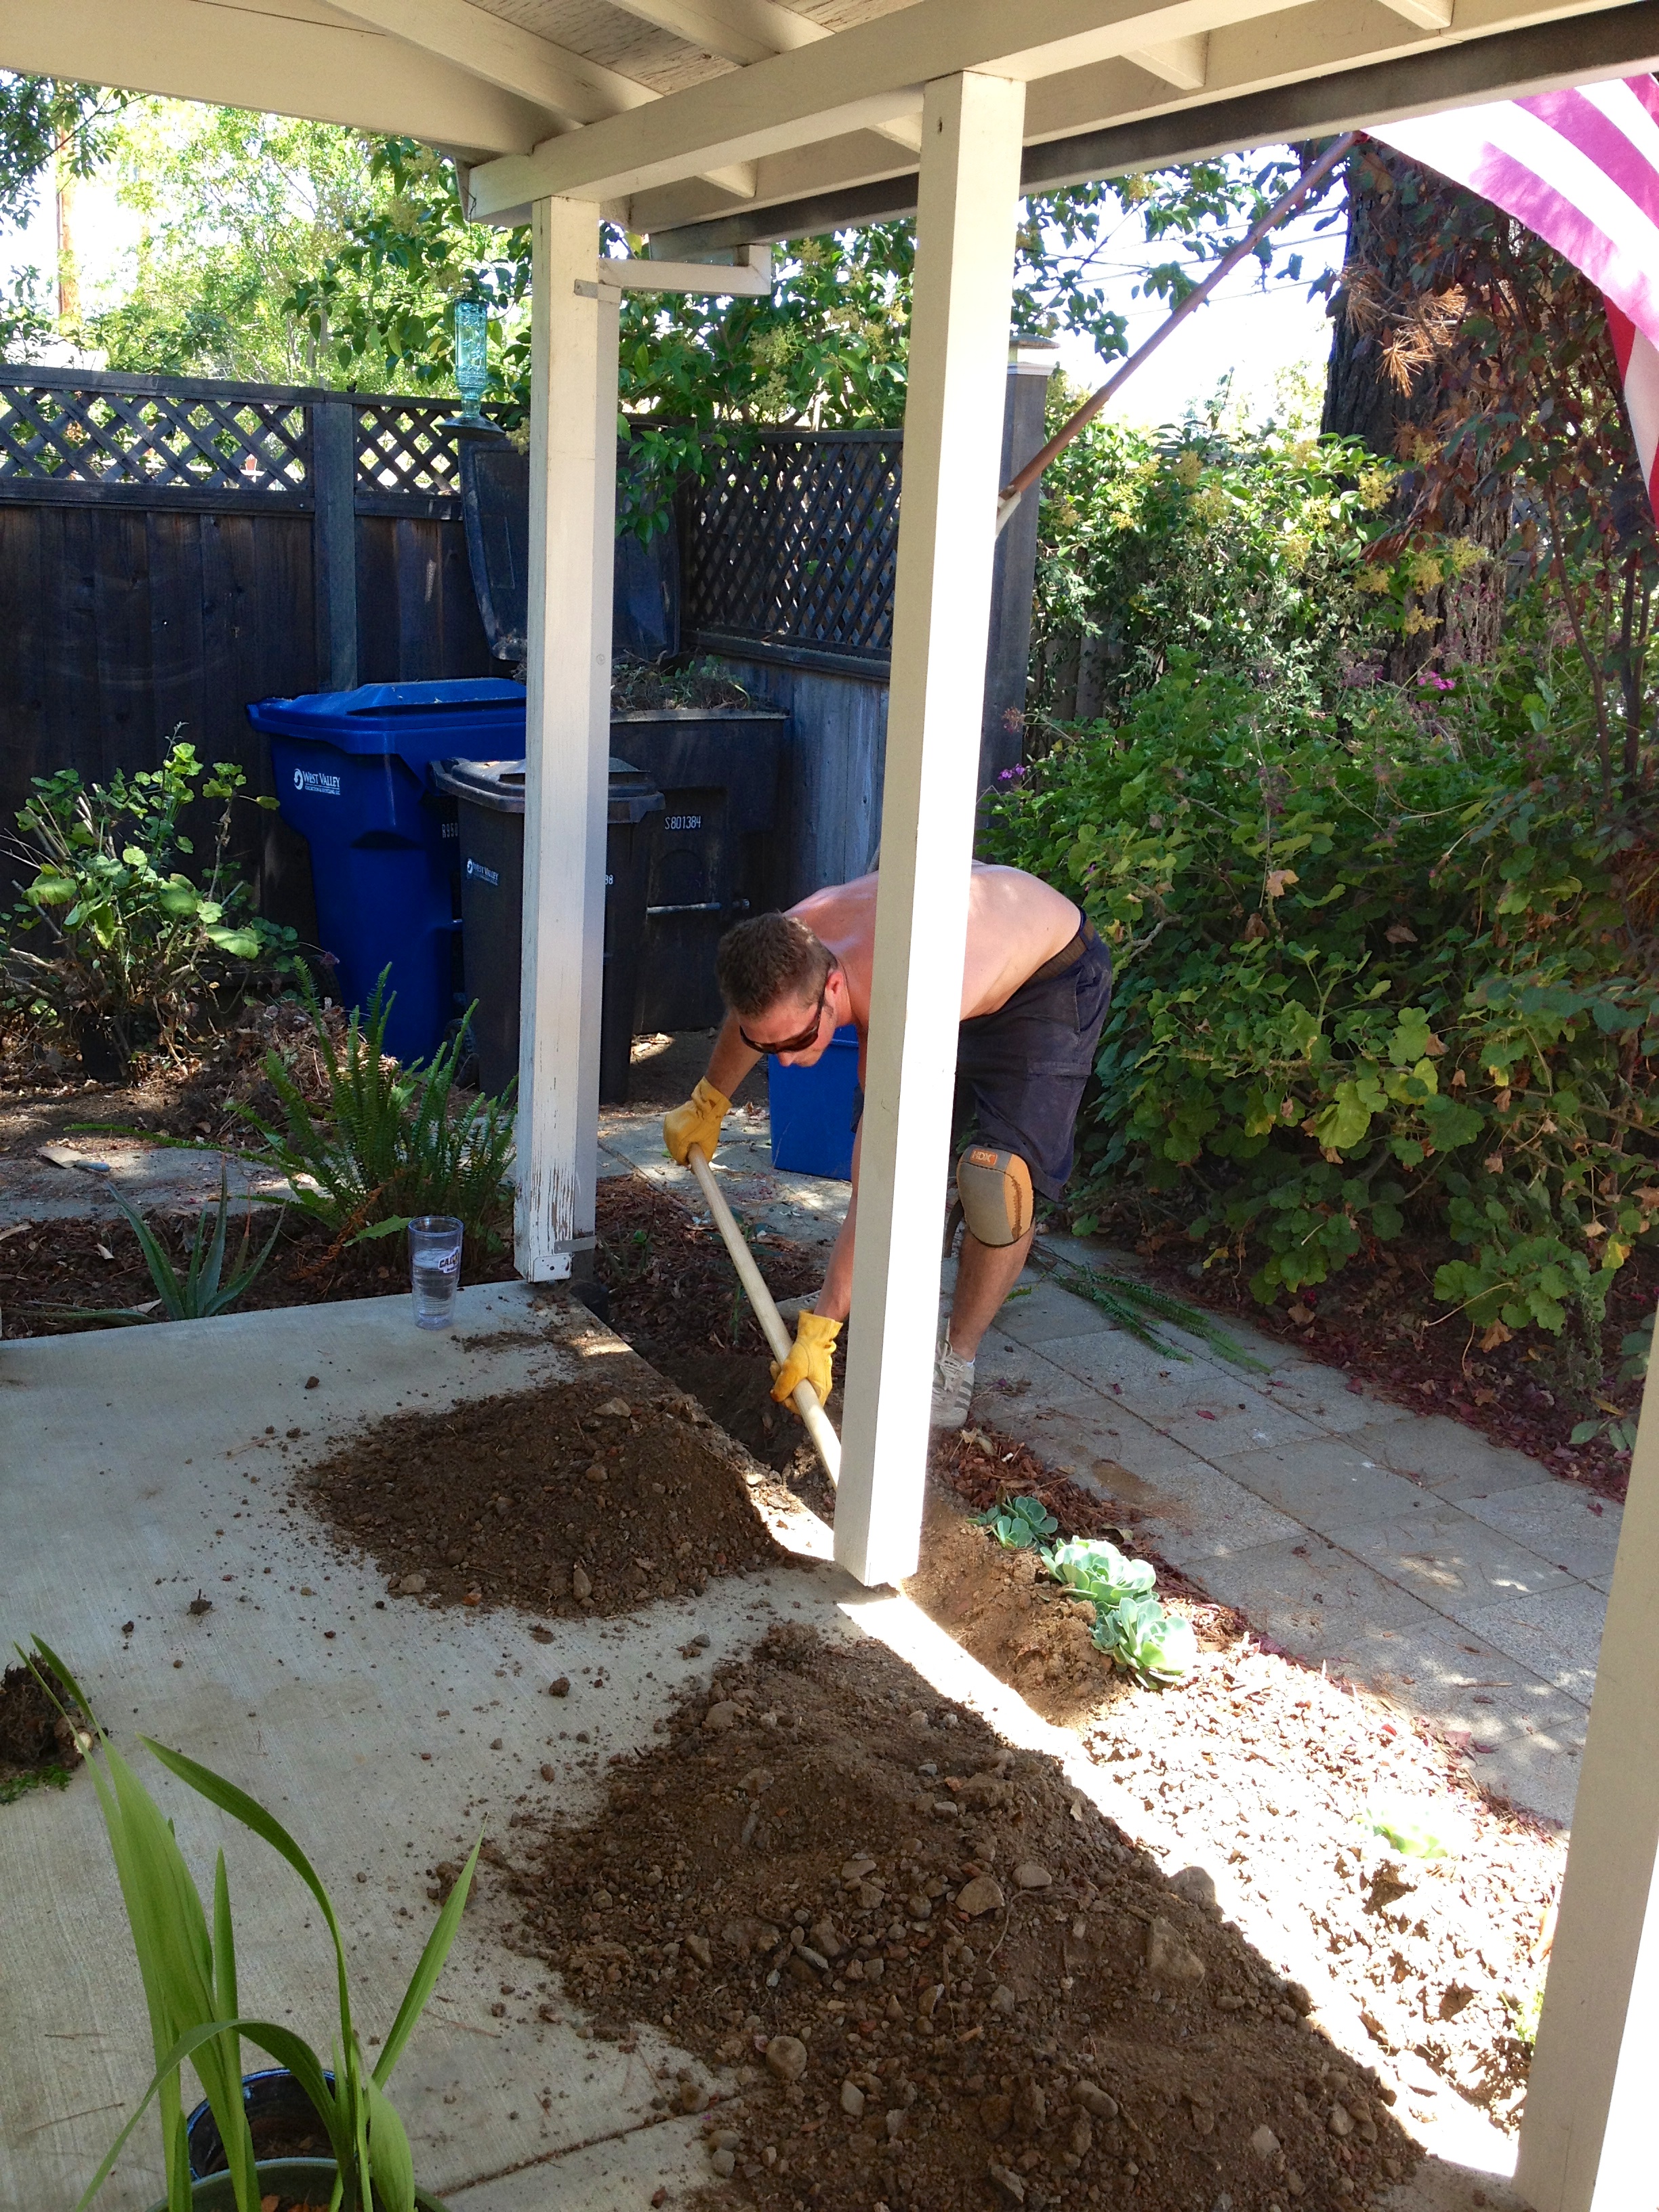
Lastly, before we could roll out the grass, we dug a bunch of trenches and put in sprinklers.
Lots of trenches. Note the rounded concrete corner in the foreground of this photo? I forgot to mention that my dad also cut the square corner into a nice round curve 🙂
Now, with the concrete done, soil tilled and fertilized, and sprinklers in, our lawn prep was officially done. Next up: the lawn!
I have a confession to make: I grew up less than one mile from the Winchester Mystery House and I never made the trek over there for there to see it in person. I guess that’s not entirely true; I saw the house from the street every time I drove to the movies or the mall or to the freeway. But I had never really seen the house, or the grounds, or even the free museum until very recently (this last part is the strangest to me, because I love museums and I love free things…). Sometimes it takes visitors from far away places (like Kankakee, Illinois) to inspire you to be a tourist in your hometown. And when Grandma Webster came all the way out to visit us, the time finally seemed right!

I love visitors. Grandma Webster, come back anytime 🙂
Now a little background on both Grandma Webster’s visit and the Winchester Mystery House. Grandma Webster came out to visit the California family to check in on kids, grandkids, and great grandkids, see all the progress we’ve made on our recent projects, and enjoy a little relaxing family time in the warm California sun. Little did she know, she picked one of the very few weekends that Campbell summers get above 90 degrees. Oh, and did I mention we don’t have air conditioning? I think we were all melting!
Now for the Winchester Mystery House. You can read the extensive history about it here: http://www.winchestermysteryhouse.com/learn.cfm. But allow me to briefly summarize the particular kind of crazy that was Sarah Winchester and her home: Sarah married William Winchester, of the infamous Winchester rifle, and amassed a huge fortune. After the deaths of her daughter and husband, Sarah became incredibly depressed and sought out spiritual help. A medium explained that the Winchester family and fortune were haunted by every soul killed by a Winchester rifle, and that the only way to appease the spirits was to build them a massive house. As long as construction on the house continued, the spirits would leave Sarah and her money alone. I think the medium had ties to a developer in the west and got some cut of all this money! Not the point… Sarah took the medium’s advice to heart: she started building and never stopped.

We took the tours of the house and saw doors open onto solid walls, second story doors open into thin air, staircases that disappear into the ceiling, hidden passages, windows through interior rooms, and all sorts of other things designed to confuse the haunting spirits (Sorry for the lack of personal photos in this post. Our tour guide informed us that some Hollywood bigwig is currently shooting a film here and all interior photography is banned until the film wraps. Sounds fishy to me, but what do I know?).


The tour also took us around the grounds (where photos were permitted and encouraged). When Sarah lived in the house, it was surrounded by orchards and farmland as far as the eye could see. Now, there is a movie theatre complex on one side, a shopping mall on another, and a major freeway just a stone’s throw to the south. Although the Winchester name is mostly associated with rifles (and there is a whole museum dedicated to the different types of rifles), Sarah Winchester made quite a bit of money and a great local name for herself with her orchards.


See the door? That opens into thin air? I don’t make this stuff up…
My favorite part of the tour were the stories about the 1906 earthquake. There was considerable damage to the house, but nothing that couldn’t be rebuilt. And Sarah did love to build! Sarah was in her spirit room during the earthquake, and the house “adjusted” so much during the quake that she was unable to open any of the doors or windows in that room when the shaking stopped (and there were lots of doors and windows!). It took her staff upwards of 12 hours to find where she was in the house (that’s the problem with secret passages, trap doors, and trick staircases) and free her from the room. She wouldn’t let them break any of the windows or doors, for fear of what the spirits would do to her for ruining their home.
So the real question: after all my years of living in San Jose, was it worth the trip? Absolutely! I found the tour fascinating, and the interior of the home is furnished with all period pieces. It’s like stepping back in time and seeing it through Sarah’s eyes. And although it’s not air conditioned, it was significantly cooler than our house and a nice break from the heat. The best part of the tour? The hard hats!
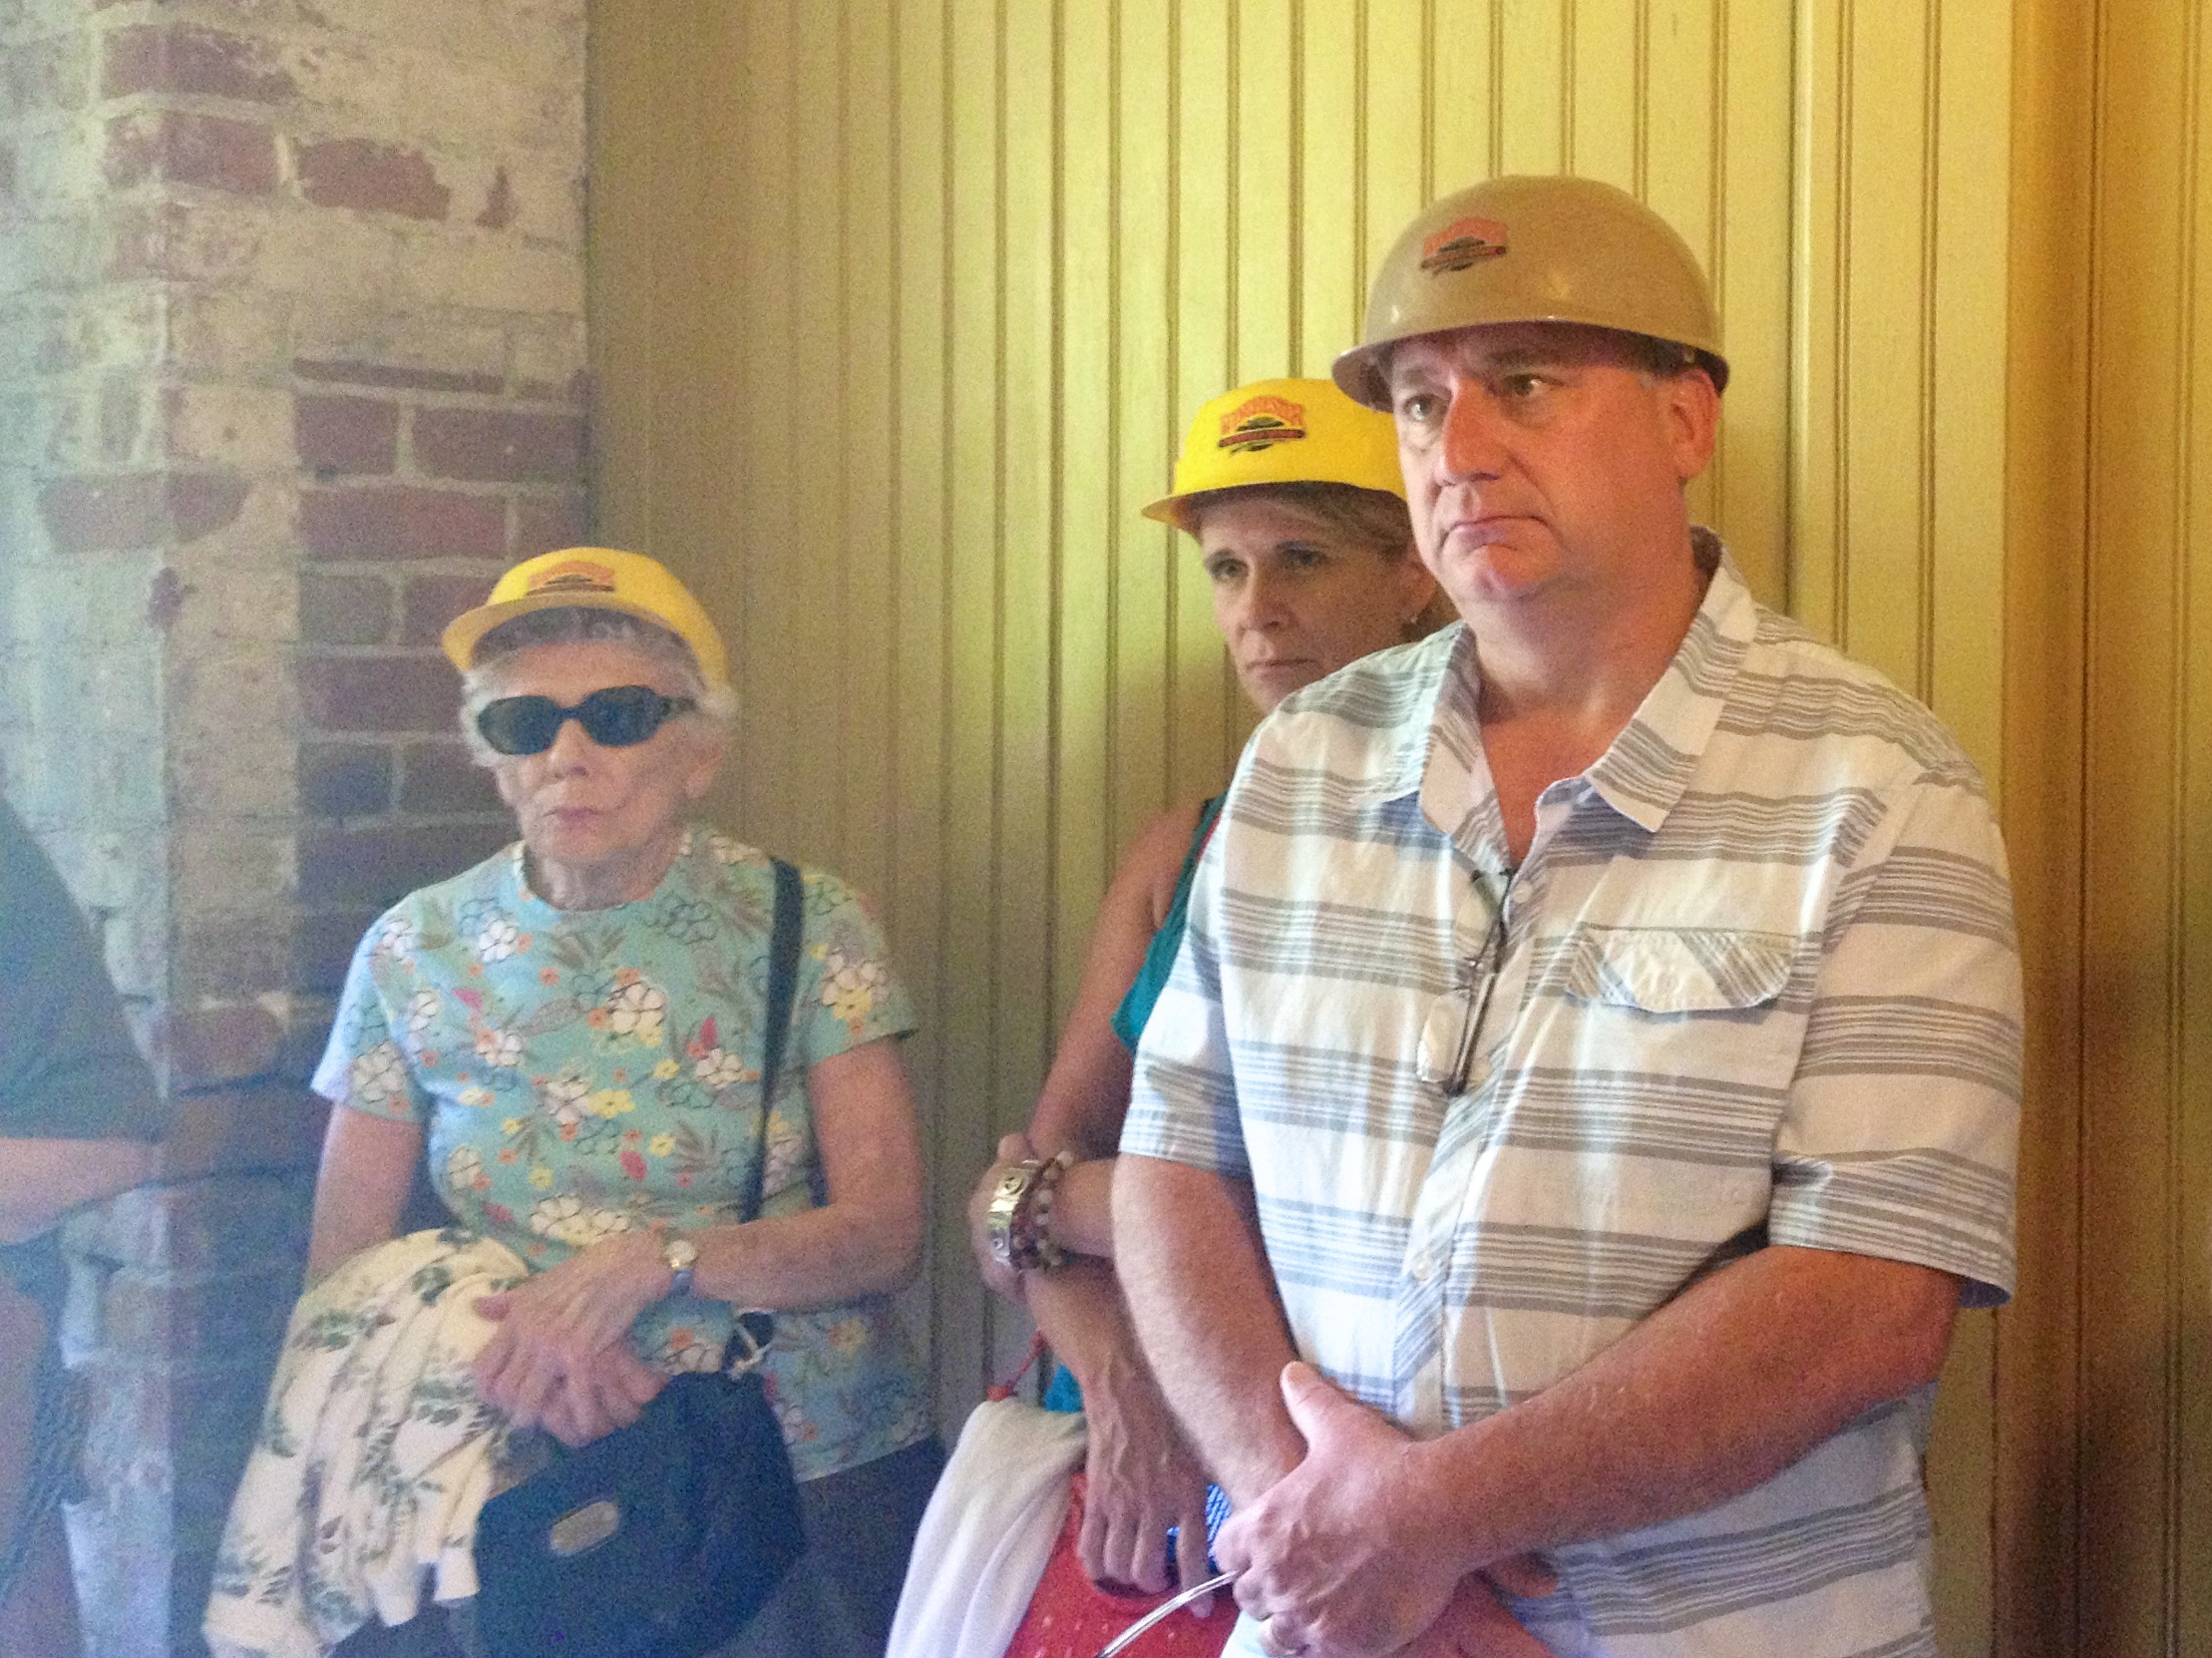
Everyone looks good in a hard hat
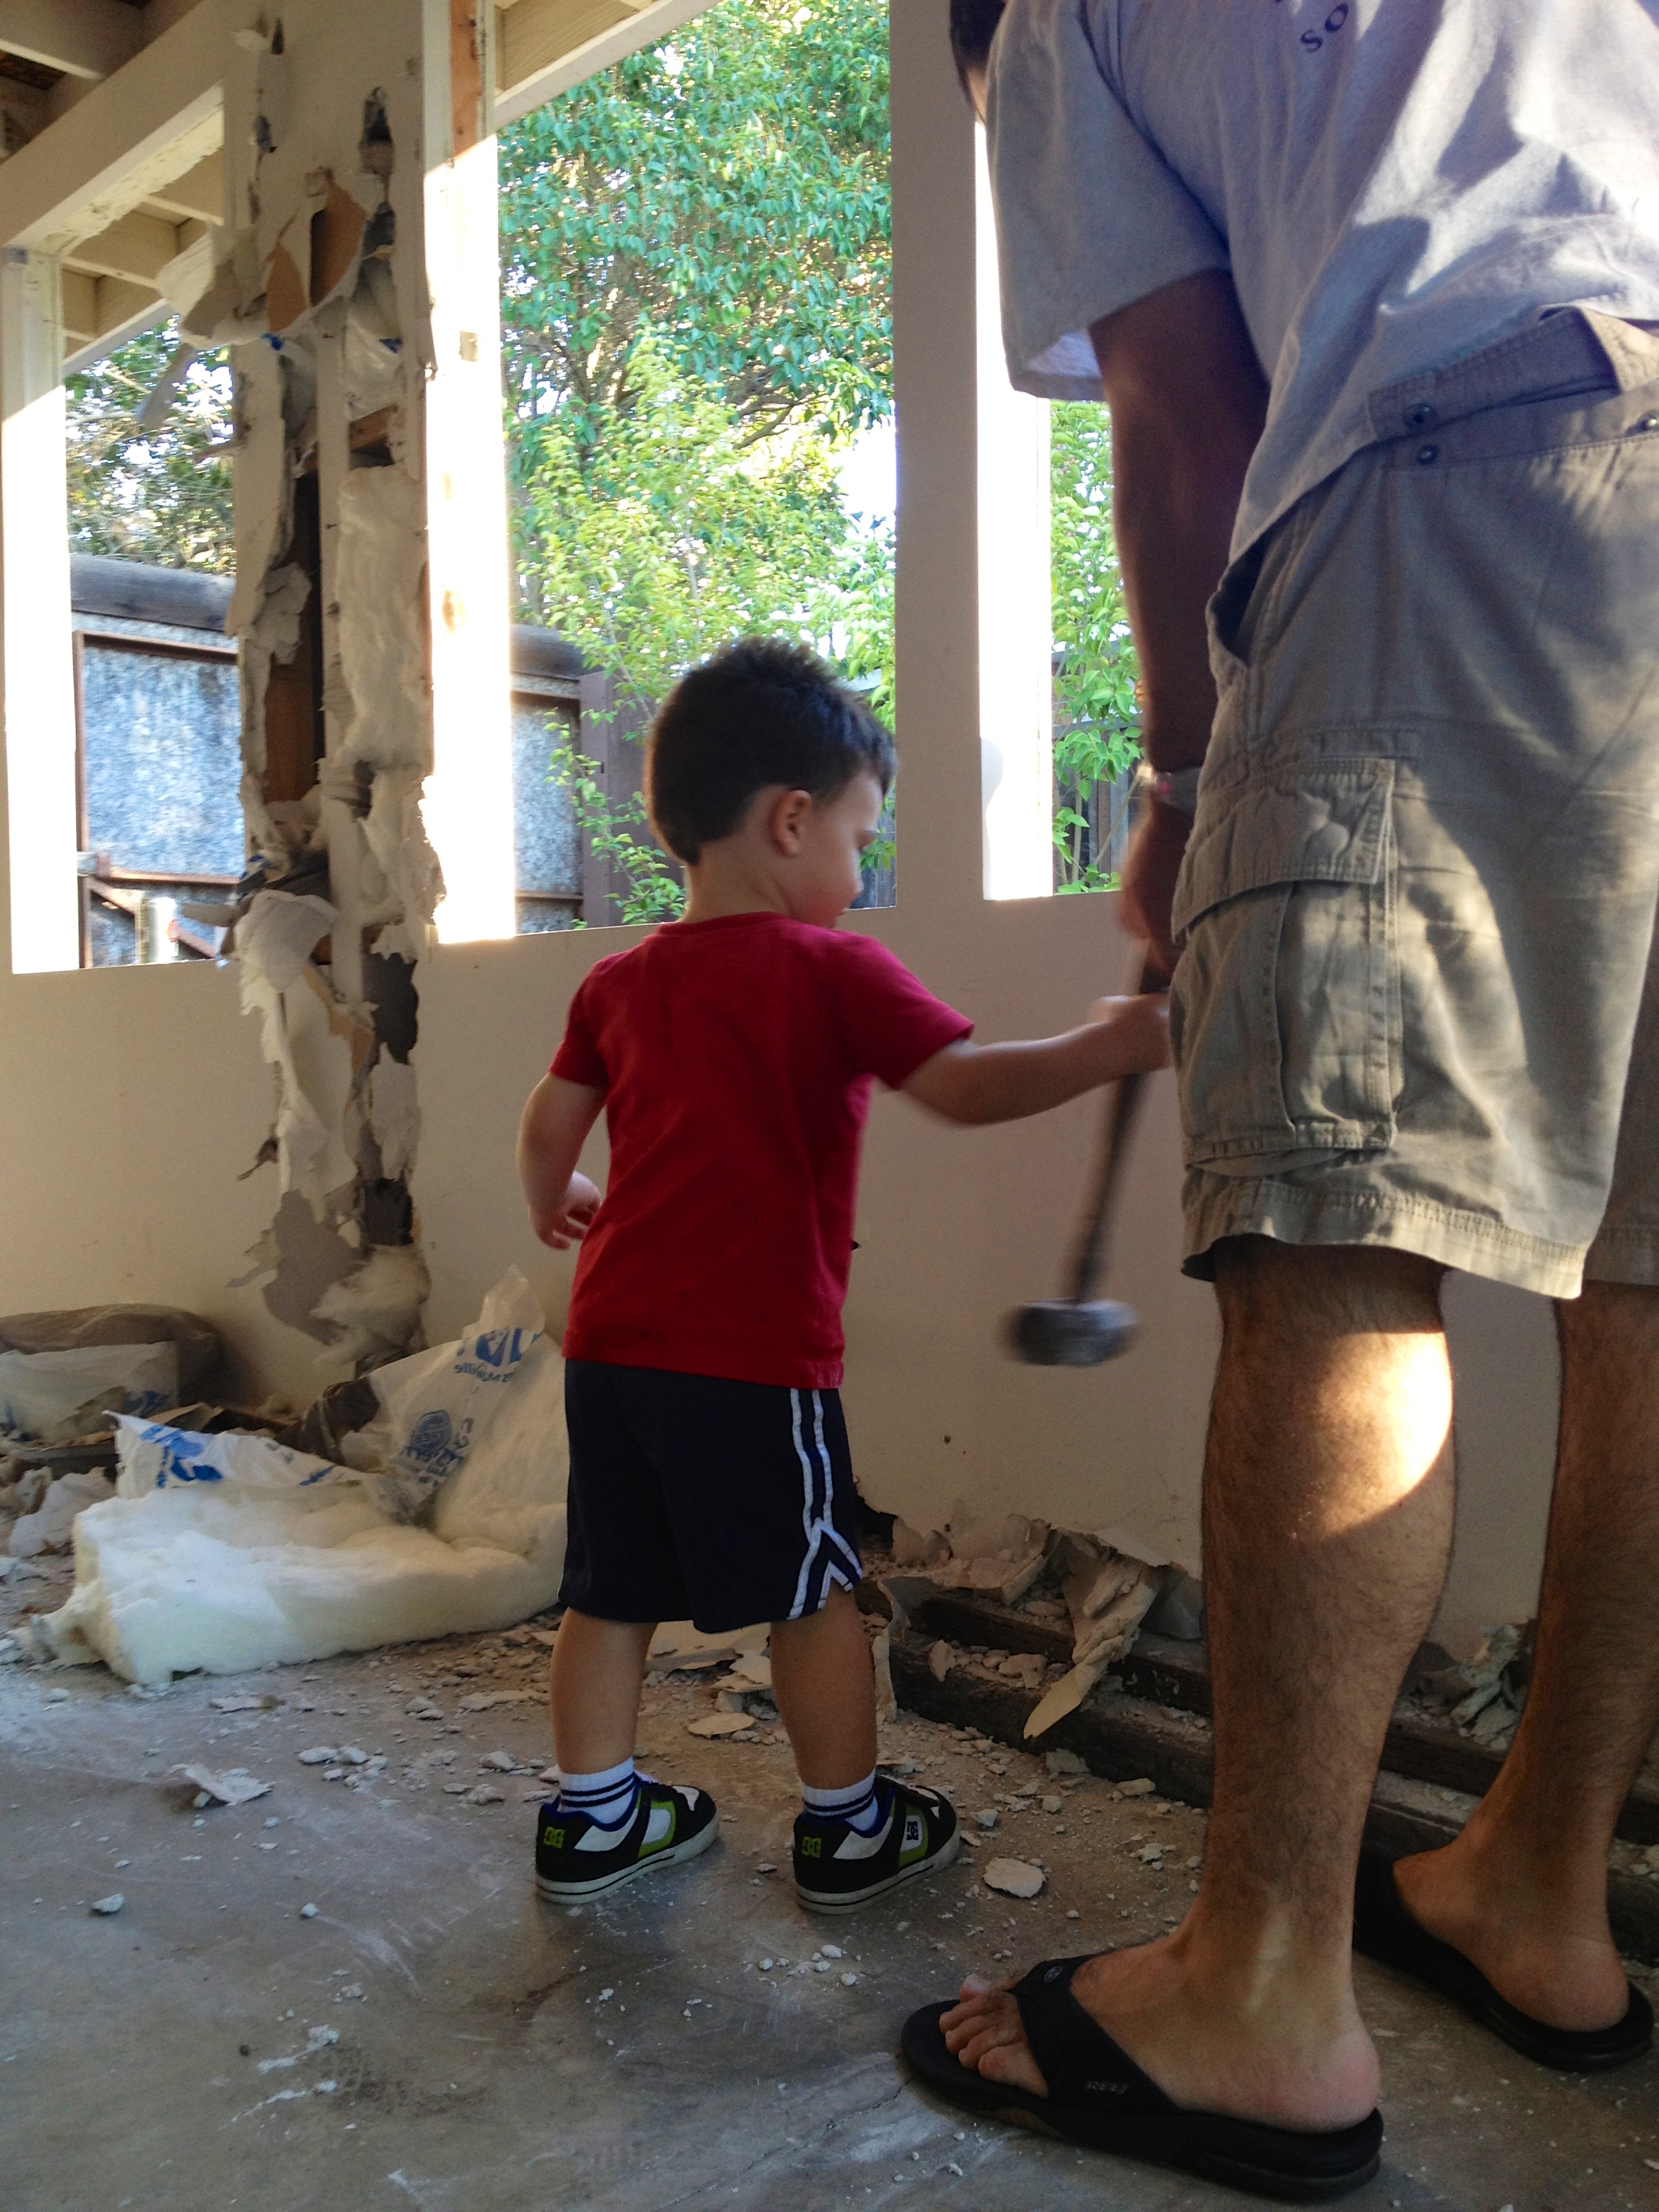
The West Wing had long outlived its glory days as a sort of secondary garage-storage room-workshop. And you know how much boys of all ages love demo work… we get them started real young in this family. Here is Will’s first attempt with a sledgehammer. Dani, please don’t blame me when Will starts hammering holes in the walls of your beautiful new home… it was Stephen’s idea!
But I digress. If you recall from the months and months ago when I first told you how much I loathed the West Wing (more on that here), and the fact that the structure is not a wing and is not on the west side of the house, you can only imagine how excited I was that demo weekend had finally arrived. I was even more excited than my mom is in this picture:

There aren’t any photos to show my excitement, but that captures it quite well. Here are some photos of the demo work, and a step-by-step guide on how to demolish the West Wing at your house. Oh, wait, you don’t have one? Consider yourself lucky!
Step 1: Remove any existing windows and doors (this is probably the least fun part). Then take your first whack at the drywall with a crowbar.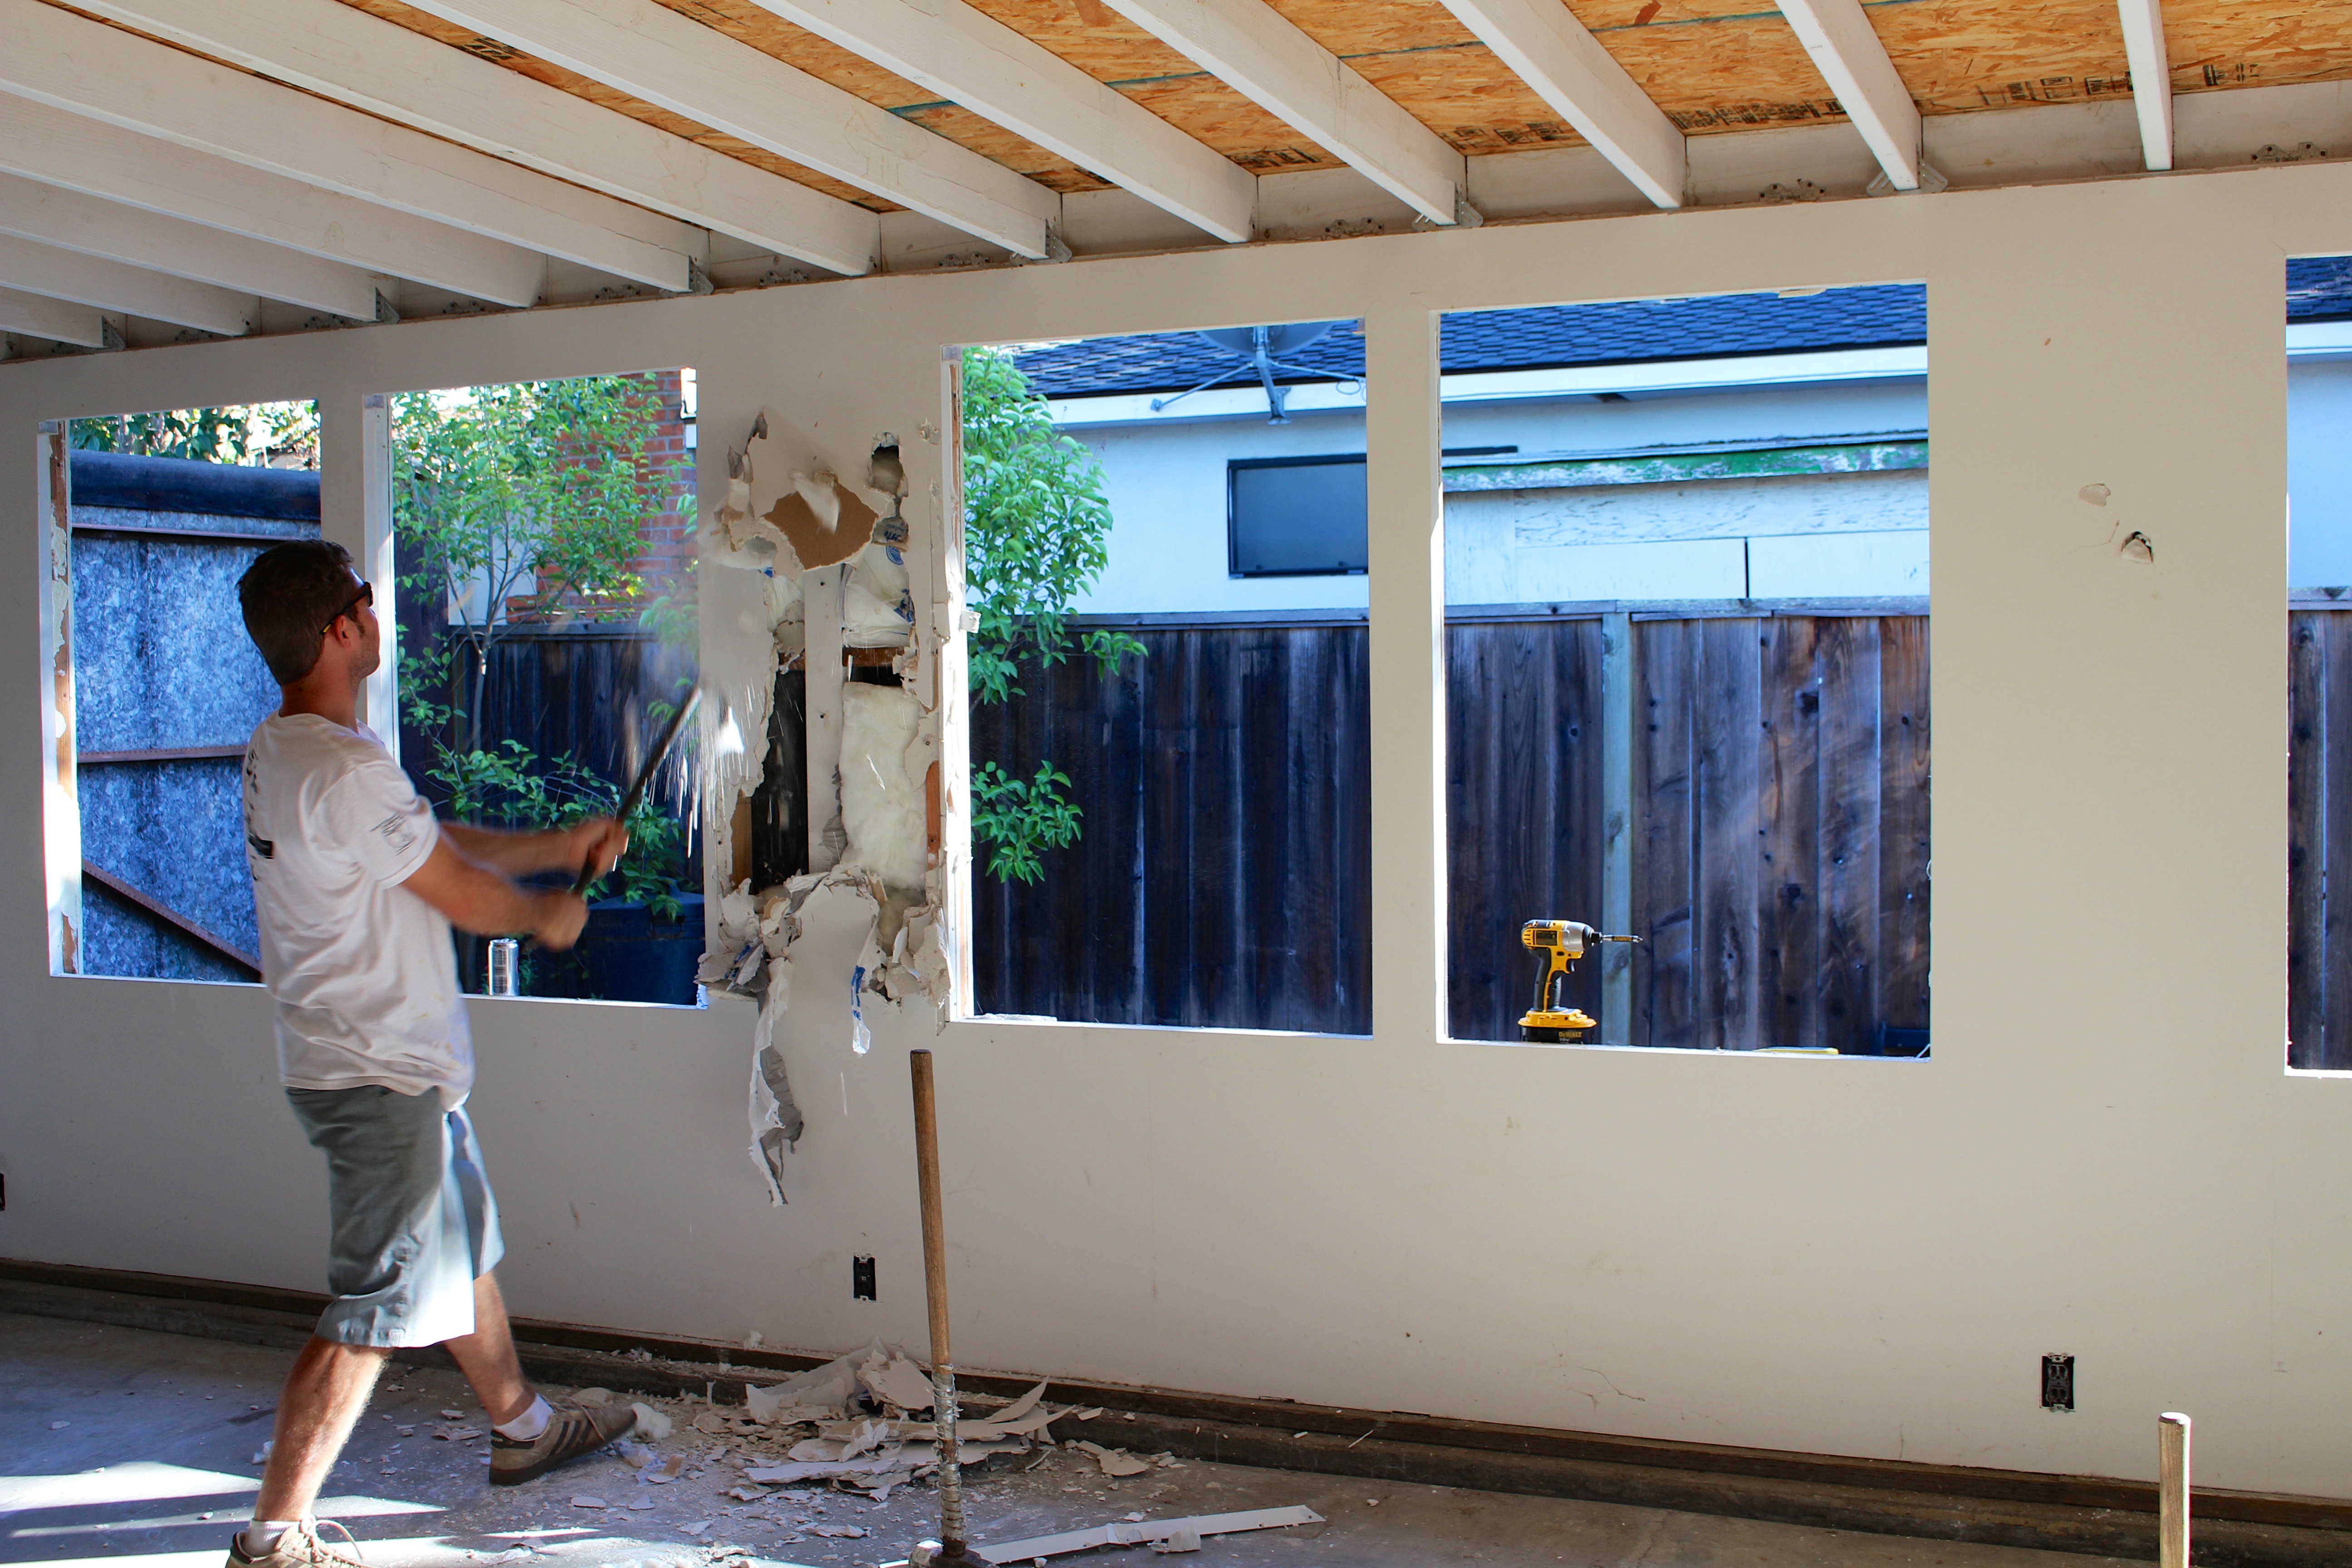
Step 2: Realize that you don’t have to remove all that drywall, only the parts concealing electrical work that you do have to remove. Then stand around and make a plan.
Step 3: Raise the roof! Actually, just remove it entirely. No photos of this step, sadly. I think my dad did this during the week without us? Or the roof removal process wasn’t very photogenic. It was a long time ago, and I don’t remember…
Step 4: Detach to-be-demolished walls from to-remain walls.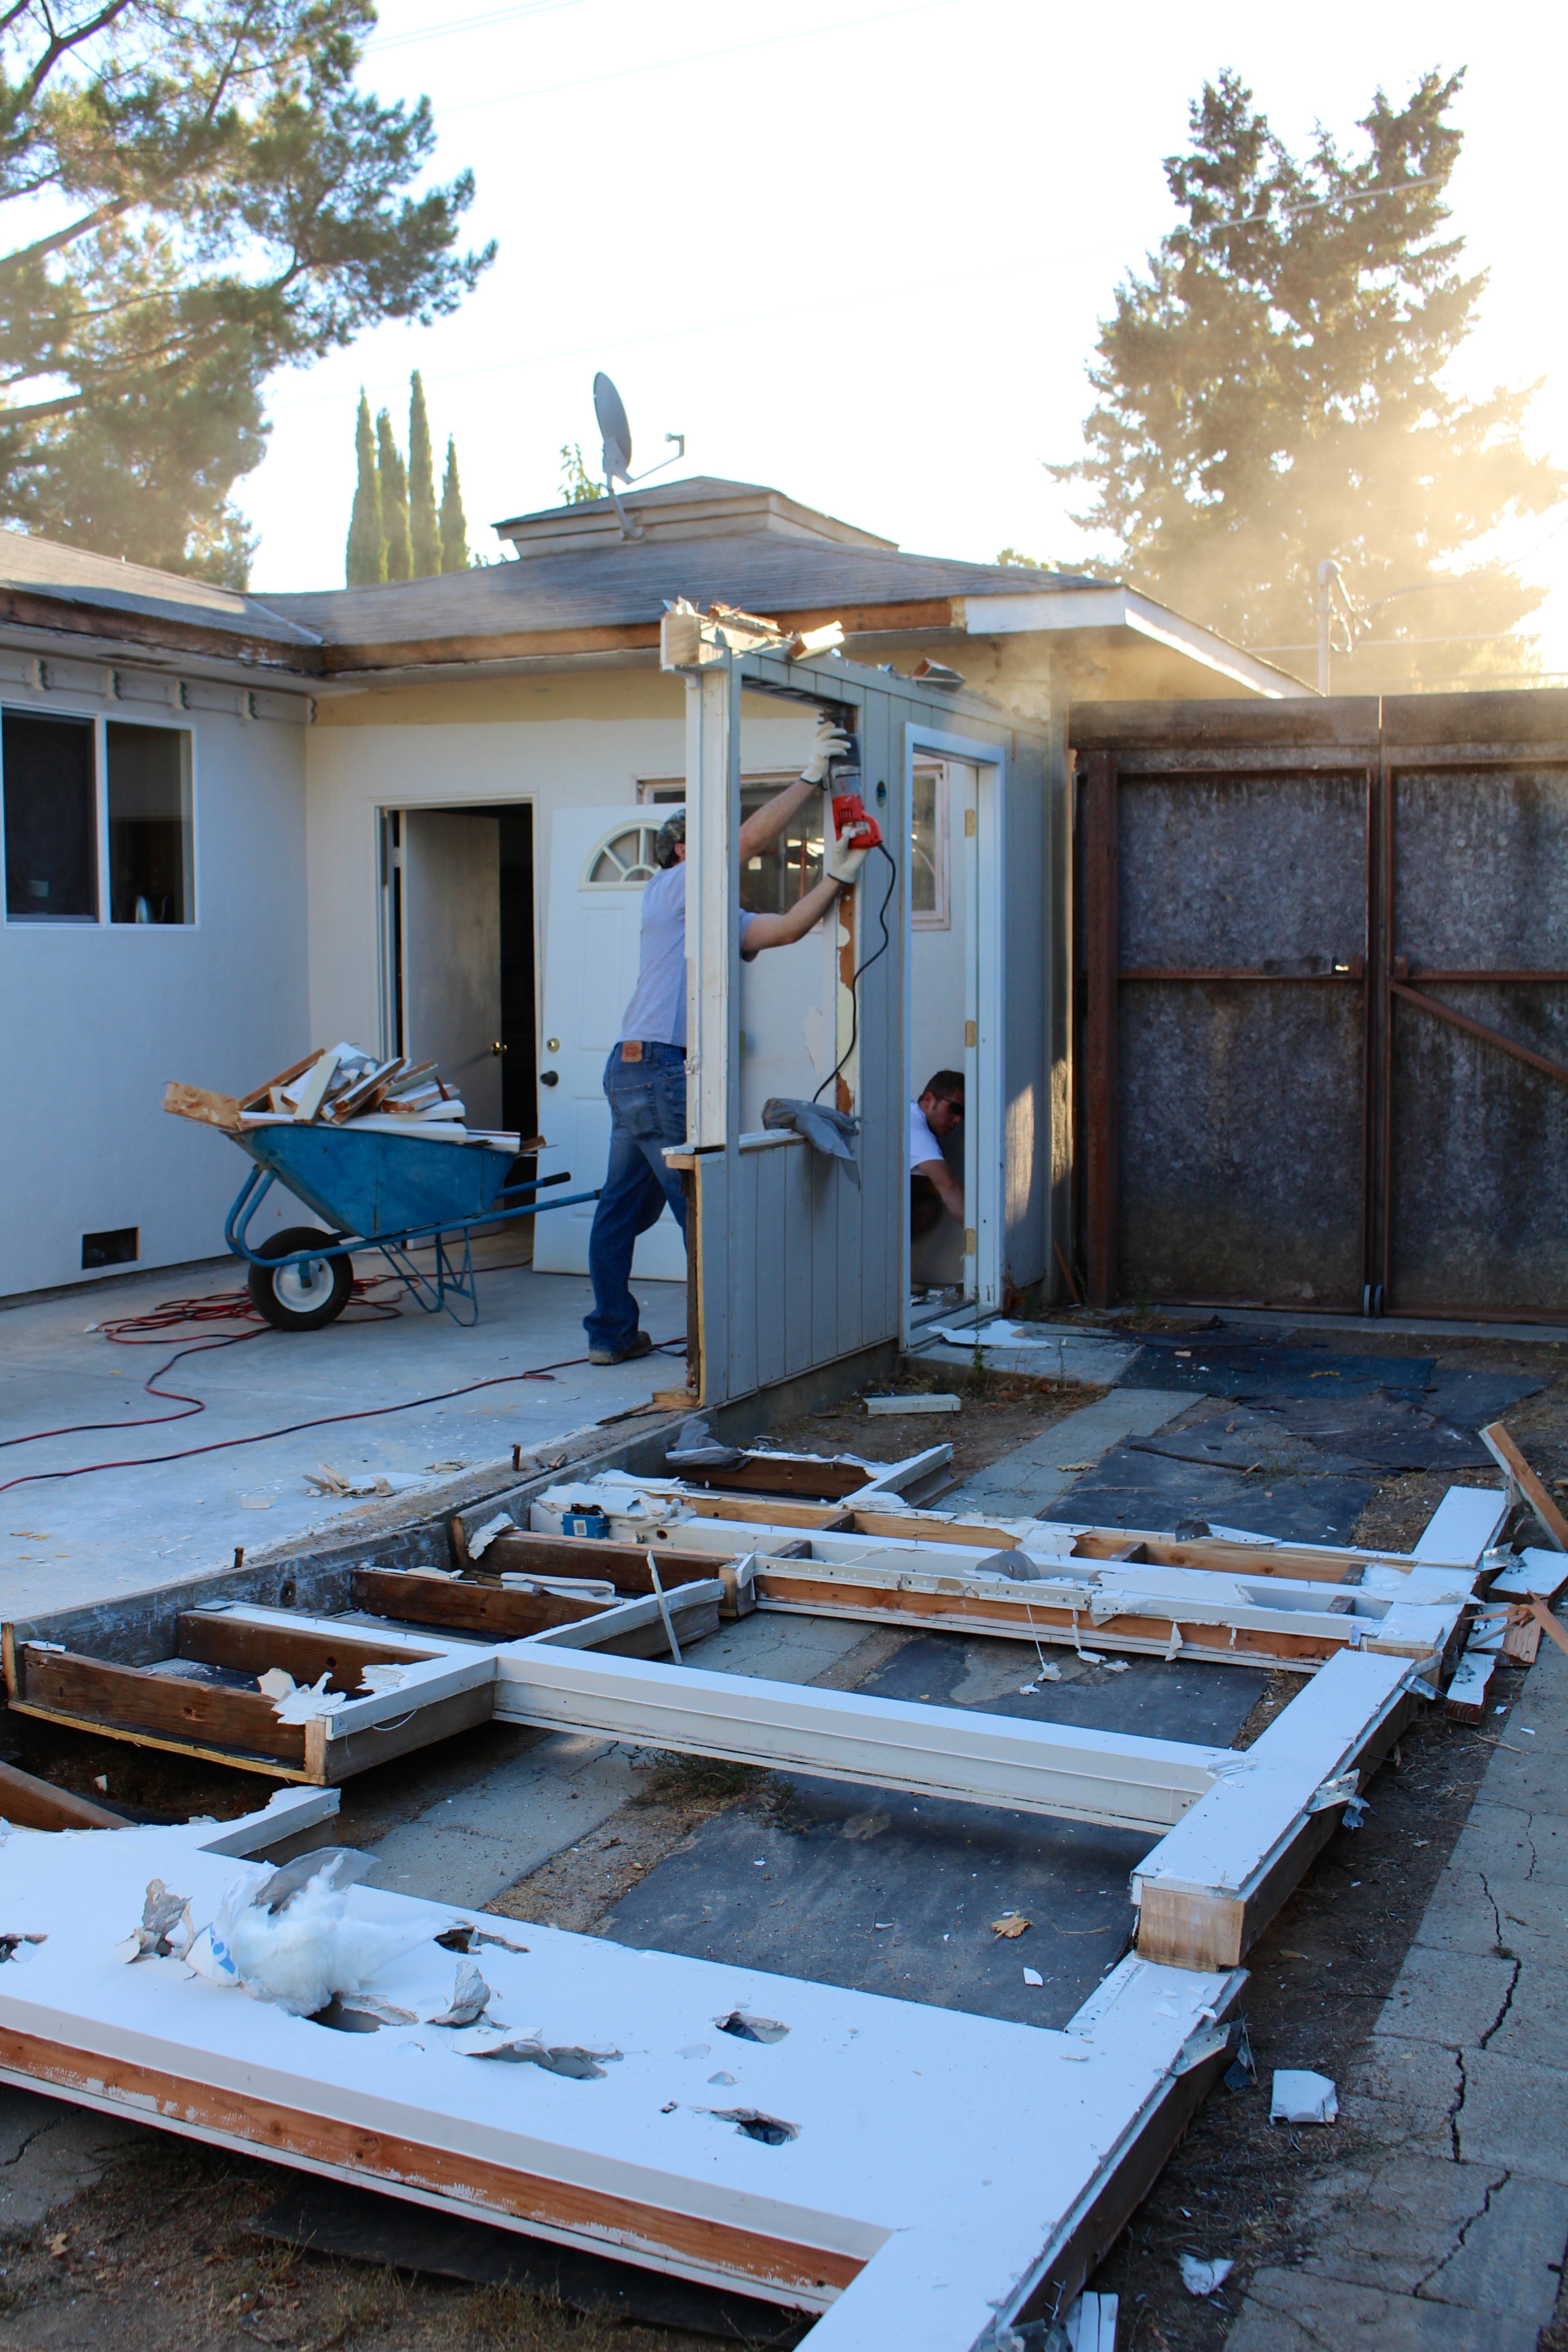
Step 5: Push walls over!!! Note: my steps may be slightly out of order. Don’t worry about it…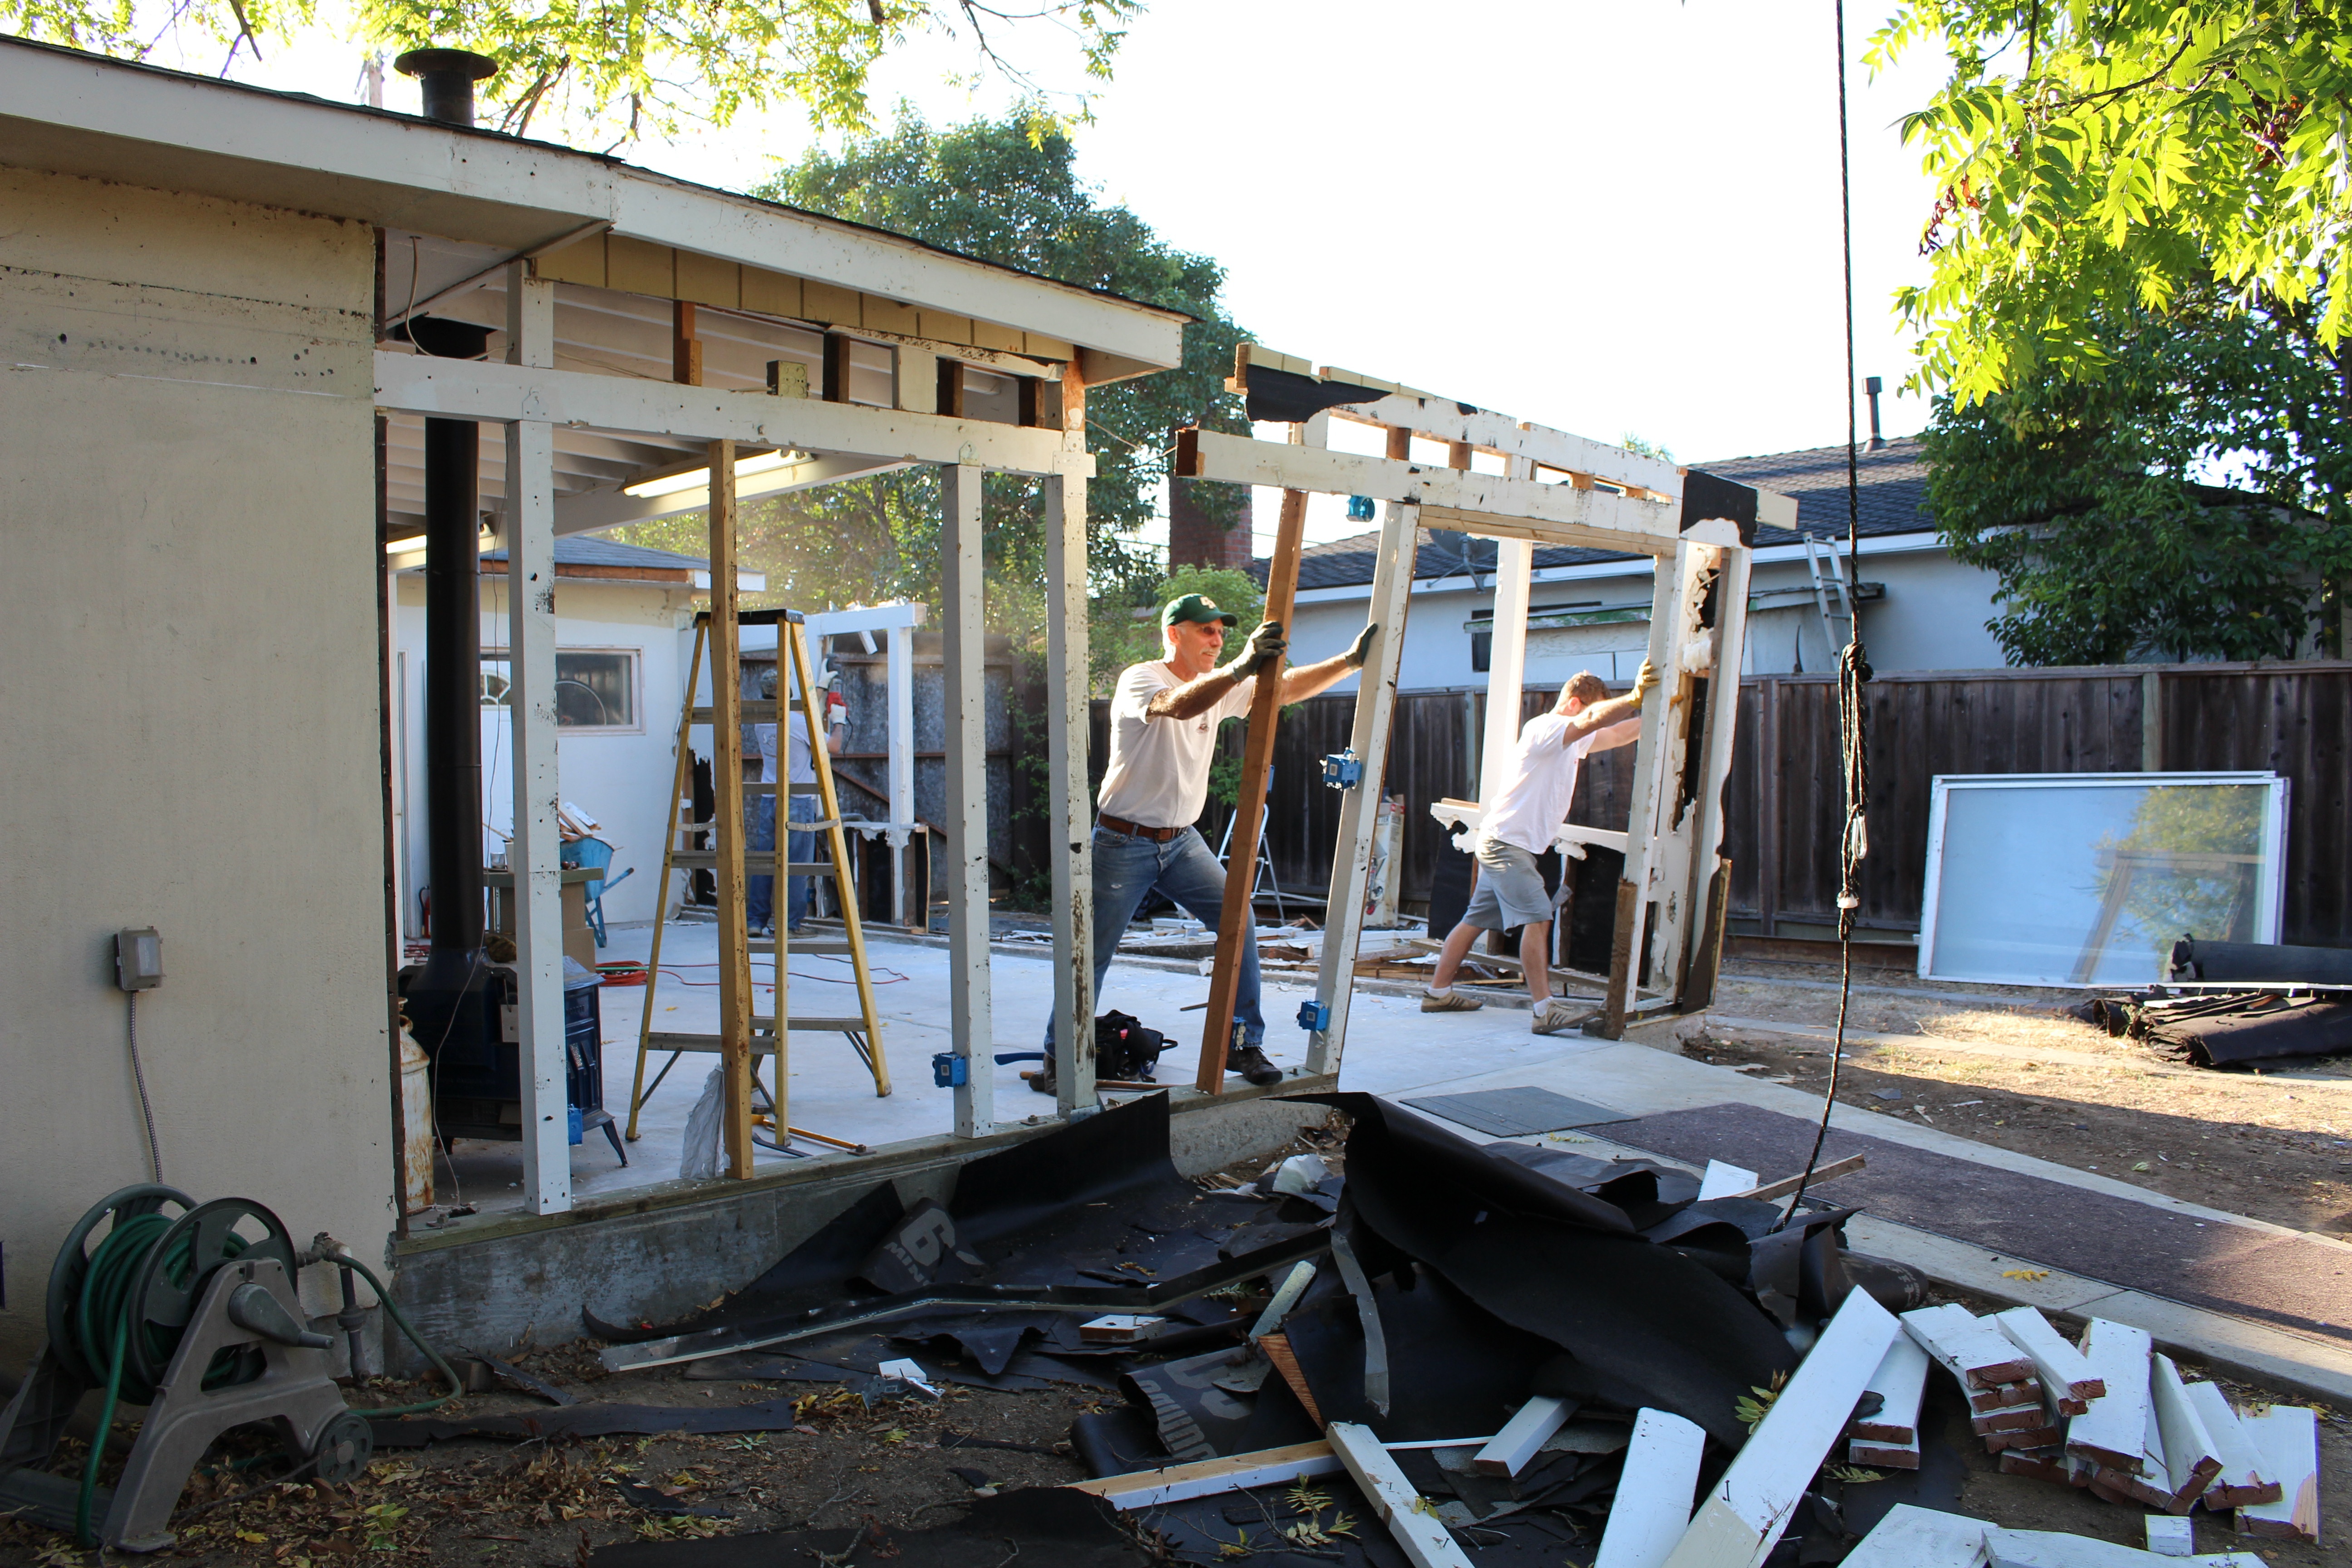
Step 6: Examine handiwork. Reward yourself with a beer. That’s the most fun you’re going to have today: now you have to break up all the demolition debris so it fits into the massive dump truck you borrowed.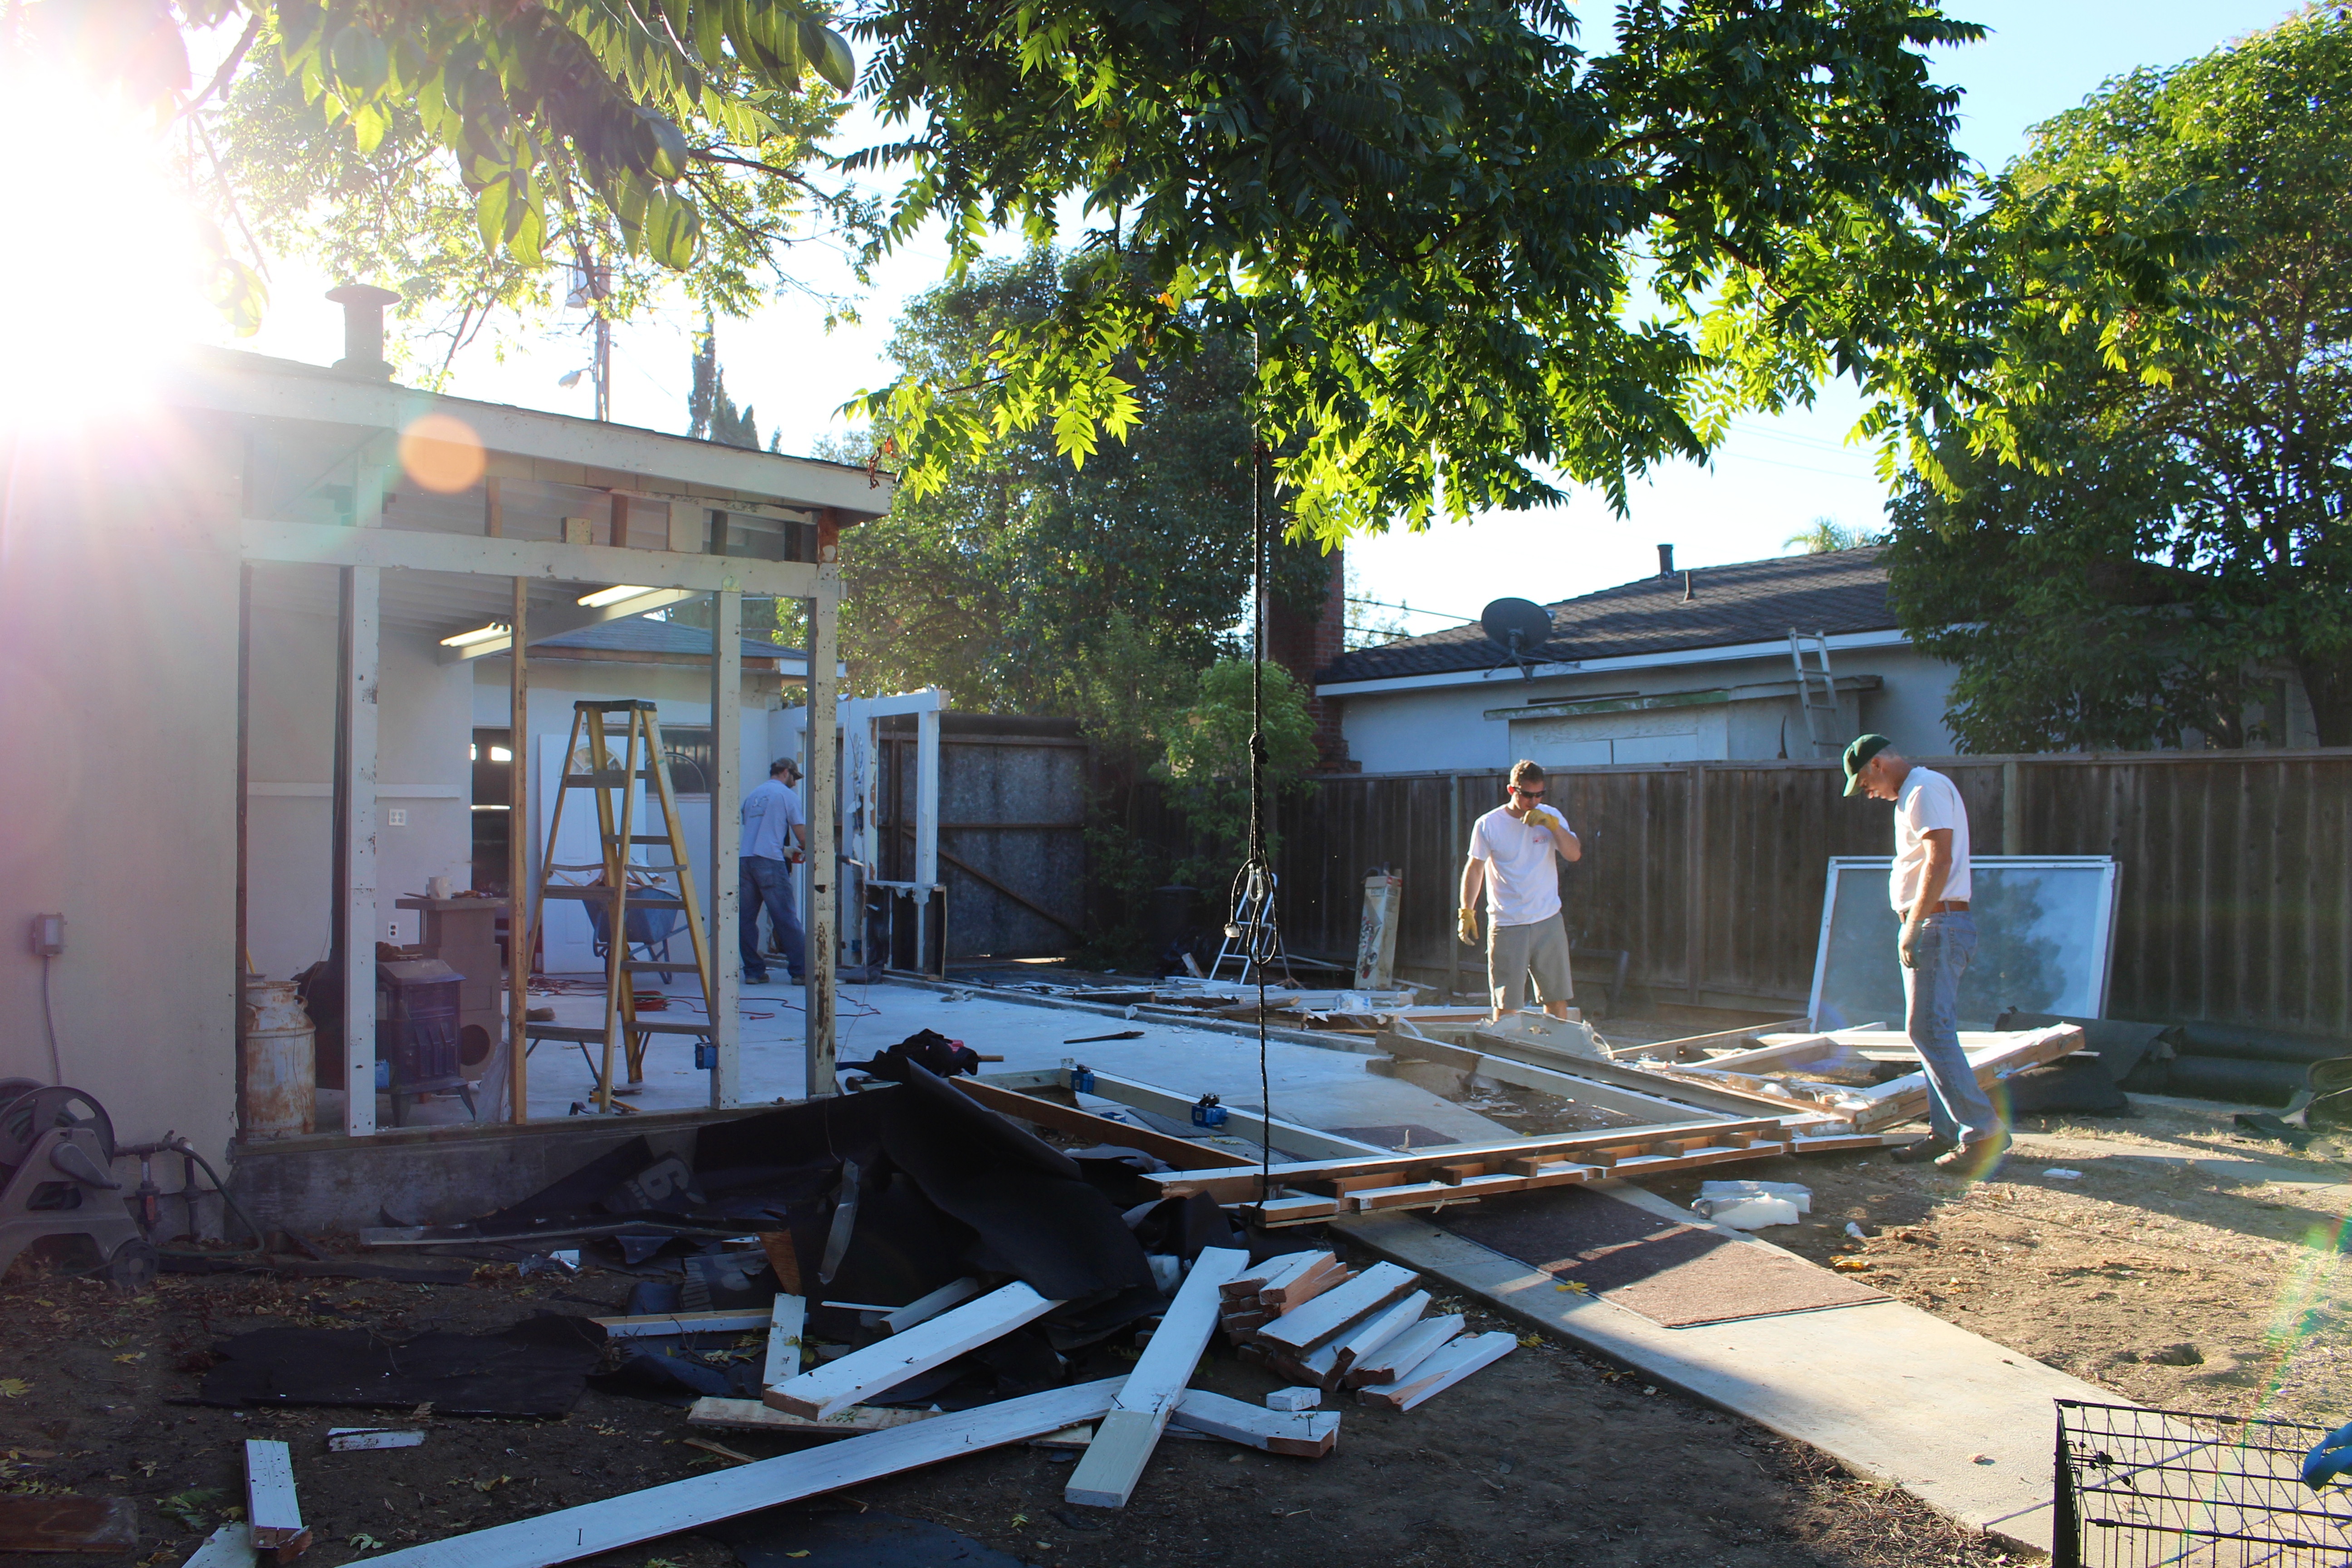
Step 7: Drive massive dump truck to the dump. While you’re driving, you MUST grin like a little kid the whole way. This step is non-negotiable.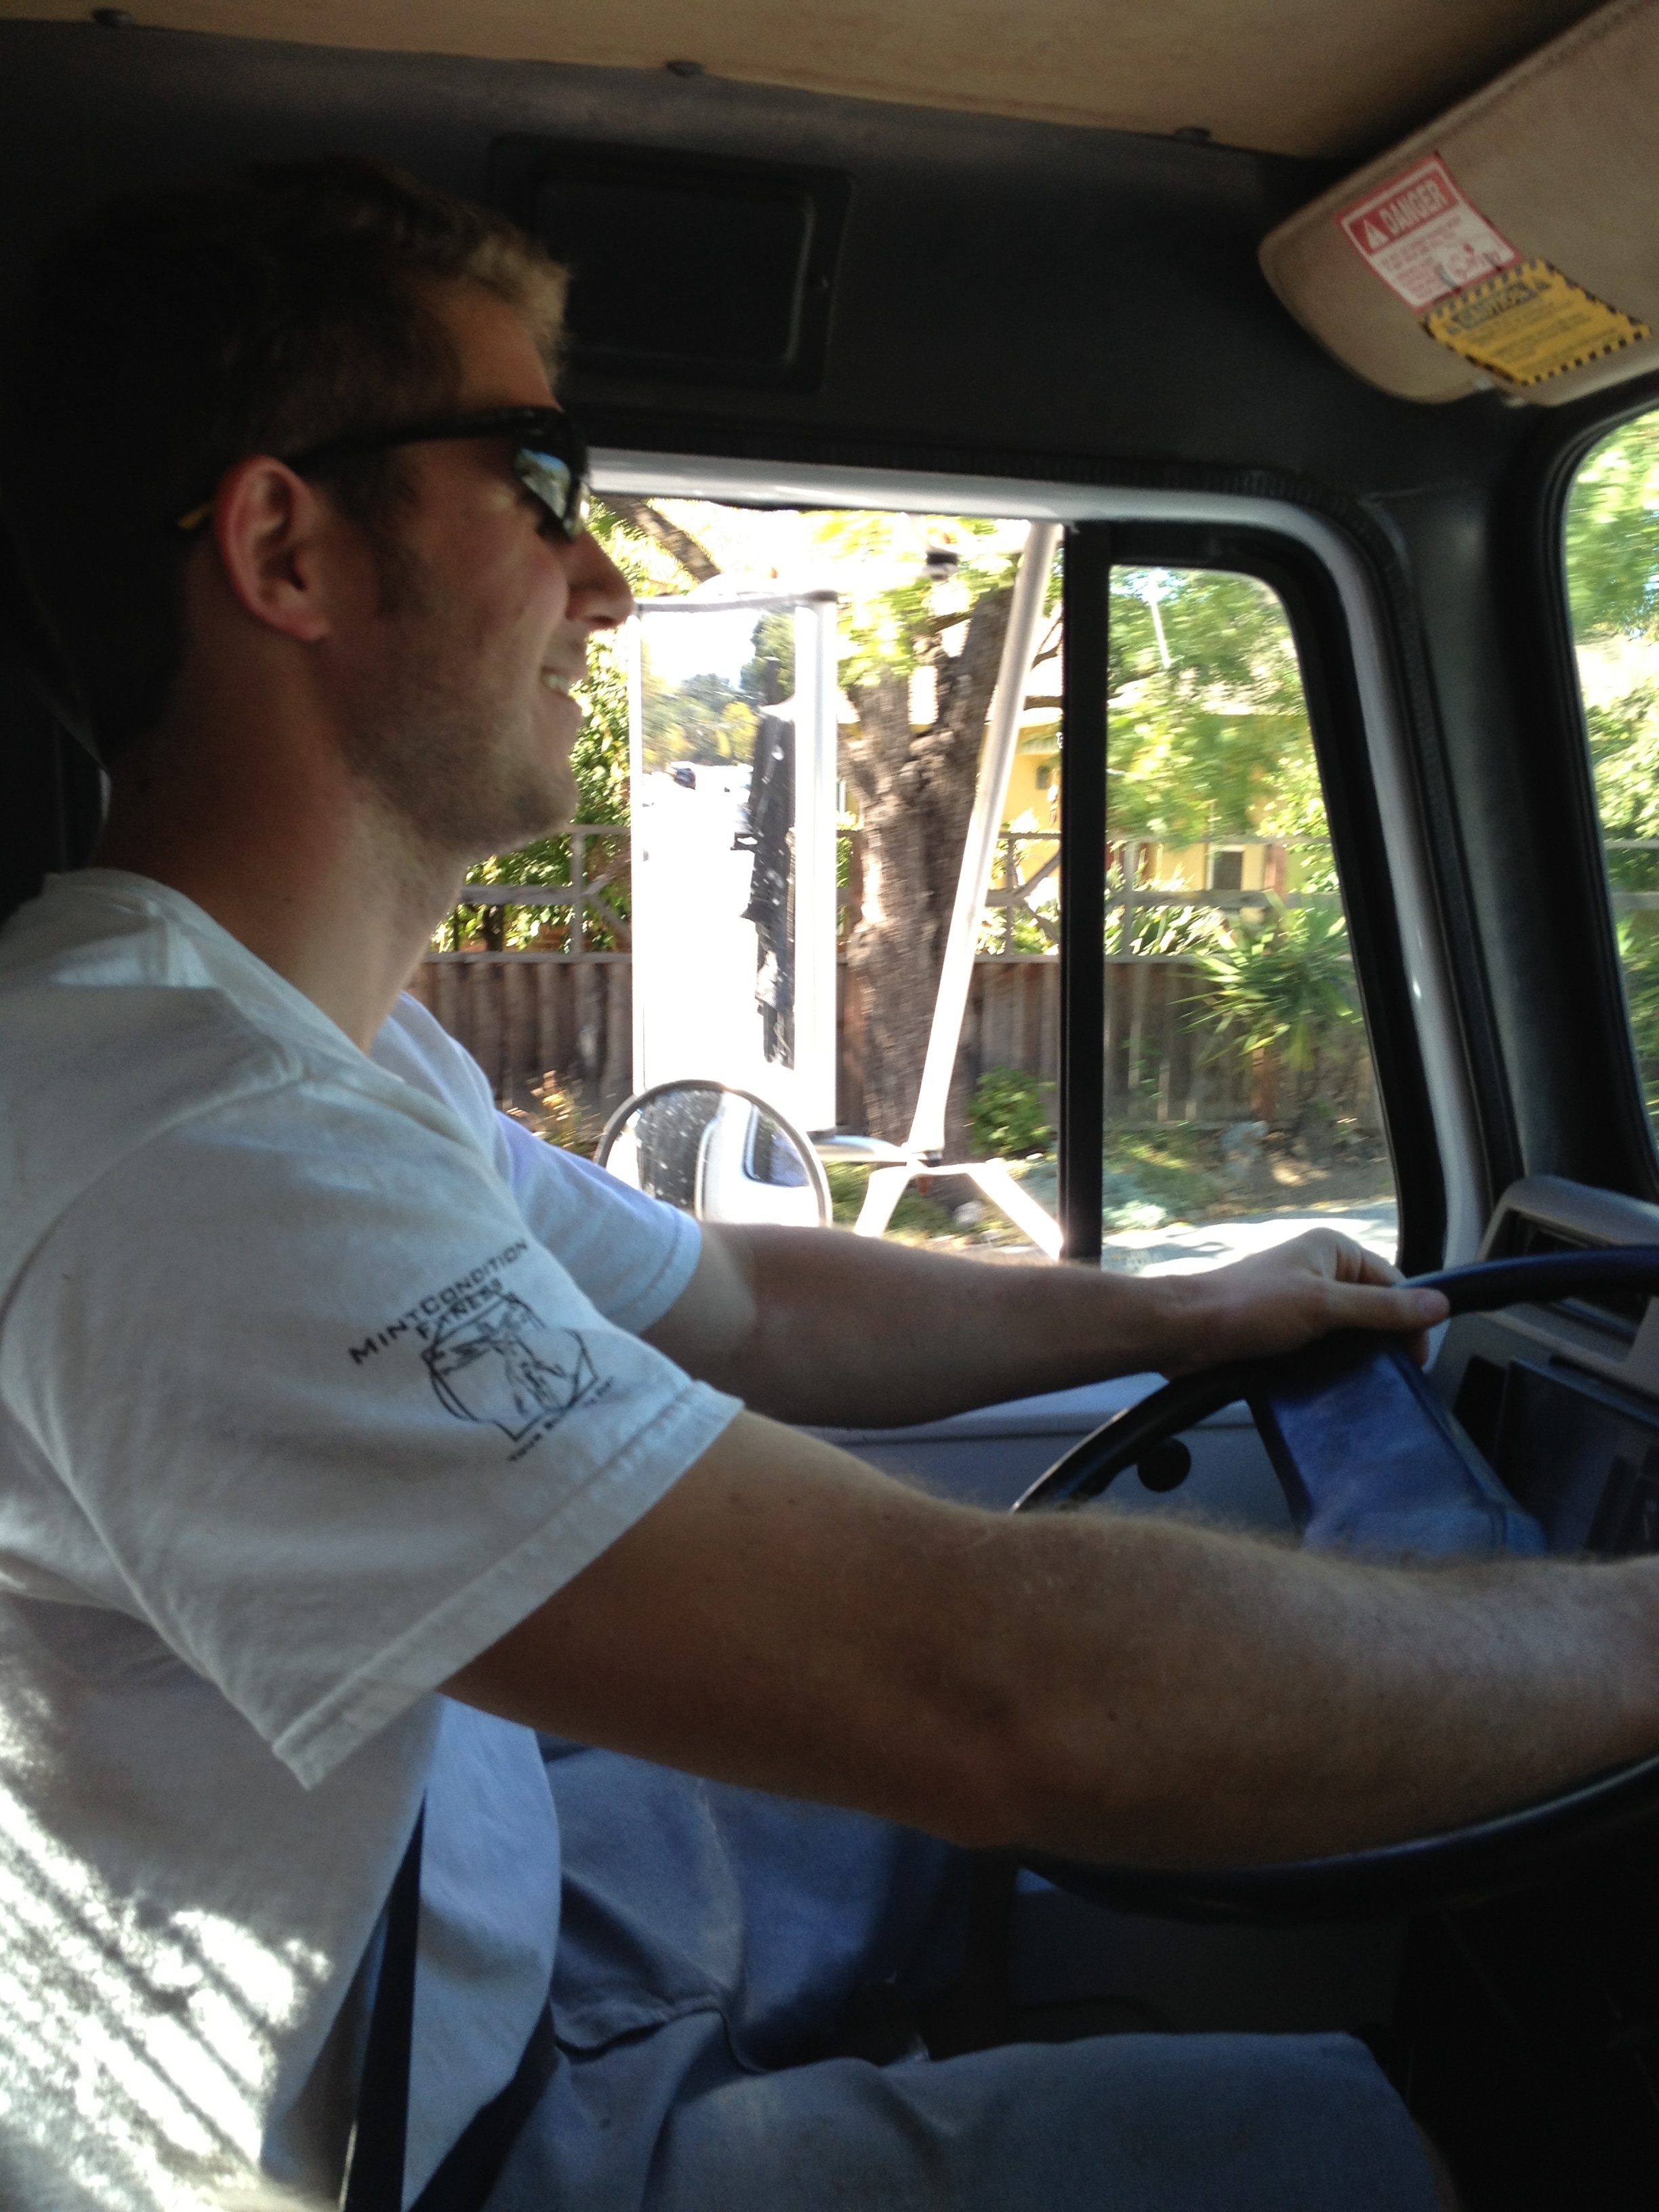 Step 8: Thoroughly enjoy watching the dump truck do all of the remaining work for you. That’s right: no shovels, no brooms, no clean up; just push the button and watch it all slide out! (Click that link to watch the quick video)
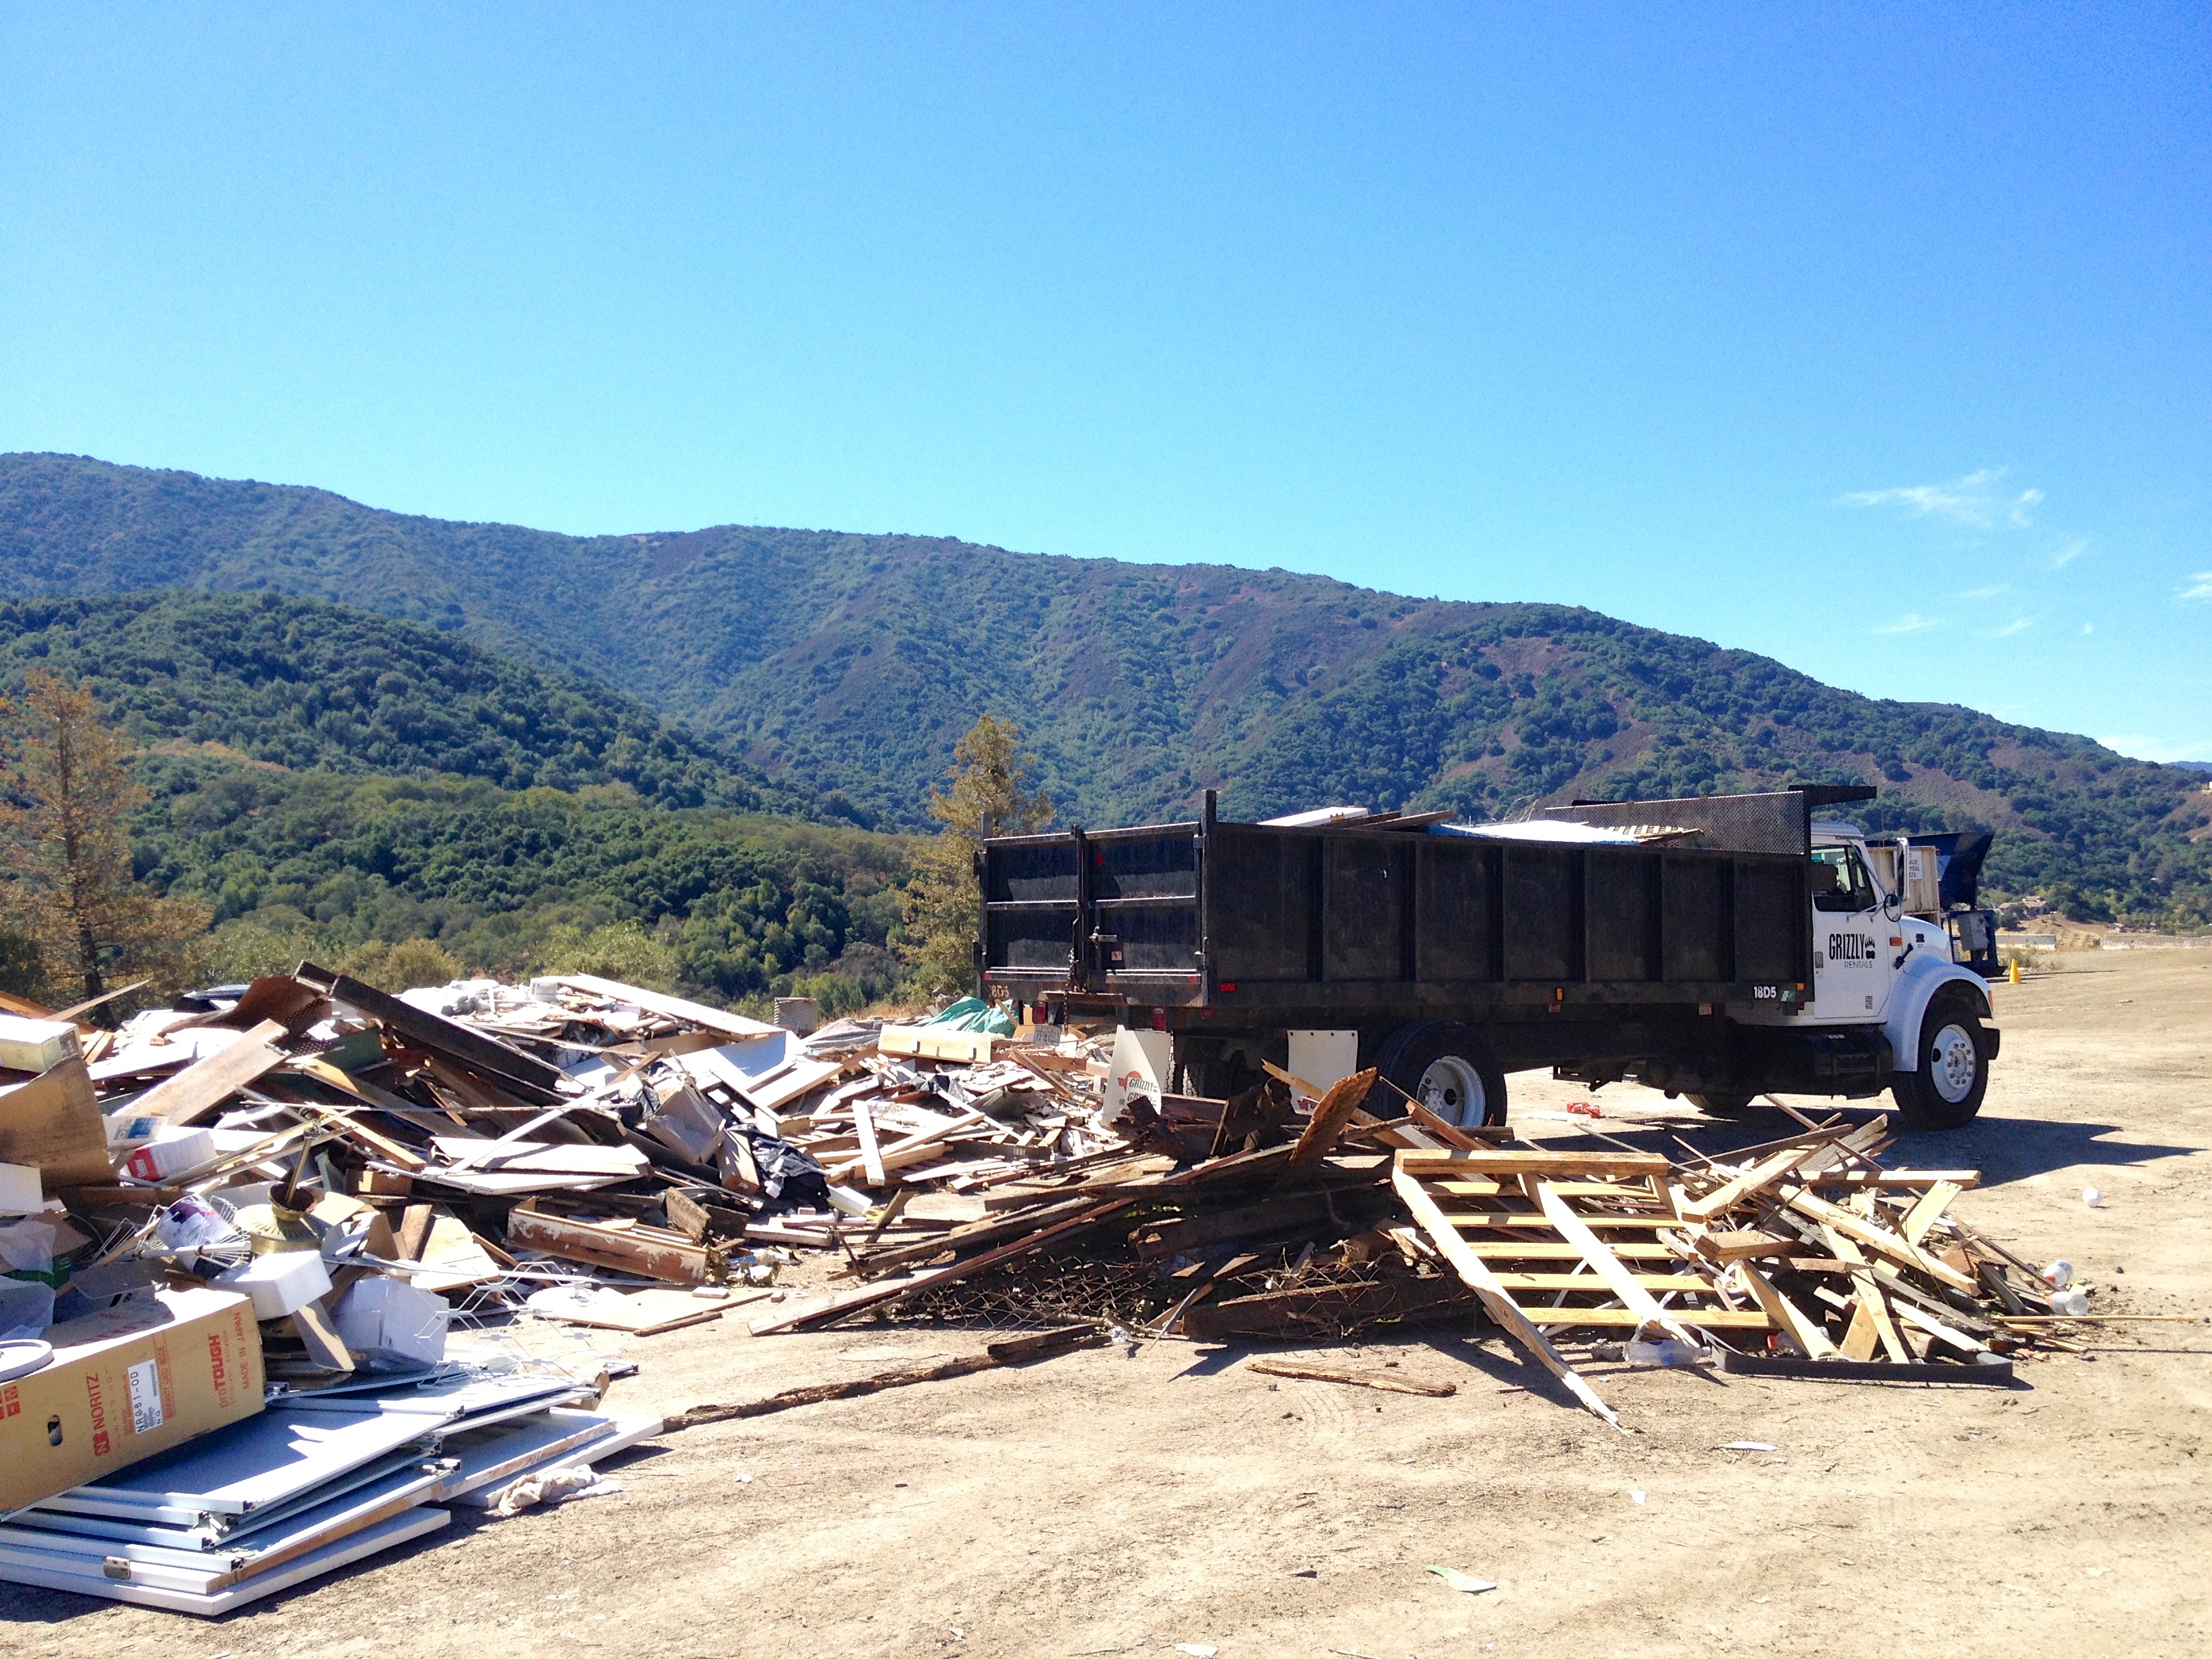
Step 9: Share the glorious before and after photos, and revel in the sunlight now streaming through your kitchen window.
Before and After #1

Before and After #2

Before and After #3
And there you have it. That’s how to demolish the West Wing in 9 steps (give or take, I probably forgot a few in there somewhere). It’s probably also worth mentioning that we went back after demo was done and gave all of the newly exposed wood trim a thick, fresh coat of paint. To, you know, protect it from the elements. Even though there weren’t very many elements to be had this winter in California.
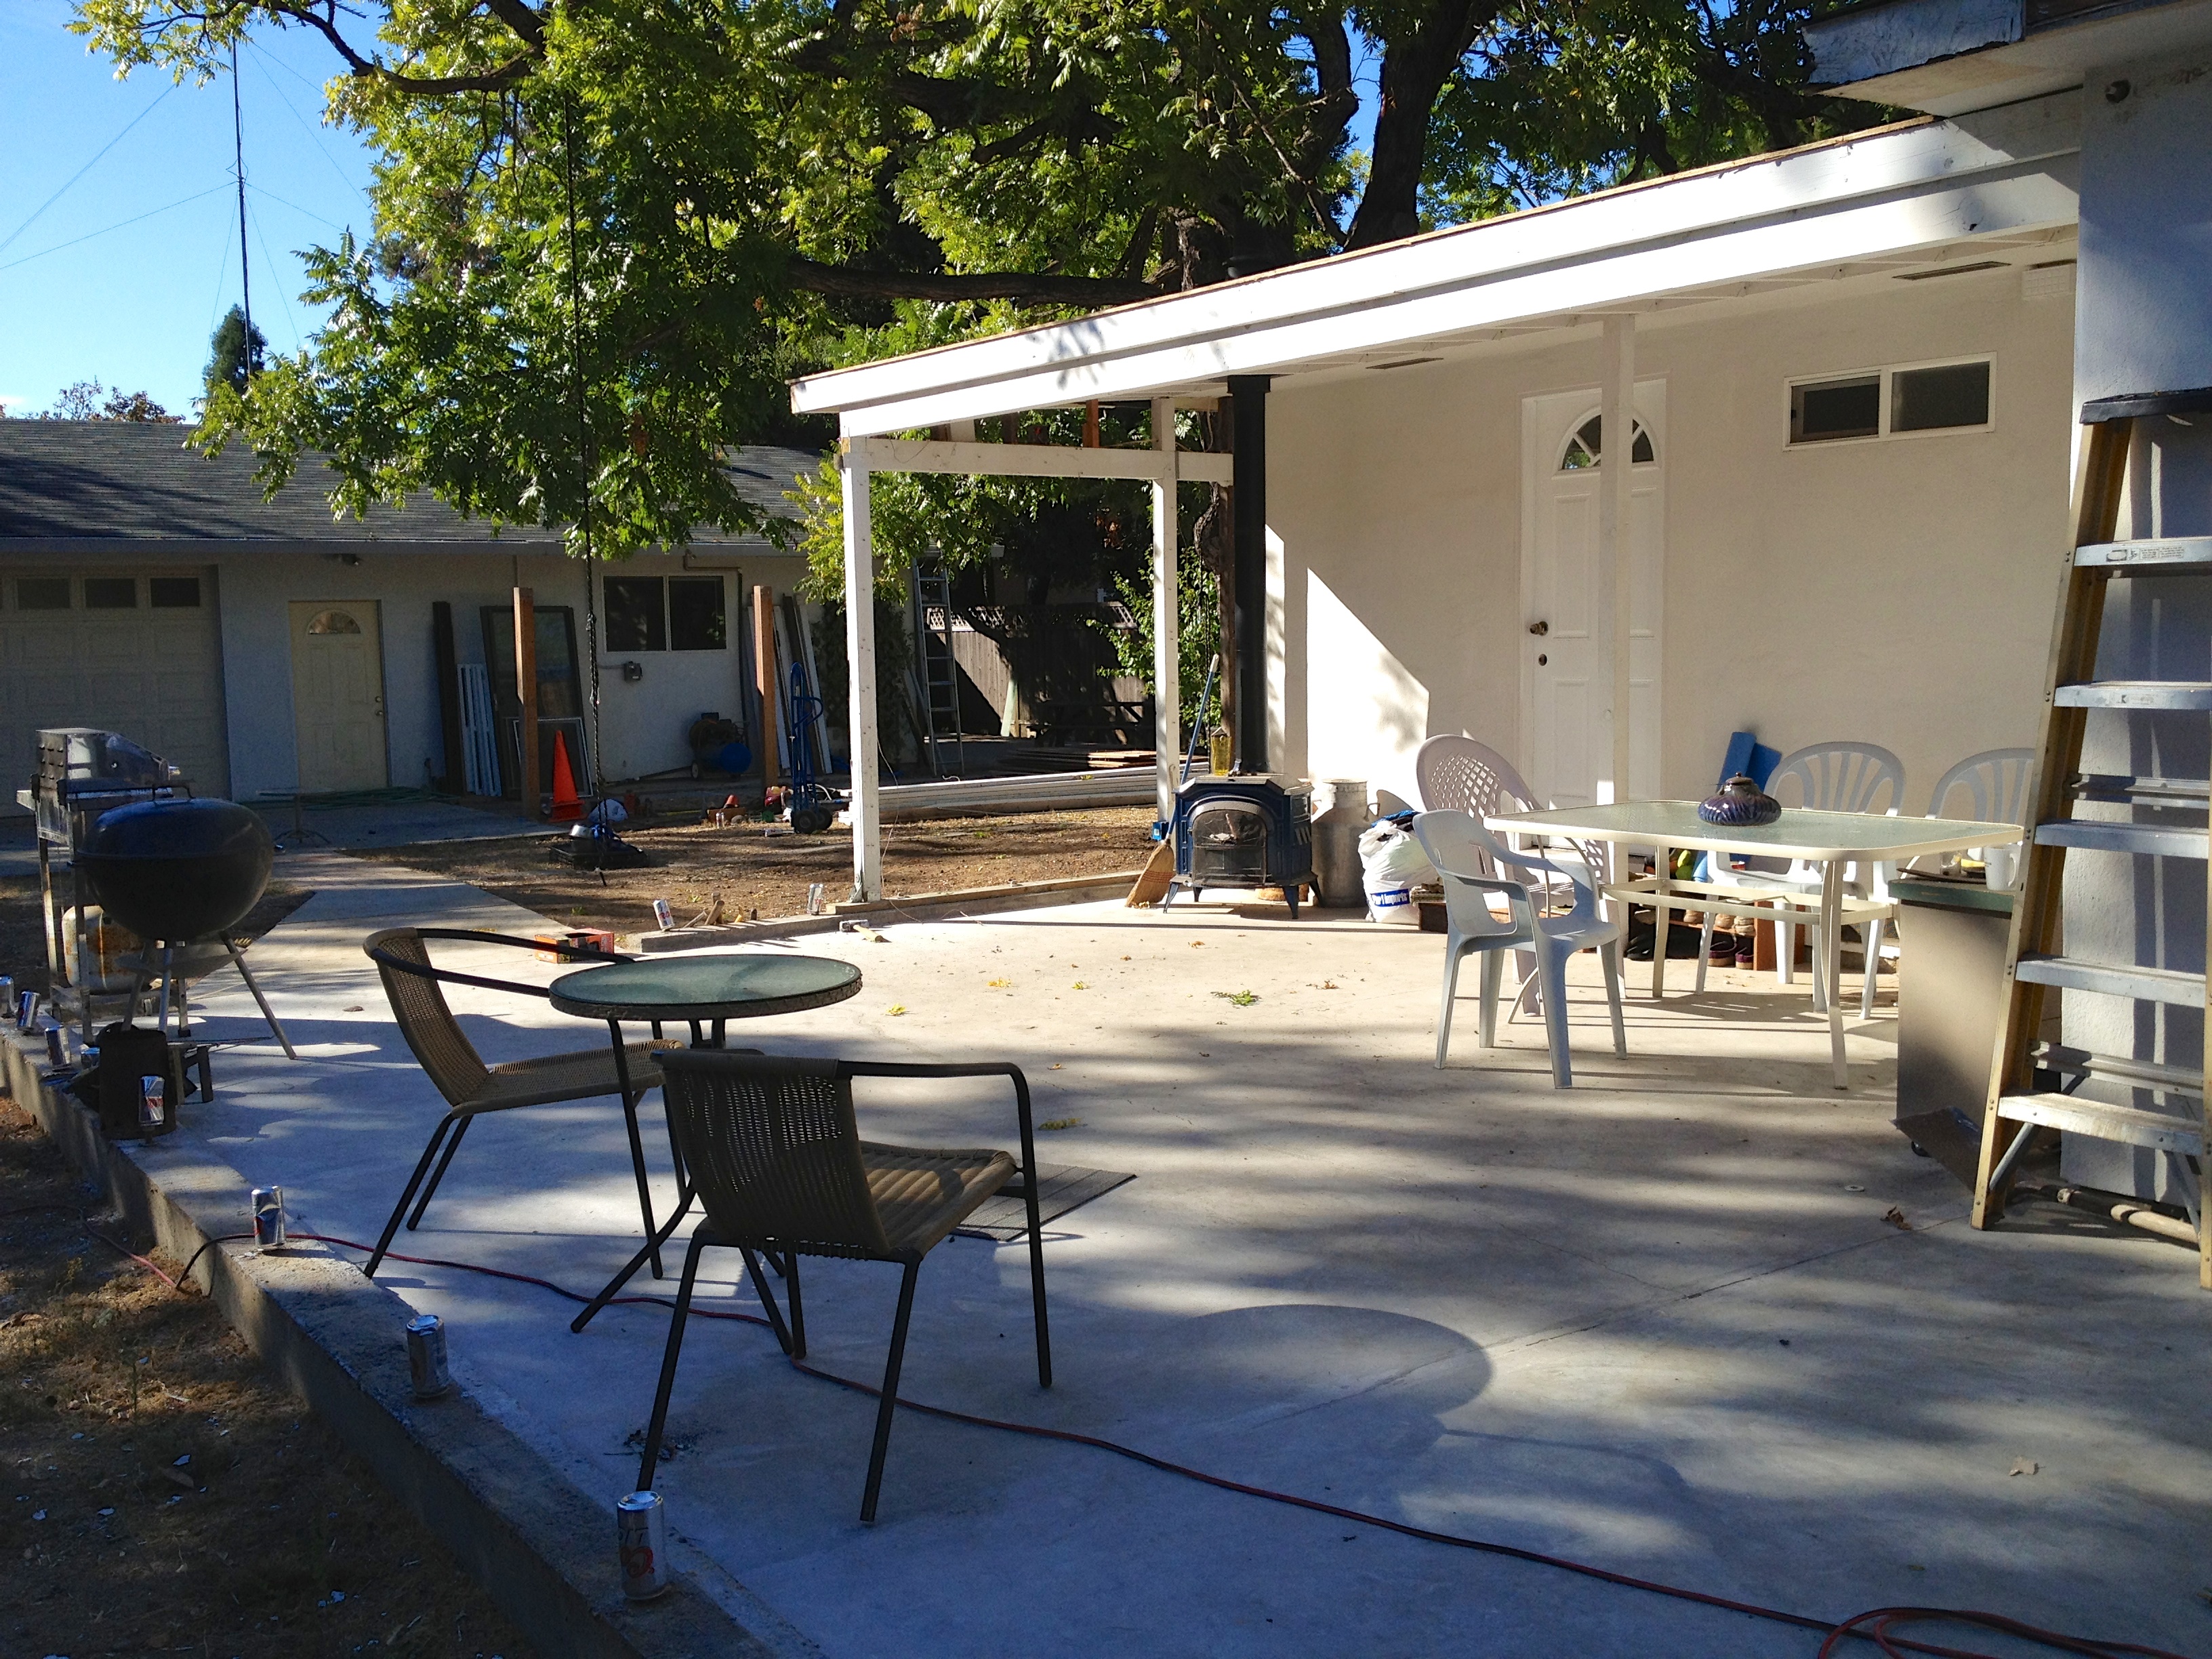
I am happy to report that 6ish months later we love our new, open-air, outdoor patio. The BBQs have moved up to this space now, and we eat a lot of meals out at this table. And now that the warm summer months are fast approaching, we plan to use it even more!
Hello, boys and girls! Welcome back to what was once a fairly consistent blog that most of you probably semi-enjoyed (or at least pretended to be somewhat interested in). You’ll be happy to hear that the blog is making a comeback. Again… But for real this time! We have way too much to show and tell, and I’m too excited to keep these photos locked up on my computer/hard drive/camera card any longer.
Now this is just a teaser post, to get you all ready for the big show. But you should know this: unlike other blog revival efforts, I already have SIX posts ready to go. All I have to do is press “upload” and they will be available for your viewing pleasure. But then you would probably be completely overwhelmed and stop reading, so we’re just going to do one at a time. For your own good!
Just one last note, and then you can get excited in anticipation for the blog content set to roll out tomorrow. For those who have been to our house in the last 6-8 months, you will probably notice that the blog content is starting with projects (and trips) that we took last summer/fall. My apologies for this, but be patient… there is a lot to catch up on before I can start revealing all the hard work we’ve been putting in to the Lounge and the Shop. Here are a few teaser photos, to keep you coming back for more.
Sneak Peak!
More Sneak Peak!
And I need your help on this, faithful readers! If I fall off the wagon after the 6 posts I’ve already prepared for you, please harass me with a barrage of emails/texts/blog comments/phone calls/facebook messages/etc. until I post again. But be warned: the goal is three posts a week, so don’t start bothering me if a day or two go by silently 🙂
Hope you’re all happy and healthy and gearing up for some great projects and travels of your own!
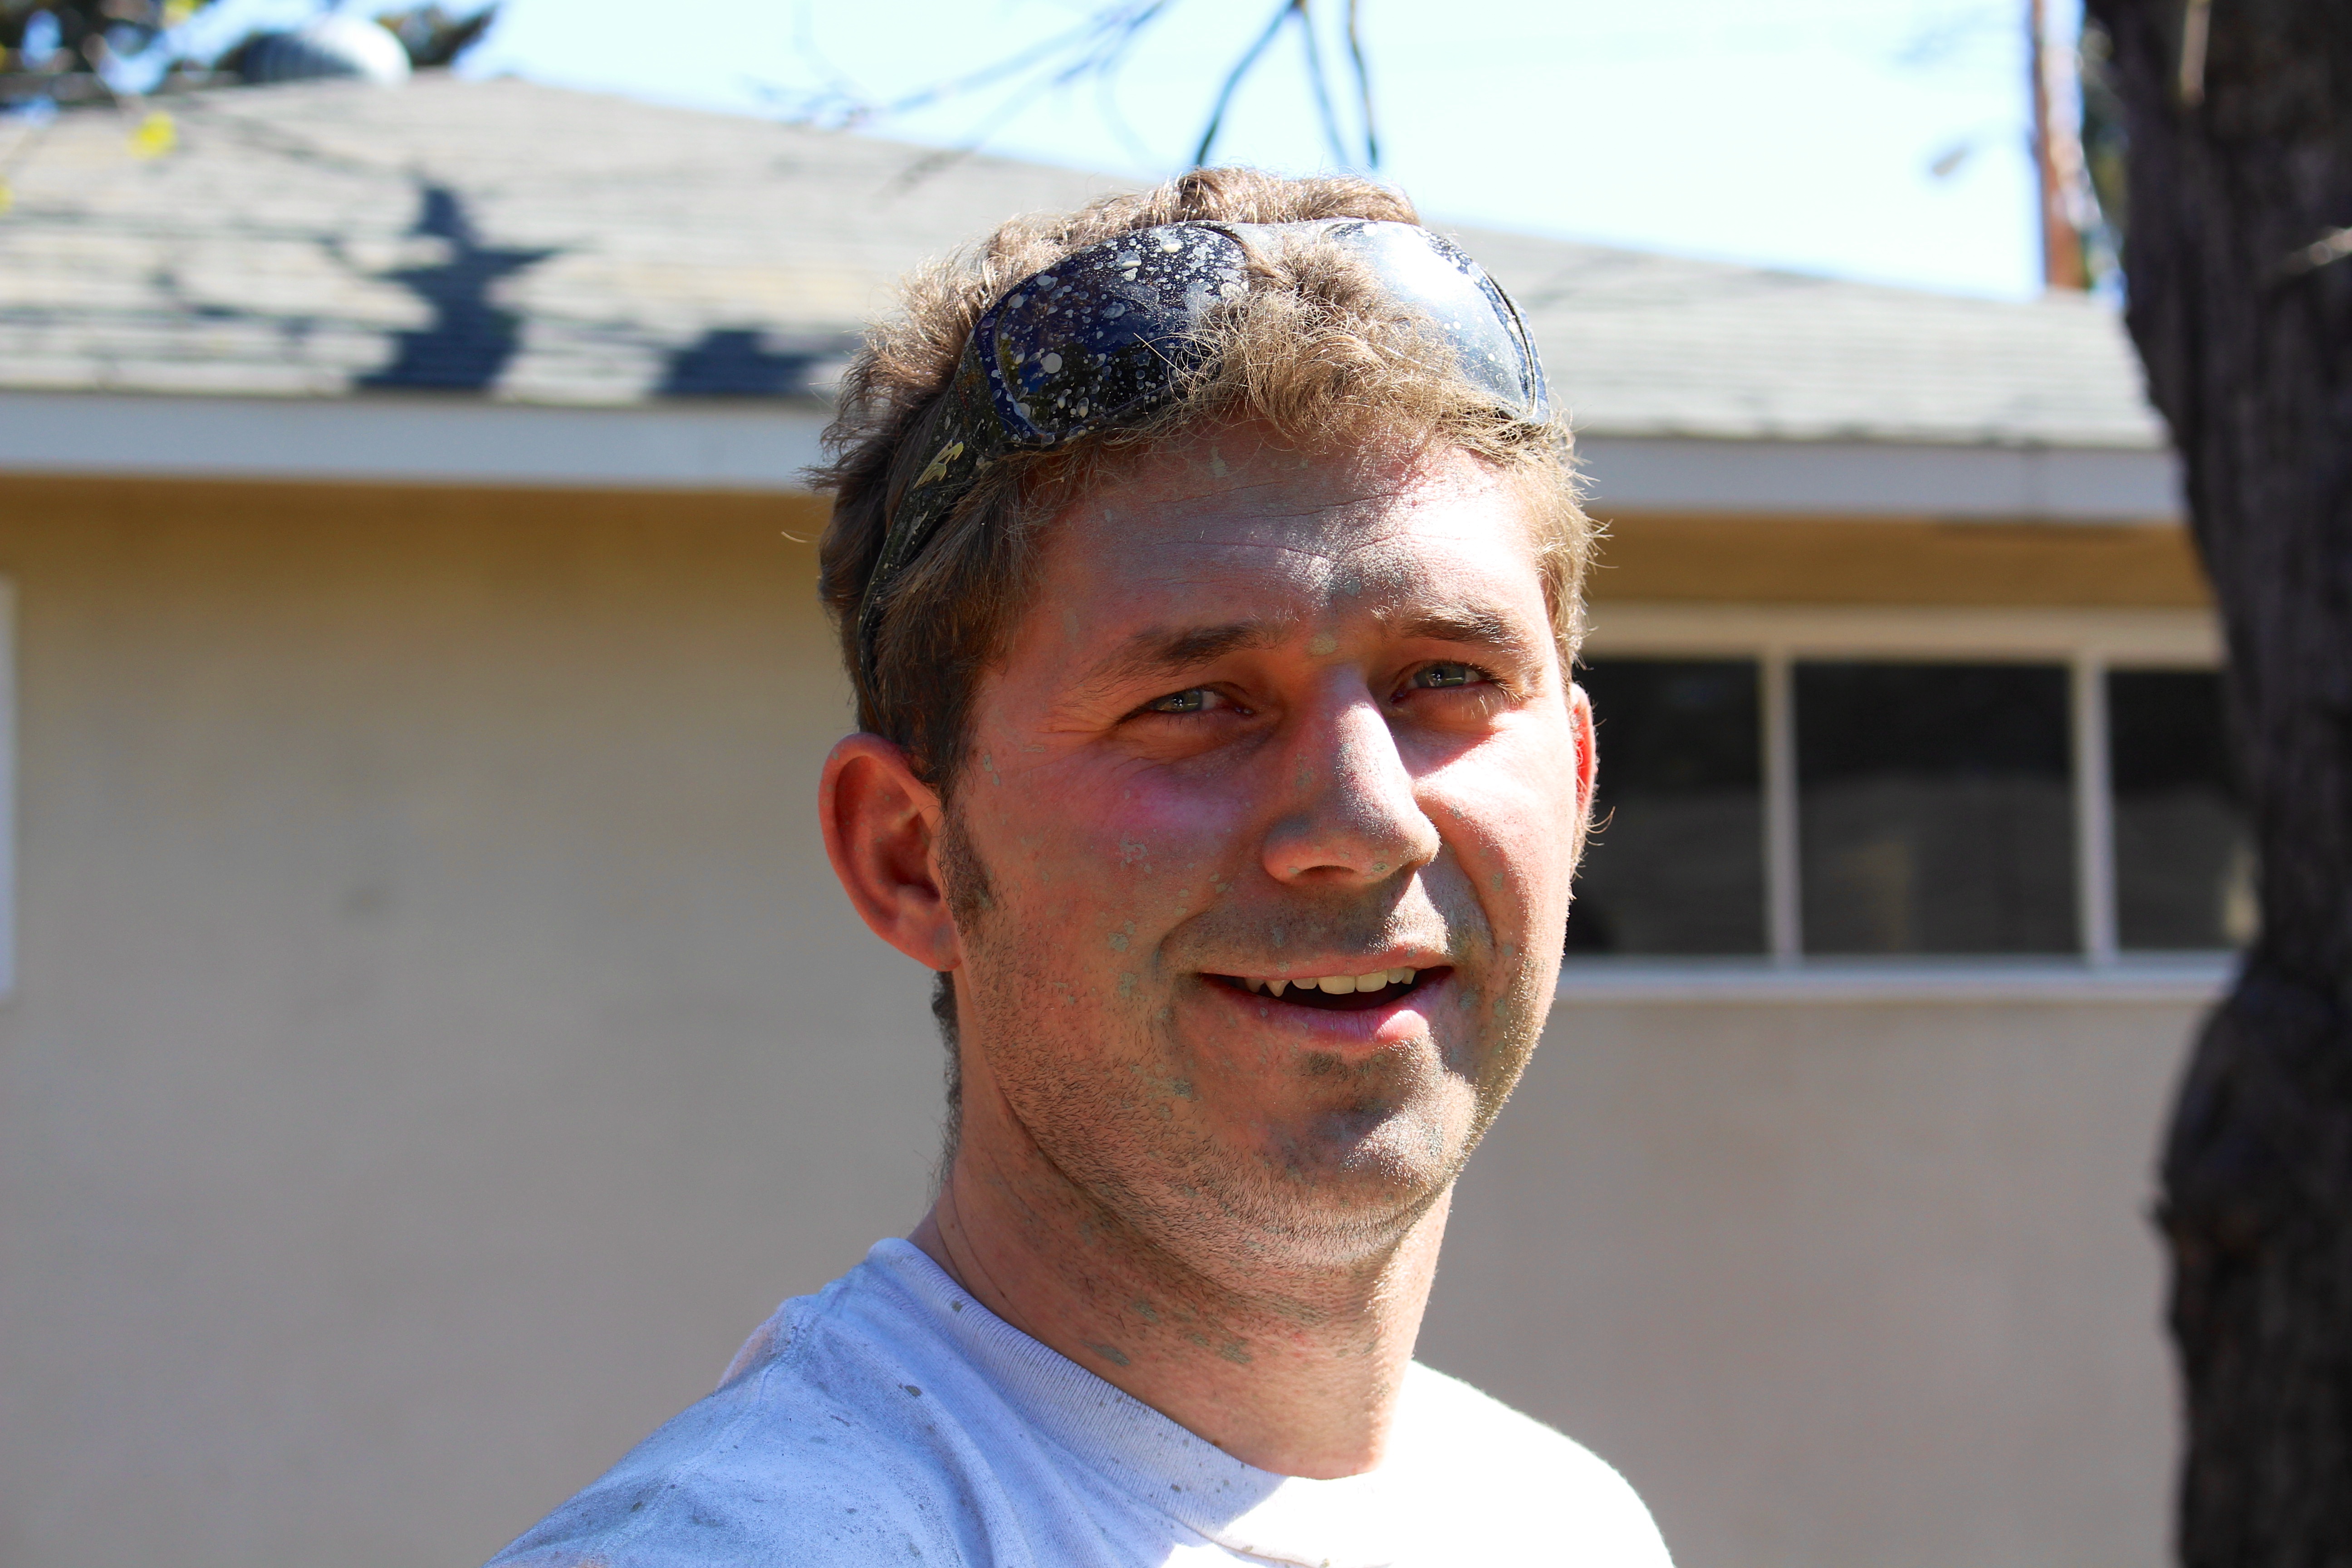
Justin’s face after the paint spraying experience

Cutting tile for the lounge
Now I know you’ve all seen more current photos of the backyard than those that I’m sharing today. Just keep in mind I’m going back in time to fill in some of the blanks, and show you some “progress” photos 🙂
Backyard Demo
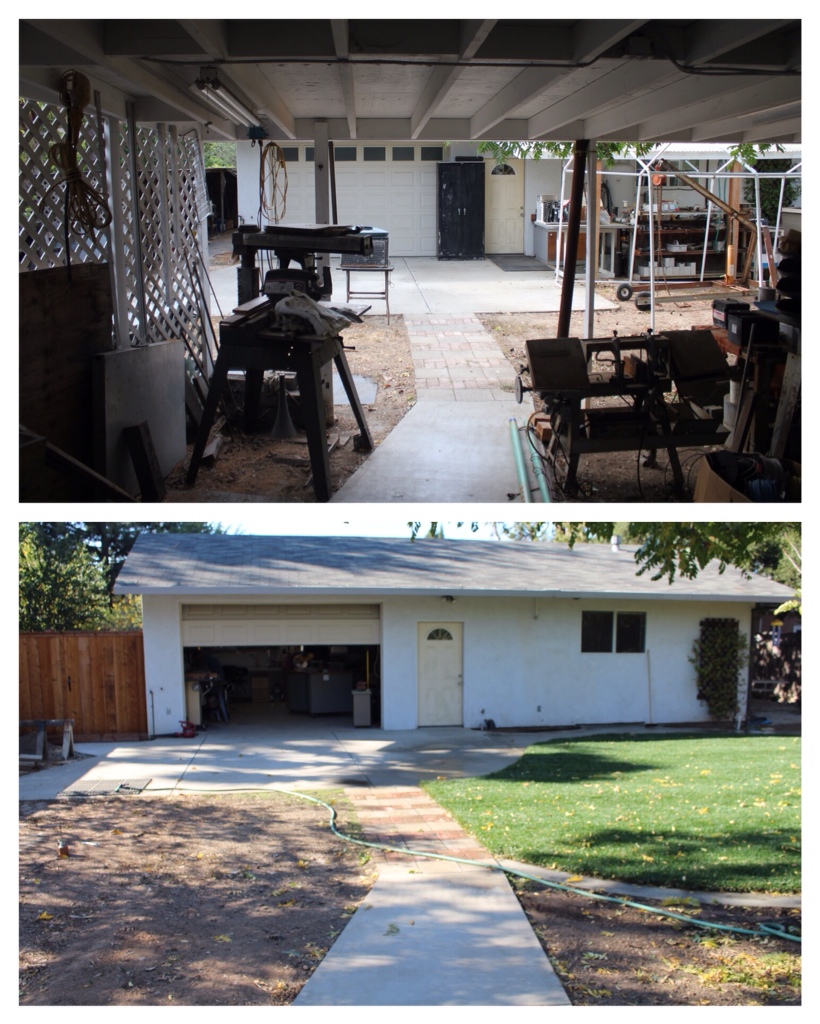
When we bought our house, we inherited quite a few extraneous structures. One of these structures we love and is quite useful, and may be one of the reasons we wanted to buy this house in the first place. What, you don’t want a 1000-square foot shop where your husband can make (and fix) all kinds of cool things? Well, you’re just crazy. Anyway, other than the house and the shop, we knew that all of these covered structures would eventually be torn down.
We got rid of the first structure back in early spring so we could make room for our planters and fruit trees. Now, to open up our backyard a little more, we decided to tackle the two most offensive structures in the yard. Which also happen to be the easiest to knock down, but that is beside the point. The first structure to go extended off the back of what we call the west wing. The second structure shot off the front of the shop. The previous owner liked covered spaces a lot…
Enter crowbars, sledge hammers, manual labor, and some good old fashioned blood, sweat, and tears. My dad came over and helped out with the first tear down, and I wasn’t really kidding about the blood, sweat, and tears! Demo can be dangerous, kids, but also fun… Here are some photos of the men in action.
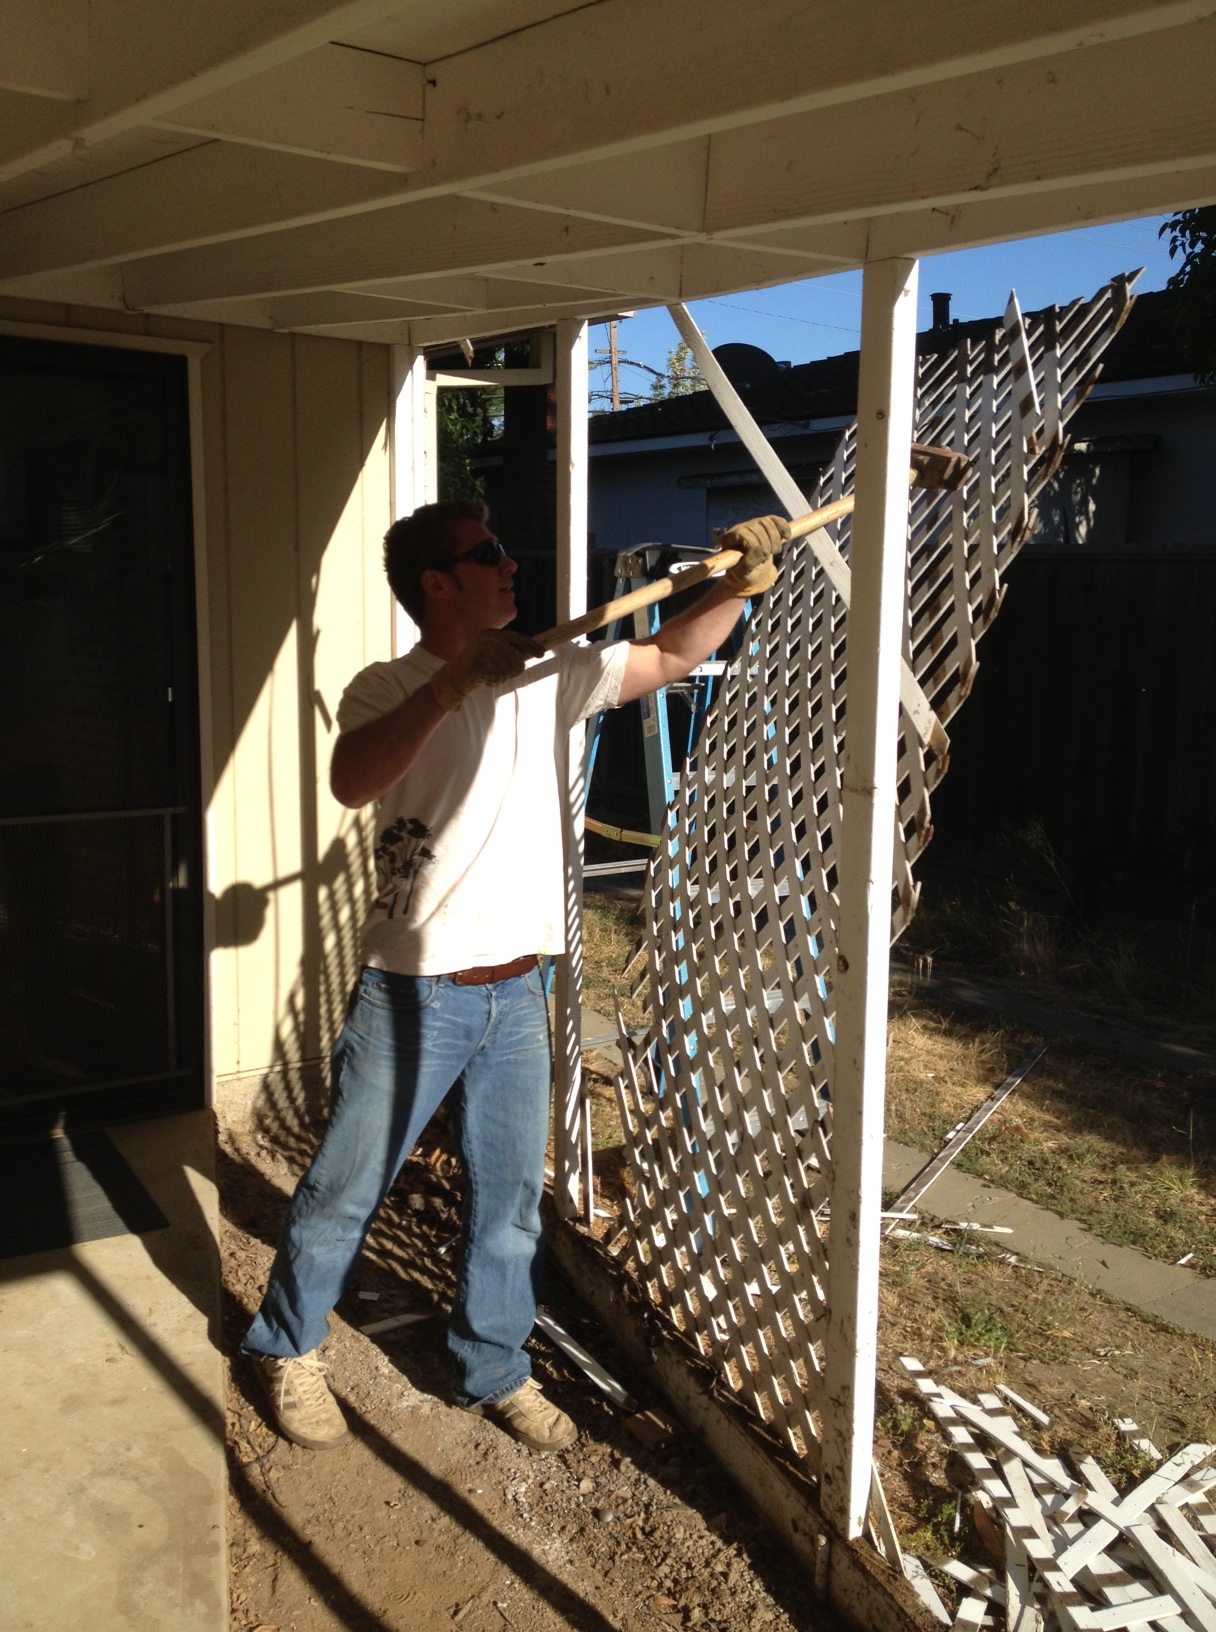
Extraneous structure #2 Justin tackled all by his lonesome. I watched and enjoyed my cocktail. And helped a little!


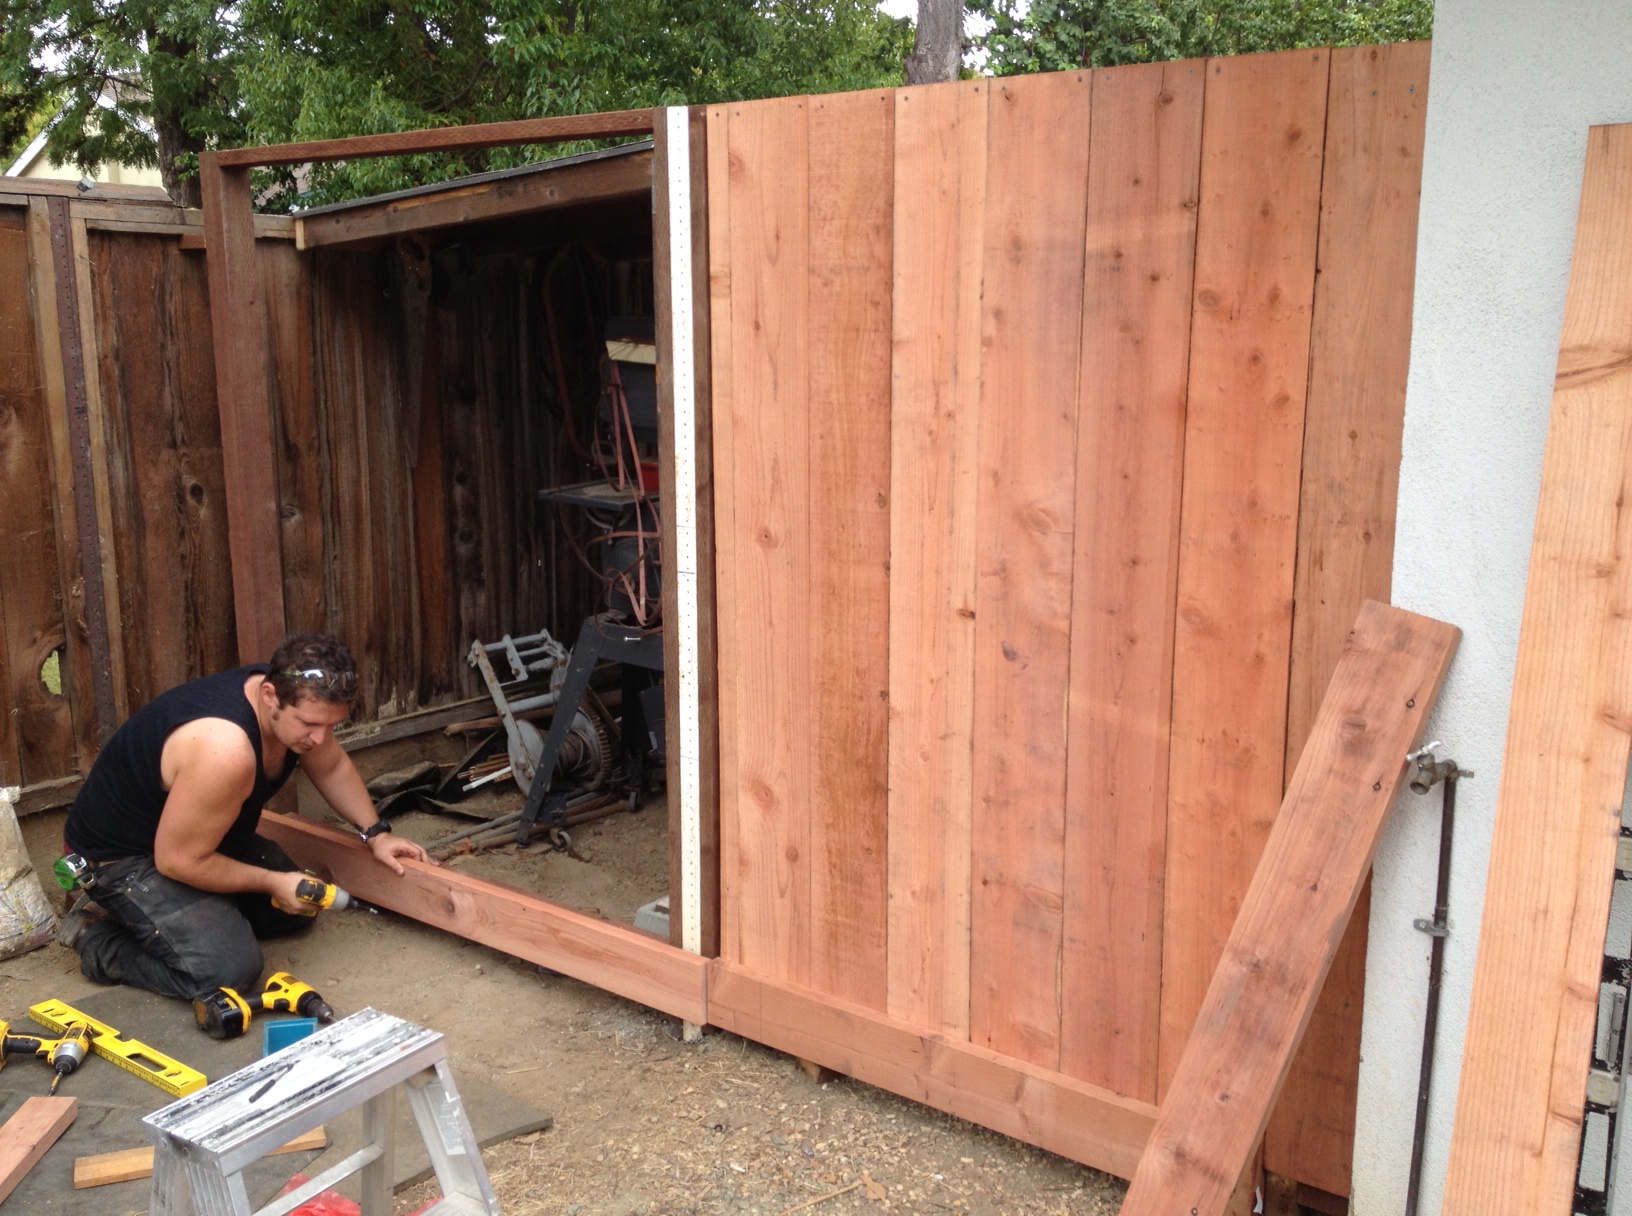
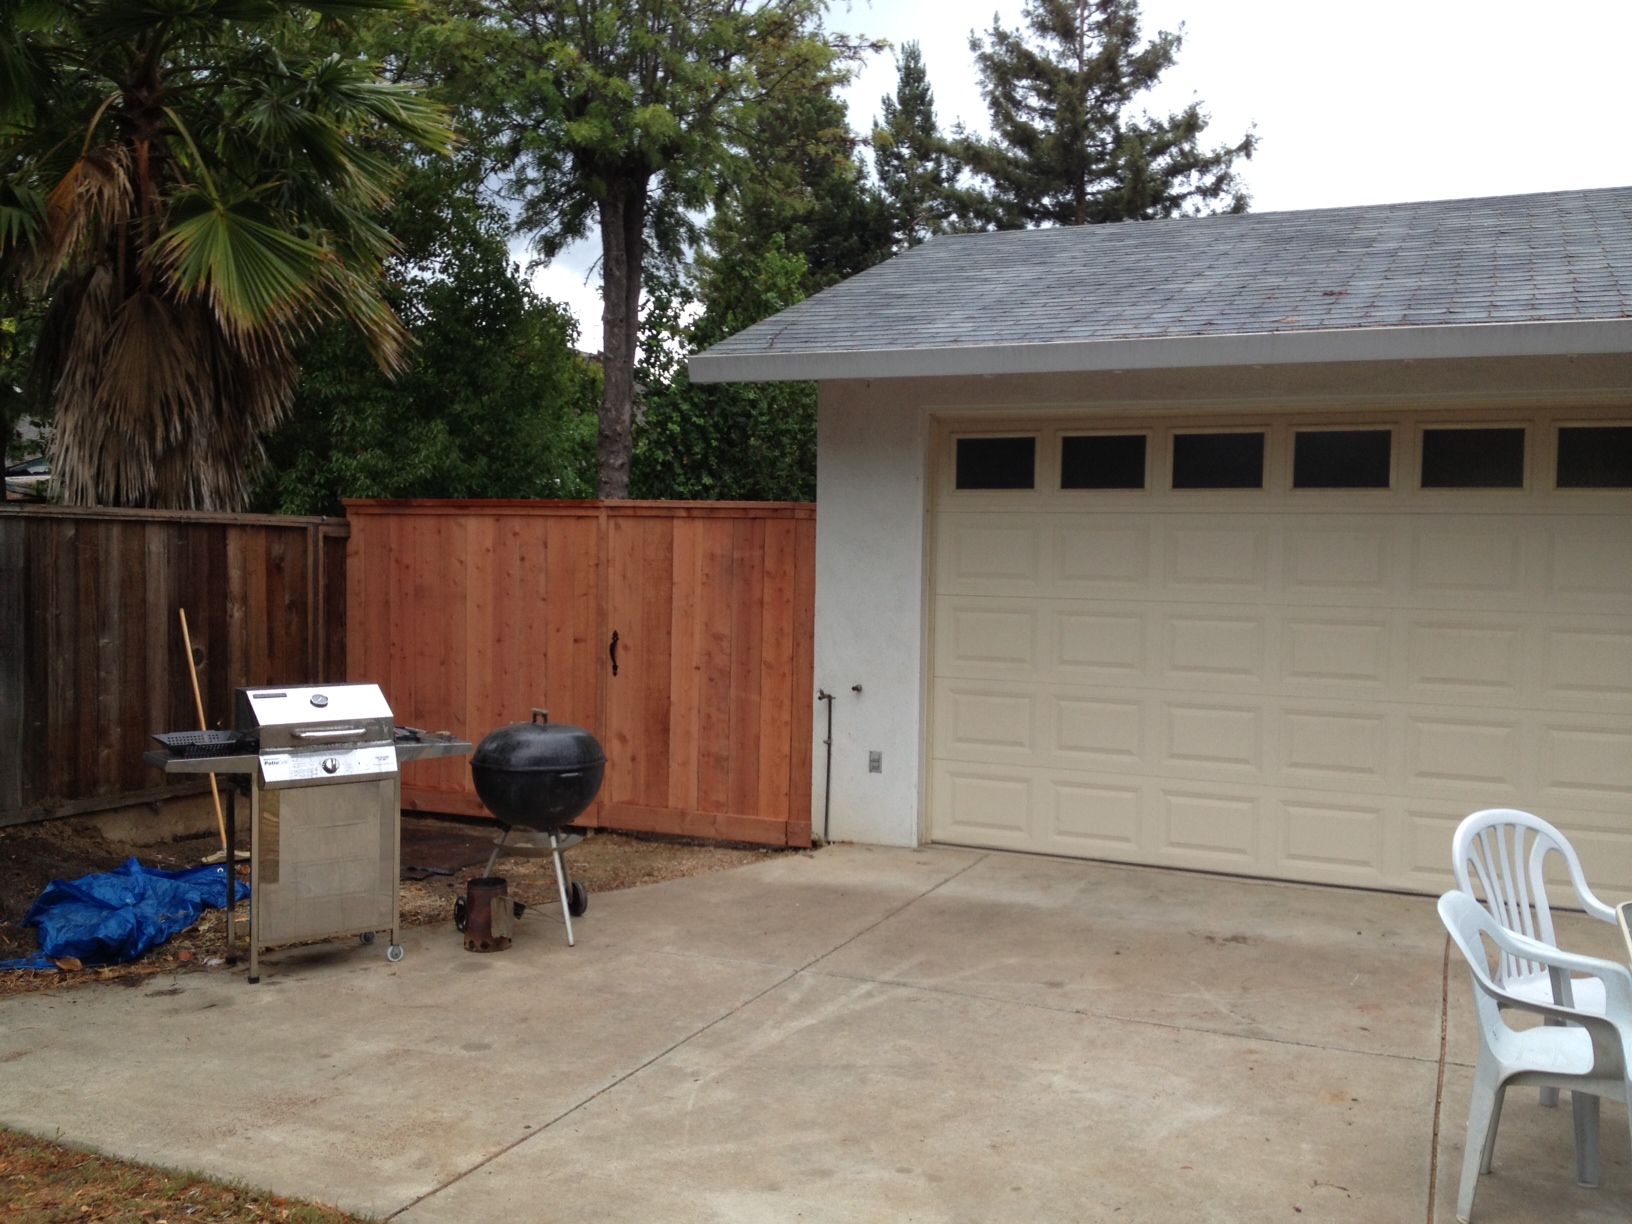
Fence Building
Dan, Brigitte, and Aspen came to visit us early this summer. Dan and Justin spent the better part of the weekend building a fence and gate on the left side of the shop. This shop side yard area was all covered and perfect for storing wood, garden tools, project materials, and other goodies, so we were reluctant to tear it down. My dad had the idea to just bud a fence and a gate in front of it, to make the area look more finished and less of an eye sore.
Dan and Justin did a beautiful job, and everyone was thrilled with the outcome. While the boys worked away, Brigitte and I entertained Aspen and did a few canning/jamming projects of our own!


Redwood Bark around the Planters
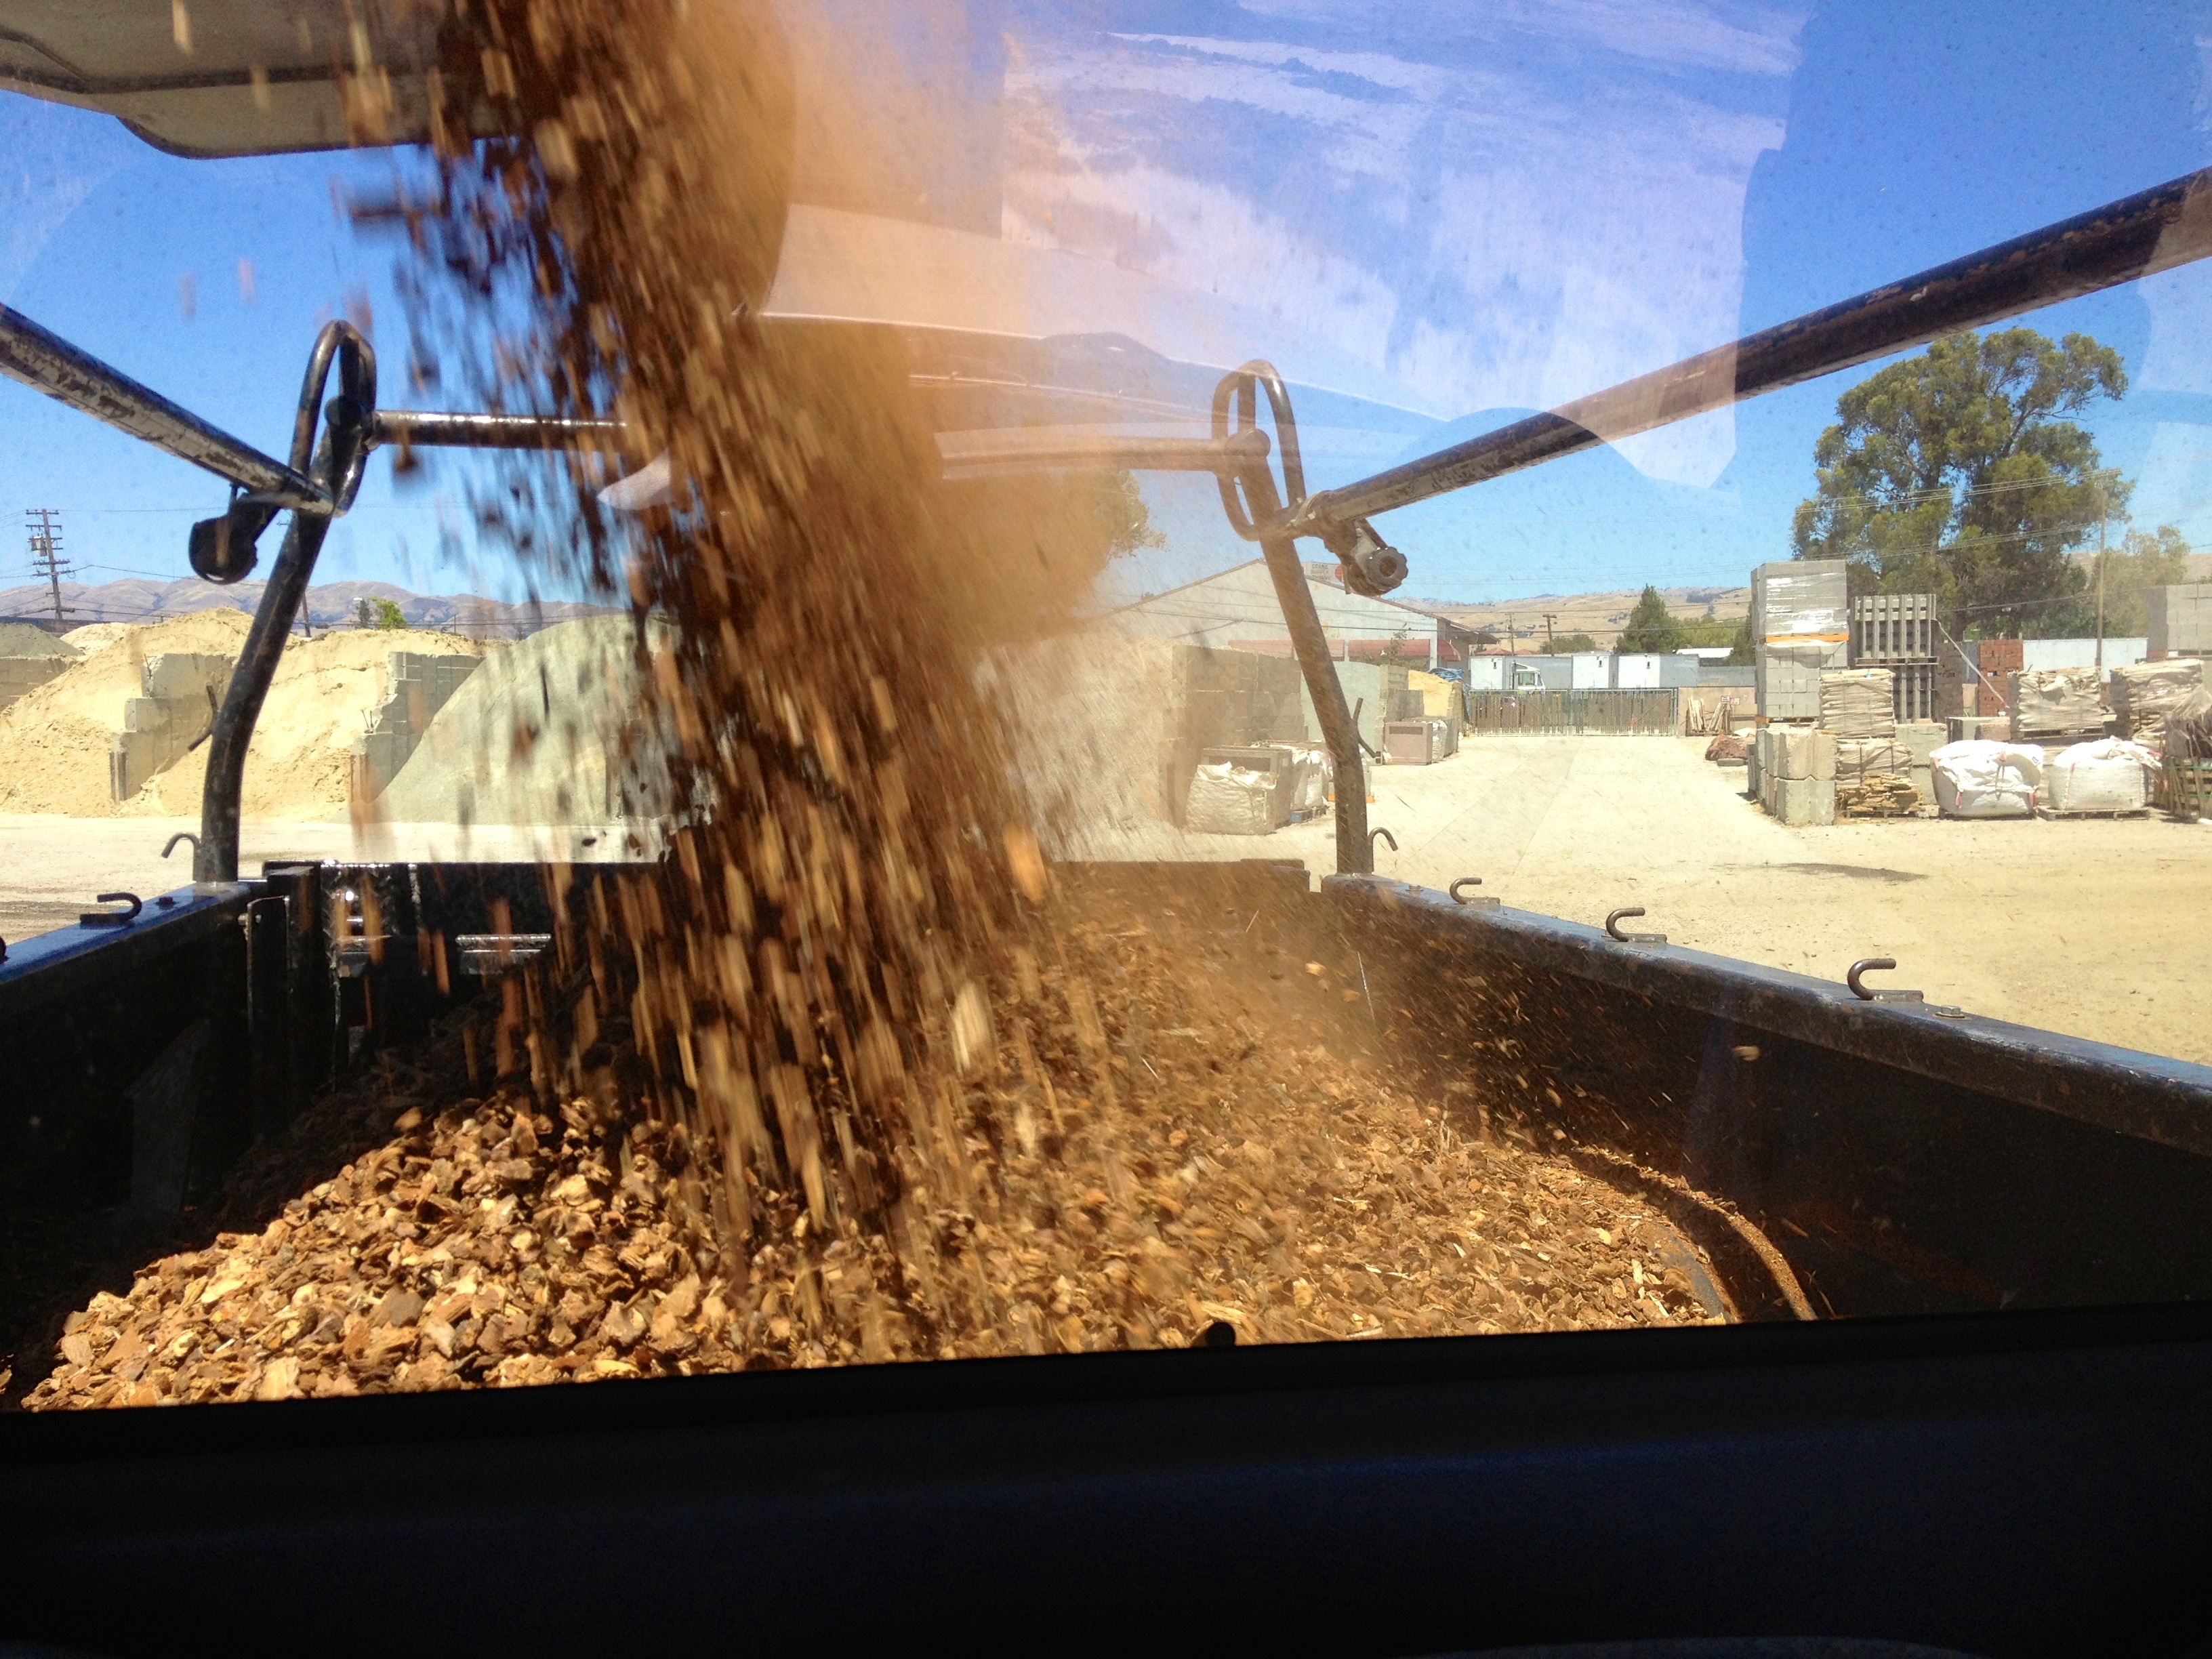
One weekend, I decided to buy four yards of redwood bark and spread it all around our fruit trees and planters. I’ll spare you the details on this one… Let’s just say it was really hot, I bit off a little more than I could chew in an afternoon, and I apologize to that evenings BBQ guests for having to watch the tail end of my shoveling bark out if a truck in my bikini. Good thing no one took pictures of that! Talk about a hot mess. But the bark looks great!
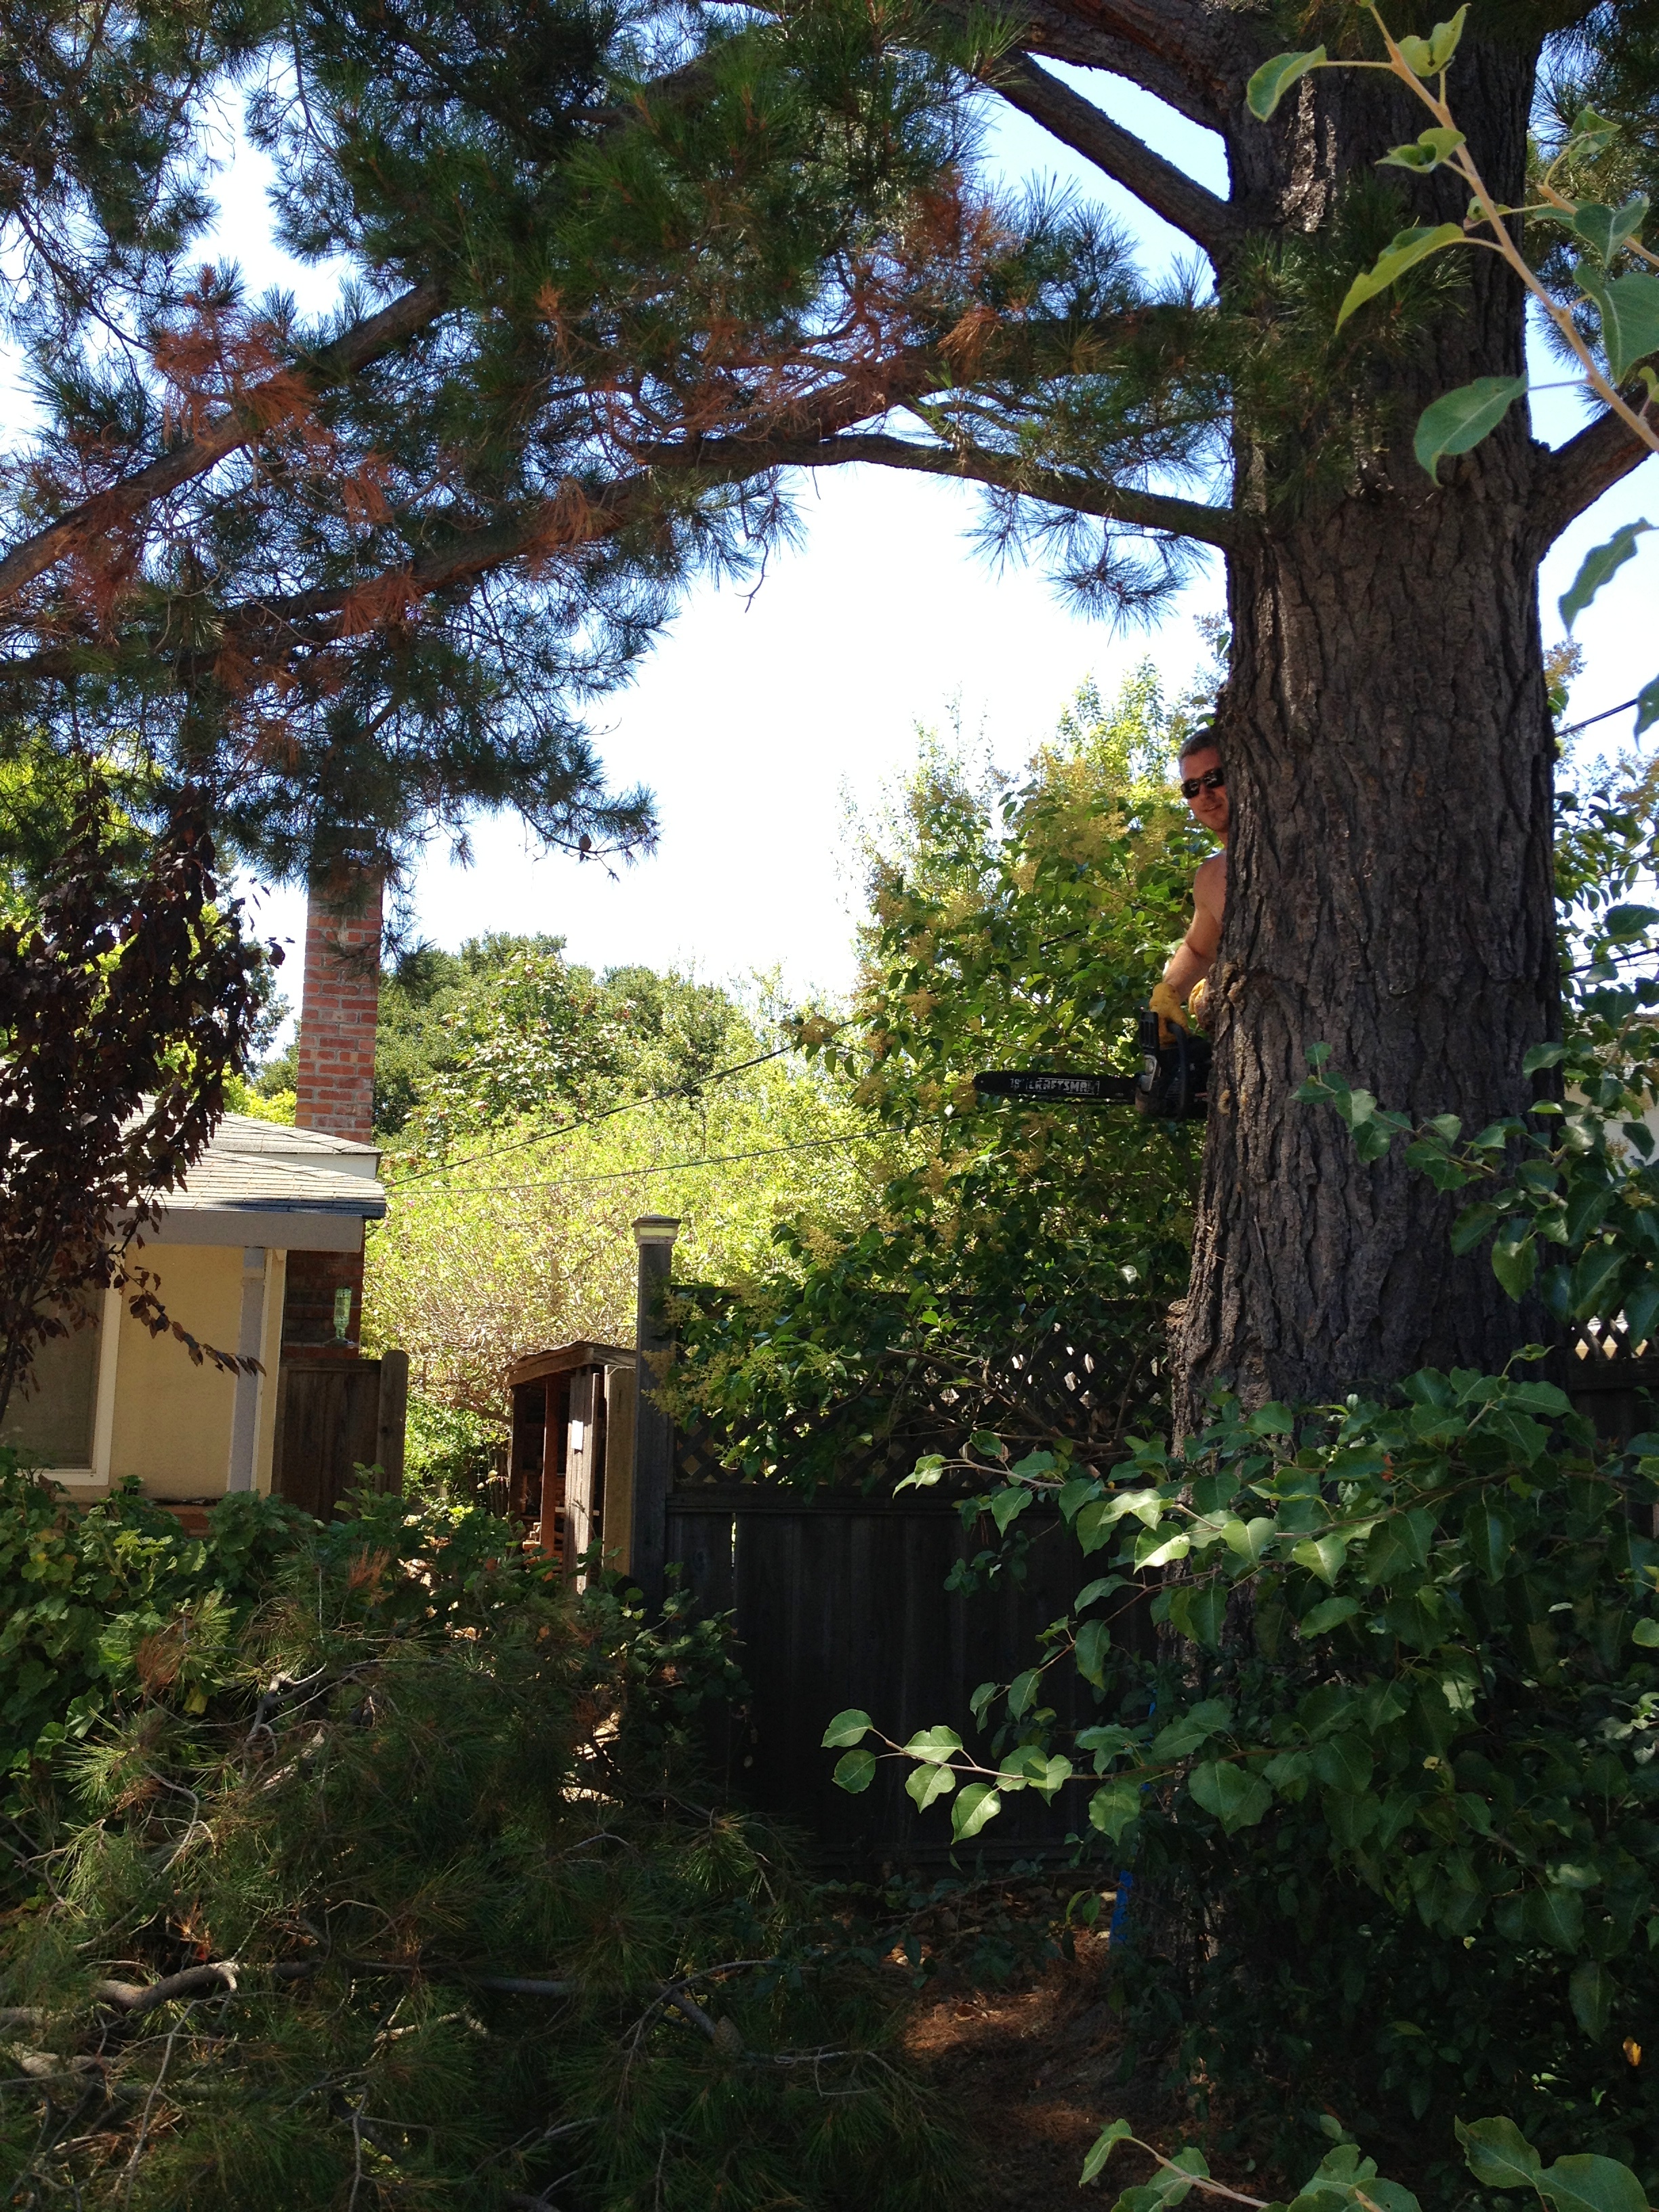
Tree Haircuts (and Removal!)
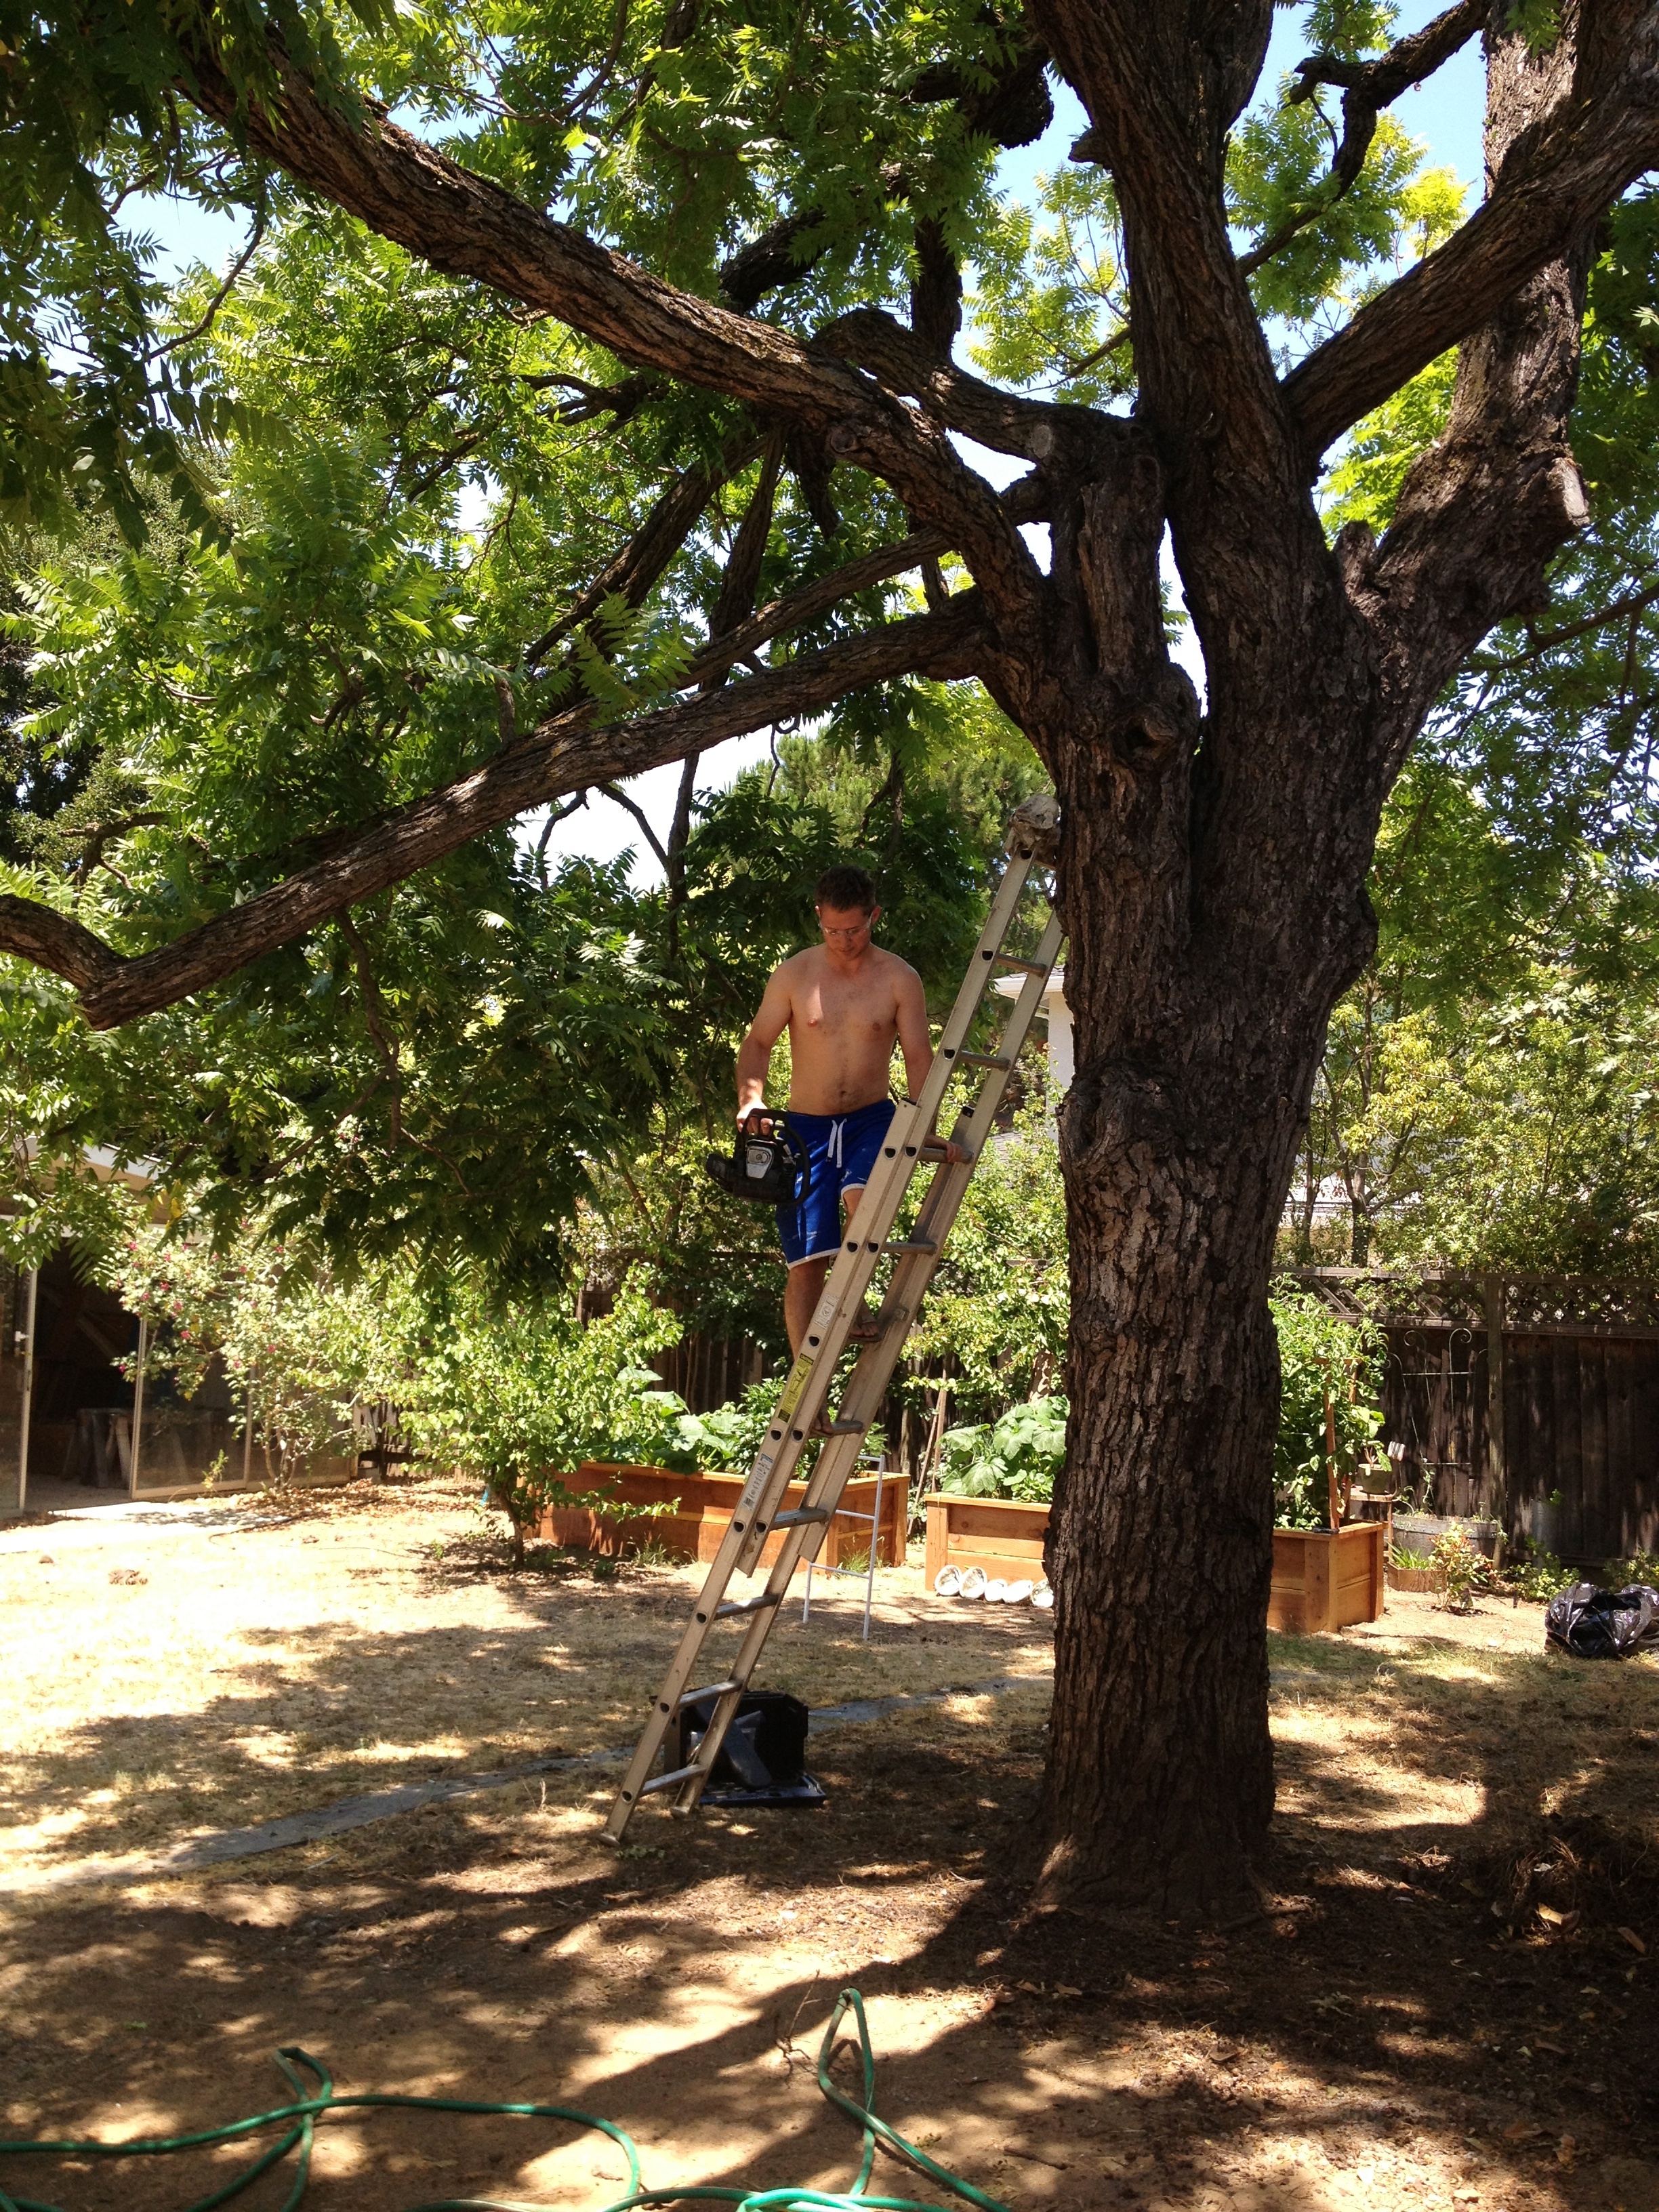
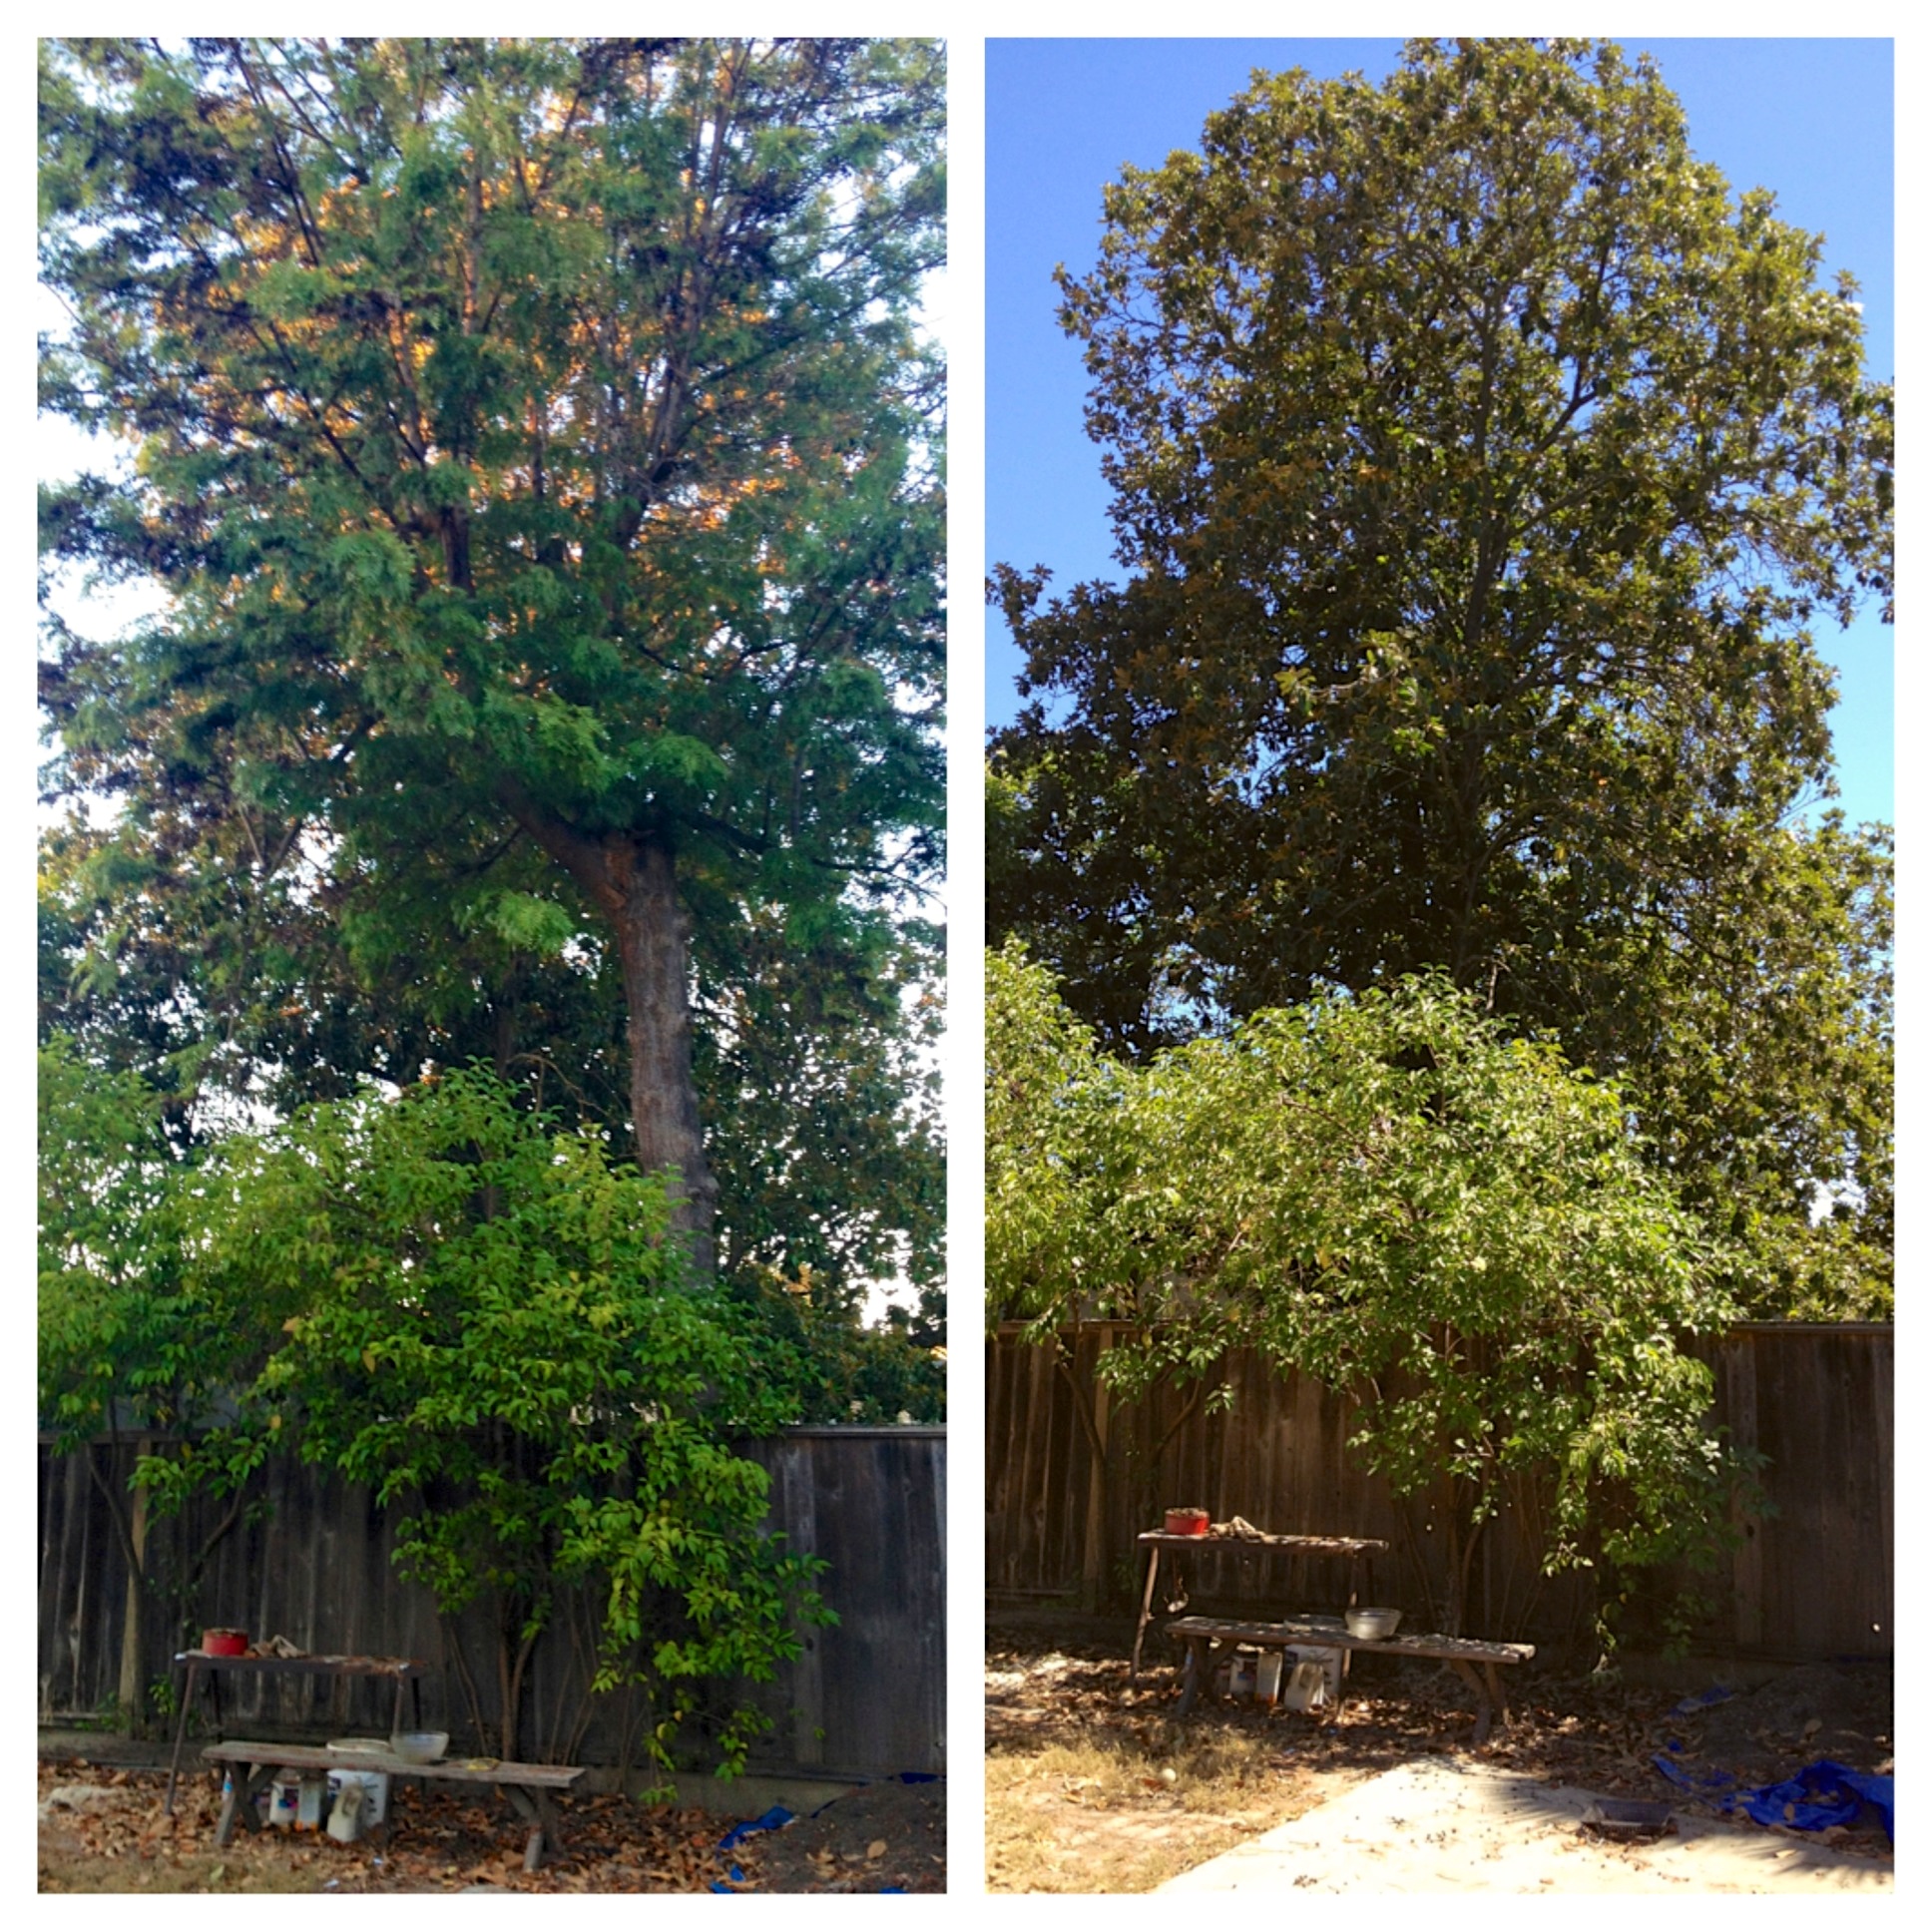
Apparently my family is plagued with black walnut trees. We inherited a rather large one, and while it has provided lots of shade for us it also provides lots of stuff to pick up. Not to mention, it was in need of a serious haircut. So haircut she got!
As a kid, I was convinced that black walnuts must be the messiest trees in the world. My parents used to coerce my sisters and I into having races to pick up the most walnuts. So you can imagine my shock when we moved into Burrows, had the black walnut to contend with, AND discovered an even messier tree. Enter our neighbor’s silk oak. I don’t understand the name: it’s not silky and it’s not technically an oak… Anyway, after living with the silk oak mess for about six months, we got our neighbors permission to chop the thing down. Even though this tree was in the neighbors yard, at least half of it hung over the fence into our yard, dropping leaves, berries, furry things, and who knows what else. It also blocked a lot of sun. Sadly, Justin and I both had to work while the tree trimmers were there so we didn’t get to see the show. But now, we have no more mess, more sun, and a pretty view of that same neighbors magnolia tree. Here are the before and afters:
We also had two cypress tress removed from the front yard:
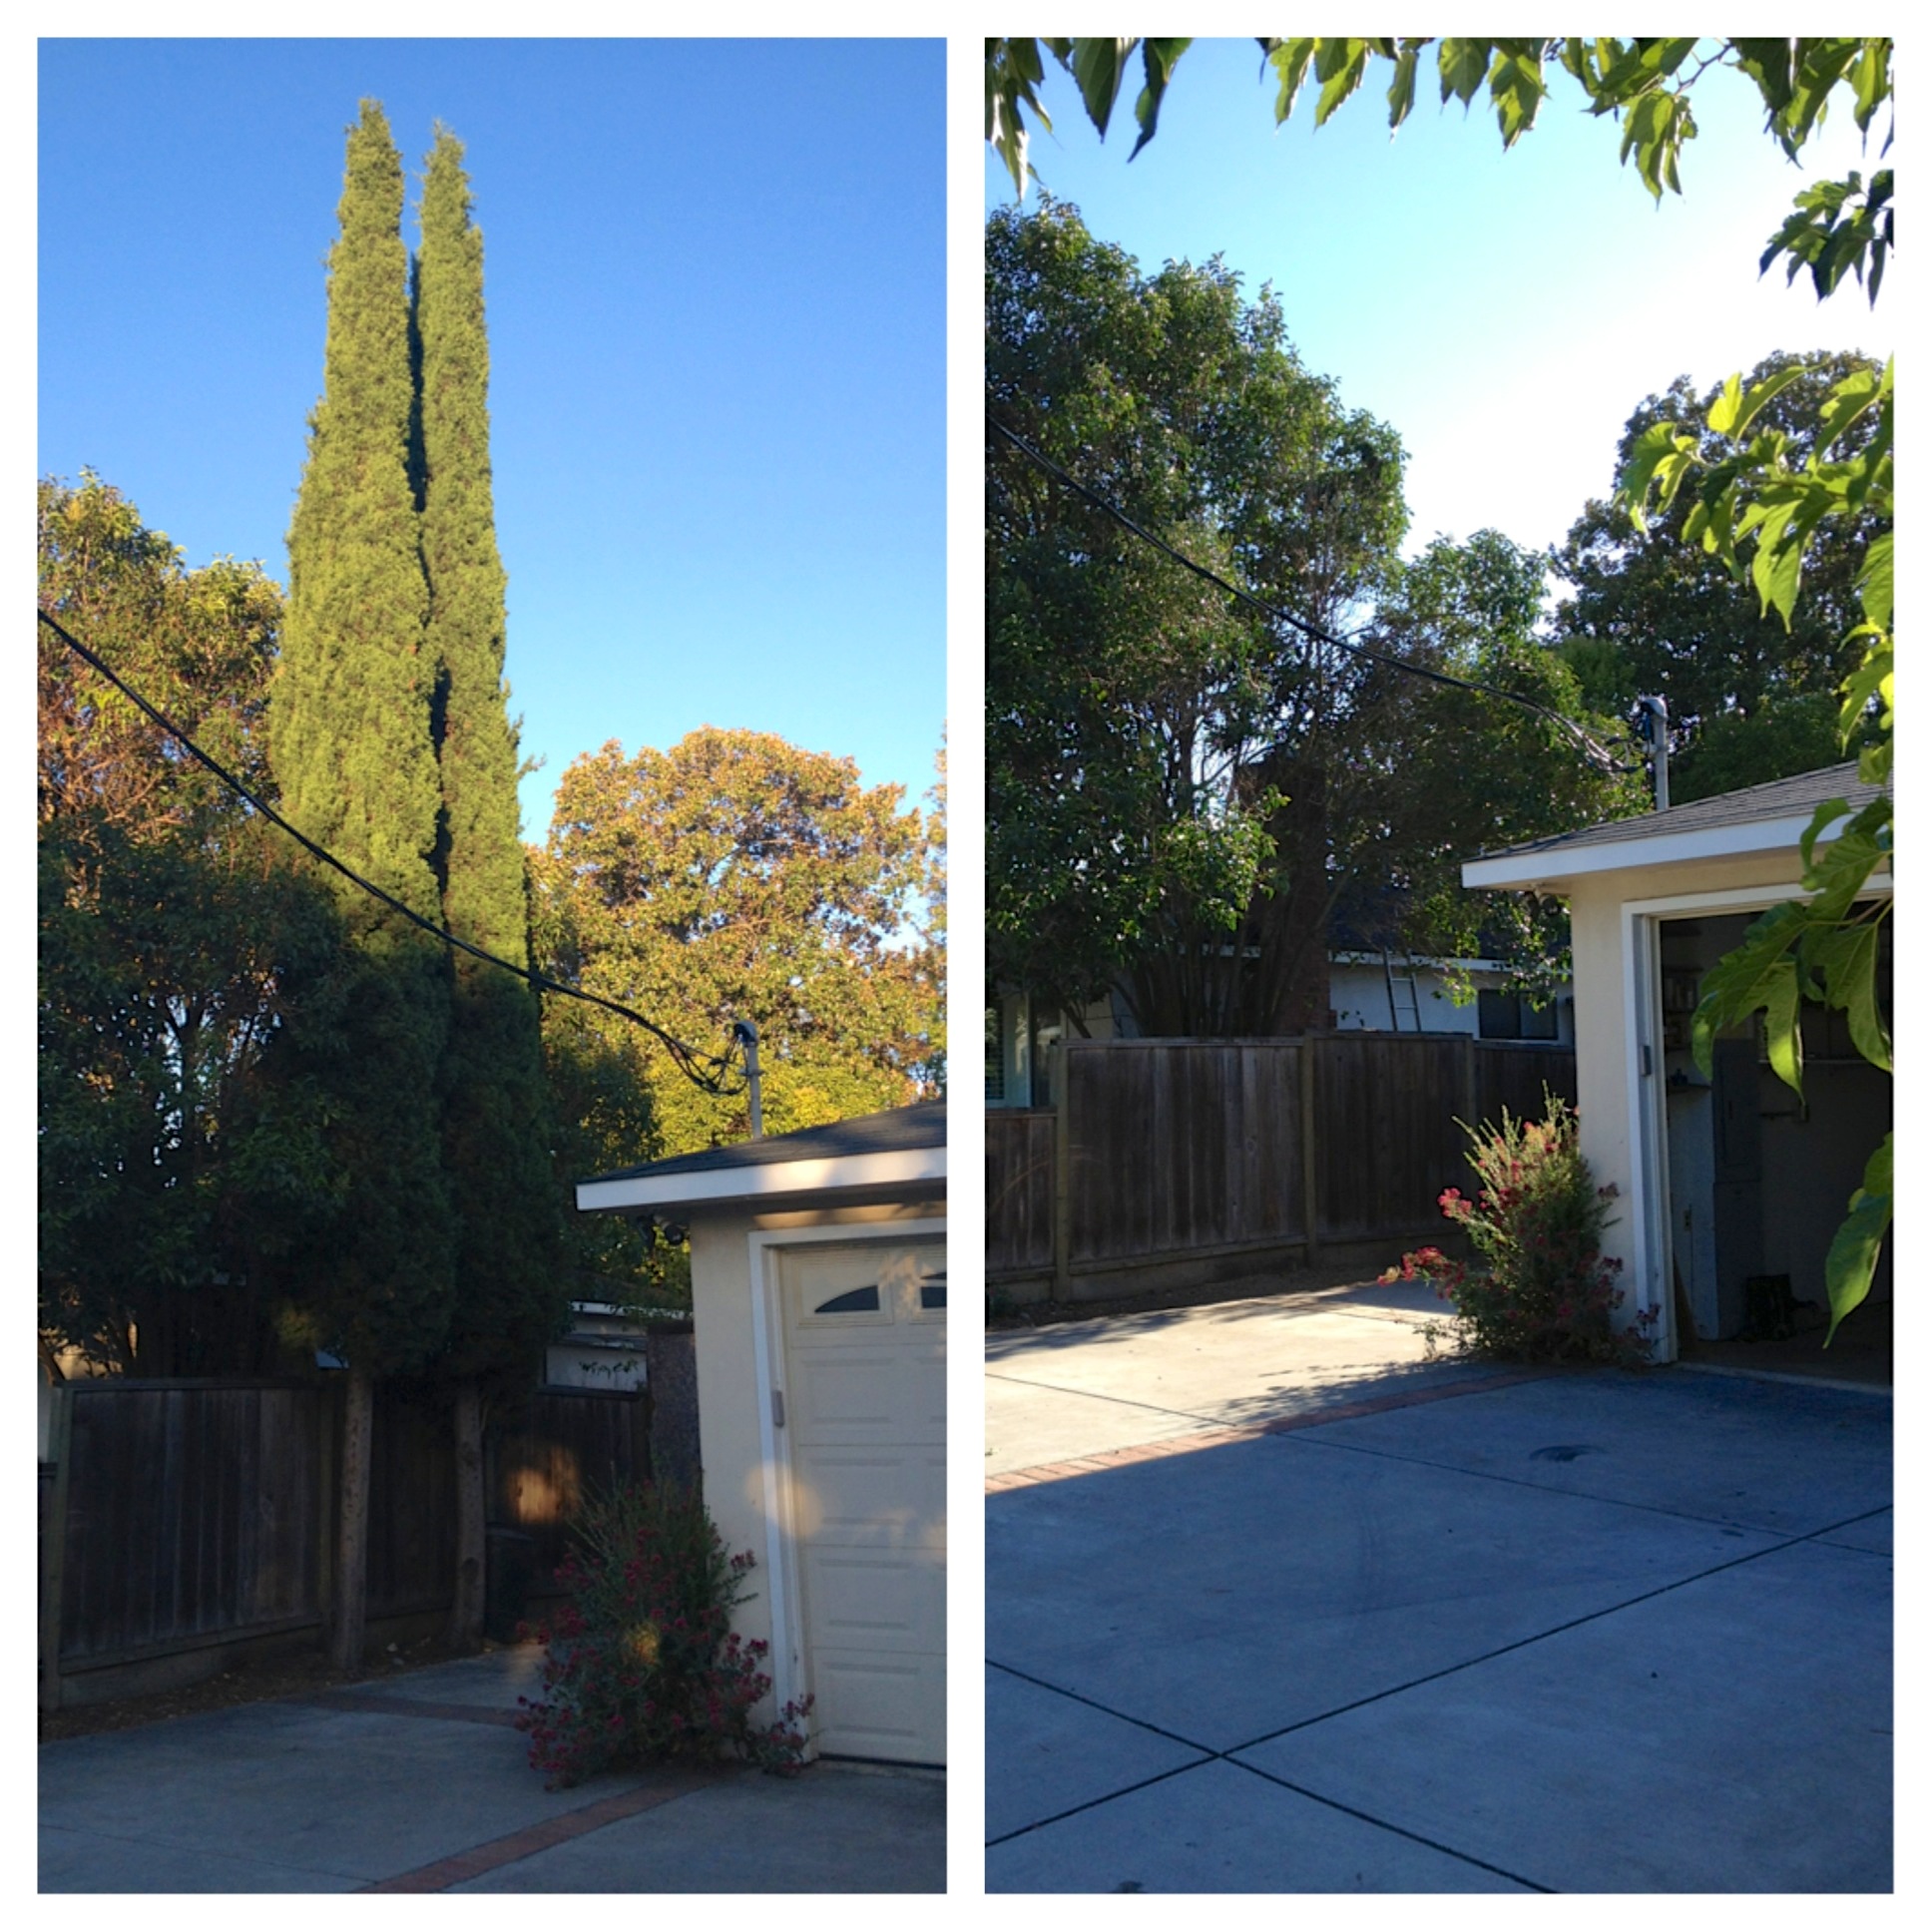
And we trimmed up the big tree in the front as well.
Front Yard Irrigation
We spent a day putting in irrigation and drip sprinklers in the planters off the front porch. I spend most of my gardening time out back, and the plants we had up front suffered from my lack of attention! Now with drippers, they get plenty of water even when I forget.

Sorry for the super long, whirlwind post. But we have a lot to catch up on! And I’ll end with a funny picture from one of our many work days:

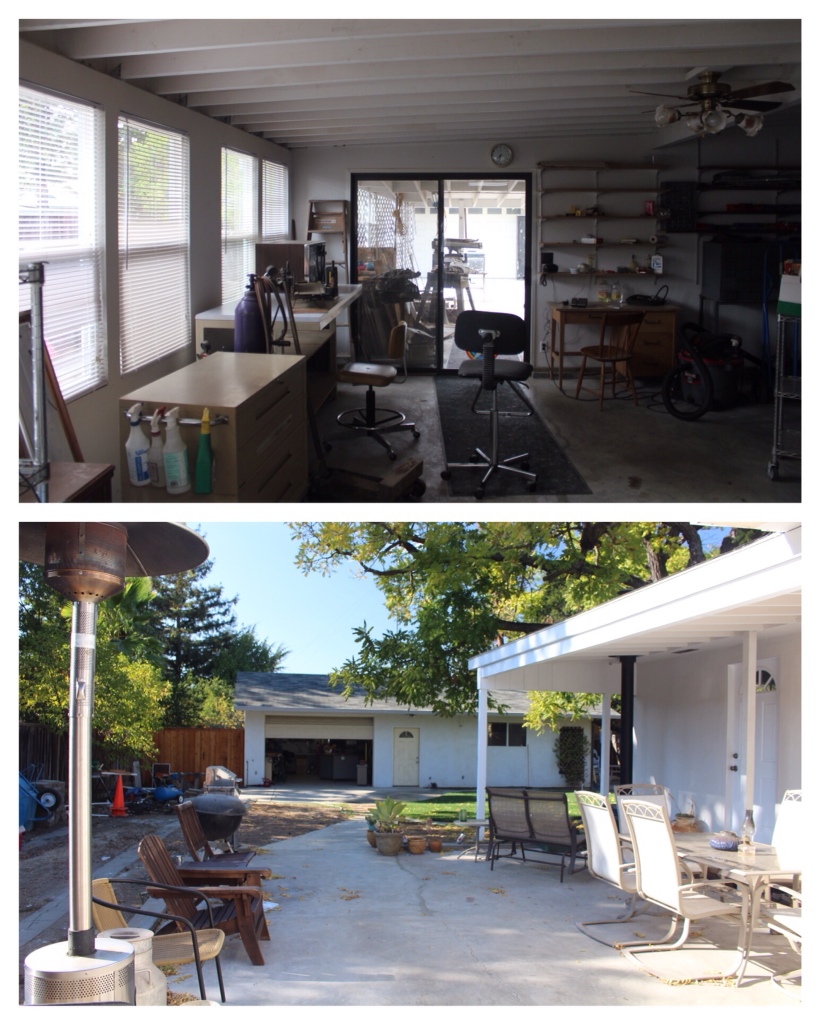
As promised, here is part 2 of yesterday's before and after post. For those of you who were following the blog before it mysteriously disappeared, yesterday's post may not have been too surprising. But today's post may just knock your socks off. This is what we've really been doing all summer! I've divided our outdoor spaces into the former west wing, the yard, and the shop. Enjoy!
The Former West Wing
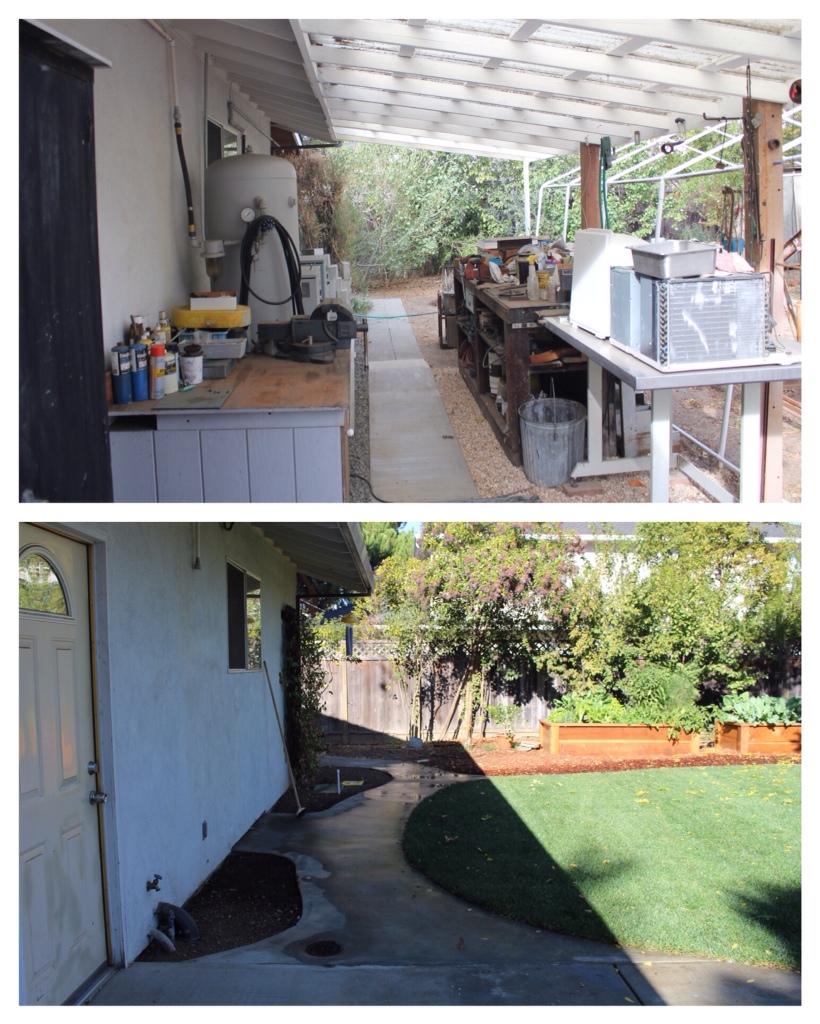
When we moved in, there was a large, walled- and windowed-in, “covered porch” off the south side of the house. This essentially blocked all natural light from coming in through the kitchen and bathroom windows, so I complained incessantly about it. Also, as we discovered last winter, it leaked like a sieve. Another great reason to get rid of it before the rainy season! After a massive demo project, we finally got some good old natural, southern light into the house. And (major bonus) a nice big, partially covered patio with a wood burning stove. Who can complain about that? No one!
As a quick side note, the west wing is an incredibly deceptive name for this former structure. It is not on the west side of the house, and it is not really a wing in any sense of the word. But for some reason, the name just stuck. So don't worry about it…
Here is our “missions accomplished” list:
- Remove (and sell!) all the windows, doors, and skylight (gotta love Craigslist)
- Remove the electrical work in the walls and ceiling to be demolished
- Demo the walls and most of the ceiling. We left the space over the table and the wood burning stove covered
- Re-roof the portion of the west wing ceiling we left intact
- Paint all the newly exposed beams
- Strategically place empty beer cans over the rebar protruding out of the stem wall leftover (hey, we're classy like that!)
- Moved in our patio furniture and BBQ apparati to create a pretty sweet hang out spot
So open and light and bright back there now! In the short term, we are planning to add some plants and outdoor art to the patio, add a light fixture that isn't fluorescent over the table, and do some patio furniture makeovers. In the long term, we plan to do a legitimate addition to the house in this area, but that's a few years and a few pretty pennies down the road.
The Backyard
This is my favorite. Even more so than getting natural light in kitchen. When we moved in, the backyard looked more like a junkyard than any place where you would want to hang out. It took a lot of work and even more imagination to make this area what I would call a functioning backyard. But now it's beautiful! Here's what we have done so far:
- Removed all the miscellaneous junk back here. This involved a few trips to the dump, a few craigslist sales, and perpetually full garbage and recycling cans.
- Weeded. And weeded. And weeded some more. Actually, I'm still weeding… Not sure I will ever cross that off the to do list 🙂
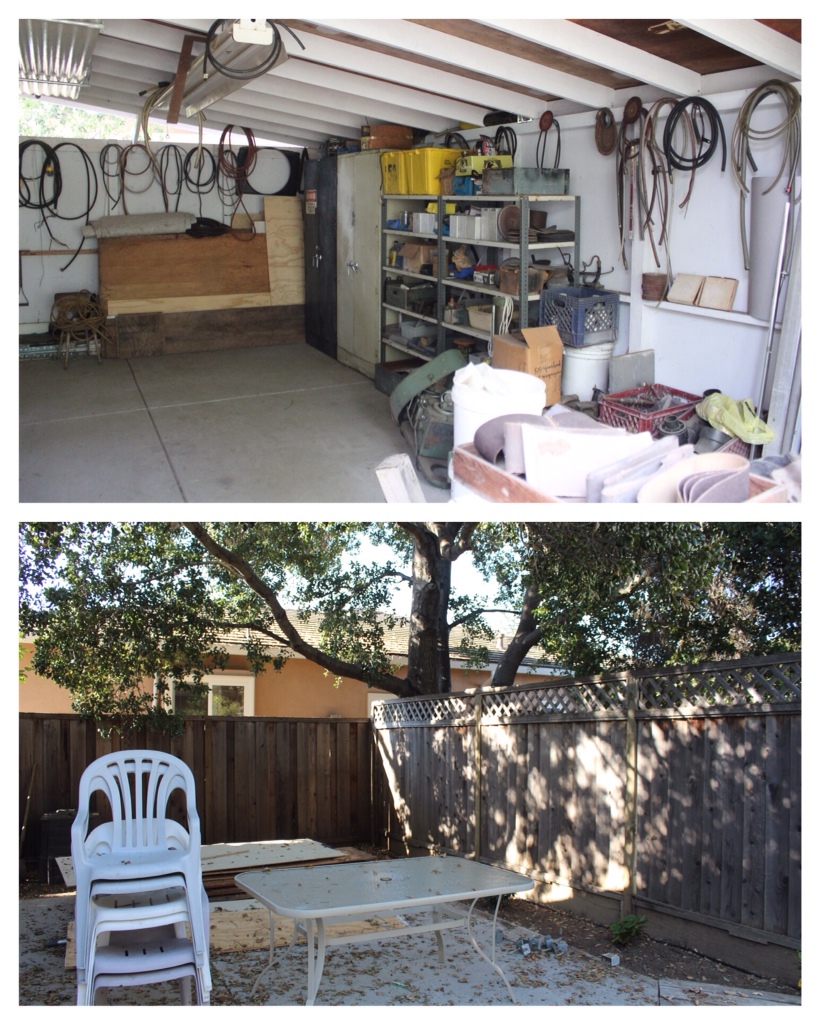
- Demolished the extraneous structures. Throughout the last few months, we removed a shed, a structure off the back of the west wing, a structure off the front of the shop, and another large covered patio off the north side of the shop. LOTS of demo
- Built a fence on the south side of the shop to wall off the storage area back there. It was a magic act: now you see all the construction/project materials we are storing, and now you don't! Plus, it's a pretty good looking gate.
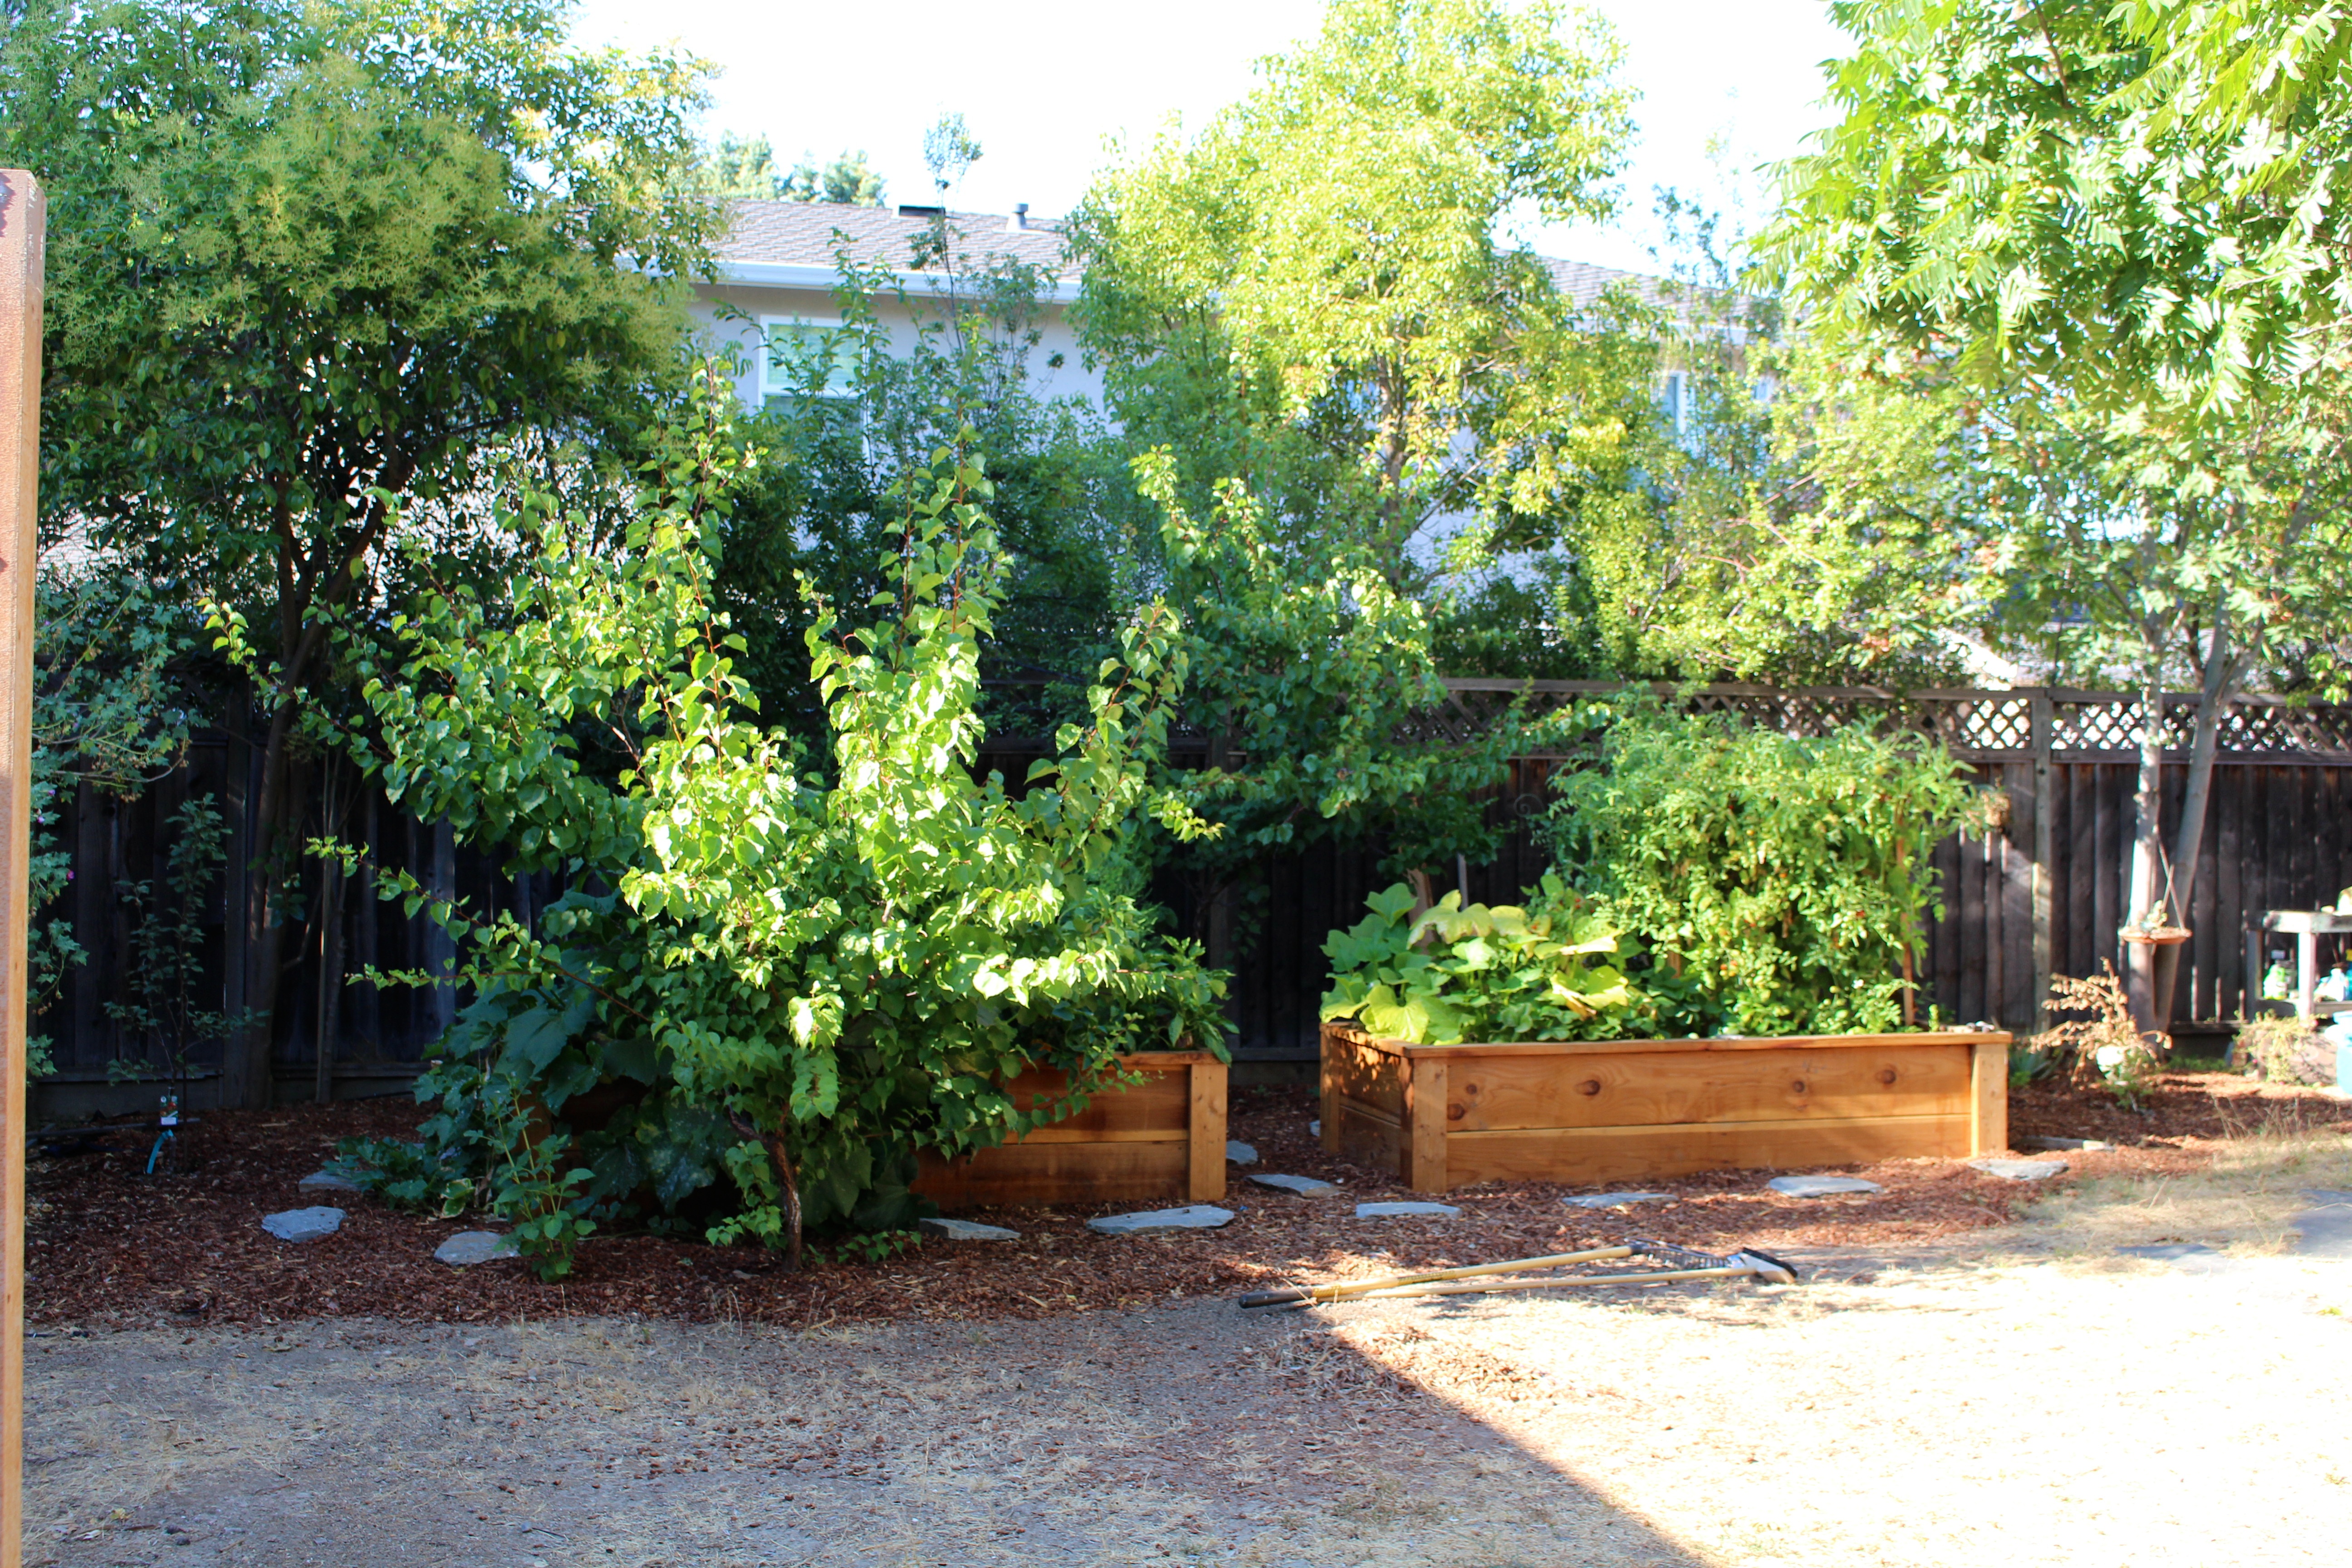
- Built redwood planters for our backyard garden and trimmed up the fruit trees (and added a few more) along the fence behind them.
- Gave the big black walnut a haircut. He needed it, desperately.
- Paid to have a silk oak tree removed from our neighbors yard. This was expensive, but so worth it. That tree dropped something year round and made our yard a constant mess. But no more!
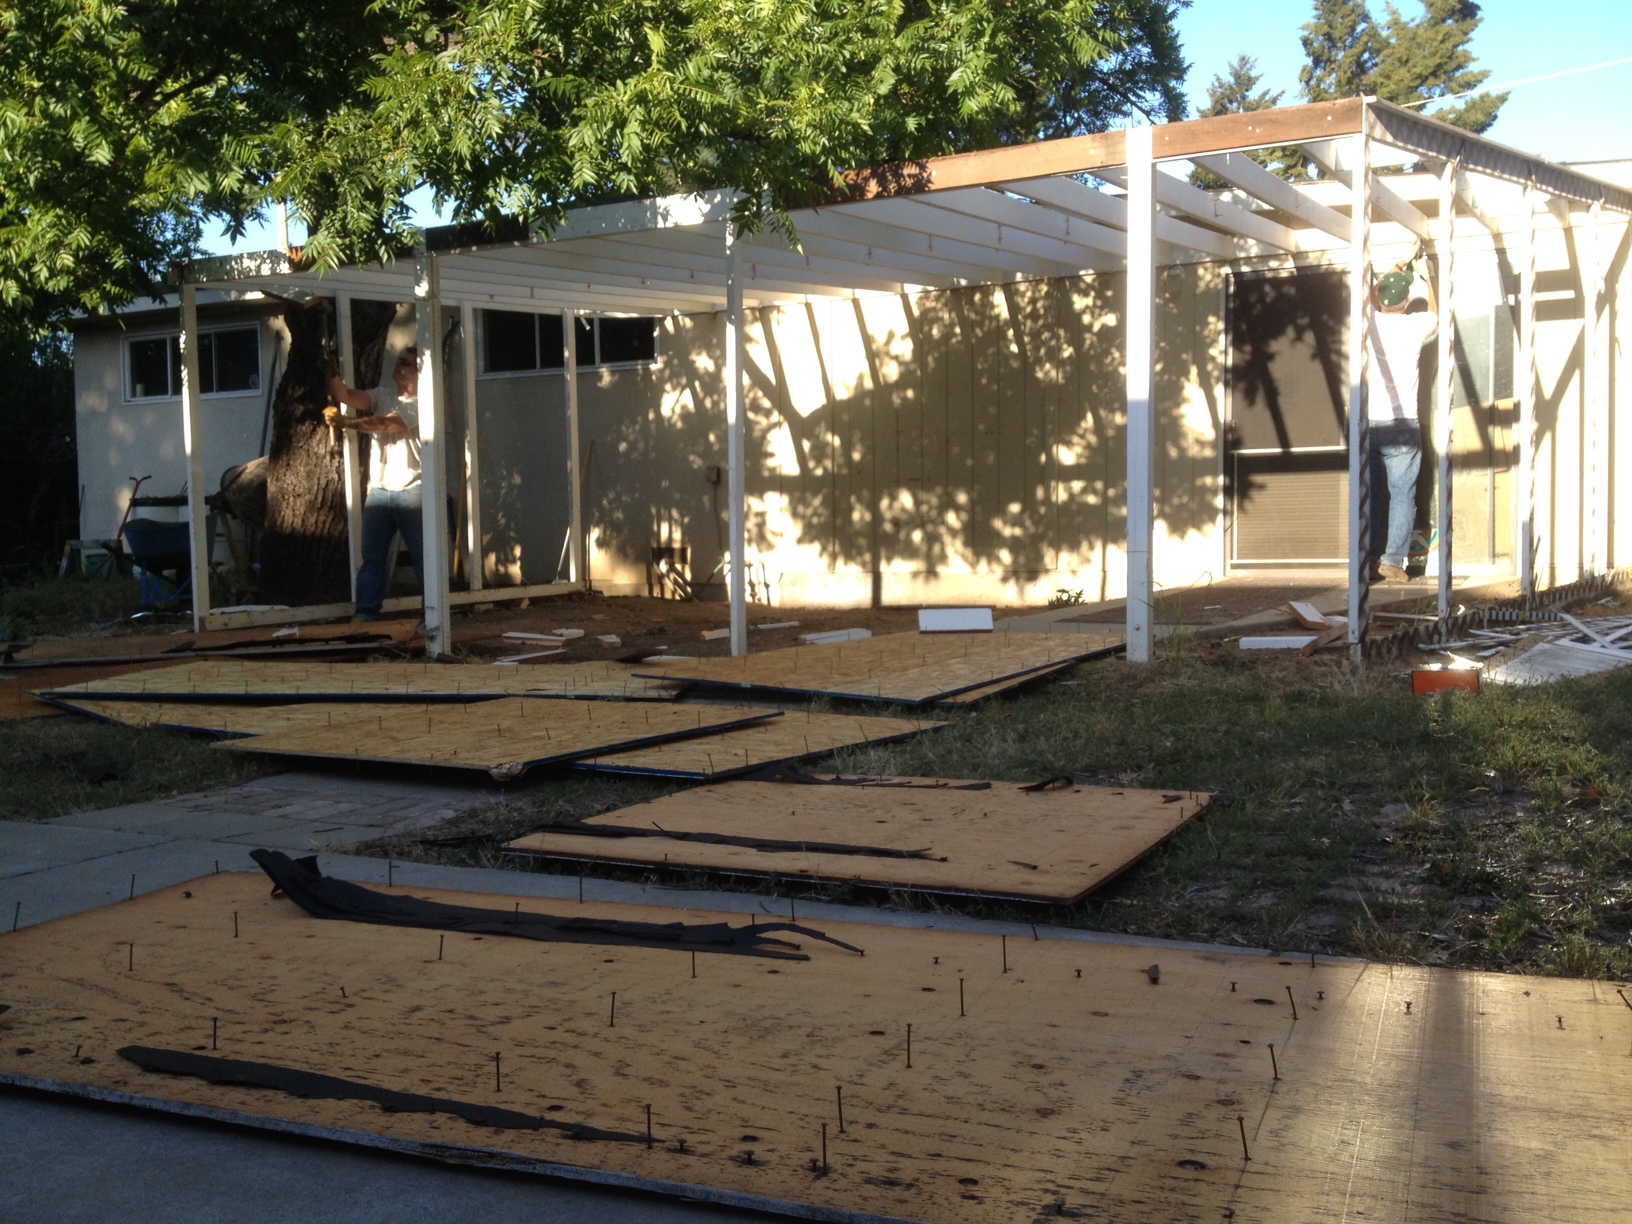
- Poured concrete to connect the existing patios on the north and east sides of the shop, and to create a mow strip for the future lawn.
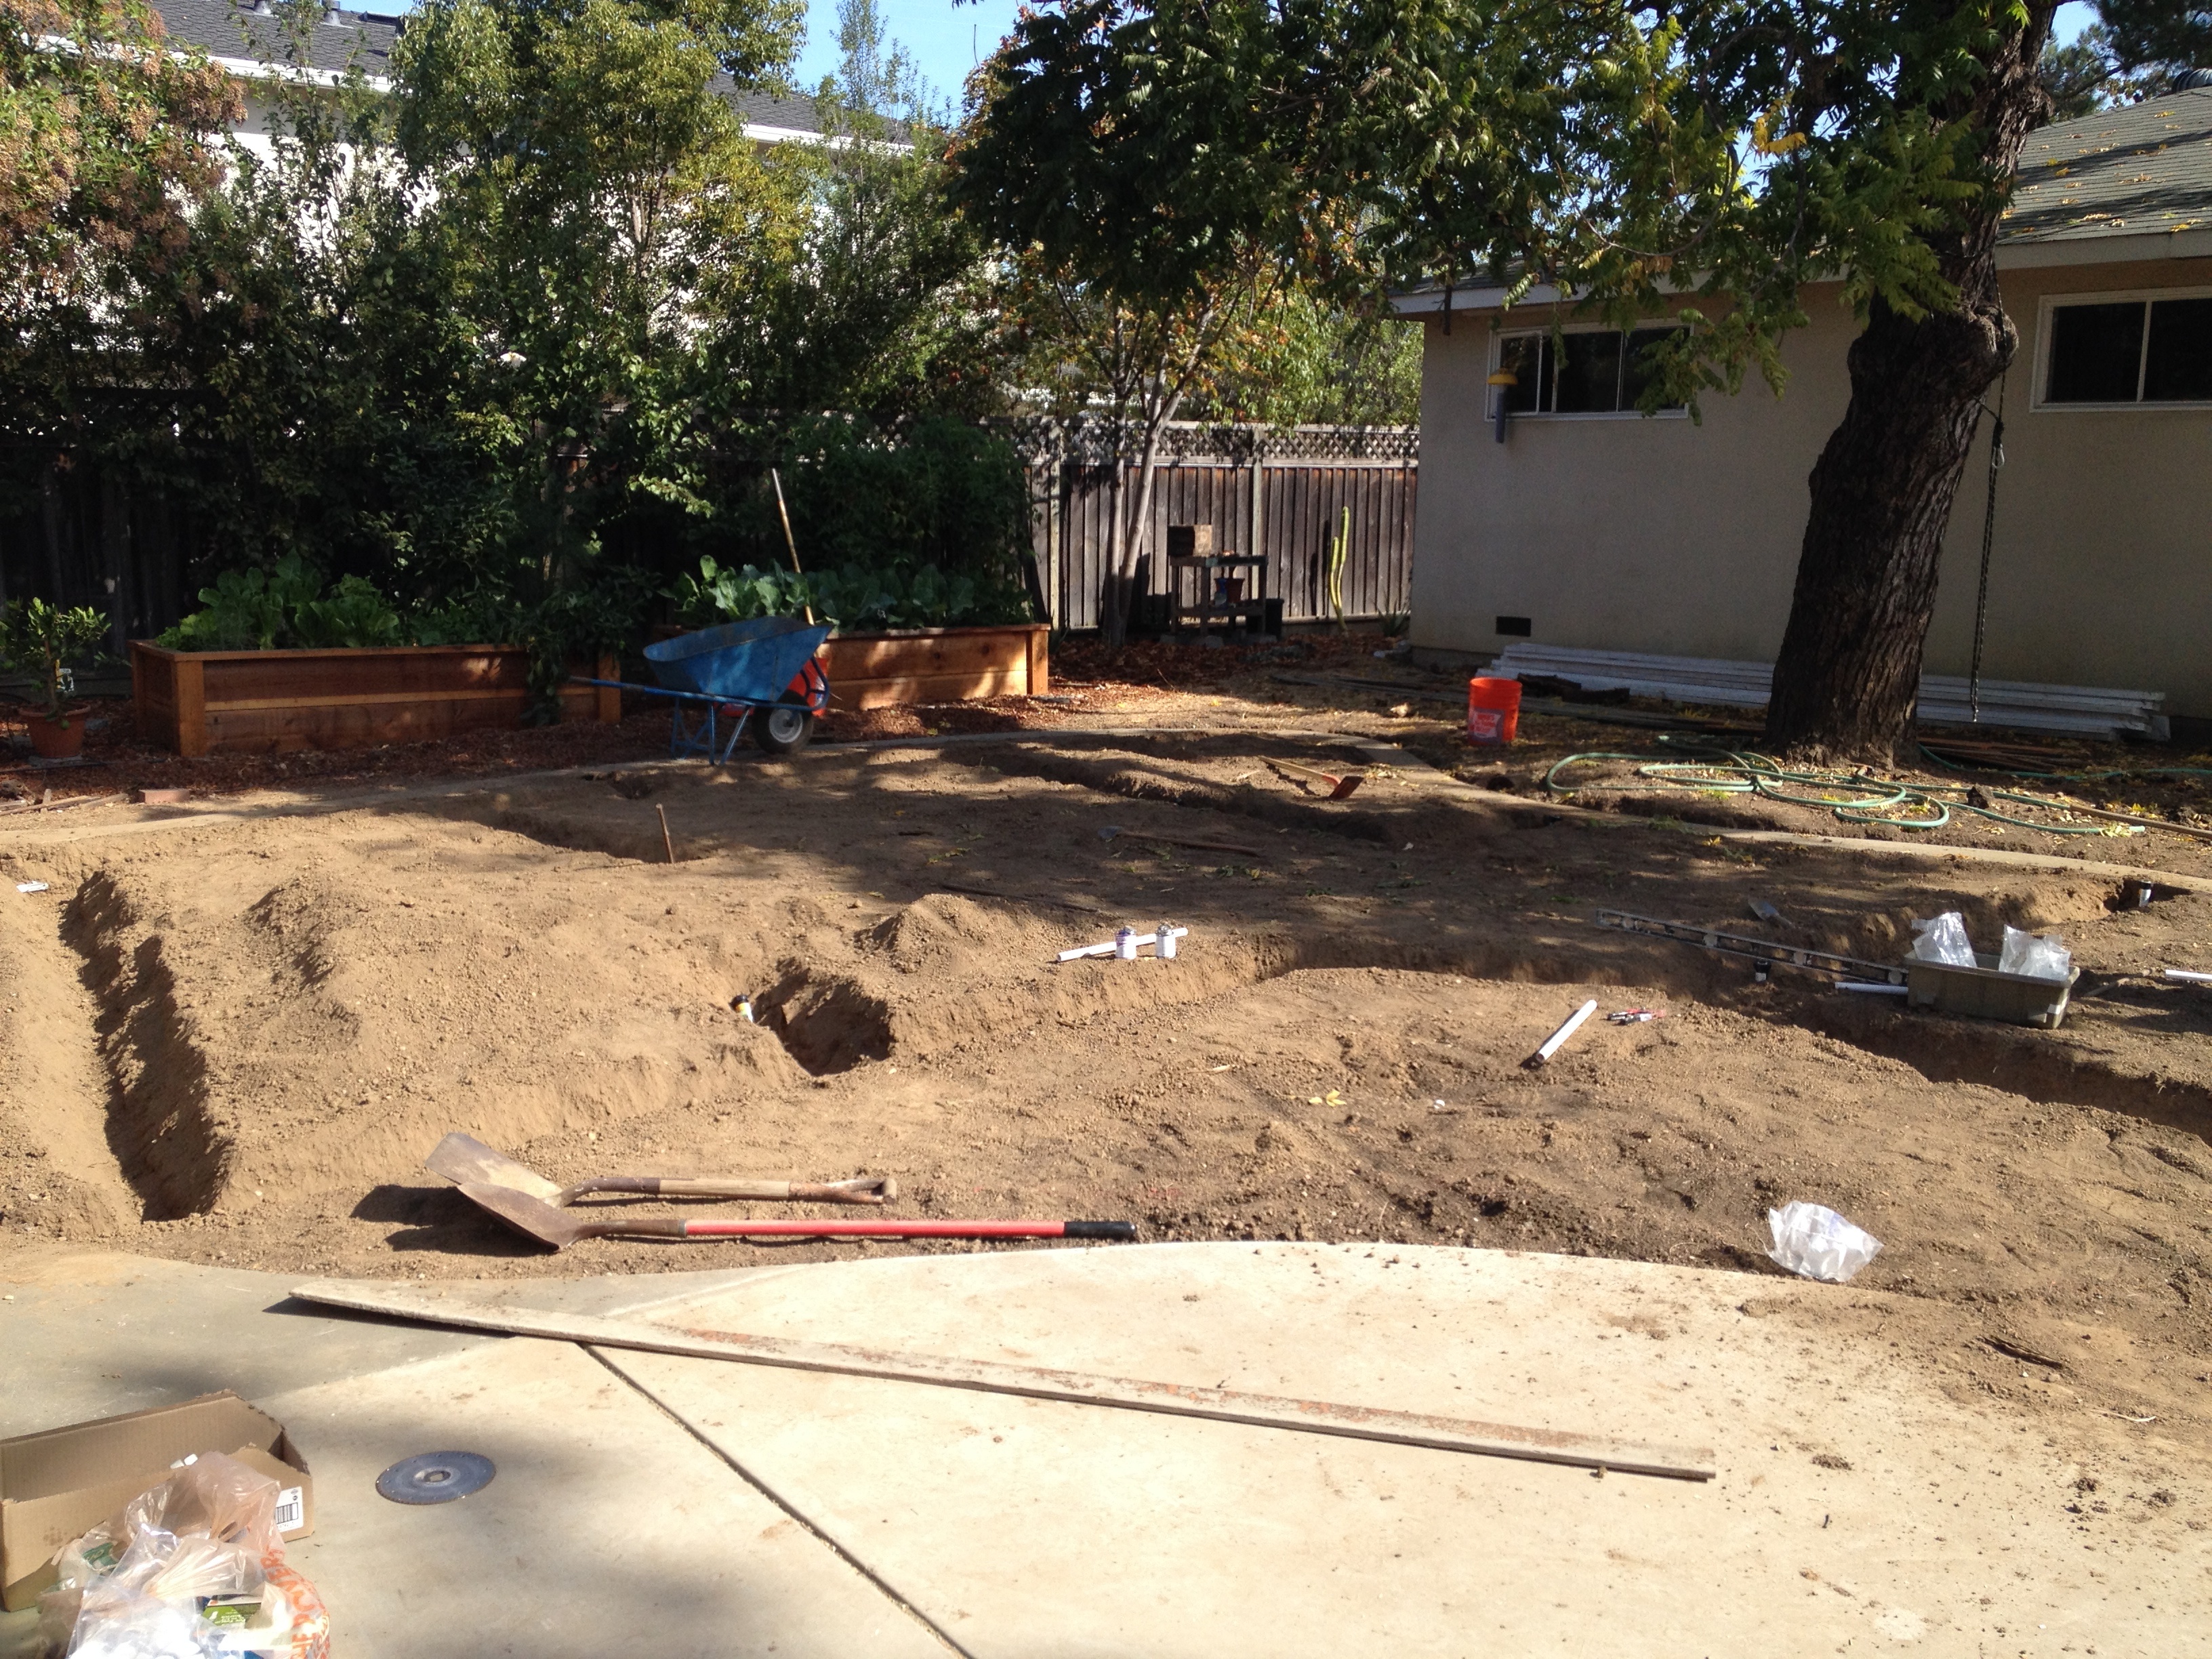
- Installed sprinklers and irrigation all over and leveled out the lawn area to prepare for the sod.
- Put in sod! Talk about rewarding. Another magic trick: from dirt to lawn in just a few hours!
- Sold all the tools and machinery that belonged to the previous owner (Justin and I didn't have any part of this, and, no, we didn't see any of the money from that sale. That all happened before we owned the house).
- Removed most of the shelves (big surprise!)
- Got the shop side organized. Justin had a lot of tools to begin with, and got a lot more for Christmas last year, but a lot of the tools here are also hand-me-downs or on semi-permanent loan. You'd be surprised how many people you know that want their tools and equipment to go to a good home where they will be used and loved! Another part of the organization was refurbishing a kitchen island. My aunt and uncle were remodeling their kitchen, and passed their island (and dishwasher and refrigerator!) to us. We put the island on wheels, gave it a fresh coat of paint, and created a top out of recycled flooring (more on this later), and now we have a roving work station!
- Cleaned out the lounge side. I would say organized, but that's a stretch. We got rid of everything we knew we wouldn't want, and tried to set up the rest of it in a respectable fashion. Oh, and we now have a beer fridge 🙂
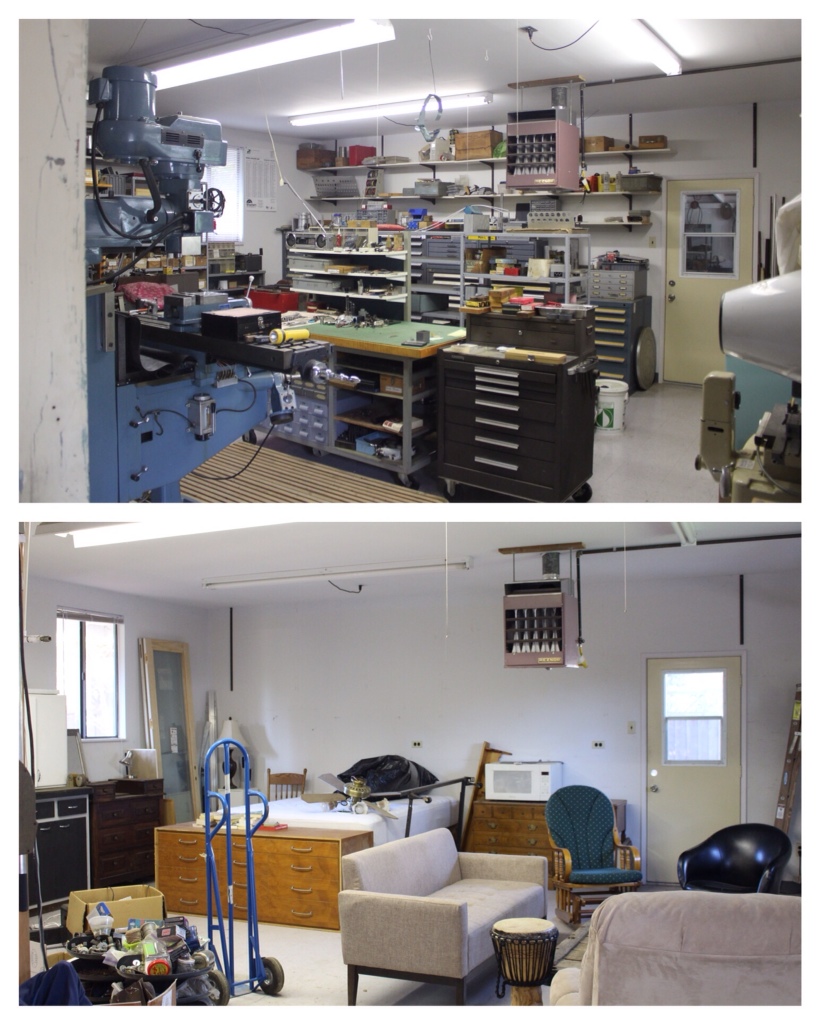
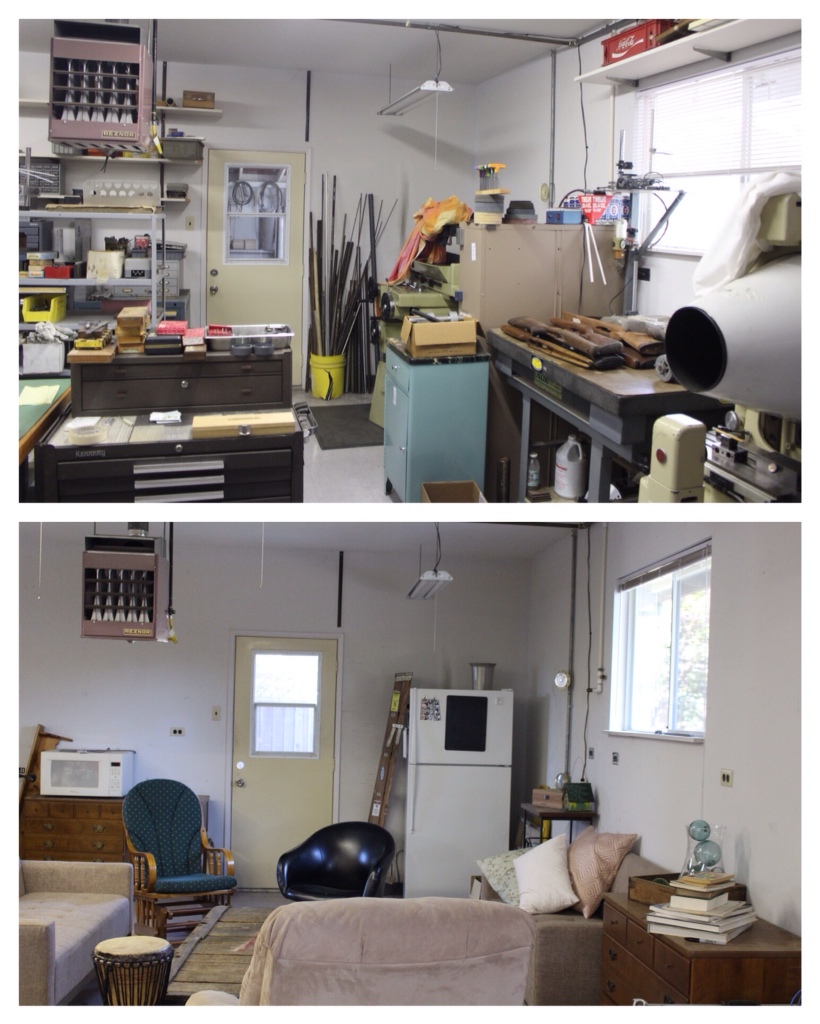
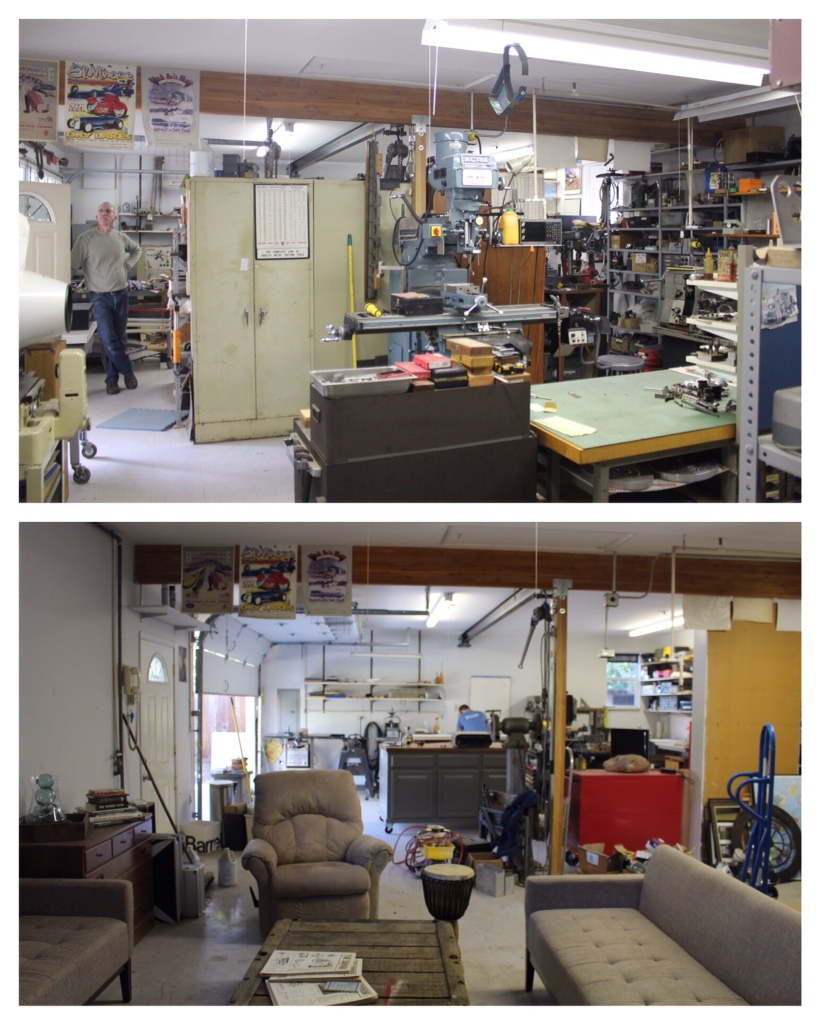
The shop may not look that different. But, as Justin says, at least everything in their is ours now. I haven't decided if this is a good thing or a bad thing… But there you have it!

